Perfect Rice Krispie Treats Recipe – Classic, Chewy & Irresistible
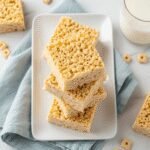
The ultimate Rice Krispie Treats recipe that delivers perfectly chewy, gooey, and delicious treats every single time. Made with just three simple ingredients in about 10 minutes, these classic no-bake treats are perfectly sweet, crispy, and nostalgic. They’re ideal for parties, snacks, or any time you need a quick and easy dessert that everyone will love. This foolproof recipe creates treats that stay soft and chewy, never hard or rock-like!
- Prep Time: 5 minutes
- Cook Time: 5 minutes
- Total Time: 10 minutes (plus 30 minutes cooling time)
- Yield: 12-16 servings 1x
- Category: Dessert, Snack
- Method: Stovetop (No-Bake)
- Cuisine: American
- Diet: Vegetarian
Ingredients
Scale
- 3 tablespoons unsalted butter
- 10 ounces (about 40) regular marshmallows, or 4 cups mini marshmallows
- 6 cups Rice Krispies cereal
- ½ teaspoon vanilla extract (optional, but recommended)
- ⅛ teaspoon salt (optional, but enhances flavor)
- Butter or cooking spray for greasing
Instructions
- Prep your pan: Line a 9×13-inch baking pan with parchment paper, leaving some overhang on the sides for easy removal. Alternatively, grease the pan generously with butter or cooking spray. Also grease a rubber spatula or wooden spoon—you’ll thank me later when the mixture doesn’t stick!
- Melt the butter: In a large pot or Dutch oven over low heat, melt the 3 tablespoons of butter. Swirl the pan to ensure the butter melts evenly and coats the bottom.
- Add marshmallows: Add the marshmallows to the melted butter. Stir constantly with a wooden spoon or greased spatula over low heat. This should take about 3-5 minutes. The marshmallows will gradually melt and become smooth and creamy. Don’t rush this step by turning up the heat—low and slow prevents burning and ensures even melting.
- Add optional flavorings: Once the marshmallows are completely melted and smooth (no lumps remaining), remove from heat immediately. If using, stir in the vanilla extract and salt quickly.
- Add cereal: Working quickly, add all 6 cups of Rice Krispies cereal to the pot. Use your greased spatula to fold the cereal into the marshmallow mixture, stirring gently but thoroughly until every piece of cereal is evenly coated. Work quickly—the mixture starts to set as it cools.
- Transfer to pan: Immediately pour the mixture into your prepared pan. Using your greased spatula (or greased hands!), press the mixture evenly into the pan. Don’t press too hard—you want to compress it just enough to hold together without making the treats dense. A light, even pressure is perfect.
- Cool and cut: Let the treats cool at room temperature for at least 30 minutes until completely set. Using the parchment paper overhang, lift the treats out of the pan onto a cutting board. Use a sharp knife (lightly greased or wiped with butter) to cut into 12-16 squares, depending on your preferred size.
- Serve and enjoy: Serve immediately, or store in an airtight container at room temperature.
Notes
- Low heat is crucial: High heat can scorch the marshmallows and create hard, tough treats. Always use low heat and patience.
- Fresh marshmallows: Old or stale marshmallows don’t melt smoothly and create tough treats. Always use fresh, soft marshmallows.
- Work quickly: Once you add the cereal, work fast because the mixture sets up as it cools.
- Don’t over-press: Pressing too firmly creates dense, hard treats. Use gentle, even pressure.
- Grease everything: Greasing your spatula, hands, and knife makes handling the sticky mixture so much easier.
- Thickness options: Use a 9×9-inch pan for thicker treats or a 9×13-inch pan for classic thickness.
Nutrition
- Serving Size: 1 square (based on 16 servings)
- Calories: 96
- Sugar: 10g
- Sodium: 68mg
- Fat: 2g
- Saturated Fat: 1.2g
- Unsaturated Fat: 0.7g
- Trans Fat: 0g
- Carbohydrates: 19g
- Fiber: 0.1g
- Protein: 1g
- Cholesterol: 6mg
Find it online: https://focialy.com/rice-krispie-treats-recipe/