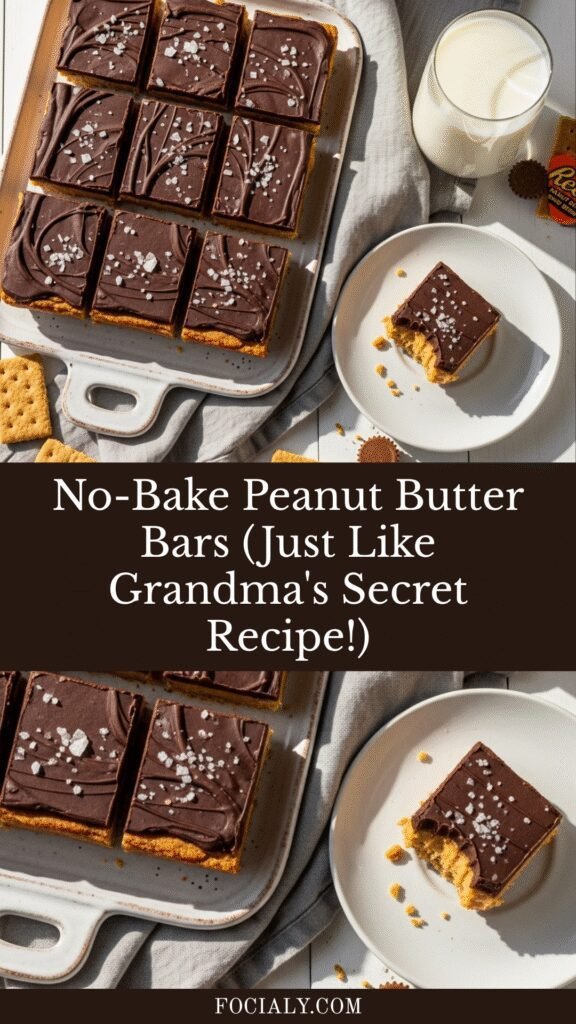
No-Bake Peanut Butter Bars (Just Like Grandma’s Secret Recipe!)
If you’re searching for a dessert that’s ridiculously easy, incredibly delicious, and requires zero baking skills, these peanut butter bars are about to become your new best friend. Picture this: a thick, creamy peanut butter base with a smooth chocolate topping that melts in your mouth—all made with just five simple ingredients you probably already have in your pantry.
These no-bake peanut butter bars are the perfect solution for last-minute gatherings, bake sales, potlucks, or those moments when you’re craving something sweet but don’t want to spend hours in the kitchen. They taste like a homemade Reese’s Peanut Butter Cup but in bar form, with a texture that’s part fudge, part cookie, and completely irresistible. Kids absolutely adore them, adults can’t stop reaching for seconds, and the best part? They come together in about 15 minutes of active time.
Whether you’re bringing dessert to a family reunion, treating your coworkers, or simply satisfying your own sweet tooth on a Tuesday evening, these peanut butter bars deliver that perfect combination of salty-sweet flavor that makes them disappear from the pan faster than you can say “just one more piece.”
History / Background
Peanut butter bars have a special place in American home baking history, particularly across the Midwest and Southern states where no-bake desserts have long been cherished for their practicality and crowd-pleasing appeal. While we can’t pinpoint exactly who created the first peanut butter bar, these treats emerged during the mid-20th century when convenience baking became popular among busy homemakers.
The recipe gained significant traction in the 1960s and 1970s, appearing in church cookbooks, community recipe collections, and handwritten recipe cards passed between neighbors. This was an era when no-bake desserts were revolutionary—they saved precious oven space during hot summer months and didn’t require the precision that traditional baking demanded.
Peanut butter bars are essentially the homemade cousin of the iconic Reese’s Peanut Butter Cup, which H.B. Reese created in 1928. The combination of peanut butter and chocolate has been an American favorite for nearly a century, and home bakers quickly realized they could recreate that magical pairing in bar form with minimal effort.
What makes this recipe particularly special is its accessibility. During times when elaborate layer cakes and complex pastries required expensive ingredients and advanced techniques, peanut butter bars democratized dessert-making. They proved that something simple could be absolutely spectacular, and that philosophy continues to resonate with home cooks today.
Regional variations exist—some Southern bakers add a layer of marshmallow fluff, while Midwestern cooks might incorporate crushed graham crackers for extra texture. But the classic version remains beloved for its pure, straightforward celebration of peanut butter and chocolate in perfect harmony.
Why You’ll Love This Recipe
These peanut butter bars check every single box for what makes a recipe truly worth making. They’re the kind of dessert that looks impressive but requires minimal skill, tastes like you spent all day in the kitchen but comes together in minutes, and satisfies cravings without breaking the bank.
Here’s why this recipe deserves a permanent spot in your dessert rotation:
- No baking required – Perfect for hot summer days when you don’t want to turn on the oven, or when you need a quick dessert without the wait time
- Just 5 simple ingredients – Peanut butter, powdered sugar, butter, graham crackers, and chocolate chips make up this entire recipe
- Ready in 30 minutes – About 15 minutes of prep time, then just pop them in the fridge to set
- Crowd-pleaser guaranteed – I’ve never met someone who doesn’t love the peanut butter and chocolate combination
- Budget-friendly – Uses affordable pantry staples without any specialty ingredients
- Customizable – Easy to adapt for different dietary needs or flavor preferences
- Perfect for any occasion – Works for everything from casual weeknight desserts to holiday cookie trays
- Kid-approved – Children love helping make these, and they’re safe since there’s no hot oven involved
- Impressive presentation – They look professionally made when cut into neat squares
- Great for gifting – Package them up in a cute tin, and you’ve got a thoughtful homemade gift
The texture is absolutely divine—dense and creamy like fudge but with that slightly crumbly peanut butter cookie quality. The chocolate layer on top adds the perfect finishing touch, creating a dessert that rivals anything from a fancy bakery.
Ingredient Notes
Let’s talk about what goes into these amazing bars and why each ingredient matters. Understanding your ingredients helps you make smart substitutions and ensures perfect results every time.
Creamy Peanut Butter – This is the star of the show. Use a commercial brand like Jif, Skippy, or Peter Pan rather than natural peanut butter. Natural varieties have oil separation and lack the stabilizers that give these bars their perfect texture. The creamy consistency ensures smooth, even mixing throughout the base layer.
Powdered Sugar (Confectioners’ Sugar) – Also called icing sugar, this sweetens the peanut butter layer and gives it that melt-in-your-mouth texture. Powdered sugar dissolves easily and creates a smooth consistency that granulated sugar simply can’t achieve. If you’re in a pinch, you can pulse granulated sugar in a blender to create your own powdered sugar.
Unsalted Butter – Butter adds richness and helps bind everything together. Unsalted is preferred so you can control the saltiness level. Make sure it’s softened (not melted!) for easy mixing. If you only have salted butter, that works too—just reduce or omit any additional salt in the recipe.
Graham Cracker Crumbs – These provide structure and a subtle honey-graham flavor that complements the peanut butter beautifully. You can buy pre-crushed crumbs or make your own by processing whole graham crackers in a food processor. For a gluten-free version, use gluten-free graham crackers or substitute with crushed gluten-free cookies.
Semi-Sweet Chocolate Chips – The chocolate topping is what transforms these from good to absolutely incredible. Semi-sweet provides the perfect balance of sweetness without being cloying. You can also use milk chocolate chips for a sweeter finish, dark chocolate for a more sophisticated flavor, or even a combination. For the smoothest topping, add a tablespoon of coconut oil or shortening when melting.
Optional additions: A pinch of vanilla extract enhances all the flavors, while a sprinkle of flaky sea salt on top adds a gourmet touch that really makes the chocolate and peanut butter pop.
Equipment Needed
One of the best things about this recipe is that it requires minimal kitchen equipment—nothing fancy or specialized. Here’s what you’ll need:
- 9×13-inch baking pan – This is the standard size for these bars, creating pieces that are the perfect thickness. If you only have a 9×9-inch pan, the bars will be thicker (which isn’t a bad thing!), but you may need to adjust chilling time.
- Parchment paper or aluminum foil – Lining your pan makes removal so much easier and ensures clean cuts. Leave an overhang on the sides to use as “handles” for lifting the entire slab out.
- Large mixing bowl – For combining the peanut butter mixture. A sturdy bowl works best since you’ll be doing some vigorous mixing.
- Microwave-safe bowl – For melting the butter and later the chocolate. Alternatively, you can use a small saucepan if you prefer stovetop melting.
- Spatula or wooden spoon – For mixing and spreading the peanut butter layer evenly.
- Measuring cups and spoons – Accuracy matters here for the right texture and consistency.
- Offset spatula (optional but helpful) – Makes spreading the chocolate layer smooth and professional-looking.
- Sharp knife – For cutting clean, beautiful squares once everything is set. Wipe the knife clean between cuts for the neatest presentation.
- Food processor (optional) – Only needed if you’re making your own graham cracker crumbs from whole crackers.
That’s it! No stand mixer, no fancy tools, just basic kitchen equipment that most home cooks already own.
PrintPeanut Butter Bars Recipe
These no-bake peanut butter bars feature a thick, creamy peanut butter base topped with smooth melted chocolate. Made with just 5 simple ingredients, they taste like homemade Reese’s Peanut Butter Cups and come together in minutes. Perfect for potlucks, bake sales, or satisfying your sweet tooth any day of the week.
- Prep Time: 15 minutes
- Chill Time: 2 hours
- Total Time: 2 hours 15 minutes
- Yield: 24 bars 1x
- Category: Dessert
- Method: No Bake
- Cuisine: American
Ingredients
For the Peanut Butter Layer:
- 1 cup (2 sticks) unsalted butter, melted
- 2 cups graham cracker crumbs (about 16-18 full graham crackers)
- 2 cups creamy peanut butter
- 2½ cups powdered sugar
- 1 teaspoon vanilla extract (optional)
- ¼ teaspoon salt (optional, but enhances flavor)
For the Chocolate Topping:
- 2 cups semi-sweet chocolate chips
- 2 tablespoons creamy peanut butter (makes the chocolate smoother and adds extra peanut butter flavor)
- Flaky sea salt for topping (optional but highly recommended)
Instructions
Step 1: Prepare Your Pan
Line a 9×13-inch baking pan with parchment paper, leaving an overhang on two sides to create handles for easy removal later. Alternatively, you can use aluminum foil lightly greased with butter or cooking spray.
Step 2: Make the Peanut Butter Base
In a large mixing bowl, combine the melted butter and graham cracker crumbs. Stir until the crumbs are fully moistened and the mixture looks like wet sand. Add the peanut butter and powdered sugar, mixing thoroughly until everything is completely combined and smooth. The mixture will be thick and slightly crumbly but should hold together when pressed. Add vanilla extract and salt if using.
Step 3: Press Into Pan
Transfer the peanut butter mixture to your prepared pan. Using your hands or the back of a spatula, press the mixture firmly and evenly into the pan, making sure to get into all corners. Apply good pressure to compact the layer—this ensures clean cuts later. The surface should be as smooth and level as possible.
Step 4: Melt the Chocolate
In a microwave-safe bowl, combine the chocolate chips and 2 tablespoons of peanut butter. Microwave in 30-second intervals, stirring between each interval, until completely melted and smooth (usually takes 1-2 minutes total). Be careful not to overheat, as chocolate can seize if it gets too hot. Alternatively, melt using a double boiler on the stovetop.
Step 5: Add the Chocolate Layer
Pour the melted chocolate mixture over the peanut butter layer. Use an offset spatula or the back of a spoon to spread it evenly across the entire surface, working quickly before the chocolate begins to set. If desired, sprinkle flaky sea salt over the top while the chocolate is still wet.
Step 6: Chill Until Set
Refrigerate the pan for at least 2 hours, or until the chocolate is completely firm and set. For faster results, you can place them in the freezer for about 45 minutes, though refrigerating gives a better texture.
Step 7: Cut and Serve
Once fully chilled, use the parchment paper overhang to lift the entire slab out of the pan and onto a cutting board. Using a sharp knife (wipe it clean between cuts for neat edges), slice into 24 squares or your desired size. For the cleanest cuts, let the bars sit at room temperature for about 5 minutes before slicing.
Notes
- Storage: Keep peanut butter bars in an airtight container in the refrigerator for up to 2 weeks. They can also be frozen for up to 3 months.
- Graham cracker substitution: If you can’t find graham crackers, substitute with crushed vanilla wafer cookies, digestive biscuits, or even crushed pretzels for a salty twist.
- Peanut butter alternatives: For those with peanut allergies, use sunflower seed butter, almond butter, or cashew butter. The texture and flavor will be slightly different but still delicious.
- Chocolate options: Feel free to use milk chocolate, dark chocolate, or white chocolate chips based on your preference. You can even create a marbled effect by swirling two types together.
- Make them thicker: Use a 9×9-inch pan instead of 9×13-inch for extra-thick, decadent bars.
Nutrition
- Serving Size: 1 bar (out of 24)
- Calories: 285
- Sugar: 22g
- Sodium: 135mg
- Fat: 18g
- Saturated Fat: 7g
- Unsaturated Fat: 9g
- Trans Fat: 0g
- Carbohydrates: 28g
- Fiber: 2g
- Protein: 5g
- Cholesterol: 20mg
Note: Nutrition information is approximate and will vary based on specific brands and ingredients used.
Tips & Variations
The beauty of this recipe is how easily it adapts to different tastes and dietary needs. Here are some creative ways to customize your peanut butter bars:
Flavor Variations:
- Peanut Butter Cup Bars: Press mini Reese’s cups into the peanut butter layer before adding the chocolate topping
- Cookies and Cream: Replace 1 cup of graham cracker crumbs with crushed Oreo cookies
- Crunchy Style: Use crunchy peanut butter instead of creamy for added texture, or stir in ½ cup chopped peanuts
- S’mores Bars: Add a layer of marshmallow fluff between the peanut butter base and chocolate topping
- Salted Caramel Swirl: Drizzle salted caramel sauce over the chocolate layer before it sets
- Espresso Enhancement: Add 1 tablespoon instant espresso powder to the chocolate for a mocha twist
Dietary Adaptations:
- Gluten-Free: Use certified gluten-free graham crackers or substitute with gluten-free cookies
- Vegan: Replace butter with coconut oil or vegan butter, use dairy-free chocolate chips, and ensure your graham crackers are vegan
- Reduced Sugar: Use sugar-free powdered sweetener and sugar-free chocolate chips (note: texture may be slightly different)
- Keto-Friendly: Replace graham crackers with almond flour and use sugar-free sweeteners throughout
Mix-In Ideas:
- Mini chocolate chips stirred into the peanut butter layer
- Toffee bits for a butterscotch crunch
- Crushed pretzels for extra saltiness
- Shredded coconut for tropical flair
- Rice Krispies for added crunch
Pro Chef Tips
Want bakery-quality results? These professional techniques will take your peanut butter bars from good to absolutely phenomenal:
Temperature Matters: Make sure your melted butter has cooled slightly before mixing with the other ingredients. If it’s too hot, it can make the mixture oily and harder to work with. Room temperature is ideal.
Press Firmly: The key to bars that cut cleanly without crumbling is compacting that base layer really well. Use the bottom of a measuring cup or glass to press down firmly and evenly across the entire surface. You want it packed tight!
Chocolate Smoothness Secret: Adding a tablespoon or two of peanut butter to your melted chocolate isn’t just for flavor—it helps the chocolate spread more easily and prevents it from cracking when you cut the bars. Some chefs also add a teaspoon of coconut oil for extra glossiness.
The Freezer Trick: If you’re short on time, pop the pan in the freezer for 30-45 minutes instead of refrigerating for 2 hours. This sets everything faster, though I find refrigerating gives a slightly better texture.
Clean Cuts Every Time: For professional-looking squares, dip your knife in hot water, wipe it dry, then make your cut. Repeat this process between each cut. The warm knife glides through the chocolate without dragging or cracking.
Don’t Skip the Salt: Even if you’re not a “salty dessert” person, a tiny pinch of salt in the peanut butter layer and a sprinkle of flaky sea salt on top makes a tremendous difference. Salt enhances sweetness and prevents the bars from tasting one-dimensional.
Room Temperature Advantage: Let your bars sit at room temperature for about 5 minutes before cutting. They’ll still be firm enough to cut cleanly, but the chocolate won’t crack as easily as it does straight from the fridge.
Even Distribution: When spreading the chocolate topping, work from the center outward, using gentle pressure. This prevents the peanut butter layer underneath from lifting or shifting.
Common Mistakes to Avoid
Even though this recipe is beginner-friendly, there are a few pitfalls that can affect your results. Here’s what to watch out for:
Using Natural Peanut Butter: This is the most common mistake. Natural peanut butter has oil separation and lacks stabilizers, which makes the bars greasy and prevents them from setting properly. Stick with conventional brands like Jif, Skippy, or store brands—they contain the emulsifiers needed for the right texture.
Not Pressing the Base Layer Firmly Enough: If you just spread the peanut butter mixture loosely without compacting it, your bars will crumble when you try to cut them. Apply real pressure when pressing it into the pan—you want it dense and tightly packed.
Overheating the Chocolate: Chocolate can seize (turn grainy and thick) if it gets too hot or comes into contact with water. Always melt in short 30-second bursts, stirring between each interval, and make sure your bowl is completely dry. If your chocolate does seize, try stirring in a teaspoon of coconut oil to smooth it back out.
Cutting Too Soon: I know it’s tempting to dive right in, but cutting before the bars are fully set results in messy, misshapen pieces. The chocolate needs at least 2 hours to firm up properly. Patience pays off with clean, beautiful squares.
Not Lining the Pan: Trying to cut bars directly in the pan leads to messy, uneven pieces. Always line with parchment paper or foil so you can lift the entire slab out and cut on a flat surface. This also prevents the bottom layer from sticking to the pan.
Uneven Chocolate Layer: If you don’t spread the chocolate quickly and evenly, you’ll end up with thick spots in some areas and thin spots in others. Work efficiently and use an offset spatula for the smoothest finish.
Storing at Room Temperature: While the bars can sit out for a few hours during serving, they should be stored in the refrigerator. At room temperature, especially in warm weather, they become soft and can get messy. Refrigeration keeps them perfectly sliceable.
Storage & Meal Prep
These peanut butter bars store beautifully, making them perfect for advance preparation and meal planning.
Refrigerator Storage:
Store your peanut butter bars in an airtight container in the refrigerator for up to 2 weeks. Layer parchment paper between stacked bars to prevent them from sticking together. The bars taste best when eaten within the first week, though they remain safe to eat (and still delicious) beyond that.
Room Temperature:
While these bars need to be refrigerated for long-term storage, they can sit at room temperature for 3-4 hours without any issues. This makes them perfect for parties, potlucks, or bake sales. Just keep them in a cool area away from direct sunlight or heat sources.
Individual Wrapping:
For lunch boxes or grab-and-go snacks, wrap individual bars in plastic wrap or parchment paper. They’ll stay fresh in the fridge for up to 2 weeks and are perfect for portion control.
Freezer Storage:
These bars freeze exceptionally well for up to 3 months. Wrap them individually in plastic wrap, then place in a freezer-safe container or zip-top bag. When you’re ready to enjoy, you have two options: thaw in the refrigerator overnight, or eat them straight from the freezer for a firmer, almost fudge-like texture (many people actually prefer them this way!).
Serving from Frozen:
Frozen peanut butter bars are incredibly popular, especially during summer. The texture becomes firmer and more fudge-like, and they’re wonderfully refreshing on hot days. Let them sit at room temperature for just 5 minutes before eating if you prefer a slightly softer bite.
Reheating Tips:
These bars are meant to be enjoyed chilled or at room temperature—no reheating necessary. However, if you’ve frozen them and want to return them to their original texture, simply thaw in the refrigerator for 3-4 hours or overnight.
Make-Ahead & Freezer Notes
Peanut butter bars are one of the best make-ahead desserts you can prepare. Their texture actually improves after a day in the refrigerator as the flavors meld together.
Make-Ahead Schedule:
You can prepare these bars up to 5 days in advance of when you need them. Make them, cut them, and store them in an airtight container in the refrigerator. They’ll be perfectly fresh and ready to serve. This is ideal for holiday planning, birthday parties, or any event where you want to spread out your cooking tasks.
Prepare Components Separately:
In a pinch, you can make the peanut butter layer up to 2 days ahead, keep it covered in the refrigerator, then add the chocolate topping the day before serving. Just let the peanut butter layer sit at room temperature for 10 minutes before adding the chocolate so the temperature difference doesn’t crack the chocolate.
Freezer-Friendly Details:
These bars are absolutely freezer-friendly and maintain their quality for up to 3 months when properly stored. Here’s the best approach:
- Make the bars completely as directed and allow them to set fully in the refrigerator
- Cut into individual squares
- Place bars on a baking sheet lined with parchment paper, not touching
- Freeze uncovered for 1-2 hours until solid
- Transfer to a freezer-safe container or bag, layering parchment paper between layers
- Label with the date
Thawing Instructions:
When you’re ready to serve frozen bars, you have several options. For the softest, most authentic texture, thaw them in the refrigerator for 4-6 hours or overnight. For a quicker thaw, leave them at room temperature for 30-45 minutes. Or, as mentioned earlier, enjoy them straight from the freezer for a firmer, fudge-like treat that’s especially delightful in summer.
Gift-Giving Preparation:
Planning to give these as gifts? Make them up to 2 weeks ahead and keep refrigerated, or up to 3 months ahead and keep frozen. Arrange them in decorative tins or boxes lined with parchment paper. If gifting frozen bars, include a note about thawing instructions or mention that they’re delicious eaten frozen, too!
Serving Suggestions
While peanut butter bars are incredible all on their own, the right accompaniments can elevate your dessert experience. Here are some creative serving ideas:
Classic Pairings:
- Cold milk – The most traditional choice and absolutely perfect for balancing the richness
- Hot coffee – The slight bitterness of coffee complements the sweet, nutty flavors beautifully
- Vanilla ice cream – Serve a square with a scoop of vanilla for an indulgent dessert plate
- Fresh strawberries – The bright acidity cuts through the richness and adds a fresh element
Creative Presentations:
- Dessert Charcuterie Board: Arrange cut bars alongside fresh fruit, mini cookies, and chocolate-covered pretzels for a stunning party spread
- Ice Cream Sandwiches: Place a scoop of your favorite ice cream between two peanut butter bars
- Dessert Parfait: Crumble a bar over layers of whipped cream and chocolate pudding
- Brownie Sundae Style: Warm slightly, top with vanilla ice cream, whipped cream, and chocolate sauce
Beverage Pairings:
- Hot chocolate with marshmallows
- Peanut butter milkshakes
- Cold brew coffee
- Caramel latte
- Chocolate milk (especially for kids!)
- Dessert wine like port or sweet Riesling (for adults)
Party Service Ideas:
- Cut into bite-sized pieces for cocktail parties
- Serve on individual dessert plates with a dollop of whipped cream
- Stack in a pyramid on a serving platter with fresh mint garnish
- Package individually in clear bags tied with ribbon for party favors
Seasonal Twists:
- Summer: Serve frozen with fresh berries on the side
- Fall: Sprinkle with cinnamon and serve with apple slices
- Winter: Top with crushed candy canes for a holiday twist
- Spring: Garnish with fresh mint and serve with lemon sorbet
FAQs Section
Q: Can I use natural peanut butter instead of regular peanut butter?
A: I don’t recommend it for this recipe. Natural peanut butter contains more oil and lacks the stabilizers found in commercial brands, which can make your bars greasy and prevent them from setting properly. The texture will be too soft and oily. Stick with conventional brands like Jif, Skippy, or Peter Pan for the best results.
Q: Why are my peanut butter bars too crumbly or falling apart?
A: This usually happens for two reasons: either the base layer wasn’t pressed firmly enough into the pan, or the measurements were off (particularly too much graham cracker crumbs relative to the wet ingredients). Make sure you’re packing the mixture down really well—use the bottom of a glass or measuring cup to apply firm pressure across the entire surface.
Q: Can I make these without graham crackers?
A: Absolutely! You can substitute the graham crackers with an equal amount of crushed vanilla wafer cookies, digestive biscuits, Nilla wafers, or even crushed pretzels for a salty twist. Each will give a slightly different flavor, but they all work structurally.
Q: My chocolate layer cracked when I cut the bars. What went wrong?
A: Chocolate cracks when it’s too cold or when it’s cut too quickly after removing from the fridge. To prevent this, let your bars sit at room temperature for 5-10 minutes before cutting. Also, use a warm knife (dip in hot water and wipe dry between cuts) to glide through smoothly without cracking.
Q: How do I make these bars more or less sweet?
A: To reduce sweetness, decrease the powdered sugar by ½ cup and use dark chocolate chips instead of semi-sweet. To make them sweeter, increase powdered sugar by ¼ cup and use milk chocolate chips. You can also adjust the chocolate layer thickness—use 1½ cups chips for less chocolate, or 2½ cups for a thicker, sweeter layer.
Q: Can I double this recipe?
A: Yes! Simply double all ingredients and use two 9×13-inch pans, or press everything into a large sheet pan. Keep in mind that if you use a larger, single pan, you may need to adjust the thickness and chilling time accordingly.
Q: Are these bars safe for school events with peanut allergies?
A: Unfortunately, traditional peanut butter bars aren’t safe for peanut allergy environments. However, you can make a “peanut-free” version using sunflower seed butter or wow butter (which tastes remarkably similar to peanut butter). Always check with school administrators about their specific allergy policies before bringing homemade treats.
Q: Why did my peanut butter layer turn out oily?
A: This typically happens when the butter is added while still too hot, or if you used natural peanut butter. Make sure your melted butter has cooled to just warm (not hot) before mixing. Also, confirm you’re using conventional peanut butter, not the natural, oil-separated kind.
Conclusion
There you have it—the ultimate guide to making perfect peanut butter bars every single time! These five-ingredient, no-bake treats prove that the simplest recipes are often the most beloved. With their creamy peanut butter base, smooth chocolate topping, and that irresistible Reese’s-like flavor, these bars are destined to become a staple in your dessert rotation.
Whether you’re baking for a crowd, prepping snacks for the week, or simply satisfying a late-night chocolate-peanut butter craving, this recipe delivers foolproof results with minimal effort. The best part? You probably already have everything you need sitting in your pantry right now.
I’d love to hear how your peanut butter bars turn out! Did you try any of the variations? What’s your favorite way to serve them? Drop a comment below and let me know. And if you loved this recipe as much as I do, please share it with your friends and save it to your Pinterest boards so you can find it again. Happy baking (or should I say, happy no-baking)!