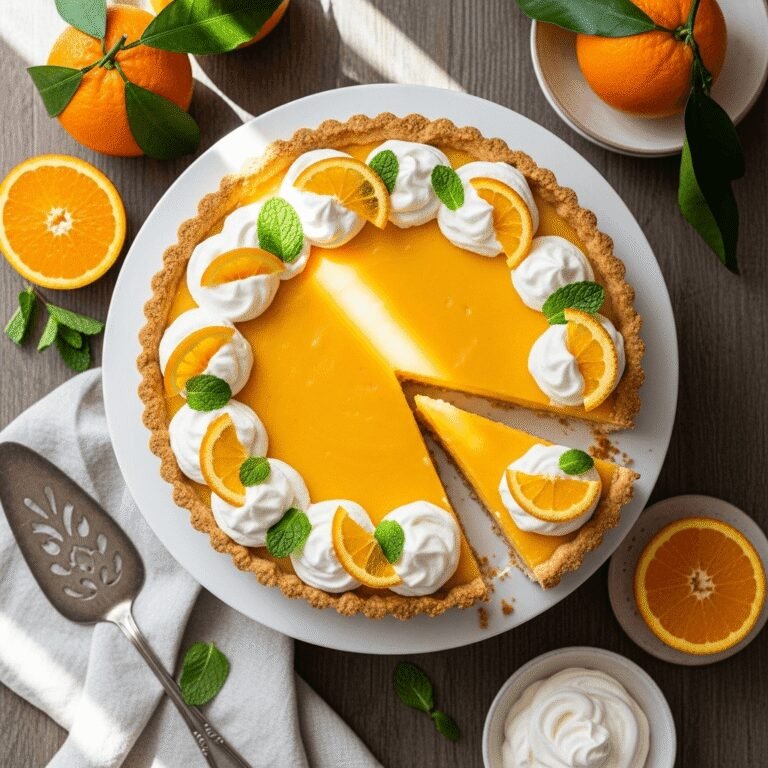
The Ultimate Butterscotch Pie Recipe: Creamy, Rich & Absolutely Irresistible

If you’ve been searching for the perfect butterscotch pie recipe that delivers nostalgic, old-fashioned flavor with a silky-smooth filling, you’ve just found it! This homemade butterscotch pie features a rich, creamy butterscotch custard nestled in a flaky pie crust and topped with billowy whipped cream or meringue. It’s the kind of dessert that disappears fast at family gatherings, holiday dinners, and potluck celebrations.
Unlike store-bought butterscotch pudding, this from-scratch recipe captures the deep, caramelized flavor of real brown sugar and butter, creating a dessert that’s truly special. Whether you’re serving it for Thanksgiving, Christmas, a Sunday dinner, or just because you’re craving something sweet and comforting, this butterscotch pie is guaranteed to become a treasured recipe in your collection. The best part? It’s surprisingly easy to make, requiring just simple pantry ingredients and about 30 minutes of active cooking time.
History / Background
Butterscotch pie has been gracing American dessert tables since the late 1800s, though its exact origins remain delightfully mysterious. The term “butterscotch” itself likely comes from the combination of butter and “scotch,” which in old English meant “to cut” or “to score”—referring to how the candy was traditionally cut into pieces. Some food historians suggest the flavor originated in Scotland, while others believe it was simply named for its Scottish-style richness.
What we do know is that butterscotch became wildly popular in America during the early 20th century, particularly in the Midwest and South, where cream pies reigned supreme. Before the convenience of instant pudding mixes (which didn’t arrive until the 1940s), home cooks made butterscotch pie completely from scratch, stirring pots of brown sugar, butter, and cream over the stove until they achieved that signature golden, caramelized flavor.
During the Great Depression and post-war era, butterscotch pie became even more beloved because it used affordable, readily available ingredients—eggs, milk, butter, brown sugar, and flour—to create an impressive, restaurant-quality dessert. Unlike fruit pies that required seasonal produce, butterscotch pie could be enjoyed year-round, making it a practical yet luxurious treat.
Today, butterscotch pie remains a nostalgic favorite, often associated with grandmother’s kitchen and special Sunday dinners. While chocolate and banana cream pies often steal the spotlight, butterscotch pie holds a special place in the hearts of those who appreciate its unique, complex sweetness that’s distinctly different from caramel.
Why You’ll Love This Recipe
This isn’t just another cream pie recipe—it’s a showstopping dessert that tastes like it came from a professional bakery but is completely achievable for home bakers of all skill levels. The filling strikes the perfect balance between sweet and rich, with a depth of flavor that you simply can’t get from a boxed mix.
Here’s why this butterscotch pie will become your new favorite dessert:
- Authentic flavor: Made with real brown sugar and butter for genuine butterscotch taste, not artificial flavoring
- Silky-smooth texture: The custard filling is incredibly creamy without being too heavy or overly sweet
- Make-ahead friendly: Prepare it a day in advance for stress-free entertaining
- Budget-friendly: Uses simple, inexpensive ingredients you probably already have in your pantry
- Impressive presentation: Looks like it came from a fancy bakery but costs a fraction of the price
- Nostalgic comfort: Brings back memories of classic American desserts and family gatherings
- Versatile topping options: Top with whipped cream for simplicity or meringue for drama
- No special equipment needed: Just basic kitchen tools and a little patience
- Crowd-pleaser: Appeals to all ages, from kids to grandparents
- Perfect year-round: Not dependent on seasonal ingredients like fruit pies
Ingredient Notes
Understanding your ingredients is key to creating the perfect butterscotch pie. Here’s what you’ll need and why each component matters:
Dark Brown Sugar: This is the star of the show! Dark brown sugar contains more molasses than light brown sugar, which gives butterscotch its characteristic deep, caramelized flavor. You can use light brown sugar in a pinch, but the flavor won’t be quite as rich. Don’t substitute white sugar—you’ll lose the butterscotch essence entirely.
Butter: Use real unsalted butter, not margarine or butter substitutes. The butter provides richness and helps create that signature butterscotch flavor when combined with brown sugar. Unsalted butter lets you control the salt level in your filling.
Whole Milk or Half-and-Half: Whole milk creates a lighter custard, while half-and-half produces an ultra-rich, decadent filling. For the best results, I recommend using half-and-half or a combination of whole milk and heavy cream. Avoid low-fat milk, which will result in a thin, watery filling.
Egg Yolks: The yolks act as a thickener and give the custard its silky texture and beautiful golden color. They also add richness without making the filling taste eggy. Save your egg whites for the meringue topping if you’re going that route!
All-Purpose Flour or Cornstarch: These thickeners help the custard set properly. Flour creates a slightly more stable filling, while cornstarch produces a glossier, more translucent result. You can use either one successfully.
Salt: Just a pinch enhances all the other flavors and balances the sweetness. Don’t skip it!
Vanilla Extract: Pure vanilla extract adds warmth and depth. Use the good stuff—it makes a difference.
Pie Crust: You can use store-bought (no judgment!) or homemade. A traditional pastry crust works beautifully, or try a graham cracker crust for a slightly different twist.
Optional Substitutions: For a dairy-free version, use full-fat coconut milk (the canned kind) instead of dairy milk, though the flavor will be slightly different. You can substitute coconut oil for butter, but again, expect a subtle coconut undertone.
Equipment Needed
You don’t need any fancy equipment to make this butterscotch pie—just these basic kitchen tools:
- Medium-large heavy-bottomed saucepan: Essential for cooking the custard evenly without scorching
- Wire whisk: For stirring the custard smoothly and preventing lumps
- Measuring cups and spoons: Accurate measurements are crucial for custard success
- Mixing bowls: At least two medium bowls for separating ingredients
- Fine-mesh strainer: Optional but recommended for ensuring a silky-smooth filling
- 9-inch pie pan: Standard size for this recipe
- Plastic wrap: For covering the custard directly to prevent skin formation
- Electric mixer: If making meringue topping (stand mixer or hand mixer works)
- Rubber spatula: For scraping every bit of butterscotch goodness from the pan
- Kitchen thermometer: Optional but helpful for monitoring custard temperature
- Rolling pin: If making homemade pie crust
Butterscotch Pie Recipe

This classic butterscotch pie features a rich, creamy custard filling made with brown sugar and butter, all nestled in a flaky pie crust. Topped with whipped cream or meringue, it’s an old-fashioned dessert that never goes out of style.
- Prep Time: 20 minutes
- Cooling/Chilling Time: 4 hours
- Cook Time: 15 minutes
- Total Time: 4 hours 35 minutes
- Yield: 8 servings 1x
- Category: Dessert
- Method: Stovetop, No-Bake Filling
- Cuisine: American
- Diet: Vegetarian
Ingredients
For the Butterscotch Filling:
- 1¼ cups (250g) packed dark brown sugar
- ⅓ cup (42g) all-purpose flour (or ¼ cup cornstarch)
- ¼ teaspoon salt
- 3 cups (720ml) whole milk or half-and-half
- 4 large egg yolks, lightly beaten
- 3 tablespoons (42g) unsalted butter, cut into pieces
- 1½ teaspoons pure vanilla extract
For the Pie:
- 1 (9-inch) pie crust, pre-baked and cooled (store-bought or homemade)
For the Topping (Choose One):
- 1½ cups heavy whipping cream + 3 tablespoons powdered sugar + 1 teaspoon vanilla (for whipped cream)
- OR 3 egg whites + ¼ teaspoon cream of tartar + 6 tablespoons granulated sugar (for meringue)
Instructions
Step 1: Prepare Your Workspace
Pre-bake your pie crust according to package or recipe directions and let it cool completely. Have all your ingredients measured and ready before you start cooking—custard waits for no one!
Step 2: Combine Dry Ingredients
In your heavy-bottomed saucepan, whisk together the brown sugar, flour (or cornstarch), and salt until no lumps remain. Breaking up the brown sugar clumps now will save you headaches later.
Step 3: Add Milk Gradually
Pour in about 1 cup of the milk and whisk until you have a smooth paste with no lumps. Then gradually whisk in the remaining 2 cups of milk until everything is completely combined and smooth.
Step 4: Cook the Custard
Place the saucepan over medium heat and cook, whisking constantly, until the mixture comes to a full boil. This will take 8-12 minutes. The mixture will gradually thicken, and you’ll notice it starting to bubble. Once it reaches a rolling boil, let it boil for 1 minute while whisking continuously, then remove from heat.
Step 5: Temper the Egg Yolks
In a separate bowl, have your beaten egg yolks ready. Slowly pour about 1 cup of the hot butterscotch mixture into the yolks while whisking constantly. This gradually raises the temperature of the yolks without scrambling them. Once combined, pour the egg yolk mixture back into the saucepan with the remaining butterscotch filling.
Step 6: Final Cook
Return the saucepan to medium heat and cook, whisking constantly, for 2-3 minutes more until the filling is thick and glossy. It should coat the back of a spoon and hold its shape when you draw a line through it.
Step 7: Add Butter and Vanilla
Remove from heat and stir in the butter pieces and vanilla extract until the butter is completely melted and incorporated. The butter adds incredible richness and shine.
Step 8: Strain (Optional)
For an ultra-smooth filling, pour the custard through a fine-mesh strainer into a clean bowl. This removes any small lumps or cooked egg bits.
Step 9: Fill the Pie
Pour the hot butterscotch filling into your cooled pie crust, spreading it evenly with a spatula. Press a piece of plastic wrap directly onto the surface of the filling to prevent a skin from forming.
Step 10: Chill
Refrigerate the pie for at least 4 hours or overnight until the filling is completely set and cold.
Step 11: Add Topping
For whipped cream: Beat heavy cream with powdered sugar and vanilla until stiff peaks form. Spread or pipe over the chilled pie just before serving.
For meringue: Beat egg whites with cream of tartar until soft peaks form. Gradually add sugar and beat until stiff, glossy peaks form. Spread over the pie, making sure to seal the edges. Brown under the broiler for 1-2 minutes, watching carefully, or use a kitchen torch.
Step 12: Slice and Serve
Use a sharp knife dipped in hot water (and wiped dry between cuts) to slice clean pieces. Serve chilled and enjoy!
Notes
- The custard filling can be made 1-2 days ahead and stored in the refrigerator with plastic wrap pressed directly on the surface.
- For the smoothest filling, constant whisking during cooking is essential—don’t walk away!
- If your filling seems too thin after chilling, it may not have reached a full boil or didn’t boil long enough. Next time, make sure you see large bubbles breaking the surface and let it boil for the full minute.
- Leftover pie keeps for 3-4 days covered in the refrigerator.
- For easier slicing, chill the pie overnight rather than just 4 hours.
Nutrition
- Serving Size: 1 slice (⅛ of pie)
- Calories: 385
- Sugar: 32g
- Sodium: 220mg
- Fat: 18g
- Saturated Fat: 10g
- Unsaturated Fat: 6g
- Trans Fat: 0g
- Carbohydrates: 51g
- Fiber: 0g
- Protein: 6g
- Cholesterol: 135mg
Nutrition information is approximate and based on the recipe with whipped cream topping. Values will vary based on specific ingredients used and portion sizes.
Tips & Variations
Salted Butterscotch Pie: Add ½ teaspoon of flaky sea salt to the filling and sprinkle a little more on top for a trendy salted caramel vibe.
Bourbon Butterscotch Pie: Replace 2 tablespoons of the milk with bourbon for a sophisticated, adult-friendly twist.
Chocolate Drizzle: After chilling, drizzle melted dark chocolate over the whipped cream topping for a butterscotch-chocolate combo.
Caramel Butterscotch: Stir in 2-3 tablespoons of caramel sauce along with the butter for even more depth.
Coconut Butterscotch: Fold ½ cup of toasted coconut flakes into the cooled filling before pouring into the crust.
Lighter Version: Use 2% milk and reduce the butter to 2 tablespoons. The filling will be less rich but still delicious.
Graham Cracker Crust: Swap the traditional pie crust for a graham cracker crust for a slightly sweeter, crunchier base.
Individual Servings: Make this in small mason jars or ramekins for adorable individual butterscotch pudding pies.
Pro Chef Tips
Master the Custard Temperature: The key to perfect butterscotch filling is reaching exactly 180-185°F. At this temperature, the egg yolks are cooked enough to thicken without curdling. A kitchen thermometer takes the guesswork out.
Brown Your Butter First: For next-level flavor, brown the butter in a separate pan before adding it to the custard. This adds a nutty, toasted depth that’s absolutely incredible.
Use a Heavy Pan: Thin pans create hot spots that can scorch your custard. A heavy-bottomed saucepan distributes heat evenly, giving you smooth results every time.
Whisk in a Figure-8 Pattern: Instead of circular stirring, whisk in a figure-8 motion to cover the entire bottom of the pan and prevent scorching in the corners.
Chill the Pie Overnight: While 4 hours is the minimum, overnight chilling gives the flavors time to meld and creates a firmer, easier-to-slice filling.
Room Temperature Eggs: Let your eggs sit at room temperature for 30 minutes before using. They’ll incorporate more smoothly into the hot custard without temperature shock.
Bloom Your Vanilla: Add the vanilla extract to the hot custard and let it sit for a minute before stirring. This “blooms” the vanilla and intensifies its flavor.
Double-Strain for Perfection: If you’re serving this pie for a special occasion, strain the custard twice—once after cooking and once after adding the butter and vanilla.
Common Mistakes to Avoid
Not Pre-Baking the Crust: A soggy bottom crust is the enemy of cream pies. Always fully pre-bake your crust until golden brown and let it cool completely before filling.
Walking Away from the Stove: Custard requires constant attention. If you stop whisking even for 30 seconds, you risk scorching the bottom or creating lumps. Stay focused and keep whisking!
Adding Eggs Too Quickly: Dumping hot custard directly into egg yolks will scramble them instantly. Always temper by adding hot liquid gradually while whisking constantly.
Not Reaching a Full Boil: If your filling doesn’t boil vigorously enough, the flour or cornstarch won’t fully activate, and you’ll end up with a runny pie. You need to see large bubbles breaking the surface.
Cutting Too Soon: I know it’s tempting, but slicing into a warm butterscotch pie results in a soupy mess. Patience is rewarded with clean, beautiful slices that hold their shape.
Using Low-Fat Dairy: This isn’t the recipe to cut corners on fat. Low-fat milk produces a thin, disappointing filling. Use whole milk at minimum, half-and-half for luxury.
Overmixing the Topping: Whether you’re making whipped cream or meringue, there’s a sweet spot. Overwhipped cream turns grainy and buttery; overbeaten meringue becomes dry and breaks down.
Storage & Meal Prep
Refrigerator Storage: Store butterscotch pie covered in the refrigerator for up to 4 days. Press plastic wrap directly onto the surface if the pie is untopped, or loosely cover with foil if already topped with whipped cream or meringue. Meringue-topped pies are best enjoyed within 2 days, as the meringue can weep and become watery over time.
Leftover Slices: Individual slices can be stored in airtight containers in the fridge. Place parchment paper between slices if stacking to prevent sticking.
Reheating: Butterscotch pie is best served cold, straight from the refrigerator. There’s no need to reheat this dessert—in fact, warming it will cause the filling to become loose and runny.
Keeping Crust Crispy: To prevent the crust from absorbing moisture from the filling, you can brush the pre-baked crust with a thin layer of melted white chocolate or a beaten egg white before adding the butterscotch filling. Let it set completely before filling.
Transporting: If you need to transport your butterscotch pie to a gathering, keep it chilled until the last possible moment. Use a pie carrier or secure the pie plate in a box surrounded by ice packs in a cooler. Add the whipped cream topping after arrival if possible.
Make-Ahead & Freezer Notes
Make-Ahead Timeline: This pie is actually better when made a day in advance! The overnight rest allows the flavors to develop and the filling to set perfectly firm. You can prepare the entire pie (with or without topping) up to 24 hours ahead. If adding whipped cream, wait until 2-3 hours before serving for the freshest look and taste.
Freezing the Filling: While you can freeze butterscotch pie filling, I don’t particularly recommend it. Custard-based fillings can separate or become grainy when frozen and thawed. If you must freeze it, pour the cooled filling into a freezer-safe container, press plastic wrap onto the surface, and freeze for up to 1 month. Thaw overnight in the refrigerator and whisk smooth before using.
Freezing the Whole Pie: Freeze the completed pie (without topping) for up to 1 month. Wrap tightly in plastic wrap, then aluminum foil. Thaw in the refrigerator overnight before adding topping and serving. The texture may be slightly less creamy than fresh, but it’s still delicious.
Freezing the Crust: The easiest make-ahead option is to pre-bake your pie crust and freeze it. Wrap the cooled crust well and freeze for up to 3 months. No need to thaw—simply prepare the filling and pour it into the frozen crust.
Component Prep: Make your life easier by preparing components separately. The filling can be made 2 days ahead and stored in a bowl with plastic wrap pressed on the surface. The crust can be baked 1 day ahead and stored at room temperature. Whip the cream just before serving for best volume and texture.
Serving Suggestions
Butterscotch pie is rich and satisfying on its own, but these accompaniments take it to the next level:
Beverages: Serve alongside hot coffee, espresso, or a cappuccino for a classic diner-style experience. The slight bitterness of coffee cuts through the sweetness beautifully. Sweet tea, hot chocolate, or a glass of cold milk are also excellent choices, especially for younger guests.
Fresh Fruit: Balance the richness with fresh berries—sliced strawberries, raspberries, or blackberries add a tart contrast. A simple fruit salad with mint also works wonderfully.
Ice Cream: For an over-the-top indulgent dessert, serve a slice with a scoop of vanilla bean ice cream or salted caramel ice cream on the side.
Caramel or Chocolate Sauce: Drizzle homemade caramel sauce or chocolate sauce over each slice for extra decadence.
Nuts: Sprinkle chopped toasted pecans, walnuts, or hazelnuts over the whipped cream for added texture and a sophisticated touch.
Dinner Pairing: This pie works beautifully after a hearty meal. Serve it following comfort foods like roast chicken, pot roast, fried chicken, or ham. It’s also perfect after a Thanksgiving or Christmas dinner when you want something different from pumpkin or pecan pie.
Presentation Ideas: Dust the whipped cream lightly with cinnamon, add a small piece of butterscotch candy as garnish, or create a decorative pattern with caramel sauce for an Instagram-worthy presentation.
FAQs Section
Q: Can I use instant butterscotch pudding instead of making it from scratch?
A: While you technically can, I really don’t recommend it. Instant pudding lacks the deep, authentic butterscotch flavor and rich texture of homemade custard. The difference is truly night and day, and making it from scratch only takes about 20 minutes of active time.
Q: Why did my butterscotch filling turn out lumpy?
A: Lumps usually form when the dry ingredients aren’t fully mixed before heating, or when the mixture isn’t whisked constantly during cooking. Make sure you whisk the brown sugar and flour together thoroughly to break up clumps, then whisk continuously while cooking. If you do end up with lumps, strain the custard through a fine-mesh strainer to remove them.
Q: Can I make this pie with a meringue topping instead of whipped cream?
A: Absolutely! A toasted meringue topping is traditional and delicious. Beat 3 egg whites with ¼ teaspoon cream of tartar until soft peaks form, then gradually add 6 tablespoons of sugar and beat until stiff and glossy. Spread over the warm filling (making sure to seal the edges), then brown under the broiler for 1-2 minutes or use a kitchen torch.
Q: How can I tell when my custard is thick enough?
A: The custard should coat the back of a spoon thickly, and when you draw a line through it with your finger, the line should hold without the custard running back together. It should also be at a full, rolling boil for at least 1 minute. If you’re using a thermometer, aim for 180-185°F.
Q: My pie filling didn’t set—what went wrong?
A: This usually happens when the filling didn’t reach a high enough temperature or didn’t boil long enough to activate the thickening agents. Make sure you bring the mixture to a full, bubbling boil and maintain it for the full minute. Also, double-check that you measured your flour or cornstarch correctly. If it’s still too soft, you can return the filling to the pot, cook it a bit longer, and re-chill.
Q: What’s the difference between butterscotch and caramel?
A: While both are made with sugar and butter, butterscotch uses brown sugar while caramel uses white granulated sugar. Brown sugar contains molasses, which gives butterscotch its distinctive flavor and darker color. Caramel has a cleaner, more refined sweetness, while butterscotch is deeper and more complex.
Q: Can I make this pie gluten-free?
A: Yes! Use cornstarch instead of flour as your thickener (you’ll need ¼ cup), and use a gluten-free pie crust. The filling itself is naturally gluten-free when made with cornstarch.
Q: Do I need to use dark brown sugar, or will light brown sugar work?
A: Dark brown sugar is preferred because it has more molasses, which creates that deep butterscotch flavor. Light brown sugar will still work and taste good, but the flavor won’t be quite as rich and the color will be lighter. In a pinch, you can also add a tablespoon of molasses to light brown sugar to approximate dark brown sugar.
Conclusion
There’s something magical about sliding a fork through a slice of homemade butterscotch pie—that moment when you encounter the crispy crust, the silky custard, and the cloud of whipped cream all at once. It’s pure comfort, pure nostalgia, and pure deliciousness in every single bite.
This classic butterscotch pie recipe proves that the best desserts don’t need to be complicated or trendy. Sometimes the old-fashioned recipes—the ones passed down through generations—are the ones worth making again and again. Whether you’re introducing your family to butterscotch pie for the first time or recreating a cherished memory from your childhood, this recipe delivers that perfect balance of rich, caramelized sweetness and creamy texture that defines a truly great cream pie.
I hope this butterscotch pie becomes a staple in your dessert rotation, showing up at holidays, potlucks, and Sunday dinners for years to come. If you make it, I’d absolutely love to hear how it turned out! Drop a comment below, rate the recipe, and don’t forget to save it to your Pinterest boards so you can find it again when that butterscotch craving hits.
Happy baking, friends! Now get in that kitchen and create some sweet memories. 🥧✨