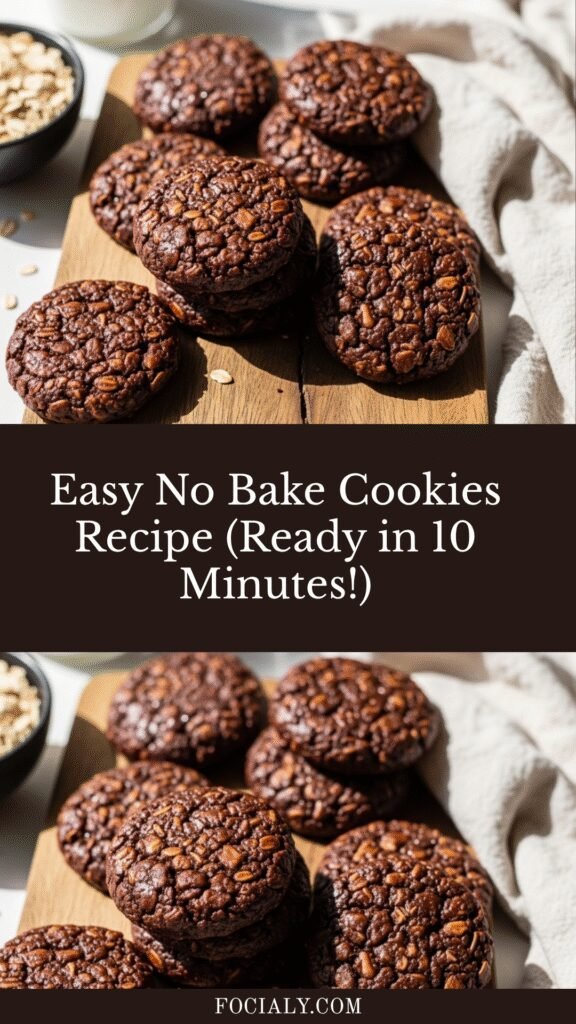
Easy No Bake Cookies Recipe (Ready in 10 Minutes!)
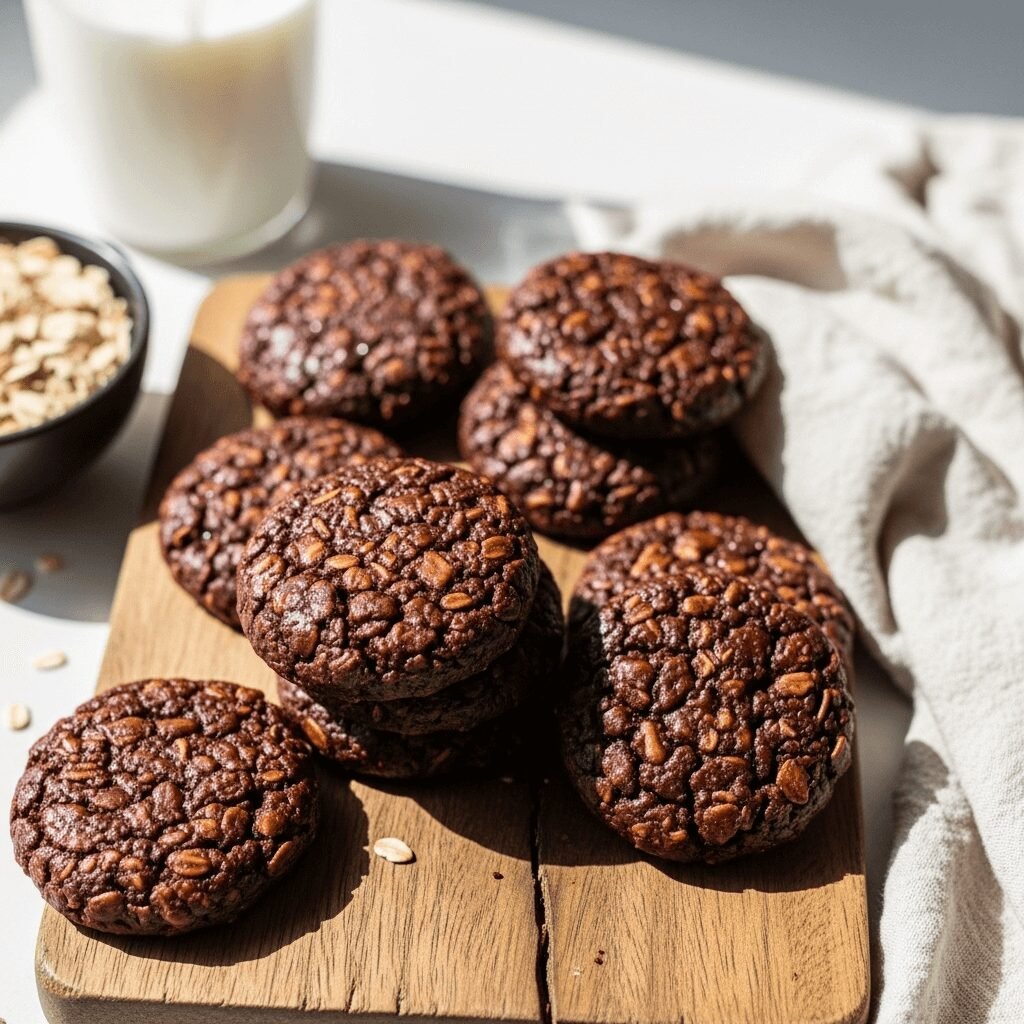
There’s something truly magical about a dessert that comes together in minutes without ever turning on your oven. No bake cookies are one of those beloved treats that have been gracing kitchen counters and holiday cookie platters for generations. These rich, chocolatey cookies with a hint of peanut butter and the satisfying chew of oats are the perfect solution when you’re craving something sweet but don’t want to deal with preheating ovens or waiting for batch after batch to bake.
What makes no bake cookies so special is their incredible versatility and foolproof nature. They’re perfect for hot summer days when you can’t bear the thought of heating up your kitchen, last-minute bake sales when you’re short on time, or teaching kids their first cooking lesson since there’s no hot oven involved. The best part? These cookies set up beautifully on the counter in just 20-30 minutes, which means you can go from craving to eating in under an hour. Whether you call them no bake cookies, preacher cookies, or chocolate oatmeal cookies, this classic American treat delivers rich chocolate flavor, creamy peanut butter goodness, and that perfect chewy texture that keeps everyone coming back for more.
History / Background
No bake cookies have a fascinating history rooted in American home cooking ingenuity. These delightful treats first gained popularity in the 1950s and 1960s when convenience cooking was becoming a major trend in American households. Homemakers were discovering creative ways to make delicious desserts without spending hours in the kitchen, and no bake cookies perfectly embodied this new approach to cooking.
The recipe is believed to have originated in the Southern United States, where they’re often called “preacher cookies” – a charming nickname that comes from the tradition of being able to whip them up quickly when the preacher unexpectedly stopped by for a visit. Can you imagine the panic of having an important guest arrive and no dessert to offer? These cookies solved that problem beautifully.
Another theory suggests these cookies became popular during the Great Depression era when families needed to stretch their budgets and couldn’t afford to waste fuel heating ovens. The stovetop method meant less energy consumption and more economical cooking. The combination of oats (an inexpensive pantry staple), cocoa powder, and a bit of peanut butter created a filling, satisfying treat that didn’t break the bank.
Throughout the decades, no bake cookies have remained a staple in American kitchens, passed down through generations via handwritten recipe cards, church cookbooks, and family traditions. They’ve become particularly associated with Christmas cookie exchanges, summer picnics, and school bake sales. The recipe has stood the test of time because it requires minimal ingredients, delivers maximum flavor, and never fails to bring smiles to faces young and old.
Why You’ll Love This Recipe
This no bake cookies recipe is about to become your new go-to dessert for countless occasions. The beauty of these cookies lies in their perfect balance of simplicity and indulgence. They taste like you spent hours in the kitchen, but the reality is you’ll barely spend 10 minutes actively working on them.
Here’s why this recipe is absolutely irresistible:
- Lightning-fast preparation – From start to finish, you’ll have cookies setting on your counter in just 10 minutes of actual cooking time
- No oven required – Perfect for hot summer days, dorm rooms, or when your oven is occupied with dinner
- Pantry-friendly ingredients – Most of these items are probably sitting in your cupboard right now
- Kid-friendly cooking project – Safe for children to help with since there’s no hot oven or complicated techniques involved
- Incredibly budget-friendly – These cookies cost just pennies per serving, making them perfect for feeding a crowd
- Foolproof recipe – Even beginner cooks get perfect results every single time with this straightforward method
- Rich, indulgent flavor – The combination of chocolate, peanut butter, and vanilla creates a taste that rivals any bakery cookie
- Perfect texture every time – Chewy, fudgy centers with just the right amount of oat texture
- Highly customizable – Easy to adapt with different nut butters, add-ins, or flavor variations
- Great for gifting – Stack them in a pretty tin or box for holiday gifts, teacher appreciation, or hostess presents
Ingredient Notes
Understanding your ingredients is key to making perfect no bake cookies every single time. Let’s break down what you’ll need and why each component matters:
Granulated Sugar – This provides the sweetness and helps create the proper texture when boiled with the milk and butter. Don’t substitute with powdered sugar, as it won’t create the right consistency.
Milk – Whole milk works best for richness, but 2% will also work well. The milk helps create the syrupy base that binds everything together. Avoid skim milk as it lacks the fat needed for proper texture.
Unsalted Butter – Adds richness and helps create that glossy, fudgy texture. Using unsalted allows you to control the salt level. If using salted butter, reduce the added salt slightly.
Cocoa Powder – Use unsweetened cocoa powder for the best chocolate flavor. Dutch-processed or natural cocoa both work beautifully. This gives the cookies their deep, chocolatey taste without adding extra sweetness.
Creamy Peanut Butter – The star ingredient that adds protein, richness, and that irresistible peanut butter flavor. Use regular creamy peanut butter (like Jif or Skippy) rather than natural peanut butter, which can separate and affect the texture. Almond butter or sunflower seed butter work as substitutions for those with peanut allergies.
Vanilla Extract – A small amount enhances all the other flavors and adds depth. Don’t skip this ingredient even though it seems minor.
Quick-Cooking Oats – These are essential for texture and substance. Quick oats work better than old-fashioned oats because they’re finer and incorporate more smoothly. Avoid instant oats or steel-cut oats. If you only have old-fashioned oats, pulse them a few times in a food processor to break them down slightly.
Salt – Just a pinch balances the sweetness and enhances the chocolate and peanut butter flavors.
Equipment Needed
One of the best things about no bake cookies is that you don’t need any fancy kitchen equipment. Here’s everything you’ll need:
- Medium to large saucepan (at least 2-quart capacity) – For cooking the sugar mixture
- Wooden spoon or heat-resistant silicone spatula – For stirring the hot mixture
- Measuring cups and spoons – Accurate measurements are crucial for this recipe
- Wax paper or parchment paper – For placing the cookies to set
- Baking sheets or large cutting boards – To hold the wax paper with cookies
- Timer – Essential for timing the boiling process accurately
- Ice cream scoop or two spoons – For portioning out uniform cookies
No Bake Cookies Recipe
These classic no bake cookies are rich, chocolatey, and perfectly chewy with a delicious combination of peanut butter and oats. Ready in just minutes without turning on your oven, they’re the ultimate quick and easy dessert that tastes absolutely indulgent.
- Prep Time: 5 minutes
- Setting Time: 20-30 minutes
- Cook Time: 5 minutes
- Total Time: 30-40 minutes
- Yield: 36 cookies 1x
- Category: Dessert
- Method: Stovetop
- Cuisine: American
- Diet: Vegetarian
Ingredients
- 2 cups granulated sugar
- ½ cup whole milk
- ½ cup (1 stick) unsalted butter
- ¼ cup unsweetened cocoa powder
- ½ cup creamy peanut butter
- 1 teaspoon vanilla extract
- 3 cups quick-cooking oats
- ¼ teaspoon salt
Instructions
- Prepare your workspace – Line two large baking sheets with wax paper or parchment paper and set aside. This is important to do first because once the mixture is ready, you need to work quickly.
- Combine the base ingredients – In a medium saucepan, combine the sugar, milk, butter, and cocoa powder. Stir everything together over medium heat until the butter is completely melted and the mixture is smooth.
- Bring to a boil – Increase the heat to medium-high and bring the mixture to a full rolling boil. Once it reaches a boil, let it boil for exactly 1 minute without stirring. This timing is crucial for achieving the right texture. Use a timer to ensure accuracy.
- Remove from heat – After exactly 1 minute of boiling, remove the saucepan from the heat immediately. Working quickly, stir in the peanut butter and vanilla extract until completely smooth and well combined.
- Add the oats – Fold in the quick oats and salt, stirring vigorously until every oat is coated with the chocolate mixture. The mixture will start to thicken as you stir.
- Drop the cookies – Working quickly (the mixture will begin to set), use a spoon or small ice cream scoop to drop spoonfuls of the mixture onto your prepared wax paper. Aim for cookies about 2 inches in diameter. If the mixture gets too thick to scoop, you can briefly return it to low heat for 10-15 seconds to loosen it slightly.
- Let them set – Allow the cookies to sit at room temperature for 20-30 minutes until they’re completely firm and set. Don’t refrigerate them during this initial setting period, as it can cause them to become crumbly.
- Serve and enjoy – Once set, the cookies are ready to eat! Store any leftovers in an airtight container at room temperature.
Notes
- Timing is everything: The 1-minute boil is crucial. Under-boiled cookies won’t set properly and will be mushy. Over-boiled cookies will be dry and crumbly.
- Work quickly: Once you remove the mixture from heat, work fast to get the cookies dropped onto the wax paper before the mixture hardens in the pot.
- Altitude adjustments: If you live at high altitude (above 3,000 feet), you may need to boil the mixture for 2-3 minutes instead of 1 minute.
- Testing doneness: If you’re unsure if you’ve boiled long enough, drop a tiny bit of the mixture onto wax paper after the 1-minute boil. If it sets within a few minutes, you’re good to go.
- Humidity matters: Very humid days can affect how well the cookies set. If they seem too soft, let them sit longer or move them to a drier room.
Nutrition
- Serving Size: 1 cookie Servings Per Recipe: 36
- Calories: 98
- Sugar: 12g
- Sodium: 35mg
- Fat: 4g
- Saturated Fat: 1.5g
- Unsaturated Fat: 2g
- Trans Fat: 0g
- Carbohydrates: 15g
- Fiber: 1g
- Protein: 2g
- Cholesterol: 5mg
Tips & Variations
The beauty of no bake cookies is how easily you can customize them to suit your preferences or dietary needs. Here are some fantastic ways to make this recipe your own:
Flavor Variations: Try using almond butter or cashew butter instead of peanut butter for a different nutty flavor. You can also use crunchy peanut butter if you prefer extra texture. For a fun twist, add ½ teaspoon of espresso powder to intensify the chocolate flavor, or swap the vanilla for almond or maple extract.
Mix-In Magic: Stir in ½ cup of shredded coconut, mini chocolate chips, chopped nuts, or dried cranberries along with the oats for added texture and flavor. Some people love adding a tablespoon of flaxseed or chia seeds for a nutritional boost.
Dietary Adaptations: Make these cookies gluten-free by ensuring your oats are certified gluten-free. For a vegan version, use plant-based milk, vegan butter, and substitute the peanut butter with sunflower seed butter or tahini. You can also use coconut sugar instead of granulated sugar for a lower glycemic option, though the texture may be slightly different.
Spice It Up: Add a pinch of cinnamon, a dash of sea salt on top, or even a tiny bit of cayenne pepper for a Mexican hot chocolate twist.
Pro Chef Tips
Want to make no bake cookies that rival the pros? Here are insider secrets that will elevate your cookie game:
Master the boil: The single most important factor in perfect no bake cookies is nailing that 1-minute rolling boil. Set a timer the moment you see vigorous bubbles covering the entire surface. A rolling boil means the bubbles don’t stop when you stir. This step allows the sugar to reach the right temperature to set properly.
Use a candy thermometer: For the most consistent results, especially if you’re new to making no bake cookies, use a candy thermometer. The mixture should reach 230°F during the boil. This takes the guesswork out of the process.
Quality ingredients matter: Use good quality cocoa powder for the best chocolate flavor. Dutch-processed cocoa gives a smoother, more refined taste, while natural cocoa provides a more intense chocolate punch.
Room temperature prep: Make sure your peanut butter is at room temperature before starting. Cold peanut butter won’t incorporate smoothly into the hot mixture and can cause the cookies to seize up or become grainy.
Don’t skimp on stirring: When you add the oats, stir vigorously and thoroughly. Every single oat should be coated with the chocolate mixture. Uneven stirring leads to inconsistent texture.
Perfect portions: Use a cookie scoop for uniform size and professional appearance. This also ensures even setting time for all cookies.
Common Mistakes to Avoid
Even with a simple recipe like no bake cookies, a few common pitfalls can affect your results. Here’s what to watch out for:
Under-boiling the mixture – This is the number one reason no bake cookies don’t set properly. If your cookies are still gooey after an hour, you didn’t boil the mixture long enough. The mixture must reach a full rolling boil for exactly 1 minute. Set a timer and don’t guess.
Over-boiling the mixture – On the flip side, boiling too long causes cookies to become dry, crumbly, and chalky. They might even harden before you can get them out of the pot. If this happens, you can add a tablespoon of milk and gently reheat to salvage the batch.
Using natural peanut butter – Natural peanut butter with separated oils doesn’t bind properly in this recipe and can cause the cookies to be oily or fail to set. Stick with processed peanut butter brands like Jif, Skippy, or Peter Pan for best results.
Working too slowly – Once you remove the pot from heat, you have a limited window to drop the cookies before the mixture hardens. Have your wax paper ready and work quickly. If the mixture does get too thick, you can briefly return it to low heat for just 10-15 seconds.
Refrigerating too soon – While it’s tempting to speed up the setting process by putting cookies in the fridge, this can actually cause them to become grainy or crumbly. Let them set at room temperature for best texture.
Storage & Meal Prep
Proper storage ensures your no bake cookies stay fresh and delicious for as long as possible. Here’s everything you need to know:
Room Temperature Storage: Once completely set, store no bake cookies in an airtight container at room temperature. Layer them between sheets of wax paper or parchment paper to prevent sticking. They’ll stay fresh for up to 1 week, though they’re often gone much sooner in most households!
Refrigerator Storage: If your kitchen is very warm or humid, you can store the cookies in the refrigerator for up to 2 weeks. Just be aware that refrigeration can sometimes cause them to dry out slightly. Let them sit at room temperature for 10 minutes before eating for the best texture.
Texture Tips: If your stored cookies become too hard, place a slice of bread in the container with them for a few hours. The cookies will absorb moisture from the bread and soften up. If they become too soft or sticky, that’s usually a sign they were under-boiled initially.
Serving from Storage: These cookies are delicious served at room temperature or slightly chilled. Some people even love them frozen for a fudgy, cold treat in summer!
Make-Ahead & Freezer Notes
No bake cookies are fantastic for making ahead, which makes them perfect for holiday cookie trays or planned events.
Make-Ahead: You can make these cookies up to 1 week in advance. Store them in an airtight container at room temperature, and they’ll be just as delicious as the day you made them. This makes them perfect for busy holiday seasons when you need to spread out your baking tasks.
Freezing Instructions: Yes, these cookies freeze beautifully! Once completely set, place them in a single layer on a baking sheet and freeze until solid (about 1 hour). Then transfer to a freezer-safe container or heavy-duty freezer bag, layering between parchment paper. They’ll keep in the freezer for up to 3 months.
Thawing: To thaw, simply transfer the desired number of cookies from the freezer to an airtight container and let them come to room temperature for about 30 minutes. They’ll taste freshly made! You can also eat them directly from the freezer for a firmer, fudge-like texture.
Freezing Tip: Freeze cookies in portion-sized amounts so you can pull out just what you need without thawing the entire batch. This is perfect for packing in lunchboxes or satisfying those late-night sweet cravings.
Serving Suggestions
No bake cookies are delicious on their own, but here are some wonderful ways to serve them that will make them even more special:
Classic Cookie Plate: Arrange your no bake cookies on a pretty platter alongside other favorites like chocolate chip cookies, snickerdoodles, and sugar cookies for a crowd-pleasing dessert spread.
With Beverages: These cookies pair beautifully with a tall glass of cold milk (a classic!), hot coffee, or iced tea. For adults, they’re surprisingly delicious with a glass of cold brew coffee or even red wine.
Ice Cream Sandwiches: Use two slightly larger no bake cookies to sandwich a scoop of vanilla ice cream for an indulgent frozen treat. Roll the edges in mini chocolate chips or chopped peanuts for extra pizzazz.
Gift Giving: Stack these cookies in a mason jar, cellophane bag tied with ribbon, or decorative tin for teacher gifts, neighbor treats, or holiday presents. They ship well and look beautiful layered in clear containers.
Dessert Platter Accompaniments: Serve alongside fresh strawberries, banana slices, or apple wedges for a nice contrast. The fruit provides a refreshing balance to the rich, sweet cookies.
Party Dessert Table: These cookies are perfect for birthdays, potlucks, bake sales, and graduation parties. Their familiar flavor appeals to all ages, and they hold up well at room temperature for several hours.
FAQs Section
Why didn’t my no bake cookies harden? The most common reason is not boiling the sugar mixture long enough. The mixture needs to reach a full rolling boil for exactly 1 minute. If your cookies are still soft after 30-45 minutes, the mixture wasn’t boiled long enough. Unfortunately, once dropped, there’s no way to fix under-boiled cookies. Make a note to boil for the full minute next time, and consider using a candy thermometer to reach 230°F.
Can I make no bake cookies without peanut butter? Absolutely! You can substitute almond butter, cashew butter, sunflower seed butter, or even cookie butter for peanut butter. Just make sure you’re using a creamy, well-stirred nut or seed butter rather than a natural separated one. The flavor will be slightly different but still delicious.
How do I know when to stop boiling the mixture? Set a timer for exactly 1 minute once the mixture reaches a full rolling boil (meaning bubbles cover the entire surface and don’t stop when you stir). If you have a candy thermometer, the mixture should reach 230°F. This is the soft-ball stage in candy making, which gives these cookies their perfect chewy texture.
Can I double this recipe? Yes, but with caution. When doubling, use a larger pot to prevent boil-overs, and you may need to increase the boiling time to 1.5-2 minutes because you have more volume. It’s often easier and more reliable to make two separate batches rather than doubling.
Why are my cookies dry and crumbly? This happens when the mixture is boiled too long or at too high a temperature. The sugar crystallizes and dries out, making the cookies crumbly. To prevent this, watch your timer carefully and remove from heat right at the 1-minute mark. If you notice they’re getting crumbly, store them with a slice of bread to add back some moisture.
Can I use old-fashioned oats instead of quick oats? Quick oats are really best for this recipe because they’re finer and incorporate more smoothly into the mixture. If you only have old-fashioned oats, pulse them in a food processor a few times to break them down into smaller pieces. Whole old-fashioned oats can result in cookies that don’t stick together as well.
How long do no bake cookies last? When stored properly in an airtight container at room temperature, these cookies will stay fresh for up to 1 week. In the refrigerator, they’ll last up to 2 weeks. For longer storage, freeze them for up to 3 months. They’re usually so delicious they don’t last more than a few days in most households!
Conclusion
There you have it – everything you need to know to make absolutely perfect no bake cookies every single time! These classic chocolate peanut butter oat cookies are truly a gift to home bakers everywhere. They’re quick, easy, budget-friendly, and absolutely delicious. Whether you’re making them for a bake sale, holiday cookie exchange, after-school snack, or just because you’re craving something sweet, this foolproof recipe delivers every time.
The beauty of no bake cookies lies in their simplicity and reliability. Once you master the 1-minute boil, you’ll be making these cookies for years to come, probably passing the recipe down to your own kids and grandkids just like generations before us have done. They’re the kind of recipe that brings people together, whether you’re making them with your children on a lazy Saturday afternoon or whipping up a batch to share with neighbors and friends.
So grab your saucepan, gather your ingredients, and give this recipe a try today! I promise you’ll be amazed at how something so simple can taste so incredible. Once these cookies set and you take that first chewy, chocolatey, peanut buttery bite, you’ll understand why no bake cookies have remained an American favorite for over 70 years.
Have you made no bake cookies before? Do you have a family recipe or special twist you love? I’d love to hear about it in the comments below! And if you try this recipe, please come back and let me know how it turned out. Don’t forget to save this recipe to your Pinterest boards so you can find it again when that cookie craving hits – trust me, it will!
Happy baking (or should I say, happy not baking!)! 🍪