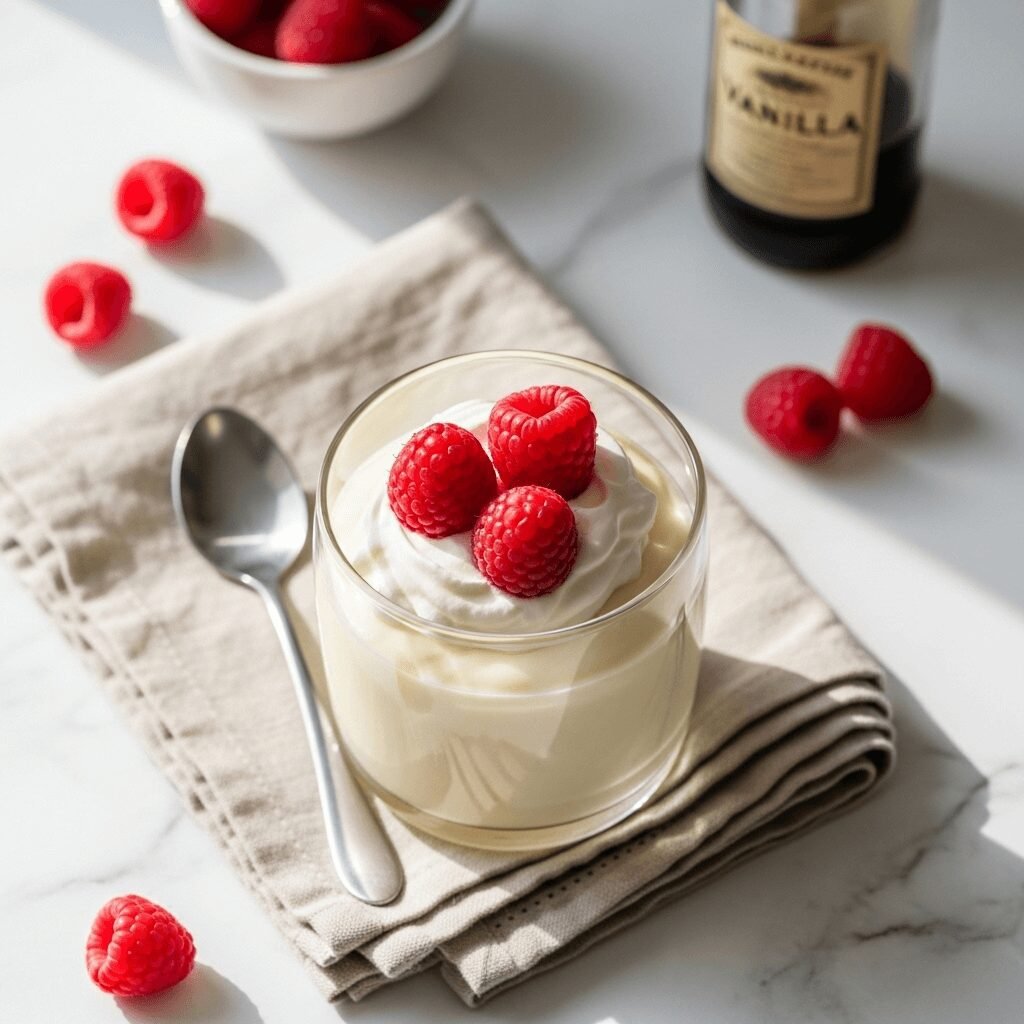
The Best Homemade Vanilla Pudding Recipe (Creamy & Easy!)

There’s something truly magical about homemade vanilla pudding that takes you right back to childhood. This classic vanilla pudding recipe is silky smooth, wonderfully creamy, and bursting with pure vanilla flavor that no boxed mix can replicate. Whether you’re craving a simple weeknight dessert, planning an elegant dinner party finale, or looking for the perfect filling for your favorite pies and parfaits, this easy vanilla pudding delivers every single time.
Unlike instant pudding that relies on artificial flavors and stabilizers, this from-scratch recipe uses simple pantry ingredients you probably already have on hand. The best part? It only takes about 15 minutes of active cooking time to create this luscious, restaurant-quality dessert. Serve it warm for ultimate comfort, or chill it until cold and spoonable for a refreshing treat. Either way, you’ll wonder why you ever bought the boxed stuff once you taste how incredible real vanilla pudding can be.
This recipe is perfect for serving as-is in individual dessert cups, layering into banana pudding, filling cream puffs and éclairs, or using as a base for trifles. It’s versatile, foolproof, and absolutely delicious—exactly what every home cook needs in their dessert repertoire.
History / Background
Vanilla pudding has a rich history that spans centuries and continents. The word “pudding” itself comes from the French “boudin,” originally referring to sausages, but the term evolved over time to describe a wide variety of sweet and savory dishes. The creamy, custard-style pudding we know and love today has its roots in medieval European cooking, where cooks thickened milk and cream with eggs, flour, or bread to create satisfying desserts.
Vanilla, the star flavor of this pudding, has an equally fascinating backstory. Native to Mexico, vanilla was used by the Aztecs to flavor chocolate drinks long before Europeans arrived in the Americas. Spanish conquistadors brought vanilla back to Europe in the 16th century, where it quickly became prized as one of the world’s most expensive and sought-after spices. The labor-intensive cultivation and hand-pollination of vanilla orchids made it a luxury ingredient reserved for the wealthy.
The transformation of pudding into an everyday American dessert happened in the late 19th and early 20th centuries. As vanilla became more accessible and refrigeration became common in households, creamy puddings gained popularity as a simple, affordable treat that families could enjoy regularly. The introduction of cornstarch as a thickening agent revolutionized pudding-making, replacing the more finicky egg-based custards and making the process much more foolproof for home cooks.
In the 1950s, instant pudding mixes hit the market and changed everything. While convenient, many cooks today are rediscovering the superior taste and texture of homemade vanilla pudding. There’s simply no comparison between the artificial flavor of boxed pudding and the rich, aromatic complexity of real vanilla beans or quality vanilla extract in a properly made pudding. This recipe honors that traditional approach while keeping the process simple enough for busy modern families.
Why You’ll Love This Recipe
This homemade vanilla pudding recipe strikes the perfect balance between impressive results and effortless execution. It’s the kind of recipe that makes you look like a culinary genius without requiring any advanced techniques or specialty ingredients.
Here’s why this recipe will become your go-to dessert:
- Incredibly Easy – With just 6 basic ingredients and one pot, you’ll have smooth, creamy pudding ready in under 20 minutes of hands-on time
- Better Than Store-Bought – The flavor is incomparably rich and authentic, with none of the chemical aftertaste that comes from instant pudding mixes
- Budget-Friendly – This recipe costs a fraction of premium pudding cups and feeds a crowd for just a few dollars
- Perfectly Customizable – Easily adapt the sweetness level, vanilla intensity, or consistency to match your exact preferences
- Kid-Approved – Children absolutely love the smooth, creamy texture and sweet vanilla flavor—it’s a guaranteed hit at the family table
- Versatile Base Recipe – Use it as-is or transform it into banana pudding, parfaits, pie filling, or layered desserts
- No Artificial Ingredients – You control exactly what goes into your pudding, making it a healthier choice for your family
- Make-Ahead Friendly – Prepare it in advance and keep it chilled until you’re ready to serve, making it perfect for entertaining
Whether you’re a beginner cook or an experienced home chef, this recipe delivers consistent, delicious results every single time.
Ingredient Notes
Understanding your ingredients helps you make the best vanilla pudding possible. Here’s what you need and why each component matters:
Whole Milk – The foundation of your pudding. Whole milk (3.25% fat) creates the creamiest, most luxurious texture. You can substitute 2% milk if needed, but avoid skim milk as it will result in a thinner, less satisfying pudding. For an even richer dessert, replace up to half the milk with heavy cream.
Granulated Sugar – Sweetens the pudding while also helping create that smooth, glossy texture. The amount can be adjusted based on your preference—start with the recipe amount and taste before chilling. You can substitute with coconut sugar for a subtle caramel note, though the color will be darker.
Cornstarch – The magic thickening agent that transforms liquid milk into silky pudding without eggs. Cornstarch gives you that perfect spoonable consistency and creates a cleaner vanilla flavor than flour-thickened versions. Make sure it’s fresh—old cornstarch won’t thicken properly.
Salt – Just a pinch enhances all the other flavors and prevents the pudding from tasting flat or one-dimensional. Don’t skip it!
Unsalted Butter – Added at the end for richness and a gorgeous glossy finish. The butter also helps prevent a skin from forming on top as the pudding cools. Use real butter, not margarine, for the best flavor.
Pure Vanilla Extract – The star of the show! Use high-quality pure vanilla extract rather than imitation for the most authentic, complex flavor. For an extra-special touch, you can split and scrape a vanilla bean into the milk while it heats, then strain it out before serving.
Equipment Needed
You don’t need any fancy tools to make perfect vanilla pudding. Here’s what you’ll use:
- Medium Heavy-Bottomed Saucepan – Essential for even heat distribution and preventing scorching
- Wire Whisk – For smooth mixing and preventing lumps in your pudding
- Measuring Cups and Spoons – Accuracy matters in pudding-making for proper consistency
- Rubber Spatula – For scraping down the sides of the pot and ensuring nothing sticks or burns
- Fine-Mesh Strainer (optional but recommended) – For an ultra-smooth, silky texture
- Mixing Bowls – For holding ingredients and serving
- Plastic Wrap or Parchment Paper – To prevent skin formation while chilling
- Individual Serving Dishes or One Large Bowl – For presentation and serving
Vanilla Pudding Recipe

This homemade vanilla pudding is silky smooth, perfectly sweet, and bursting with pure vanilla flavor. Made from scratch with simple ingredients in just one pot, it’s far superior to any boxed mix and ready in minutes!
- Prep Time: 5 minutes
- Cook Time: 12 minutes
- Total Time: 2 hours 17 minutes
- Yield: 6 servings 1x
- Category: Dessert
- Method: Stovetop
- Cuisine: American
- Diet: Vegetarian
Ingredients
- 3 cups whole milk
- ½ cup granulated sugar
- ¼ cup cornstarch
- ¼ teaspoon salt
- 3 tablespoons unsalted butter
- 2 teaspoons pure vanilla extract
Instructions
- Prepare Your Ingredients – Measure all ingredients and have them ready. This recipe moves quickly once you start cooking, so preparation is key.
- Mix the Dry Ingredients – In your medium saucepan, whisk together the sugar, cornstarch, and salt until thoroughly combined with no lumps remaining.
- Add the Milk Gradually – Pour in about ½ cup of the milk and whisk vigorously until you have a smooth paste with no dry pockets of cornstarch. This prevents lumps from forming later. Gradually whisk in the remaining milk until completely smooth.
- Cook Over Medium Heat – Place the saucepan over medium heat and cook, whisking constantly, for 8-12 minutes. The mixture will seem thin at first, then suddenly begin to thicken. Keep whisking throughout this entire process to prevent scorching on the bottom.
- Reach Full Boil – Continue cooking and whisking until the pudding comes to a full boil. You’ll see large bubbles breaking the surface. Once it reaches a boil, continue cooking for 1 additional minute while whisking constantly. The pudding should be thick enough to coat the back of a spoon and hold its shape briefly when dripped.
- Remove from Heat and Add Butter – Take the pan off the heat immediately. Add the butter and whisk until it’s completely melted and incorporated into the pudding, creating a beautiful glossy finish.
- Stir in Vanilla Extract – Add the vanilla extract and whisk until evenly distributed throughout the pudding. The aroma will be incredible!
- Strain for Smoothness (Optional) – For the silkiest texture, pour the pudding through a fine-mesh strainer into a clean bowl. This removes any small lumps that may have formed.
- Portion into Serving Dishes – Divide the warm pudding among 6 individual serving dishes or pour into one large serving bowl.
- Prevent Skin Formation – Press a piece of plastic wrap or parchment paper directly onto the surface of the pudding in each dish. This prevents the dreaded pudding skin from forming as it cools.
- Chill Until Set – Refrigerate for at least 2 hours, or until the pudding is completely chilled and set. The pudding will continue to thicken as it cools.
- Serve and Enjoy – Remove the plastic wrap, add your favorite toppings if desired, and serve cold. Enjoy your homemade vanilla pudding!
Notes
- For chocolate pudding, add 3 tablespoons of cocoa powder to the dry ingredients and increase sugar to ⅔ cup.
- Pudding will thicken significantly as it cools, so don’t worry if it seems slightly thin when hot.
- If you prefer sweeter pudding, increase sugar to ⅔ cup.
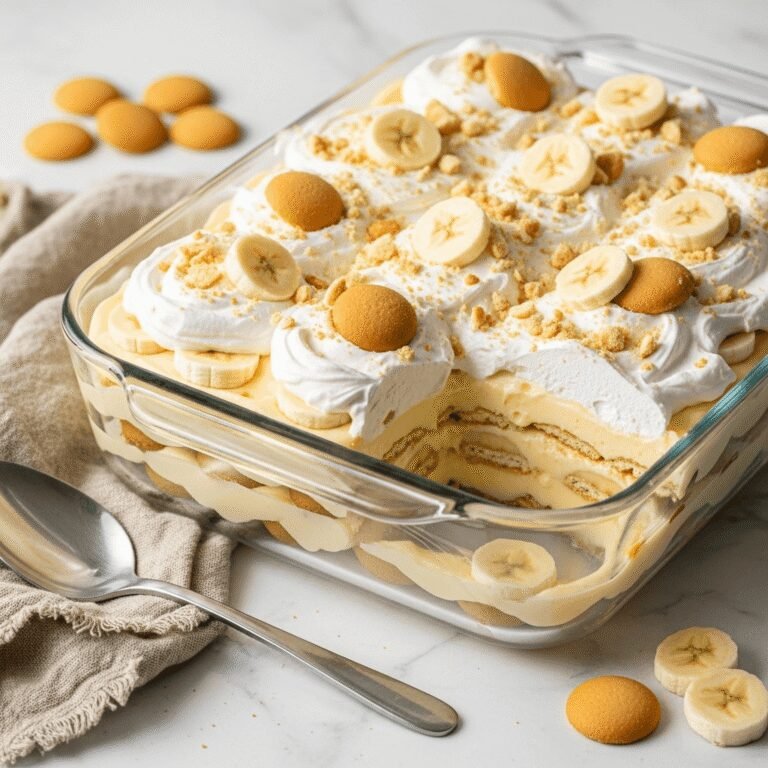
- For banana pudding, layer with vanilla wafers and fresh banana slices.
- The pudding is safe to eat warm, but the texture is best when fully chilled.
Nutrition
- Serving Size: ½ cup (approximately) Servings Per Recipe: 6 Amount Per Serving
- Calories: 215
- Sugar: 22g
- Sodium: 165mg
- Fat: 8g
- Saturated Fat: 5g
- Unsaturated Fat: 2.5g
- Trans Fat: 0g
- Carbohydrates: 32g
- Fiber: 0g
- Protein: 4g
- Cholesterol: 25mg
Nutrition information is approximate and calculated per serving based on the recipe as written.
Tips & Variations
Flavor Variations:
- Chocolate Vanilla Swirl – Make the vanilla pudding, then swirl in melted chocolate or chocolate sauce before chilling for a marbled effect
- Butterscotch Twist – Replace granulated sugar with brown sugar and add an extra tablespoon of butter for rich butterscotch notes
- Coffee-Vanilla – Add 1 tablespoon of instant espresso powder to the milk for a sophisticated coffee-flavored pudding
- Coconut Vanilla – Replace 1 cup of milk with coconut milk and add ½ teaspoon coconut extract along with the vanilla
- Almond Vanilla – Add ½ teaspoon of almond extract along with the vanilla for a subtle nutty flavor
Texture Modifications:
- For thicker pudding (pie-filling consistency), increase cornstarch to 5 tablespoons
- For thinner, more pourable pudding, reduce cornstarch to 3 tablespoons
- For extra-creamy pudding, replace 1 cup of milk with heavy cream
Dietary Adaptations:
- Dairy-Free Version – Use full-fat coconut milk, oat milk, or cashew milk (avoid almond milk as it’s too thin)
- Lower Sugar – Reduce sugar to ⅓ cup and add a few drops of stevia if needed
- Vegan – Use plant-based milk and replace butter with coconut oil or vegan butter
Pro Chef Tips
Temperature Control is Everything – Medium heat is crucial. Too high and you’ll scorch the bottom before the pudding thickens; too low and it takes forever and may not thicken properly. If you see any browning on the bottom, your heat is too high.
Never Stop Whisking – Constant whisking isn’t just a suggestion—it’s essential. The moment you stop, the pudding can form lumps or scorch on the bottom. Get comfortable with your whisk arm workout!
The Paste Method Prevents Lumps – Always create that smooth paste with a small amount of liquid before adding the rest. This technique, used by professional pastry chefs, ensures your cornstarch disperses evenly and won’t clump.
Don’t Fear the Boil – Many home cooks worry about boiling milk, but with pudding, you must reach a full boil to activate the cornstarch completely. Undercooked pudding will thin out as it sits and won’t have that perfect texture.
Add Vanilla After Cooking – Heat destroys the delicate aromatic compounds in vanilla extract. Always add it after removing from heat to preserve that beautiful vanilla flavor.
Use a Heavy-Bottomed Pan – Thin pans create hot spots that lead to scorching. Invest in a quality heavy-bottomed saucepan for perfect pudding every time.
The Spoon Test – Your pudding is ready when it thickly coats the back of a spoon and you can draw a line through it with your finger that holds its shape.
Common Mistakes to Avoid
Mistake #1: Using Cold Ingredients – Starting with cold milk straight from the refrigerator will work, but room-temperature milk heats more evenly and reduces cooking time. However, if you’re short on time, cold is fine—just expect to whisk for a few extra minutes.
Mistake #2: Not Whisking Constantly – This is the number one reason for lumpy pudding. Even 30 seconds without whisking can create lumps or scorched spots. Stay committed to continuous whisking throughout the entire cooking process.
Mistake #3: Stopping Before the Full Boil – If you pull your pudding off the heat too soon, the cornstarch won’t fully activate. The pudding might seem thick when hot but will thin out disappointingly as it cools. Always let it reach those big, rolling boiling bubbles.
Mistake #4: Skipping the Plastic Wrap – That rubbery skin that forms on top of pudding happens when the surface is exposed to air as it cools. Press plastic wrap or parchment directly onto the surface to prevent this entirely.
Mistake #5: Impatience with Chilling – Warm pudding is thin and soupy. The magic happens in the refrigerator where it sets up to that perfect spoonable consistency. Give it the full 2 hours minimum for best results, or overnight if you have time.
Storage & Meal Prep
Refrigerator Storage: Store your vanilla pudding in an airtight container or in individual serving dishes covered with plastic wrap. It will keep beautifully in the refrigerator for up to 5 days. Always press plastic wrap directly onto the surface before covering to prevent skin formation.
Shelf Life: Properly stored homemade pudding maintains its best quality for 4-5 days. After that, it’s still safe to eat but the texture may become slightly grainy and the vanilla flavor may fade.
Reheating Tips: While pudding is traditionally served cold, you can gently rewarm it if you prefer. Place it in a microwave-safe bowl and heat in 15-second intervals, stirring between each, until it reaches your desired temperature. The texture will become more fluid when warm, which some people love. Alternatively, you can enjoy it at room temperature—just let it sit out for 20-30 minutes before serving.
Container Tips: Glass or ceramic containers work best for storing pudding as they don’t absorb odors. Avoid metal containers which can sometimes impart a slight metallic taste. Mason jars make excellent individual serving containers that you can prepare ahead and grab from the fridge as needed.
Make-Ahead & Freezer Notes
Make-Ahead Instructions: Vanilla pudding is actually better when made ahead! The flavors meld and develop as it sits, and the texture becomes even more perfect. You can make this pudding up to 3 days in advance of when you need it. Simply prepare as directed, chill completely, and keep covered in the refrigerator until serving time. This makes it ideal for party planning and holiday meal prep.
Freezing Information: While you technically can freeze vanilla pudding, I don’t recommend it. The cornstarch-based structure breaks down during freezing and thawing, resulting in a watery, separated mess with a grainy texture that no amount of stirring will fix. If you must freeze it, use it in smoothies or baked goods rather than serving it as pudding.
Best Reheating Method: If you’ve made the pudding ahead and prefer it slightly warm, use the double-boiler method for the most even, gentle reheating. Place the pudding in a heatproof bowl set over a pot of simmering water, stirring frequently until warmed through. This prevents any hot spots or cooking that could affect the silky texture.
Batch Cooking: This recipe doubles or triples beautifully if you’re feeding a crowd. Just use a larger pot and be prepared to whisk a bit longer as more volume takes additional time to heat through and thicken properly.
Serving Suggestions
Vanilla pudding is wonderfully versatile and pairs beautifully with so many accompaniments. Here are some delicious ways to serve it:
Classic Toppings:
- Freshly whipped cream with a sprinkle of cinnamon or nutmeg
- Fresh berries (strawberries, blueberries, raspberries, or blackberries)
- Sliced bananas with a drizzle of caramel sauce
- Crushed vanilla wafers or graham crackers for crunch
- Chocolate shavings or mini chocolate chips
- Toasted coconut flakes
- Chopped nuts (pecans, almonds, or walnuts)
Layered Desserts:
- Classic Southern banana pudding with vanilla wafers and banana slices
- Trifle layers with pound cake, fresh fruit, and whipped cream
- Parfaits with granola and mixed berries
- Dirt cups with crushed Oreos and gummy worms (kids love these!)
Side Pairings:
- Shortbread cookies or biscotti for dipping
- Fresh fruit salad
- Warm brownies with cold pudding on top
- Angel food cake or sponge cake
- Baked pie crust tartlet shells filled with pudding and fresh fruit
Beverage Pairings:
- Strong black coffee or espresso (the bitterness contrasts beautifully)
- Hot tea—try Earl Grey or chamomile
- Cold milk for kids
- Dessert wine like Moscato or late-harvest Riesling
- Irish cream liqueur for adult gatherings
FAQs Section
Q: Can I make this pudding without cornstarch?
A: Yes, but the result will be different. You can substitute 6 tablespoons of all-purpose flour for the cornstarch, but flour-thickened pudding has a slightly less clear appearance and different mouthfeel. Alternatively, you can make a traditional egg-custard style pudding using 4 egg yolks instead of cornstarch, though that requires tempering and more technique.
Q: Why did my pudding turn out lumpy?
A: Lumps happen when cornstarch isn’t properly dispersed or when the mixture isn’t whisked constantly during cooking. Make sure you create a smooth paste with the cornstarch and sugar before adding all the milk, and never stop whisking once you put the pan on the heat. If you do get lumps, push the pudding through a fine-mesh strainer while still hot.
Q: Can I use low-fat or skim milk?
A: You can, but the pudding won’t be as creamy and rich. Lower-fat milk produces a thinner, less luxurious texture. If you must use 2% or skim milk, consider adding an extra tablespoon of cornstarch to compensate for the missing fat that helps create body.
Q: How do I know when the pudding is thick enough?
A: The pudding should coat the back of a spoon thickly, and when you run your finger through the coating, the line should hold without the pudding running back together. Remember, it will thicken significantly more as it cools, so it should be pourable (but thick) when hot.
Q: Can I double this recipe?
A: Absolutely! Just use a larger pot (at least 4-quart capacity) and be prepared to whisk for a few extra minutes since more volume takes longer to heat and thicken. All the proportions remain exactly the same—just multiply every ingredient by two.
Q: My pudding has a skin on top. How do I prevent this?
A: Always press plastic wrap or parchment paper directly onto the surface of the pudding immediately after pouring it into serving dishes. The skin forms when the hot pudding’s surface is exposed to air as it cools. Direct contact with plastic prevents air exposure entirely.
Q: Is homemade pudding safe for pregnant women?
A: Yes! This pudding recipe is completely safe during pregnancy because it contains no raw eggs and is cooked thoroughly on the stovetop. It’s actually a safer choice than traditional custard-style puddings that use eggs.
Q: Can I reduce the sugar to make it healthier?
A: You can reduce the sugar to ⅓ cup if you prefer less sweetness, though the pudding will be noticeably less sweet. Below that amount, you might want to add a sugar substitute to maintain some sweetness without affecting the texture, as sugar also contributes to the body of the pudding.
Conclusion
There’s truly nothing quite like a bowl of silky, homemade vanilla pudding to bring comfort and joy to your day. This simple recipe proves that you don’t need boxed mixes or complicated techniques to create a dessert that tastes absolutely incredible. With just a few basic ingredients and about 15 minutes at the stove, you can treat your family to a classic dessert that’s infinitely better than anything store-bought.
The beauty of this vanilla pudding is its versatility—enjoy it on its own, dress it up with your favorite toppings, or use it as the foundation for show-stopping layered desserts. It’s perfect for weeknight treats, special occasions, holiday gatherings, and everything in between. Plus, knowing exactly what goes into your pudding means you can feel good about serving it to the people you love.
I hope this recipe becomes a treasured staple in your kitchen, just as it has in mine. There’s something wonderfully satisfying about mastering a classic like this—it connects us to generations of home cooks who’ve found joy in creating simple, delicious food from scratch.
Now it’s your turn! Give this homemade vanilla pudding recipe a try and let me know how it turns out. Did you add any creative toppings? Use it in a layered dessert? I’d love to hear about your experience in the comments below. And if you love this recipe as much as I do, please save it to your Pinterest boards and share it with your friends who appreciate real, homemade desserts. Happy cooking! 🥄✨