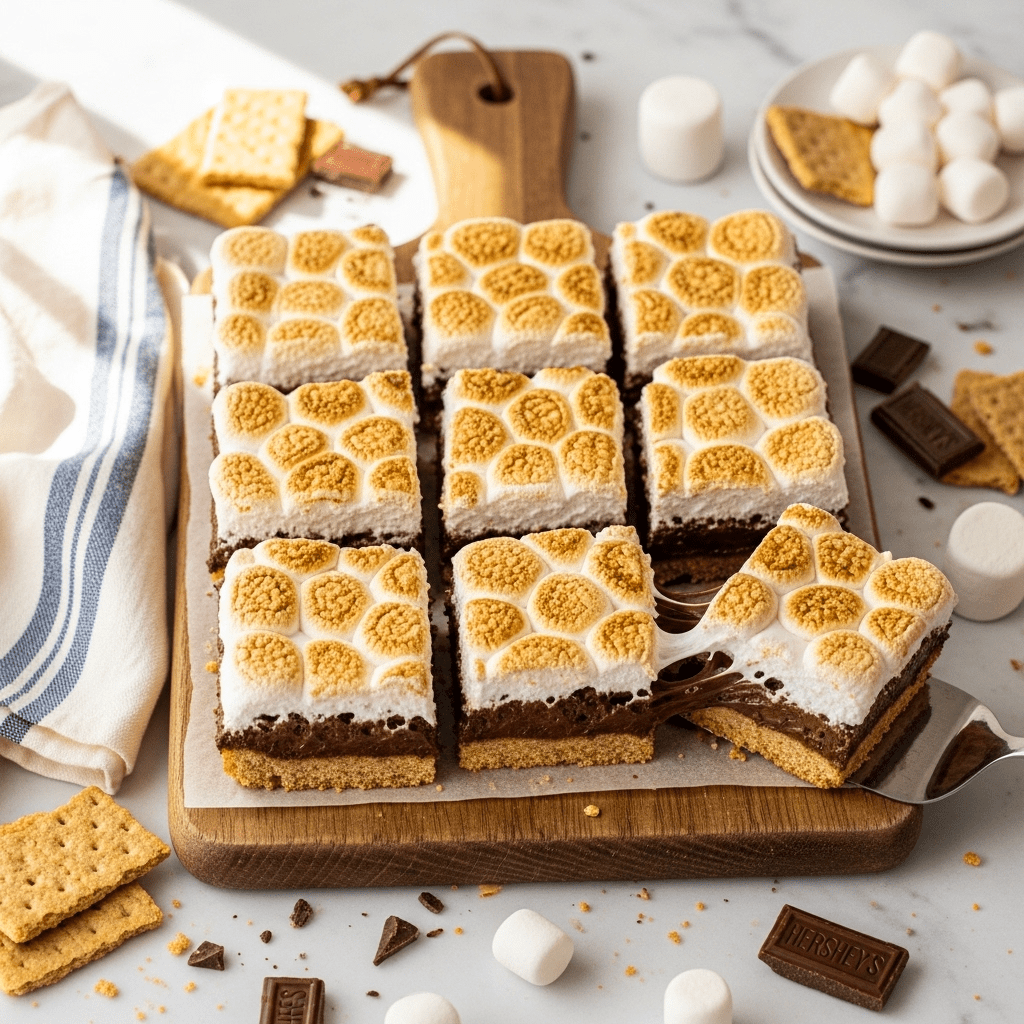
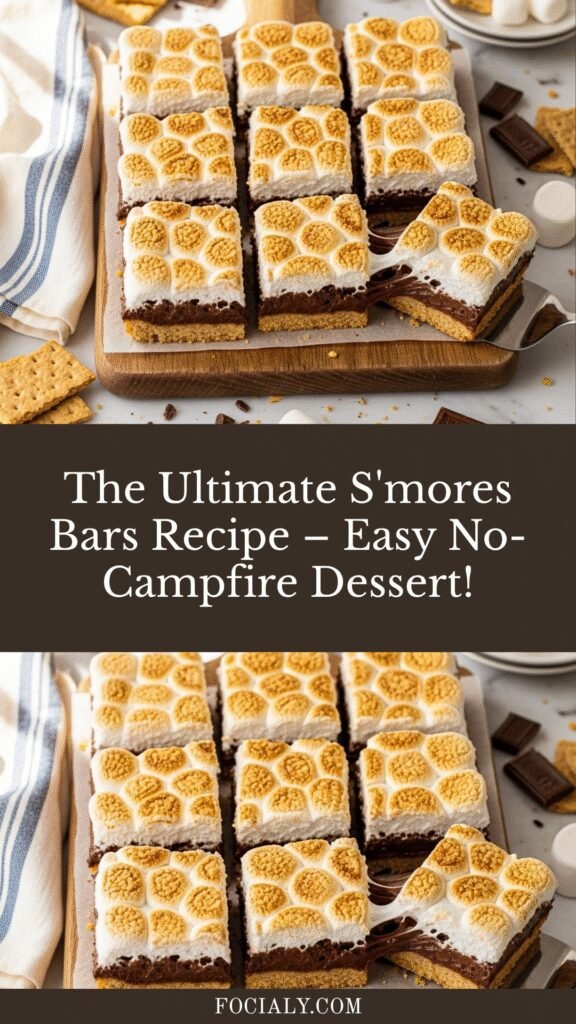
The Ultimate S’mores Bars Recipe – Easy No-Campfire Dessert!
If you’ve ever wished you could enjoy the nostalgic, gooey magic of s’mores without building a campfire, you’re going to absolutely love these S’mores Bars! This recipe transforms the classic campfire treat into an easy-to-make, shareable dessert that’s perfect for any occasion. Imagine thick graham cracker crust, a layer of rich chocolate, and perfectly toasted marshmallows all baked together in one pan. These bars capture all the flavors of traditional s’mores but in a convenient, slice-and-serve format that’s ideal for parties, potlucks, summer barbecues, or even a cozy weekend baking session with the kids.
S’mores Bars are incredibly versatile – serve them at birthday parties, holiday gatherings, school bake sales, or simply as a weeknight treat when you’re craving something sweet and comforting. They’re also fantastic for outdoor entertaining when you want that campfire vibe without the actual fire. The best part? You can make these indoors year-round, so you’re never more than an hour away from s’mores satisfaction!
History / Background
The story of s’mores begins in the 1920s when the Girl Scouts published the first known recipe for “Some Mores” in their 1927 publication “Tramping and Trailing with the Girl Scouts.” The name itself is a contraction of “some more,” because once you’ve had one, you always want some more! This simple combination of graham crackers, chocolate, and marshmallows roasted over an open flame quickly became an iconic American tradition, synonymous with camping, summer nights, and childhood memories.
For decades, s’mores remained primarily a campfire activity, but creative home bakers eventually realized they could capture these beloved flavors in bar form. The evolution of s’mores into a baked bar dessert likely emerged in the 1990s and early 2000s when home baking trends exploded and food bloggers began reimagining classic treats in new formats. S’mores Bars solve the logistical challenges of traditional s’mores – no fire needed, no sticky fingers from roasting marshmallows, and everyone gets an equal portion of all three components.
Today, S’mores Bars have become a dessert staple in American home baking, particularly popular during summer months but enjoyed year-round. They represent the perfect marriage of nostalgia and convenience, bringing that campfire magic into your kitchen with minimal effort and maximum deliciousness.
Why You’ll Love This Recipe
These S’mores Bars are about to become your new favorite dessert for so many reasons! They deliver all the classic s’mores flavor you crave with a fraction of the effort, and they’re so much easier to serve at gatherings than individual s’mores. The graham cracker crust is buttery and crisp, the chocolate layer is rich and melty, and the marshmallow topping gets beautifully golden and gooey. Plus, there’s something incredibly satisfying about slicing into a pan of these bars and seeing those perfect layers.
Here’s why you’ll make these again and again:
- No campfire required – Make perfect s’mores indoors any time of year
- Crowd-pleaser guaranteed – Everyone loves s’mores, and these bars serve a crowd easily
- Simple ingredients – You probably have everything you need already
- Kid-friendly recipe – Great for baking with children (they love arranging the toppings!)
- Make-ahead friendly – Prep components in advance for easy assembly
- Minimal cleanup – Just one baking pan and a few mixing bowls
- Customizable – Easy to adapt with different chocolates or add-ins
- Perfect portions – No more uneven s’mores with too much chocolate or not enough marshmallow
- Budget-friendly – Affordable ingredients that won’t break the bank
- Ready in under an hour – From prep to finish, you’re looking at about 45 minutes
Ingredient Notes
Let’s talk about what makes these S’mores Bars so irresistibly delicious. Each ingredient plays an important role in creating that authentic s’mores experience.
Graham Crackers: The foundation of any good s’more! You’ll need graham cracker crumbs for the crust. You can buy pre-made crumbs or make your own by crushing whole graham crackers in a food processor or placing them in a sealed bag and rolling with a rolling pin. Honey graham crackers give the traditional flavor, but cinnamon or chocolate graham crackers work beautifully too for a fun twist.
Butter: Unsalted butter is best so you can control the salt level, but salted butter works fine too (just reduce any added salt). The butter binds the graham cracker crumbs together and adds richness to the crust. Make sure it’s melted for easy mixing.
Sugar: A bit of granulated sugar sweetens the crust just enough without making it overly sweet, allowing the chocolate and marshmallow layers to shine. Brown sugar can be substituted for a deeper, more caramel-like flavor.
Chocolate Bars: Traditional s’mores use Hershey’s milk chocolate bars, and these work perfectly in bar form. You can also use semi-sweet chocolate, dark chocolate for a more sophisticated flavor, or even white chocolate if you’re feeling adventurous. Chocolate chips work in a pinch, but bar chocolate creates more even layers.
Marshmallows: Large marshmallows work best because you can slice them in half horizontally to create an even layer. Mini marshmallows are also fine and actually easier to work with – just spread them evenly across the chocolate. Jumbo marshmallows can be quartered.
Optional Add-ins: Salt enhances all the flavors (just a pinch!), and vanilla extract in the crust adds warmth. Some bakers like adding a tablespoon of cocoa powder to the crust for extra chocolate flavor.
Equipment Needed
Getting set up with the right tools makes this recipe even easier. Here’s what you’ll need:
- 9×13-inch baking pan – Standard size for bar recipes; creates the perfect thickness
- Parchment paper or aluminum foil – For easy removal and cleanup (leave overhang on sides)
- Food processor or rolling pin – For crushing graham crackers if making your own crumbs
- Large mixing bowl – For combining crust ingredients
- Measuring cups and spoons – For accurate measurements
- Rubber spatula or wooden spoon – For mixing and spreading
- Sharp knife – For cutting chocolate bars and slicing finished bars
- Oven mitts – Safety first when handling hot pans!
- Cooling rack – Allows air circulation for even cooling
- Optional: Kitchen torch – For extra-toasted marshmallow tops (broiler works too!)
S’mores Bars Recipe
These easy S’mores Bars capture all the nostalgic flavors of campfire s’mores in a convenient, shareable dessert. With a buttery graham cracker crust, layers of melted chocolate, and perfectly toasted marshmallows on top, these bars are always a crowd favorite!
- Prep Time: 15 minutes
- Cook Time: 25 minutes
- Total Time: 40 minutes
- Yield: 24 bars 1x
- Category: Dessert
- Method: Baking
- Cuisine: American
- Diet: Vegetarian
Ingredients
For the Graham Cracker Crust:
- 2½ cups graham cracker crumbs (about 18-20 full graham crackers)
- ½ cup unsalted butter, melted
- ¼ cup granulated sugar
- ¼ teaspoon salt
- 1 teaspoon vanilla extract (optional)
For the Layers:
- 8 full-size Hershey’s milk chocolate bars (1.55 oz each), or 2 cups chocolate chips
- 4 cups mini marshmallows, or 32 large marshmallows cut in half horizontally
Instructions
- Preheat and Prep: Preheat your oven to 350°F (175°C). Line a 9×13-inch baking pan with parchment paper or aluminum foil, leaving an overhang on two sides for easy removal. Lightly spray with cooking spray.
- Make the Crust: In a large mixing bowl, combine graham cracker crumbs, melted butter, sugar, salt, and vanilla extract (if using). Mix with a fork or spatula until the mixture resembles wet sand and holds together when pressed.
- Press the Crust: Pour the graham cracker mixture into the prepared pan. Using the bottom of a measuring cup or your hands, press the mixture firmly and evenly into the bottom of the pan. Make sure it’s well-compacted – this creates a sturdy base that won’t crumble when cut.
- Bake the Crust: Bake the crust for 8-10 minutes until it’s just starting to turn golden around the edges and smells toasted. Remove from the oven but keep the oven on.
- Add Chocolate Layer: Immediately after removing the crust from the oven, break the chocolate bars into individual pieces and arrange them evenly over the hot crust in a single layer, covering as much surface as possible. The heat from the crust will begin to melt the chocolate. Let it sit for 2-3 minutes, then use an offset spatula to gently spread the softened chocolate into an even layer.
- Add Marshmallow Layer: Working quickly while the chocolate is still soft, arrange the marshmallows over the chocolate layer. If using large marshmallows cut in half, place them cut-side down in even rows. If using mini marshmallows, spread them evenly to cover all the chocolate, pressing them gently into the chocolate.
- Final Bake: Return the pan to the oven and bake for 12-15 minutes, or until the marshmallows are puffed and golden brown on top. Watch carefully during the last few minutes as marshmallows can go from golden to burnt quickly.
- Optional Torch Step: For extra-toasted marshmallows, you can briefly broil the bars for 1-2 minutes (watch constantly!) or use a kitchen torch to brown the tops further after baking.
- Cool Completely: Remove from the oven and let the bars cool completely in the pan on a wire rack. This is crucial – if you cut them while warm, they’ll be gooey and fall apart. For best results, refrigerate for 1-2 hours or until fully set.
- Cut and Serve: Using the parchment paper overhang, lift the entire slab out of the pan and place on a cutting board. Use a large, sharp knife to cut into 24 bars (6 rows by 4 rows). For cleanest cuts, wipe the knife clean between cuts, or run it under hot water and dry it before each cut.
Notes
- For easiest cutting, refrigerate the bars until firm, or even freeze for 30 minutes before slicing
- Store bars in an airtight container at room temperature for up to 3 days, or refrigerate for up to 5 days
- These bars can be made ahead – the crust can be baked a day in advance and stored covered
- If your marshmallows aren’t browning enough in the oven, use your broiler on high for 1-2 minutes, watching very carefully
- For extra decadence, drizzle cooled bars with melted chocolate
- Line your pan well – these bars are sticky and much easier to remove with parchment paper
Nutrition
- Serving Size: 1 bar (1/24 of recipe)
- Calories: 185
- Sugar: 18g
- Sodium: 95mg
- Fat: 8g
- Saturated Fat: 4.5g
- Unsaturated Fat: 3g
- Trans Fat: 0g
- Carbohydrates: 28g
- Fiber: 1g
- Protein: 2g
- Cholesterol: 12mg
Note: Nutrition information is approximate and calculated based on standard ingredient measurements. Actual values may vary based on specific brands and ingredient substitutions used.
Tips & Variations
Want to customize these S’mores Bars to make them your own? Here are some delicious ways to switch things up!
Chocolate Variations:
- Use dark chocolate bars for a more sophisticated, less sweet version
- Try peanut butter cups instead of plain chocolate for a Reese’s twist
- Mix milk chocolate and white chocolate for a marbled effect
- Add a layer of Nutella or cookie butter between the crust and chocolate
Flavor Boosters:
- Sprinkle sea salt flakes over the marshmallow layer before baking for salted s’mores bars
- Add a teaspoon of espresso powder to the crust for deeper chocolate flavor
- Mix in mini chocolate chips or crushed toffee bits to the graham cracker crust
- Drizzle with caramel sauce after cooling for extra decadence
Mix-In Ideas:
- Press chopped peanuts, pecans, or walnuts into the crust before baking
- Scatter Reese’s Pieces, M&Ms, or chopped candy bars over the chocolate layer
- Add a thin layer of peanut butter or almond butter between crust and chocolate
- Sprinkle graham cracker crumbs over the marshmallow layer for extra texture
Themed Variations:
- Campfire S’mores Bars: Add a few drops of liquid smoke to the crust for authentic campfire flavor
- Birthday S’mores Bars: Use chocolate cake mix in the crust and add sprinkles
- Mint S’mores Bars: Use mint chocolate bars or add peppermint extract to the crust
- Strawberry S’mores Bars: Layer fresh sliced strawberries over the chocolate before marshmallows
Pro Chef Tips
Want to take your S’mores Bars from good to absolutely incredible? These professional techniques will elevate your baking game:
Perfect Crust Every Time: The secret to a crust that holds together is proper compression. After pressing the graham cracker mixture into the pan, take an extra minute to really pack it down firmly using the bottom of a flat measuring cup. Press especially hard around the edges where the crust tends to crumble most.
Chocolate Layer Mastery: For the smoothest, most even chocolate layer, arrange your chocolate pieces while the crust is still hot from its initial bake. The residual heat begins melting the chocolate immediately. After 2-3 minutes, use an offset spatula in gentle sweeping motions rather than aggressive spreading – this prevents the crust from lifting.
Temperature Control: Room temperature ingredients don’t matter much here, but your oven temperature does. Use an oven thermometer to ensure accuracy – many ovens run hot or cold, which affects marshmallow browning. If your marshmallows brown too quickly, reduce temperature to 325°F and bake slightly longer.
Marshmallow Arrangement: For the most Instagram-worthy results with large marshmallows, cut them in half horizontally with a knife sprayed with cooking spray (prevents sticking). Arrange them cut-side down in tight rows with no gaps. This creates a bakery-style appearance and ensures every bite has marshmallow.
The Cooling Secret: This is critical – resist cutting into these bars while warm! The chocolate layer needs time to resolidify, and the marshmallow needs to set. For absolute best results, refrigerate for 2 hours before cutting. If you’re in a hurry, pop them in the freezer for 30 minutes.
Clean Cutting Technique: Professional bakers always clean their knife between cuts. Run a large sharp knife under very hot water, dry it quickly, and make one cut. Wipe clean, repeat. This creates pristine edges without dragging marshmallow across the bars. A serrated knife can also work well for sawing through the marshmallow layer.
Flavor Depth: Toast your graham cracker crumbs lightly in a dry pan for 3-4 minutes before making the crust. This deepens the flavor and adds a subtle nuttiness that makes people wonder what your secret ingredient is.
Common Mistakes to Avoid
Even simple recipes can go wrong if you’re not careful. Here’s how to avoid the most common S’mores Bars pitfalls:
Cutting Too Soon: The number one mistake is impatience! Cutting these bars while they’re still warm results in a gooey mess where the chocolate smears and the marshmallow stretches. Always cool completely – I know it’s hard, but trust me, it’s worth the wait.
Skimping on Pan Prep: Not lining your pan properly leads to stuck bars that crumble when you try to remove them. Always use parchment paper with overhang, or aluminum foil sprayed with cooking spray. This creates handles that let you lift the entire slab out cleanly.
Uneven Crust Pressing: If you don’t press the crust firmly enough, it’ll be crumbly and fall apart when cut. Conversely, over-mixing the crust ingredients can make it tough. Mix just until combined, then press very firmly.
Burning the Marshmallows: Marshmallows go from golden to burnt in seconds. Stay near your oven during the final baking stage, and check frequently. If they’re browning too fast, tent the pan loosely with foil for the remaining bake time.
Wrong Pan Size: Using a different sized pan changes everything. A smaller pan creates thicker bars that may not bake through properly; a larger pan makes thin bars that dry out. Stick with the 9×13-inch pan for best results.
Chocolate Coverage Gaps: Make sure your chocolate layer covers the entire crust with no gaps, or you’ll end up with patches where marshmallow sticks directly to the graham cracker base. If using chocolate bars, you may need to break pieces to fill in gaps before spreading.
Not Letting Chocolate Soften: If you try to spread cold or insufficiently melted chocolate, you’ll tear up the crust underneath. Give the chocolate those crucial 2-3 minutes on the hot crust to soften properly before spreading.
Storage & Meal Prep
Good news – these S’mores Bars store beautifully, making them perfect for advance preparation!
Room Temperature Storage: Store completely cooled bars in an airtight container with parchment paper between layers to prevent sticking. They’ll keep at room temperature for up to 3 days. The marshmallow layer may become slightly sticky in humid weather, so refrigeration is better in summer months.
Refrigerator Storage: For longer storage, refrigerate the bars in an airtight container for up to 5 days. This is actually my preferred storage method because cold bars are easier to eat without getting too messy, and the chocolate layer stays nice and firm. Let them sit at room temperature for 10-15 minutes before serving if you prefer them less firm.
Preventing Stickiness: To keep bars from sticking together during storage, place sheets of parchment or wax paper between layers, or wrap individual bars in plastic wrap. This is especially helpful if you’re packing them for lunch boxes or giving them as gifts.
Reheating Tips: While these are delicious cold or at room temperature, you can briefly warm them for that fresh-baked experience. Microwave individual bars for 8-10 seconds to slightly soften the marshmallow and chocolate. Don’t overdo it or you’ll have a melted mess!
Transporting Bars: If taking these to a potluck or party, transport them in the baking pan covered with foil, then cut on-site. This prevents them from getting damaged in transit. Alternatively, cut and pack in a sturdy container with parchment paper between layers.
Make-Ahead & Freezer Notes
These S’mores Bars are wonderfully make-ahead friendly, which is perfect for party planning!
Advance Preparation: You can prepare the graham cracker crust up to 2 days ahead. Bake the crust completely, let it cool, then cover tightly and store at room temperature. When ready to finish the bars, simply add the chocolate and marshmallow layers and complete the baking.
Freezer Instructions: Yes, these bars freeze beautifully! Once completely cooled and cut, wrap individual bars tightly in plastic wrap, then place in a freezer-safe container or zip-top bag with as much air removed as possible. Freeze for up to 3 months. For best results, place parchment paper between layers to prevent sticking.
Freezing Whole Pan: Alternatively, you can freeze the entire uncut slab. After cooling completely, wrap the whole pan (or the lifted slab) tightly in plastic wrap, then in aluminum foil. This double wrapping prevents freezer burn and keeps the bars fresh for up to 3 months.
Thawing Methods: For best texture, thaw frozen bars in the refrigerator overnight, then bring to room temperature for 20-30 minutes before serving. If you’re in a rush, you can thaw individual bars at room temperature for about 1-2 hours. Avoid microwaving to thaw as it can make the marshmallow too soft and sticky.
Best Practices: While frozen bars are delicious, the marshmallow texture changes slightly after freezing – it becomes a bit denser and less fluffy. The graham cracker crust and chocolate layer freeze perfectly. For absolute best quality, enjoy within the first month of freezing.
Serving Suggestions
S’mores Bars are versatile enough to work for any occasion! Here are some delicious ways to serve them:
Classic Presentation: Simply plate the bars on a rustic wooden board or white platter, dust with a light sprinkle of graham cracker crumbs or cocoa powder, and watch them disappear. They’re perfect alongside a cold glass of milk or hot coffee.
Dessert Pairings:
- Serve with vanilla ice cream for s’mores à la mode
- Pair with fresh berries (strawberries and raspberries) for a fruity contrast
- Accompany with whipped cream or Cool Whip for extra indulgence
- Drizzle with hot fudge or caramel sauce before serving
Beverage Matches:
- Classic cold milk (dairy or non-dairy alternatives)
- Hot chocolate for ultimate s’mores experience
- Coffee or espresso (the slight bitterness balances the sweetness)
- Red wine like port or dessert wine for adult gatherings
Party Ideas:
- Create a s’mores bar dessert table with these bars as the centerpiece
- Serve at summer BBQs alongside grilled fruit
- Pack in individual bags with ribbons for party favors
- Cut into smaller squares for dessert buffets or cookie trays
Seasonal Serving:
- Summer: Serve cold from the fridge at outdoor gatherings
- Fall: Warm slightly and serve with apple cider
- Winter: Pair with hot cocoa and marshmallows for ultimate coziness
- Spring: Serve with fresh mint tea for a refreshing combination
FAQs Section
Q: Can I use chocolate chips instead of chocolate bars? A: Absolutely! Chocolate chips work well, though they don’t create quite as smooth a layer as bar chocolate. You’ll need about 2 cups of chocolate chips. Sprinkle them evenly over the hot crust and let them soften for 2-3 minutes before gently spreading with a spatula.
Q: Why are my S’mores Bars falling apart when I cut them? A: The most common reason is cutting them too soon while they’re still warm. The chocolate needs time to resolidify. Always cool completely at room temperature, or better yet, refrigerate for 1-2 hours before cutting. Also make sure you pressed the crust firmly enough initially, and use a sharp knife cleaned between cuts.
Q: Can I make these gluten-free? A: Yes! Simply substitute gluten-free graham crackers for regular graham crackers. Everything else in the recipe is naturally gluten-free. Make sure to check your marshmallow brand – most are gluten-free, but always verify the label.
Q: My marshmallows burned before the inside was fully cooked. What happened? A: Oven temperatures vary, and marshmallows brown quickly. If this happens, reduce your oven temperature to 325°F and tent the pan loosely with aluminum foil if the marshmallows start browning too fast. You can also position the rack in the center or lower third of the oven to prevent too much top heat.
Q: Can I make these in a different sized pan? A: You can, but you’ll need to adjust baking times. An 8×8-inch pan creates thicker bars (increase baking time by 5-7 minutes), while a larger pan creates thinner bars (decrease baking time by 3-5 minutes). The 9×13-inch pan gives you the ideal thickness and texture.
Q: How do I get my marshmallows perfectly golden brown like in bakeries? A: The key is even oven heat and careful watching. Position your rack in the upper-middle position of your oven. If they’re not browning enough, use the broiler on high for 1-2 minutes at the very end, watching constantly and rotating the pan for even browning. A kitchen torch also works beautifully for targeted browning.
Q: Can I make these dairy-free or vegan? A: Yes! Use vegan butter or coconut oil instead of regular butter in the crust, dairy-free chocolate bars, and vegan marshmallows (several brands make them). The texture and taste will be very similar to the original recipe.
Conclusion
There you have it – everything you need to make the most incredible S’mores Bars that capture all that nostalgic campfire magic without ever leaving your kitchen! These bars are truly one of those recipes that bring people together, sparking memories of summer nights, childhood camping trips, and cozy gatherings around the fire. The beauty of this recipe is its simplicity combined with absolutely show-stopping results. Whether you’re a complete beginner or an experienced baker, you’ll find these bars wonderfully straightforward to make, and the reactions you’ll get when you serve them? Absolutely priceless.
I love how versatile this recipe is – dress it up with fancy chocolate and sea salt for an elegant dinner party, or keep it classic for a family movie night. Pack them in lunch boxes, bring them to potlucks, serve them at birthday parties, or simply make them on a random Tuesday because you’re craving something sweet. They’re always a hit!
Now it’s your turn to create some s’mores magic in your own kitchen! I’d absolutely love to hear how your S’mores Bars turn out. Did you try any of the variations? Add your own creative twist? Have a pro tip to share with fellow bakers? Drop a comment below – I read and respond to every single one, and your feedback helps other home cooks too!
And please, if you loved this recipe, save it to your Pinterest boards so you can find it easily next time that s’mores craving hits. Share it with your friends and family who need more easy desserts in their lives! Happy baking, and may your kitchen always smell like toasted marshmallows and chocolate! 🔥🍫