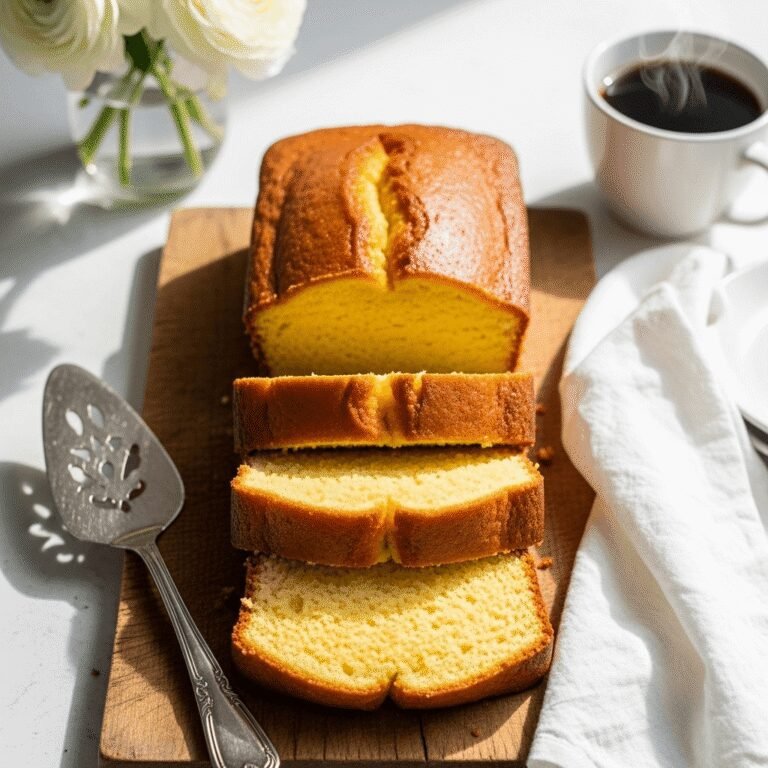
Classic Yellow Cake Recipe – Moist, Fluffy & Buttery Perfection!
There’s something truly magical about a classic yellow cake. It’s the kind of dessert that instantly transports you back to childhood birthday parties, family celebrations, and those special moments gathered around the kitchen table. This homemade yellow cake is everything you dream of in a perfect cake: incredibly moist, wonderfully fluffy, with that signature buttery flavor and gorgeous golden crumb that makes it absolutely irresistible.
Unlike box mixes that can taste artificial and leave a chemical aftertaste, this from-scratch yellow cake recipe uses simple, wholesome ingredients you probably already have in your pantry. The result? A tender, velvety cake with rich butter flavor that melts in your mouth with every bite. Whether you’re making it for a birthday celebration, layering it with your favorite frosting, or simply enjoying a slice with afternoon coffee, this easy yellow cake delivers bakery-quality results right in your own kitchen.
The beauty of this recipe lies in its versatility. Serve it plain with a dusting of powdered sugar, transform it into a stunning layer cake with chocolate frosting, or use it as the base for trifles, cupcakes, or even strawberry shortcake. It’s the ultimate blank canvas for your dessert creativity, and once you master this recipe, you’ll never reach for a box mix again.
History / Background
The yellow cake has been a cornerstone of American baking for well over a century, with its roots deeply embedded in the evolution of home baking. The distinctive yellow color comes from the generous use of egg yolks and butter, which became more accessible to average American households in the late 1800s and early 1900s as refrigeration became widespread.
Before the advent of cake mixes in the 1940s, yellow cake was considered a “celebration cake” – something you’d make for special occasions because of the expense of ingredients like butter, eggs, and vanilla. The recipe represents a shift from the white cakes that were popular in Victorian times (which used only egg whites to achieve a pristine white color) to a richer, more flavorful cake that embraced whole eggs and additional yolks.
The term “yellow cake” became standardized in American cookbooks around the 1920s and 1930s, distinguishing it from white cake, chocolate cake, and spice cake. It was prized for its tender crumb and its ability to pair beautifully with virtually any frosting or filling. When cake mixes revolutionized home baking in the post-World War II era, yellow cake mix became one of the most popular varieties, cementing its place as an American classic.
Interestingly, yellow cake also played a role in the development of modern baking science. The recipe’s balance of fat, sugar, eggs, and flour became a template that bakers and food scientists used to understand cake chemistry. Today, while many reach for convenient box mixes, there’s been a beautiful resurgence of interest in scratch baking, with home cooks rediscovering the superior taste and texture of homemade yellow cake.
Why You’ll Love This Recipe
This classic yellow cake recipe is about to become your go-to dessert for every occasion. It’s the kind of recipe you’ll make over and over again, share with friends, and eventually have memorized because it’s just that good.
Here’s why this recipe is absolutely perfect:
- Incredibly moist texture – The combination of butter, oil, and buttermilk creates a cake that stays tender for days
- Foolproof for beginners – Simple mixing method with clear instructions that guarantee success every time
- Budget-friendly ingredients – No expensive or hard-to-find items required; just pantry staples
- Versatile base – Perfect for layer cakes, sheet cakes, cupcakes, or bundts
- Real butter flavor – No artificial taste here; just pure, rich, buttery goodness
- Consistent results – This recipe has been tested multiple times to ensure it works perfectly in any kitchen
- Kid-approved – Even picky eaters love this classic flavor
- Make-ahead friendly – Can be baked in advance and stored without losing quality
- Crowd-pleaser – Everyone loves yellow cake; it’s universally appealing
- Customizable – Add citrus zest, almond extract, or other flavors to make it your own
Ingredient Notes
Understanding your ingredients is key to baking success. Here’s what you need to know about each component of this yellow cake:
All-Purpose Flour: The foundation of our cake structure. Make sure to measure correctly by spooning flour into your measuring cup and leveling it off. Don’t pack it down! You can substitute with cake flour for an even lighter texture (use 2 3/4 cups cake flour instead of 2 1/2 cups all-purpose).
Granulated Sugar: Provides sweetness and helps create that tender crumb through the creaming process. Don’t substitute with other sweeteners as sugar plays a crucial role in the cake’s structure.
Unsalted Butter: Must be at room temperature (about 65-70°F) for proper creaming. This creates air pockets that make the cake fluffy. Unsalted allows you to control the salt level. Don’t substitute with margarine; it won’t give you the same rich flavor.
Eggs: Use large eggs at room temperature. They incorporate more easily and create better volume. The yolks contribute to that beautiful yellow color and rich flavor. Let them sit on the counter for 30 minutes before baking.
Buttermilk: The secret to incredible moisture and tenderness. Its acidity reacts with baking soda to create lift and also breaks down gluten for a softer crumb. No buttermilk? Make your own by adding 1 tablespoon of vinegar or lemon juice to regular milk and letting it sit for 5 minutes.
Vegetable Oil: Yes, we’re using both butter AND oil! The oil keeps the cake moist for days since it doesn’t solidify like butter does when chilled.
Vanilla Extract: Use pure vanilla extract, not imitation. It makes a noticeable difference in flavor. For extra richness, you can use vanilla bean paste.
Baking Powder & Baking Soda: These leavening agents work together to create the perfect rise. Make sure they’re fresh (less than 6 months old) for best results.
Salt: Enhances all the other flavors. Don’t skip it even though it seems like a small amount!
Equipment Needed
Having the right tools makes baking so much easier. Here’s what you’ll need:
- Two 9-inch round cake pans (or one 9×13-inch pan for sheet cake)
- Stand mixer or hand mixer – for creaming butter and sugar
- Large mixing bowls – at least two
- Measuring cups and spoons – for accurate measurements
- Rubber spatula – for scraping down bowl and folding
- Wire cooling racks – essential for proper cooling
- Parchment paper – for lining pans
- Sifter or fine-mesh strainer – for lump-free dry ingredients
- Toothpick or cake tester – for checking doneness
- Offset spatula – helpful for frosting (optional but nice to have)
Yellow Cake Recipe

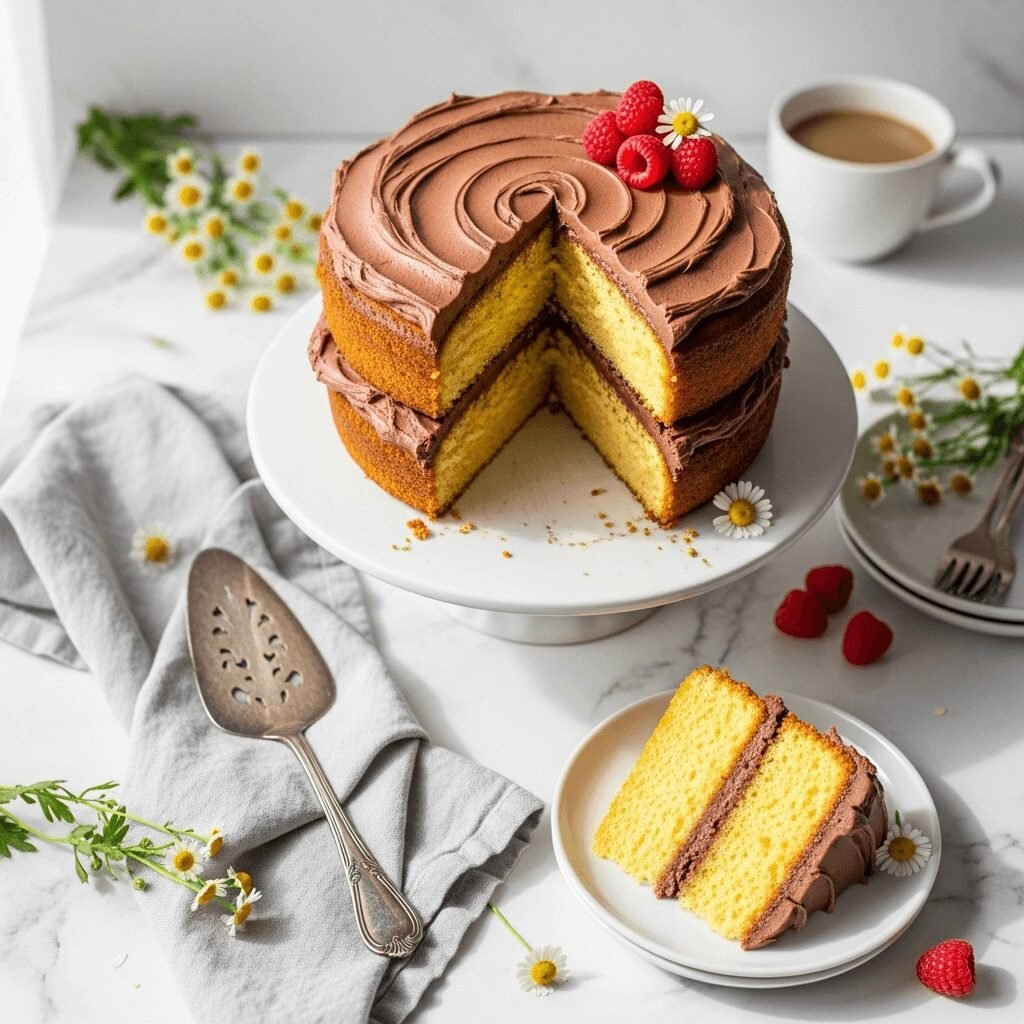
This classic homemade yellow cake is perfectly moist, fluffy, and buttery with a tender crumb that melts in your mouth. Made completely from scratch with simple ingredients, it’s far superior to any box mix and easier than you think! Perfect for birthdays, celebrations, or any time you want a delicious homemade dessert.
- Prep Time: 20 minutes
- Cook Time: 28 minutes
- Total Time: 48 minutes
- Yield: 12 servings 1x
- Category: Dessert
- Method: Baking
- Cuisine: American
- Diet: Vegetarian
Ingredients
- 2 ½ cups (315g) all-purpose flour
- 2 ½ teaspoons baking powder
- ½ teaspoon baking soda
- ¾ teaspoon salt
- 1 ¾ cups (350g) granulated sugar
- ¾ cup (170g) unsalted butter, softened to room temperature
- ¼ cup (60ml) vegetable oil
- 4 large eggs, at room temperature
- 1 tablespoon pure vanilla extract
- 1 cup (240ml) buttermilk, at room temperature
Instructions
- Preheat and Prepare: Preheat your oven to 350°F (175°C). Grease two 9-inch round cake pans with butter or non-stick spray, line the bottoms with parchment paper circles, then grease the parchment. Lightly dust with flour and tap out the excess. This ensures easy release after baking.
- Combine Dry Ingredients: In a medium bowl, whisk together the flour, baking powder, baking soda, and salt. Sift the mixture twice to ensure there are no lumps and the leavening agents are evenly distributed. Set aside.
- Cream Butter and Sugar: In a large bowl or stand mixer fitted with the paddle attachment, beat the softened butter on medium speed for about 1 minute until smooth and creamy. Gradually add the sugar and continue beating on medium-high speed for 4-5 minutes until the mixture is light, fluffy, and pale in color. This creaming process is crucial for a light texture! Scrape down the sides and bottom of the bowl as needed.
- Add Oil: Pour in the vegetable oil and beat on medium speed for about 30 seconds until fully incorporated. The mixture should look smooth and glossy.
- Incorporate Eggs: Add the eggs one at a time, beating well after each addition (about 30 seconds per egg) until fully incorporated. After all eggs are added, mix in the vanilla extract. The mixture may look slightly curdled at this point – that’s completely normal!
- Alternate Wet and Dry Ingredients: With the mixer on low speed, add the flour mixture in three additions, alternating with the buttermilk in two additions. Begin and end with the flour mixture. Mix each addition just until combined – don’t overmix! The pattern should be: 1/3 flour, 1/2 buttermilk, 1/3 flour, 1/2 buttermilk, 1/3 flour. Use a rubber spatula to scrape the bottom of the bowl and give a few final gentle folds to ensure everything is incorporated.
- Divide and Bake: Divide the batter evenly between your prepared pans (use a kitchen scale for precision if you have one – about 650g per pan). Smooth the tops with an offset spatula. Tap the pans gently on the counter 2-3 times to release any air bubbles.
- Bake: Bake for 26-28 minutes, or until a toothpick inserted into the center comes out with just a few moist crumbs (not wet batter). The cakes should spring back when lightly pressed, and the edges should be just starting to pull away from the sides of the pan. Start checking at 25 minutes to prevent overbaking.
- Cool Properly: Remove from the oven and let the cakes cool in the pans on wire racks for exactly 15 minutes. This allows them to set without becoming soggy. After 15 minutes, run a knife around the edges, invert the pans onto the cooling racks, and carefully remove the pans and parchment paper. Let the cakes cool completely before frosting (at least 1 hour).
Notes
- Room Temperature Matters: Make sure your butter, eggs, and buttermilk are at room temperature. Cold ingredients don’t mix well and can result in a dense cake.
- Don’t Overmix: Once you add the flour, mix just until combined. Overmixing develops gluten and creates a tough, dense cake.
- Even Layers: If your cakes dome in the center, use a serrated knife to level them before frosting for professional-looking layers.
- High Altitude: If baking above 3,000 feet, reduce baking powder to 2 teaspoons and increase flour by 2 tablespoons.
- Testing Doneness: Your cake is done when a toothpick comes out with a few moist crumbs – not completely clean. A completely clean toothpick means overbaked!
- Pan Size Variations: This recipe also makes 24 cupcakes (bake 18-20 minutes) or one 9×13-inch sheet cake (bake 30-35 minutes).
Nutrition
- Serving Size: 1 slice (1/12 of cake, unfrosted)
- Calories: 385
- Sugar: 32g
- Sodium: 285mg
- Fat: 18g
- Saturated Fat: 9g
- Unsaturated Fat: 8g
- Trans Fat: 0g
- Carbohydrates: 51g
- Fiber: 1g
- Protein: 6g
- Cholesterol: 95mg
Tips & Variations
Flavor Variations to Try:
- Lemon Yellow Cake: Add 2 tablespoons lemon zest and replace 1 teaspoon vanilla with lemon extract
- Almond Yellow Cake: Replace 1 teaspoon vanilla with almond extract for a subtle nutty flavor
- Orange Dreamsicle: Add 2 tablespoons orange zest and use half orange juice, half buttermilk
- Funfetti: Gently fold in ½ cup rainbow sprinkles at the end (use jimmies, not nonpareils)
- Coconut: Replace ¼ cup buttermilk with coconut milk and add ½ cup shredded coconut to the batter
- Spiced: Add 1 teaspoon cinnamon and ¼ teaspoon nutmeg to the dry ingredients
Texture Modifications:
- For an even more tender cake, substitute 2 tablespoons of flour with cornstarch
- For extra richness, use 5 egg yolks instead of 4 whole eggs
- For a lighter texture, use cake flour instead of all-purpose (increase to 2 ¾ cups)
Frosting Pairings:
- Classic: American buttercream (vanilla or chocolate)
- Elegant: Swiss meringue buttercream
- Rich: Chocolate ganache
- Light: Cream cheese frosting
- Simple: Fresh whipped cream with berries
Pro Chef Tips
- The Reverse Creaming Method: For an even more tender crumb, try this professional technique: Mix dry ingredients first, add butter and beat until crumbly, then add wet ingredients gradually. This method coats flour particles with fat before liquid is added, preventing gluten development.
- Temperature Control is Everything: Your oven temperature can vary significantly. Use an oven thermometer to ensure accuracy. Baking at too high a temperature creates a domed top and dry edges; too low results in a flat, dense cake.
- The Toothpick Test Timing: Insert your toothpick off-center, about 2 inches from the edge, not in the very center. The center takes longest to bake and will still look slightly underdone when the rest is perfect. A few moist crumbs are ideal.
- Prevent Doming: To get perfectly flat cake layers, use baking strips (or make your own with wet towels and aluminum foil) around your pans. This insulates the edges and helps the cake bake evenly.
- The Professional Crumb Coat: Before final frosting, apply a thin layer of frosting all over the cake and refrigerate for 30 minutes. This “crumb coat” traps crumbs and makes your final layer smooth and professional-looking.
- Moisture Lock: Brush each cake layer with simple syrup (equal parts sugar and water, boiled and cooled) before frosting. This keeps your cake incredibly moist and adds a subtle sweetness.
- Storage Secret: Cake layers are actually easier to frost when slightly chilled. Wrap them tightly and refrigerate for an hour or freeze for 20 minutes before assembling.
Common Mistakes to Avoid
- Using Cold Ingredients: This is the #1 mistake! Cold butter won’t cream properly, and cold eggs can cause the batter to curdle. Always bring ingredients to room temperature (takes about 30-60 minutes on the counter).
- Overmixing the Batter: Once flour is added, mix only until you no longer see dry streaks. Overmixing develops gluten and creates a tough, rubbery cake instead of a tender one. Stop while you’re ahead!
- Incorrect Measuring: Too much flour makes dry, dense cake. Always spoon flour into your measuring cup and level it off with a knife. Never scoop directly from the bag or pack it down.
- Opening the Oven Door Too Early: Don’t open the oven for at least the first 20 minutes of baking. The sudden temperature drop can cause your cake to sink in the middle. Be patient!
- Not Greasing Pans Properly: Even with non-stick pans, you need to grease thoroughly and use parchment paper on the bottom. There’s nothing worse than a perfect cake that refuses to come out of the pan!
- Frosting Warm Cake: This melts your frosting and creates a crumbly mess. Always let cake layers cool completely (at least 1 hour) before frosting. For best results, refrigerate them for 30 minutes first.
- Using Old Leavening Agents: Baking powder and baking soda lose potency over time. If yours are more than 6 months old, replace them. Test baking powder by adding a teaspoon to hot water – it should bubble vigorously.
Storage & Meal Prep
Room Temperature Storage:
Unfrosted cake layers can be wrapped tightly in plastic wrap and stored at room temperature for up to 2 days. Frosted cake should be kept in an airtight container or covered with a cake dome at room temperature for 2-3 days. After day 3, refrigerate it.
Refrigerator Storage:
Frosted cake can be refrigerated in an airtight container for up to 5 days. Before serving, let it sit at room temperature for 30-45 minutes – cold cake doesn’t taste as good! The butter will soften and the flavors will be more pronounced. Cover any cut edges with plastic wrap to prevent drying.
Leftover Single Slices:
Wrap individual slices tightly in plastic wrap, then place in a freezer bag. This makes it easy to grab a single serving whenever a craving hits!
Reheating Tips:
While cake is delicious at room temperature, if you prefer it slightly warm, microwave a slice for 10-15 seconds. Don’t overdo it or the frosting will melt! Alternatively, let refrigerated cake sit at room temperature for 30 minutes.
Keeping Cake Moist:
Place a slice of bread in the container with your cake. The bread will go stale, but it keeps the cake moist by providing a source of moisture. Replace the bread every day or two.
Make-Ahead & Freezer Notes
Make-Ahead Baking Schedule:
This cake is perfect for advance preparation, which is especially helpful for birthday parties and celebrations!
1 Week Ahead: Bake the cake layers, let them cool completely, then wrap tightly in 2 layers of plastic wrap. Refrigerate for up to 1 week. Frost 1-2 days before serving.
1 Day Ahead: Bake and assemble the entire cake, then refrigerate overnight. This actually improves the flavor as it allows time for the cake and frosting flavors to meld together.
Freezing Unfrosted Layers (Recommended Method):
Unfrosted cake layers freeze beautifully and actually make frosting easier! Once completely cool, wrap each layer tightly in plastic wrap, then again in aluminum foil, or place in a freezer-safe bag with air pressed out. Freeze for up to 3 months. To use, thaw in the refrigerator overnight, then bring to room temperature for 30 minutes before frosting. The cake will taste freshly baked!
Freezing Frosted Cake:
While possible, freezing frosted cake is trickier because frosting can become watery when thawed. If you must freeze a frosted cake, place it in the freezer uncovered for 1 hour until the frosting is firm, then wrap carefully in plastic wrap and foil. Freeze for up to 2 months. Thaw in the refrigerator overnight, unwrapping while still cold to prevent condensation from ruining the frosting.
Freezing Cupcakes:
If making cupcakes, freeze them unfrosted in an airtight container or freezer bag for up to 3 months. Frost after thawing for best results.
Best Reheating Method After Freezing:
After thawing frozen cake in the refrigerator, let it sit at room temperature for 45-60 minutes before serving. The texture and flavor will return to normal. Do not microwave frozen cake as it can become rubbery.
Serving Suggestions
A beautiful yellow cake deserves equally delicious accompaniments! Here are some wonderful ways to serve this classic dessert:
Classic Pairings:
- Chocolate Buttercream Frosting – The most beloved combination! Rich chocolate perfectly balances the buttery yellow cake
- Fresh Strawberries and Whipped Cream – Turn it into an elegant strawberry shortcake
- Vanilla Bean Buttercream – Simple, classic, and lets the cake’s butter flavor shine
- Caramel Sauce Drizzle – Adds a sophisticated dulce de leche note
- Fresh Berries – Raspberries, blueberries, or blackberries add a tart contrast
Beverage Pairings:
- Cold milk (whole milk is best with rich cake)
- Hot coffee or espresso
- Afternoon tea (especially Earl Grey or English Breakfast)
- Sparkling wine or champagne for celebrations
- Cold brew coffee for a modern twist
For Special Occasions:
- Birthday Cake: Frost with American buttercream, add rainbow sprinkles, top with candles
- Wedding Shower: Layer with lemon curd and cream cheese frosting, garnish with fresh flowers
- Easter: Frost with pastel buttercream, decorate with coconut “grass” and jelly beans
- Summer BBQ: Serve as a trifle layered with vanilla pudding, whipped cream, and berries
- Holiday Dinner: Add spices like cinnamon and serve with eggnog buttercream
Plating Ideas:
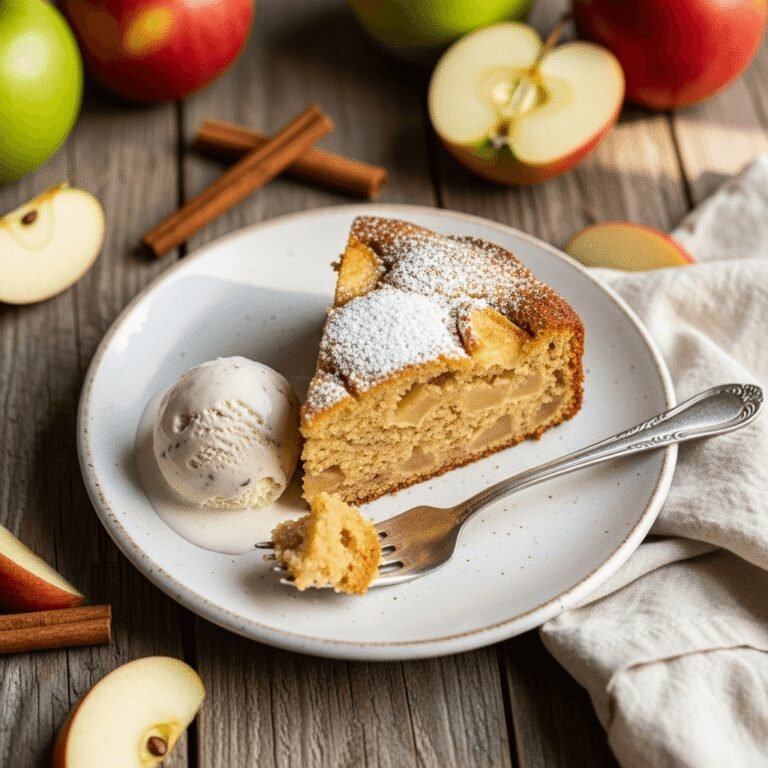
- Dust with powdered sugar and serve with vanilla ice cream
- Drizzle with chocolate ganache and add chocolate shavings
- Top with toasted coconut flakes for texture
- Serve à la mode with caramel sauce
- Create a naked cake (minimal frosting on sides) with fresh flowers
Side Dishes That Complement:
- Fresh fruit salad to cut the richness
- Coffee or vanilla ice cream
- Lemon curd or fruit compote on the side
- Chocolate sauce for drizzling
- Sweetened whipped cream
FAQs Section
Can I make this cake without buttermilk?
Absolutely! You can make a buttermilk substitute by adding 1 tablespoon of white vinegar or lemon juice to a measuring cup, then filling it with regular milk to reach 1 cup. Stir and let it sit for 5 minutes before using. The acidity mimics buttermilk and you’ll get very similar results. Plain yogurt (thinned with a bit of milk to reach pourable consistency) also works well.
Why is my yellow cake dense instead of fluffy?
Several factors can cause dense cake: overmixing the batter after adding flour (which develops too much gluten), using cold ingredients (which don’t incorporate air properly), or too much flour (measure by spooning and leveling, not scooping). Also ensure your baking powder and baking soda are fresh and not expired. Finally, make sure you’re creaming the butter and sugar for a full 4-5 minutes – this creates air pockets that make the cake light.
Can I turn this into cupcakes?
Yes! This recipe makes about 24 standard cupcakes. Fill cupcake liners about 2/3 full and bake at 350°F for 18-20 minutes, or until a toothpick inserted in the center comes out with just a few moist crumbs. Start checking at 17 minutes to prevent overbaking. Cupcakes will dome slightly as they bake.
How do I know when the cake is done baking?
Use the toothpick test: insert a toothpick into the center of the cake (slightly off-center is actually better). It should come out with a few moist crumbs clinging to it – not wet batter, but not completely clean either. The cake should also spring back when lightly pressed, and the edges should be pulling slightly away from the pan sides. Generally, this happens at 26-28 minutes, but every oven is different.
Can I make this recipe dairy-free or gluten-free?
For dairy-free: Replace butter with vegan butter sticks (not margarine), use a plant-based milk mixed with vinegar instead of buttermilk, and replace the oil with more vegan butter or use coconut oil. The results will be slightly different but still delicious. For gluten-free: Use a 1:1 gluten-free baking flour blend (like King Arthur or Bob’s Red Mill) in place of all-purpose flour. You may need to add a few minutes to the baking time.
Why did my cake sink in the middle?
A sunken center usually means the cake was underbaked (the structure hasn’t set before you removed it from the oven), you opened the oven door too early (causing a temperature drop), or your leavening agents are old and inactive. Also, too much leavening can cause the cake to rise rapidly then collapse. Follow the recipe measurements exactly and avoid opening the oven during the first 20 minutes of baking.
Can I bake this in a different pan size?
Yes! For a 9×13-inch sheet cake, use the same recipe and bake for 30-35 minutes. For a bundt pan (10-15 cup capacity), bake for 45-55 minutes. For three 8-inch rounds, divide the batter evenly and bake for 24-26 minutes. Always check for doneness with the toothpick test as times can vary by oven and pan material (dark pans bake faster than light-colored pans).
Conclusion
Congratulations – you now have the ultimate classic yellow cake recipe that will become your signature dessert! This moist and fluffy yellow cake is everything a homemade cake should be: buttery, tender, perfectly sweet, and absolutely delicious. Whether you’re celebrating a birthday, bringing dessert to a potluck, or simply treating your family to something special, this recipe delivers consistent, bakery-quality results every single time.
The best part? Once you’ve made this cake, you’ll realize that baking from scratch isn’t complicated or time-consuming – it’s actually incredibly rewarding. There’s something magical about pulling a golden, perfectly risen cake from the oven, knowing you created it with your own hands using simple, real ingredients.
I’d love to hear how your yellow cake turns out! Drop a comment below and let me know what frosting you chose, whether you made any fun variations, or how your family loved it. Don’t forget to rate the recipe – your feedback helps other home bakers find tried-and-true recipes they can trust.
Ready to save this recipe for later? Pin it to your Pinterest boards so you can find it whenever a cake craving strikes! Share it with your baking friends who appreciate a good from-scratch recipe. And if you’re new here, be sure to subscribe so you never miss a delicious recipe.
Now get baking – your perfect yellow cake awaits! 🍰💛