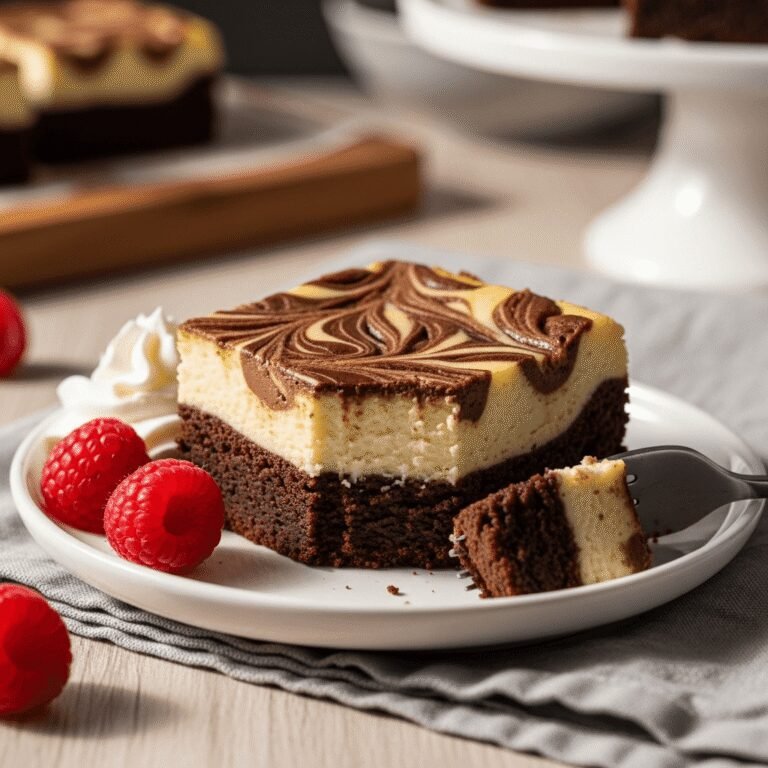
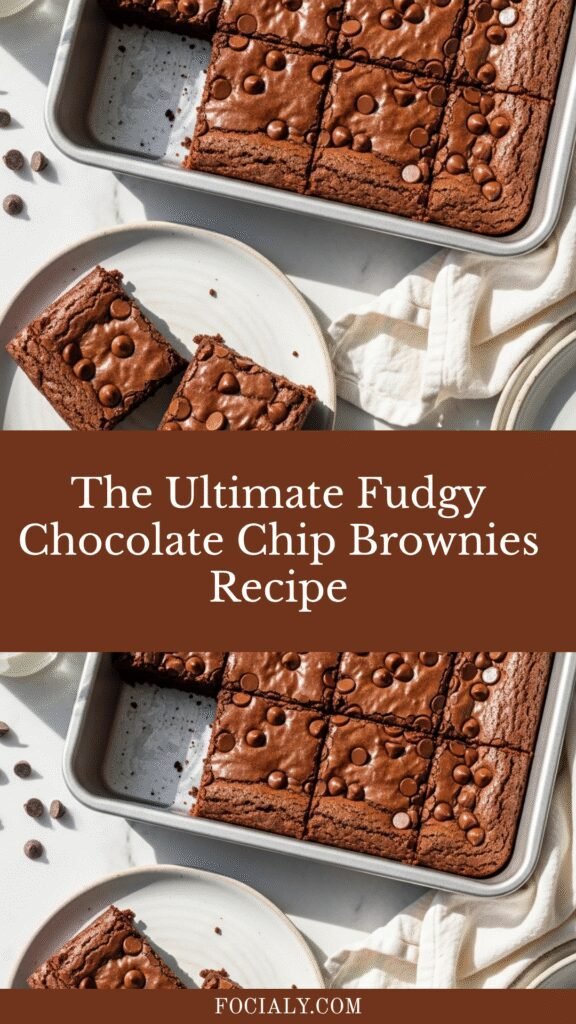
The Ultimate Fudgy Chocolate Chip Brownies Recipe
There’s something utterly magical about chocolate chip brownies – that perfect marriage between a classic brownie’s fudgy richness and the delightful surprise of melty chocolate chips in every bite. These aren’t your average brownies; they’re the kind that disappear from the pan within minutes of cooling, leaving everyone asking for the recipe.
Whether you’re baking for a weekend family gathering, need a quick dessert for unexpected guests, or simply craving something decadent on a Tuesday evening, these chocolate chip brownies deliver every single time. They’re incredibly versatile too – perfect for potlucks, bake sales, holiday cookie trays, birthday celebrations, or just because you deserve something sweet. The best part? They come together with simple pantry ingredients and require just one bowl, making cleanup a breeze. These brownies strike that perfect balance between being impressively delicious and remarkably easy to make, which is exactly what home bakers need.
History / Background
Brownies hold a special place in American baking history, and their origin story is as rich as their chocolate flavor. The browning of these beloved treats dates back to 1893 at the Chicago World’s Fair, where a socialite named Bertha Palmer requested a dessert for ladies attending the fair that would be smaller than a cake but more substantial than a cookie – something easy to eat while socializing. The Palmer House Hotel’s pastry chef created what many consider the first brownie, featuring an apricot glaze and walnuts.
However, the first published brownie recipe appeared in the 1906 edition of “The Boston Cooking School Cook Book” by Fannie Merritt Farmer. Interestingly, early brownie recipes didn’t always include chocolate – some were blonde or molasses-based. The chocolate version we know and love became standardized in the 1920s and 1930s, coinciding with the rise of convenient baking chocolate products.
The addition of chocolate chips to brownies is a more modern twist on this classic treat. Chocolate chips themselves weren’t invented until 1937 by Ruth Graves Wakefield, who famously created the chocolate chip cookie. Bakers soon discovered that adding these morsels to brownie batter created an irresistible texture contrast – the dense, fudgy brownie base punctuated with pockets of melty chocolate goodness.
Today, chocolate chip brownies represent the evolution of American home baking: taking a beloved classic and making it even better. They’ve become a staple at school bake sales, church potlucks, and family gatherings across the country, with each baker adding their own special touch to this timeless recipe.
Why You’ll Love This Recipe
These chocolate chip brownies are about to become your new go-to dessert recipe, and here’s why: they deliver that perfect fudgy texture that true brownie lovers crave, with an extra dimension of chocolate indulgence from those melty chips scattered throughout. Unlike cakey brownies that can be dry or disappointing, these stay moist and rich for days.
Here’s what makes this recipe absolutely irresistible:
- One-bowl simplicity – No complicated techniques or fancy equipment needed; everything mixes together in minutes with minimal cleanup
- Pantry-friendly ingredients – You probably have everything you need already sitting in your cupboard right now
- Foolproof results – The straightforward method means even beginner bakers will nail it on the first try
- Customizable – Easily adapt with different chocolate chips, add nuts, swirl in caramel, or keep it classic
- Budget-friendly – Makes a generous 9×13 pan that feeds a crowd without breaking the bank
- Texture perfection – Crispy, crackly top with a dense, fudgy center that’s never underbaked or dry
- Crowd-pleaser guaranteed – Adults and kids alike can’t resist these decadent squares
- Make-ahead friendly – They actually taste even better the next day as the flavors meld together
- Portion control built-in – Cut into neat squares that are perfect for sharing (or not!)
- Freezer-friendly – Double the batch and freeze half for emergency chocolate cravings
Ingredient Notes
Understanding your ingredients is the key to brownie success. Let’s break down what makes these chocolate chip brownies so incredibly delicious:
Unsalted Butter – The foundation of flavor and texture. Butter creates that rich, melt-in-your-mouth quality that’s essential to great brownies. I always use unsalted so I can control the salt level perfectly. If you only have salted butter, reduce the added salt by half. For the best flavor, use real butter rather than margarine or spreads.
Granulated Sugar – Provides sweetness and contributes to that signature crackly top. Sugar also keeps brownies moist by retaining moisture. Don’t substitute with other sweeteners here, as sugar plays a crucial structural role.
Brown Sugar – Adds depth, moisture, and a subtle caramel undertone that makes these brownies taste incredibly rich. The molasses in brown sugar keeps the texture perfectly fudgy. Light or dark brown sugar both work beautifully.
Eggs – The binding agent that holds everything together while adding richness. Room temperature eggs incorporate better into the batter. Use large eggs for this recipe.
Vanilla Extract – Enhances all the chocolate flavors and adds warmth. Pure vanilla extract is preferable, but imitation works in a pinch.
All-Purpose Flour – Provides structure without making brownies cakey. Don’t overmix once flour is added, or you’ll develop too much gluten and end up with tough brownies.
Unsweetened Cocoa Powder – This is where the chocolate magic happens. Use high-quality cocoa for the best flavor. Dutch-processed cocoa creates a deeper, darker color and richer taste, while natural cocoa is slightly more acidic and lighter. Either works wonderfully.
Salt – Balances sweetness and amplifies chocolate flavor. Don’t skip it!
Semi-Sweet Chocolate Chips – The star addition that takes these from regular brownies to extraordinary. I prefer semi-sweet for balanced sweetness, but dark chocolate chips, milk chocolate, or a combination all work. You can even use chocolate chunks for bigger pockets of melty chocolate.
Equipment Needed
You won’t need any fancy kitchen gadgets for these brownies – just basic baking essentials:
- 9×13 inch baking pan – The standard size for this recipe; metal or glass both work (glass may require slightly longer baking)
- Large mixing bowl – For combining all ingredients
- Whisk or electric mixer – A whisk works perfectly for the mixing method, though a hand mixer or stand mixer makes it even easier
- Rubber spatula – For scraping down the bowl and folding in chocolate chips
- Measuring cups and spoons – Accurate measurements are important in baking
- Parchment paper or aluminum foil – Optional but highly recommended for easy removal and cleanup
- Medium saucepan – For melting the butter (or use microwave)
- Cooling rack – Allows air circulation for even cooling
- Sharp knife – For cutting clean brownie squares
Chocolate Chip Brownies Recipe
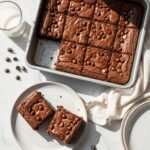
These ultra-fudgy chocolate chip brownies feature a crispy top, dense chocolatey center, and pockets of melted chocolate chips throughout. Made in one bowl with simple ingredients, they’re the perfect crowd-pleasing dessert for any occasion.
- Prep Time: 15 minutes
- Cook Time: 30 minutes
- Total Time: 45 minutes
- Yield: 24 brownies 1x
- Category: Dessert
- Method: Baking
- Cuisine: American
- Diet: Vegetarian
Ingredients
- 1 cup (2 sticks) unsalted butter, melted
- 1½ cups granulated sugar
- ½ cup packed brown sugar
- 4 large eggs, room temperature
- 2 teaspoons vanilla extract
- 1 cup all-purpose flour
- ¾ cup unsweetened cocoa powder
- ½ teaspoon salt
- 1½ cups semi-sweet chocolate chips, divided
Instructions
Step 1: Prep Your Pan
Preheat your oven to 350°F (175°C). Line a 9×13 inch baking pan with parchment paper, leaving an overhang on the sides for easy removal, or thoroughly grease the pan with butter or cooking spray.
Step 2: Melt the Butter
Melt the butter in a medium saucepan over low heat or in the microwave in 30-second intervals. Allow it to cool slightly for about 5 minutes so it doesn’t cook the eggs when mixed.
Step 3: Mix Wet Ingredients
In a large mixing bowl, whisk together the melted butter, granulated sugar, and brown sugar until well combined and smooth. The mixture should look glossy.
Step 4: Add Eggs and Vanilla
Add the eggs one at a time, whisking vigorously after each addition until fully incorporated. The batter should become lighter in color and slightly thicker. Stir in the vanilla extract.
Step 5: Incorporate Dry Ingredients
Sift the cocoa powder, flour, and salt directly over the wet mixture (sifting prevents lumps). Gently fold the dry ingredients into the wet ingredients using a rubber spatula. Mix just until no flour streaks remain – don’t overmix, or your brownies will be tough.
Step 6: Add Chocolate Chips
Reserve ½ cup of chocolate chips for topping. Fold the remaining 1 cup of chocolate chips into the batter until evenly distributed.
Step 7: Pour and Top
Pour the thick batter into your prepared pan and spread it evenly with a spatula. Sprinkle the reserved chocolate chips over the top, pressing them slightly into the batter.
Step 8: Bake
Bake for 28-32 minutes, until the top looks set and a toothpick inserted in the center comes out with a few moist crumbs (not wet batter). The brownies will continue to set as they cool. For extra fudgy brownies, err on the side of slightly underbaking.
Step 9: Cool and Cut
Allow the brownies to cool completely in the pan on a wire rack for at least 1 hour before cutting. This patience pays off – they’ll cut much cleaner when fully cooled. Lift the brownies out using the parchment overhang, then cut into 24 squares.
Notes
- For extra fudgy brownies: Reduce baking time by 2-3 minutes and remove when a toothpick has wet crumbs.
- For crinklier tops: Vigorously beat the eggs for 1-2 minutes before adding dry ingredients.
- Don’t overbake: Brownies continue cooking as they cool. Slightly underdone is better than overdone.
- Sharp, clean cuts: Wipe your knife with a warm, damp cloth between each cut for bakery-perfect squares.
Nutrition
- Serving Size: 1 brownie (1/24 of recipe)
- Calories: 215
- Sugar: 22g
- Sodium: 65mg
- Fat: 11g
- Saturated Fat: 7g
- Unsaturated Fat: 3g
- Trans Fat: 0g
- Carbohydrates: 28g
- Fiber: 2g
- Protein: 3g
- Cholesterol: 50mg
Tips & Variations
The beauty of this brownie recipe is how easily you can customize it to suit your taste or dietary needs:
Chocolate Variations:
Mix up your chocolate chips – try dark chocolate for a more sophisticated flavor, white chocolate for sweeter brownies, or a combination of all three for triple chocolate decadence. Chocolate chunks create bigger pockets of melted chocolate than chips.
Add Nuts:
Fold in 1 cup of chopped walnuts, pecans, or hazelnuts for added crunch and nutty flavor. Toast them first for even better taste.
Peanut Butter Swirl:
Drop spoonfuls of peanut butter over the batter and swirl with a knife before baking for peanut butter chocolate heaven.
Mint Chocolate:
Add ½ teaspoon peppermint extract along with the vanilla and use mint chocolate chips for refreshing mint brownies.
Espresso Enhancement:
Stir 1 tablespoon of instant espresso powder into the dry ingredients to intensify the chocolate flavor without adding coffee taste.
Caramel Swirl:
Drizzle caramel sauce over the batter and swirl with a butter knife before baking for caramel brownies.
Sea Salt Topping:
Sprinkle flaky sea salt over the top immediately after baking for sweet-salty perfection.
Gluten-Free Option:
Substitute the all-purpose flour with a 1-to-1 gluten-free baking flour blend. The texture will be very similar.
Healthier Swap:
Replace half the butter with unsweetened applesauce to reduce calories and fat while maintaining moisture.
Pro Chef Tips
Want bakery-quality brownies? These professional techniques will elevate your brownie game:
Room Temperature Eggs: This is crucial for proper emulsification. Cold eggs don’t incorporate as smoothly and can cause the butter to seize up. Set eggs out 30 minutes before baking, or place them in warm water for 5 minutes.
Quality Cocoa Matters: Invest in good cocoa powder – it’s the primary chocolate flavor. Dutch-processed cocoa creates deeper, richer brownies, while natural cocoa gives a brighter chocolate taste.
Don’t Skimp on Mixing the Eggs: When you add eggs to the sugar mixture, beat vigorously for 30-60 seconds per egg. This incorporates air and creates that gorgeous shiny, crackly top layer that makes brownies look professional.
Measure Flour Correctly: Spoon flour into your measuring cup and level it off. Scooping directly from the bag compacts the flour, giving you too much and resulting in dry, cakey brownies.
Use Parchment Overhang: Line your pan so the parchment extends over two sides. This creates “handles” for lifting the entire brownie slab out, making cutting infinitely easier and your squares perfectly neat.
The Toothpick Test Timing: For fudgy brownies, the toothpick should come out with moist crumbs, not clean. Clean means overbaked. Remember, brownies firm up considerably as they cool.
Cool Completely Before Cutting: I know it’s hard to wait, but warm brownies are gooey and crumble when cut. Fully cooled brownies slice into neat, professional-looking squares. Refrigerating for 30 minutes before cutting makes this even easier.
Hot Knife Trick: For the cleanest cuts, heat your knife under hot water, dry it quickly, then cut. Wipe the knife clean and reheat between each cut for bakery-perfect presentation.
Common Mistakes to Avoid
Even simple brownie recipes can go wrong if you’re not careful. Here’s what to watch out for:
Overbaking Is the #1 Mistake: Brownies continue cooking from residual heat as they cool. Pull them when they look slightly underdone in the center. Overbaked brownies are dry and cakey – the opposite of what we want. Set a timer for the minimum baking time and check frequently.
Overmixing the Batter: Once you add the flour, mix just until combined. Overmixing develops gluten, which creates tough, dense brownies instead of tender, fudgy ones. Use a gentle folding motion rather than aggressive stirring.
Using Cold Ingredients: Cold eggs and butter don’t combine smoothly, leading to a grainy texture and uneven baking. Always bring eggs to room temperature and let melted butter cool slightly (but remain liquid) before mixing.
Wrong Pan Size: Using a different pan size than specified changes baking time and texture dramatically. A smaller pan makes thicker brownies that need longer baking; a larger pan makes thin brownies that overbake quickly. Stick to the 9×13 inch pan for best results.
Cutting Too Soon: This causes even the best brownies to fall apart into a crumbly mess. Patience truly is a virtue here. Let them cool completely, or even refrigerate for cleaner cuts. The wait is worth it for those picture-perfect squares.
Storage & Meal Prep
Proper storage keeps your brownies tasting fresh and fudgy for days:
Room Temperature Storage: Store cut brownies in an airtight container at room temperature for up to 4 days. Layer parchment or wax paper between layers to prevent sticking. They’ll stay soft and fudgy this way.
Refrigerator Storage: Brownies can be refrigerated in an airtight container for up to 1 week. They’ll become firmer and more dense when cold – which some people actually prefer! Let them come to room temperature for 15-20 minutes before serving for the best texture.
Keeping Them Moist: Place a piece of bread in the container with your brownies. The brownies will absorb moisture from the bread, staying perfectly soft. Replace the bread slice every couple of days.
Reheating Individual Servings: For that fresh-baked taste, microwave a single brownie for 10-15 seconds. It’ll taste like it just came out of the oven, with warm, melty chocolate chips.
Prevent Drying Out: Always ensure your storage container seals tightly. Exposure to air is what makes brownies dry and stale. If you don’t have an airtight container, wrap them tightly in plastic wrap.
Make-Ahead & Freezer Notes
These brownies are fantastic for preparing in advance – perfect for busy schedules or planning ahead for parties:
Make-Ahead Baking: Bake the brownies up to 2 days before you need them. In fact, many brownie enthusiasts insist they taste even better the next day as the flavors meld together. Store covered at room temperature until ready to serve.
Freezing Whole Pan: Once completely cooled, wrap the uncut brownie slab tightly in plastic wrap, then again in aluminum foil. Label with the date and freeze for up to 3 months. Thaw overnight in the refrigerator, then cut and serve.
Freezing Individual Brownies: Cut brownies into squares, wrap each one individually in plastic wrap, then place all wrapped brownies in a freezer-safe bag or container. This way, you can grab individual portions whenever a chocolate craving hits. They’ll keep for 3 months.
Thawing Instructions: For best texture, thaw frozen brownies in the refrigerator overnight, then bring to room temperature for 20-30 minutes before serving. If you’re impatient, you can microwave a frozen brownie for 20-30 seconds for a warm, gooey treat.
Freezing Raw Batter: You can actually freeze the unbaked batter in the pan (wrapped tightly) for up to 2 months. Bake directly from frozen, adding 5-10 minutes to the baking time. This is perfect for having fresh brownies ready to bake whenever you need them.
Serving Suggestions
While chocolate chip brownies are absolutely perfect on their own, here are some delicious ways to serve them:
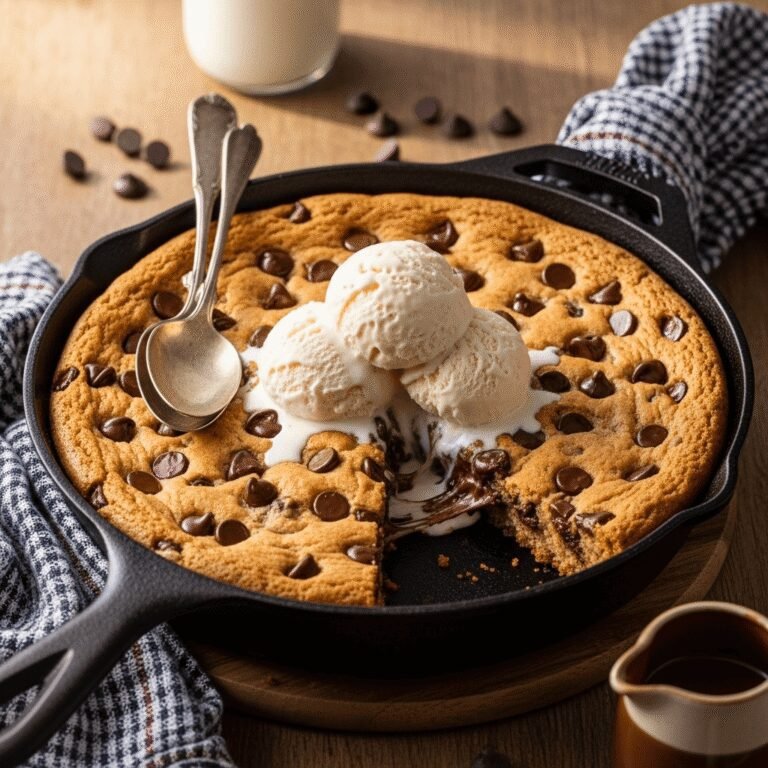
Classic à la Mode: Top a warm brownie with a scoop of vanilla ice cream and watch it melt into the crevices. Add chocolate sauce and whipped cream for the ultimate sundae experience.
Coffee Companion: Serve brownies alongside hot coffee, cappuccino, or espresso for a café-style dessert. The coffee complements the chocolate beautifully.
Milk Bar Style: Stack brownie squares with layers of whipped cream or buttercream frosting for an impressive layered dessert.
Brownie Sundae Bar: Set out brownies with various toppings – ice cream, caramel sauce, chocolate sauce, whipped cream, chopped nuts, sprinkles, and maraschino cherries. Let guests build their own creations.
With Fresh Berries: The tartness of fresh strawberries or raspberries cuts through the richness of chocolate perfectly. Add a dollop of whipped cream for an elegant presentation.
Brownie Trifle: Cube brownies and layer them with pudding, whipped cream, and chocolate chips in parfait glasses for individual trifles.
Beverage Pairings: Serve with cold milk (classic!), hot cocoa, Irish coffee, red wine (especially port), or a chocolate martini for adults.
Alongside Desserts: Brownies pair wonderfully with lighter desserts like fruit sorbet, lemon bars, or angel food cake for variety on a dessert buffet.
FAQs Section
Q: Why are my brownies cakey instead of fudgy?
A: Cakey brownies usually result from too much flour, overmixing, or overbaking. Make sure you’re measuring flour correctly (spoon and level, don’t scoop), mix just until combined after adding flour, and pull brownies from the oven when a toothpick has moist crumbs, not when it’s completely clean.
Q: Can I use oil instead of butter?
A: You can substitute vegetable or canola oil for butter using ¾ cup oil for every 1 cup butter. However, butter provides superior flavor and creates that signature crackly top. If using oil, your brownies will be fudgier but less flavorful.
Q: My brownies turned out gooey in the middle – did I underbake them?
A: Slightly gooey brownies are actually perfect! They’ll firm up as they cool. However, if they’re liquidy rather than fudgy after cooling completely, they need a few more minutes next time. Every oven is different, so adjust timing accordingly.
Q: Can I make these in a different size pan?
A: You can, but baking time will change significantly. An 8×8 pan makes thicker brownies and needs 35-40 minutes. A 9×9 pan needs about 32-35 minutes. A larger pan makes thinner brownies that bake faster. Always check for doneness rather than relying solely on time.
Q: Why do my brownies stick to the pan?
A: Proper greasing or lining is essential. Use parchment paper with overhang on two sides, or thoroughly grease every corner and edge with butter or baking spray. Also, make sure brownies are completely cool before attempting to remove them – they’re much more delicate when warm.
Q: Can I reduce the sugar in this recipe?
A: You can reduce sugar by up to ¼ cup, but brownies will be less sweet and the texture will change slightly. Sugar isn’t just for sweetness – it also contributes to moisture and that crackly top. I don’t recommend reducing it further than that.
Q: How do I know when brownies are done?
A: Insert a toothpick about 2 inches from the edge (the center is always the last to set). For fudgy brownies, it should come out with moist crumbs. For slightly firmer brownies, a few crumbs are fine, but it shouldn’t be wet batter. The edges should look set and be pulling away slightly from the pan.
Conclusion
There you have it – the ultimate chocolate chip brownie recipe that delivers rich, fudgy perfection every single time! These brownies have everything you could want: that gorgeous crackly top, dense chocolatey interior, and those irresistible pockets of melted chocolate chips throughout. Whether you’re an experienced baker or just starting your baking journey, this foolproof recipe will make you look like a professional.
The best part about these brownies? They’re endlessly adaptable to your preferences and whatever you have in your pantry. Make them nuttier, mintier, more caramel-y, or keep them classically chocolatey – they’ll be amazing no matter what. And with their easy storage and freezing capabilities, you can always have a homemade treat ready when chocolate cravings strike.
I hope you love these chocolate chip brownies as much as my family does! They’ve become our go-to dessert for every occasion, from holiday gatherings to Tuesday night treats. Once you try them, I have a feeling they’ll become a staple in your kitchen too.
Now it’s your turn! Bake up a batch of these incredible brownies and let me know how they turn out. Leave a comment below sharing your results, any fun variations you tried, or just to say hello. And if you love this recipe, please save it to your Pinterest boards so you can find it again and again – your future self will thank you when that chocolate craving hits!
Happy baking, and enjoy every fudgy, chocolatey bite! 🍫