The Ultimate Zebra Brownies Recipe – Swirled, Stunning & Ridiculously Delicious!
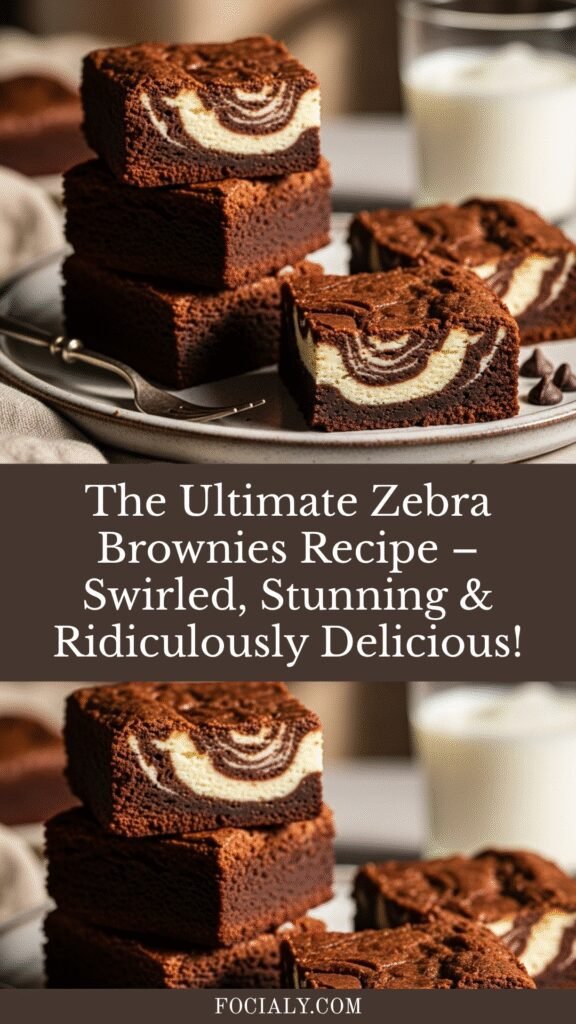
If you’ve ever scrolled through Pinterest looking for a dessert that’s as beautiful as it is delicious, you’ve probably stumbled across zebra brownies. These show-stopping treats combine rich, fudgy chocolate brownies with creamy cheesecake batter, swirled together to create a gorgeous zebra-stripe pattern that looks like it came straight from a bakery. But here’s the best part: they’re actually super easy to make at home!
Zebra brownies (sometimes called marble brownies or cream cheese brownies) are perfect for any occasion where you want to impress without spending hours in the kitchen. Bring them to potlucks, birthday parties, or holiday gatherings, and watch them disappear in minutes. They’re also fantastic as an elevated weeknight dessert when you’re craving something special. The contrast between the dense chocolate layer and the tangy, velvety cheesecake creates a flavor combination that’s absolutely irresistible. Trust me, once you make these, they’ll become your go-to impressive dessert!
History / Background
The zebra brownie is a beautiful example of American baking ingenuity – a fusion dessert that marries two beloved treats into one stunning creation. While traditional fudgy brownies have been an American staple since the late 1800s (with the first published recipe appearing in the 1896 Boston Cooking-School Cook Book), and cheesecake has ancient Greek origins, the combination of the two is a more modern innovation.
The marble or swirl technique itself has European roots, particularly in German and Austrian baking traditions where marble cakes (Marmorkuchen) have been popular for centuries. However, the specific combination of brownie batter and cheesecake filling appears to have gained popularity in the United States during the 1980s and 1990s, when home bakers began experimenting with fusion desserts.
The “zebra” name comes from the distinctive black-and-white striped pattern created by alternating dollops of chocolate brownie batter and cream cheese mixture, then swirling them together with a knife or toothpick. This technique became especially popular on social media platforms like Pinterest and Instagram, where visually striking desserts reign supreme. The zebra brownie perfectly embodies the modern dessert trend: it needs to taste amazing AND photograph beautifully.
What makes zebra brownies particularly special is their dual texture and flavor profile. You get the dense, chocolatey richness of a classic brownie paired with the light, tangy creaminess of cheesecake – all in one bite. It’s no wonder they’ve become a Pinterest sensation and a favorite at bake sales across America!
Why You’ll Love This Recipe
This zebra brownie recipe is about to become your new favorite dessert, and here’s why: it delivers bakery-quality results with surprisingly simple techniques. The visual impact alone will make you look like a professional pastry chef, but the taste is what will keep everyone coming back for seconds (and thirds!).
Here’s what makes this recipe absolutely perfect:
- Stunning presentation – The zebra stripe pattern looks incredibly impressive, yet it’s created with just a simple swirling technique that anyone can master
- Two desserts in one – You get rich, fudgy brownies AND creamy cheesecake in every single bite, satisfying multiple cravings at once
- Simple ingredients – Everything you need is probably already in your pantry and fridge – no specialty items or exotic ingredients required
- Beginner-friendly – Despite looking fancy, this recipe uses straightforward steps that even novice bakers can follow successfully
- Make-ahead friendly – These actually taste better the next day after the flavors have melded together, making them perfect for party planning
- Crowd-pleaser guarantee – I’ve never met anyone who doesn’t love these – they appeal to chocolate lovers, cheesecake fans, and everyone in between
- Budget-friendly indulgence – You can make a whole pan of impressive dessert bars for less than $10 in ingredients
- Customizable – Easy to adapt with different mix-ins, toppings, or flavor variations to suit your preferences
Whether you’re baking for a special occasion or just treating yourself on a Tuesday night, these zebra brownies deliver maximum impact with minimal effort!
Ingredient Notes
Let’s talk about what makes these zebra brownies so incredible. Each ingredient plays a specific role in creating that perfect texture and flavor balance.
For the Brownie Layer:
- Unsalted butter – Provides richness and helps create that fudgy texture. Using unsalted lets you control the salt level perfectly. Can substitute with coconut oil for a dairy-free version, though the flavor will be slightly different.
- Semi-sweet chocolate chips – The foundation of your chocolate flavor. Semi-sweet provides the perfect balance without being too bitter. You can use dark chocolate for a more intense flavor or milk chocolate for sweeter brownies.
- Granulated sugar – Sweetens the brownies and helps create that signature crackly top. Don’t reduce the amount or your brownies won’t have the right texture.
- Eggs – Bind everything together and provide structure. Make sure they’re at room temperature for better incorporation.
- Vanilla extract – Enhances the chocolate flavor and adds depth. Use pure vanilla extract, not imitation, for the best results.
- All-purpose flour – Provides structure without making the brownies cakey. Don’t overmix once you add flour or you’ll develop too much gluten.
- Cocoa powder – Intensifies the chocolate flavor and gives that deep, rich color. Dutch-process cocoa creates a darker, smoother flavor while natural cocoa is more acidic.
- Salt – A crucial ingredient that balances sweetness and enhances chocolate flavor. Don’t skip it!
For the Cheesecake Layer:
- Cream cheese – Must be full-fat and at room temperature for smooth, lump-free swirls. Low-fat cream cheese won’t provide the same creamy texture.
- Granulated sugar – Sweetens the cheesecake layer and helps it stay soft and creamy.
- Egg – Binds the cheesecake mixture and helps it set during baking. Room temperature is key here too.
- Vanilla extract – Adds classic cheesecake flavor that complements the chocolate perfectly.
Equipment Needed
Here’s everything you’ll need to create perfect zebra brownies. Having the right tools makes the process smooth and enjoyable!
- 9×13 inch baking pan – The standard size for this recipe. A metal pan will give you crispier edges; glass will bake more slowly and evenly.
- Parchment paper or aluminum foil – Line your pan for easy removal and perfect clean cuts. Leave an overhang to lift the brownies out easily.
- Two medium mixing bowls – One for the brownie batter, one for the cheesecake mixture.
- Microwave-safe bowl or double boiler – For melting chocolate and butter together smoothly.
- Electric hand mixer or stand mixer – Essential for getting the cream cheese perfectly smooth and lump-free.
- Whisk – For mixing the brownie batter without overmixing.
- Rubber spatula – For scraping bowls and ensuring no batter goes to waste.
- Measuring cups and spoons – Accurate measurements are crucial in baking!
- Butter knife or wooden skewer – For creating those beautiful zebra swirls.
- Toothpick – To test for doneness.
- Cooling rack – Allows air circulation for even cooling.
Zebra Brownies Recipe
These stunning zebra brownies combine rich, fudgy chocolate brownies with creamy cheesecake in a beautiful swirled pattern. They’re surprisingly easy to make and taste even better than they look!
- Prep Time: 20 minutes
- Cook Time: 35 minutes
- Total Time: 55 minutes (plus cooling time) Yield:
- Yield: 16-20 brownies 1x
- Category: Dessert
- Method: Baking
- Cuisine: American
- Diet: Vegetarian
Ingredients
Brownie Layer:
- 1 cup (2 sticks) unsalted butter
- 1½ cups semi-sweet chocolate chips
- 1½ cups granulated sugar
- 4 large eggs, room temperature
- 2 teaspoons vanilla extract
- ¾ cup all-purpose flour
- ½ cup unsweetened cocoa powder
- ½ teaspoon salt
Cheesecake Layer:
- 8 oz cream cheese, softened to room temperature
- ⅓ cup granulated sugar
- 1 large egg, room temperature
- 1 teaspoon vanilla extract
Instructions
- Prepare your pan: Preheat your oven to 350°F (175°C). Line a 9×13 inch baking pan with parchment paper, leaving a 2-inch overhang on two sides for easy removal. Lightly grease the parchment with cooking spray.
- Make the brownie batter: In a microwave-safe bowl, combine the butter and chocolate chips. Microwave in 30-second intervals, stirring between each, until completely melted and smooth (about 1.5-2 minutes total). Let cool for 5 minutes.
- Mix the wet ingredients: Whisk the sugar into the melted chocolate mixture until well combined. Add the eggs one at a time, whisking well after each addition. Stir in the vanilla extract.
- Add dry ingredients: In a separate bowl, whisk together the flour, cocoa powder, and salt. Gently fold the dry ingredients into the chocolate mixture until just combined. Don’t overmix! Stop as soon as you no longer see flour streaks.
- Prepare the cheesecake layer: In a separate bowl, beat the softened cream cheese with an electric mixer on medium speed until smooth and creamy (about 1-2 minutes). Add the sugar and beat until fluffy. Beat in the egg and vanilla extract until completely smooth with no lumps.
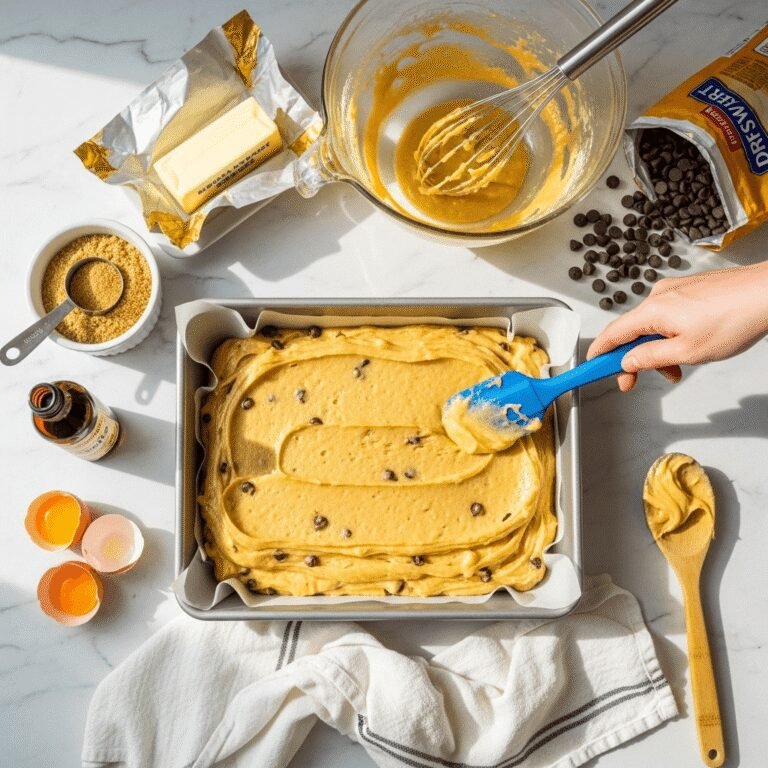
- Create the zebra pattern: Pour about ¾ of the brownie batter into your prepared pan and spread it evenly. Drop spoonfuls of the cheesecake mixture randomly over the brownie batter. Then drop spoonfuls of the remaining brownie batter over and between the cheesecake dollops.
- Swirl to perfection: Using a butter knife or wooden skewer, gently swirl through the batters in a figure-8 motion or zigzag pattern. Don’t over-swirl or you’ll lose the distinct zebra stripes – 6-8 swirls total is perfect!
- Bake: Bake for 33-38 minutes, until the edges are set and a toothpick inserted in the center comes out with a few moist crumbs (not wet batter). The center may look slightly underdone – that’s perfect! It will continue cooking as it cools.
- Cool completely: Let the brownies cool in the pan on a wire rack for at least 2 hours, or until completely cool. For the cleanest cuts, refrigerate for 1-2 hours before slicing.
- Slice and serve: Using the parchment overhang, lift the brownies out of the pan. Cut into squares using a sharp knife, wiping the blade clean between cuts for the prettiest slices.
Notes
- Room temperature ingredients are crucial – Cold cream cheese will be lumpy, and cold eggs won’t incorporate properly.
- Don’t overbake – These brownies continue cooking as they cool. Slightly underbaked centers will give you fudgy brownies; overbaking creates cakey brownies.
- For clean cuts – Use a sharp knife and wipe it clean between each cut. Chilling the brownies first makes slicing easier.
- Swirling technique – Less is more! Over-swirling will muddy the pattern instead of creating distinct stripes.
- Storage – These actually taste better the second day after the flavors have melded together.
Nutrition
- Serving Size: 1 brownie (based on 20 servings)
- Calories: 285
- Sugar: 26g
- Sodium: 115mg
- Fat: 16g
- Saturated Fat: 9g
- Unsaturated Fat: 5g
- Trans Fat: 0g
- Carbohydrates: 33g
- Fiber: 2g
- Protein: 4g
- Cholesterol: 85mg
Tips & Variations
Flavor Variations:
- Peppermint zebra brownies – Add ½ teaspoon peppermint extract to the brownie batter and crush candy canes on top before baking
- Espresso brownies – Add 1 tablespoon instant espresso powder to the chocolate mixture for deeper chocolate flavor
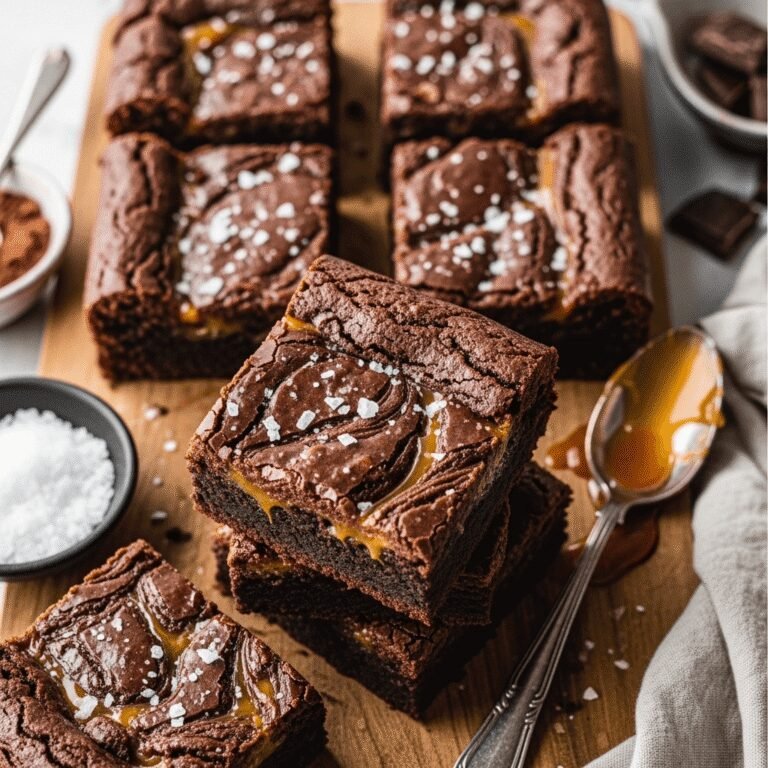
- Salted caramel – Drizzle with caramel sauce and sprinkle with flaky sea salt after baking
- Peanut butter swirl – Replace half the cream cheese with creamy peanut butter for a peanut butter cheesecake layer
- Oreo zebra brownies – Press crushed Oreos into the batter before swirling
- Raspberry white chocolate – Use white chocolate chips in the brownie layer and add raspberry jam swirls
- Nutty delight – Fold ½ cup chopped walnuts or pecans into the brownie batter
Dietary Modifications:
- Gluten-free – Substitute the all-purpose flour with a 1:1 gluten-free baking flour blend
- Reduce sugar – You can reduce the sugar in the brownie layer by ¼ cup if you prefer less-sweet brownies, though texture will be slightly affected
Texture Preferences:
- Extra fudgy – Reduce baking time by 2-3 minutes and refrigerate before serving
- Cakey brownies – Add an extra 2 tablespoons of flour and bake for the full 38 minutes
- Thicker bars – Use an 8×8 or 9×9 pan and increase baking time to 45-50 minutes
Pro Chef Tips
Temperature control is everything: One of the biggest secrets to perfect zebra brownies is temperature management. When you melt the chocolate and butter, let it cool for 5-10 minutes before adding eggs. If it’s too hot, you’ll cook the eggs and create scrambled egg bits in your brownies – not appetizing! Room temperature eggs blend more easily and create a smoother batter.
Quality chocolate matters: Since chocolate is a star ingredient here, use good-quality chocolate chips or bar chocolate. Cheap chocolate can taste waxy and won’t melt as smoothly. Ghirardelli, Guittard, or Callebaut are excellent choices that won’t break the bank but will elevate your brownies significantly.
The undermixing rule: Once you add flour to the brownie batter, mix only until the flour disappears. Overmixing develops gluten, which creates tough, cakey brownies instead of fudgy ones. Use a folding motion with a rubber spatula rather than vigorous stirring.
Perfect swirling technique: Here’s the professional trick – when you swirl, insert your knife or skewer all the way to the bottom of the pan and make deliberate, smooth motions. Random swirling creates mud; purposeful swirling creates art. Think of drawing a few large figure-8s or S-shapes through the entire pan rather than lots of small swirls.
The toothpick test nuance: For fudgy brownies, you want moist crumbs on your toothpick, not wet batter but definitely not clean. The brownies will continue to set as they cool due to carryover cooking. If your toothpick comes out completely clean, you’ve actually slightly overbaked them – they’ll still taste good but won’t be as fudgy.
Cream cheese consistency: Beat your cream cheese alone first until it’s completely smooth before adding anything else. This prevents lumps. If you do get lumps, don’t panic – press the mixture through a fine-mesh sieve before dolloping it onto the brownies.
Common Mistakes to Avoid
Using cold cream cheese: This is the number one mistake! Cold cream cheese won’t blend smoothly, leaving you with lumps in your cheesecake swirl. Take it out of the refrigerator 1-2 hours before baking, or microwave it for 10-15 seconds (no more!) to soften.
Over-swirling the pattern: It’s tempting to keep swirling, but resist! Too much swirling blends the batters together into a muddy brown instead of distinct zebra stripes. Stop when you can still see clear chocolate and cream cheese sections – usually after just 6-8 deliberate swirls through the pan.
Skipping the pan liner: If you bake these directly in a greased pan without parchment paper, you’ll struggle to get clean slices and the corner pieces will stick stubbornly. The parchment overhang lets you lift the entire brownie slab out for perfect, professional-looking cuts.
Overbaking: Brownies continue cooking in the hot pan after you remove them from the oven. If you wait until the center is completely set, you’ll end up with dry, cakey brownies instead of fudgy ones. Remove them when the edges are set but the center still has a slight jiggle.
Cutting too soon: I know it’s hard to wait, but cutting into warm brownies creates a crumbly mess. Let them cool completely (at least 2 hours, or refrigerate for 1 hour) before slicing. Your patience will be rewarded with clean, beautiful cuts that show off those zebra stripes!
Not wiping the knife: For bakery-perfect squares, wipe your knife clean with a damp cloth between every single cut. Yes, it takes an extra minute, but the visual difference is dramatic.
Storage & Meal Prep
Room Temperature Storage: Zebra brownies can be stored at room temperature in an airtight container for up to 2 days. However, because of the cream cheese layer, I recommend refrigeration if your kitchen is warm or humid. Layer parchment paper between brownie layers to prevent sticking.
Refrigerator Storage: For the best texture and to keep them fresh longer, store these brownies in an airtight container in the refrigerator for up to 5 days. Many people actually prefer them cold – the texture becomes even more fudgy and the flavors intensify! Let them sit at room temperature for 10-15 minutes before serving if you prefer them less chilled.
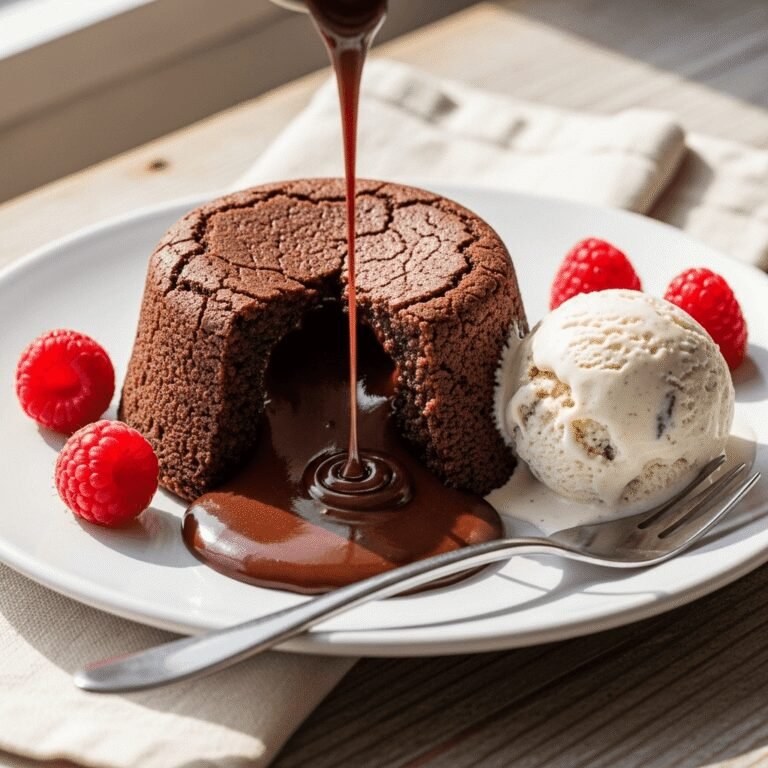
Reheating: If you want to serve these warm (which is absolutely delicious!), microwave individual brownies for 10-15 seconds, or place them in a 300°F oven for 5-7 minutes. The chocolate becomes gooey and melty – pure heaven with a scoop of vanilla ice cream!
Portioning for Meal Prep: These are perfect for meal prepping your desserts for the week. Cut them into individual portions, wrap each one in plastic wrap, then store in an airtight container or freezer bag. This way, you can grab one whenever you need a sweet treat!
Freezing for Long-Term Storage: Brownies freeze beautifully! Wrap the cooled, uncut brownie slab tightly in plastic wrap, then in aluminum foil. Or, for more convenience, cut into individual portions first, wrap each one, and freeze in a freezer-safe container. They’ll keep for up to 3 months.
Make-Ahead & Freezer Notes
Advance Preparation: These brownies are actually BETTER when made ahead! The flavors meld together beautifully overnight, and the texture becomes more fudgy. Make them up to 2 days before your event, store them covered in the refrigerator, and cut them the day you plan to serve.
Freezing Whole Pan: To freeze an entire uncut pan, let the brownies cool completely. Wrap the entire pan tightly in two layers of plastic wrap, then cover with aluminum foil. Label with the date and freeze for up to 3 months. Thaw overnight in the refrigerator, then bring to room temperature before cutting.
Freezing Individual Portions: This is my favorite method for easy grab-and-go treats! Cut the brownies into squares, wrap each one individually in plastic wrap, then place all wrapped brownies in a freezer-safe bag or container. They’ll stay fresh for 3 months, and you can thaw individual portions as needed.
Best Thawing Method: For best results, thaw frozen brownies in the refrigerator overnight. This prevents condensation and maintains the fudgy texture. If you’re in a hurry, let them sit at room temperature for 1-2 hours. You can also microwave individual frozen brownies for 20-30 seconds for a warm, gooey treat.
Make-Ahead Components: While I don’t recommend making the batters ahead separately, you can save time by measuring out your dry ingredients the night before and softening your cream cheese. This cuts down on active prep time when you’re ready to bake.
Party Planning Tip: If you’re serving these at a party, bake them 1-2 days ahead, refrigerate uncut, then slice them the morning of your event. Arrange on a serving platter and let them come to room temperature for about 30 minutes before serving for the best texture and flavor.
Serving Suggestions
Zebra brownies are delicious on their own, but here are some ways to make them even more spectacular:
Classic Pairings:
- Vanilla ice cream – The cold, creamy vanilla is the perfect complement to rich, fudgy brownies
- Fresh whipped cream – Light and airy, it balances the dense chocolate
- Fresh berries – Strawberries, raspberries, or blackberries add a tart, fresh contrast
- Hot fudge or chocolate sauce – For the ultimate chocolate lovers!
- Caramel sauce drizzle – Sweet and buttery, it adds another layer of decadence
Beverage Pairings:
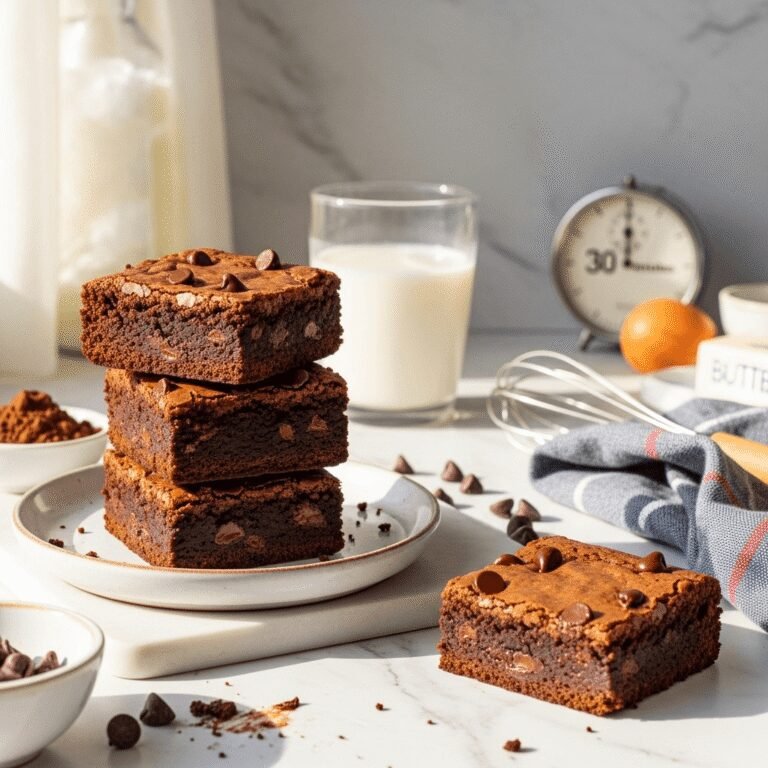
- Cold milk – The classic for a reason! Nothing beats brownies and milk
- Hot coffee – The bitter notes complement the sweet chocolate perfectly
- Hot chocolate – Go all-in on chocolate heaven
- Red wine – A bold Cabernet Sauvignon or Port pairs beautifully with rich chocolate desserts
- Espresso or cappuccino – For an elegant dessert course
Creative Presentations:
- Brownie sundaes – Top with ice cream, whipped cream, hot fudge, sprinkles, and a cherry
- Brownie trifle – Layer crumbled brownies with pudding, whipped cream, and berries in glasses
- Brownie à la mode plates – Serve warm with ice cream and garnish with fresh mint
- Dessert charcuterie – Include these on a dessert board with cookies, fruit, and chocolates
- Individual plated desserts – Place on a pool of raspberry coulis with a mint garnish for an elegant presentation
Occasion Ideas:
- Birthday parties (they’re always a hit with kids and adults!)
- Holiday gatherings (Christmas, Thanksgiving, Easter)
- Potlucks and church socials
- Bake sales (they sell out quickly!)
- Casual dinner parties
- Game day treats
FAQs Section
Can I use a different size pan?
Yes, but you’ll need to adjust baking time. For an 8×8 or 9×9 inch pan, increase baking time to 45-50 minutes as the brownies will be thicker. For a larger pan, reduce time to 28-32 minutes as they’ll be thinner. Always check with the toothpick test!
Why are my brownies cakey instead of fudgy?
This usually happens from overbaking or overmixing the batter. Make sure to remove the brownies when they still look slightly underdone in the center – they’ll continue cooking as they cool. Also, avoid mixing the batter vigorously once you add the flour.
Can I make these without a mixer?
Absolutely! You can make the brownie layer entirely by hand with a whisk. For the cream cheese layer, it’s easier with a mixer, but if your cream cheese is really soft, you can use a wooden spoon or whisk. Just make sure there are no lumps!
My cheesecake layer sank to the bottom. What went wrong?
The cheesecake mixture may have been too thin (make sure you’re using full-fat cream cheese) or the brownie batter was too thick and dense. Make sure both batters have a similar consistency – the cheesecake should be thick enough to hold its shape when dolloped. Also, avoid dropping the cheesecake dollops from too high.
Can I double this recipe?
Yes! Double all ingredients and use two 9×13 inch pans, or bake in a large sheet pan. Baking time will remain roughly the same if using two standard pans, but increase to 40-45 minutes if using a sheet pan.
How do I know when they’re done?
Insert a toothpick in the center – it should come out with moist crumbs, not wet batter, but definitely not clean. The edges should be set and pulling away slightly from the pan, while the center may still have a slight jiggle. Remember, they continue cooking as they cool!
Can I use milk chocolate or dark chocolate instead of semi-sweet?
Yes! Milk chocolate will make sweeter, less intense brownies – great for kids. Dark chocolate (60-70% cacao) creates more sophisticated, bittersweet brownies. Avoid chocolate above 70% as it can be too bitter and may not melt as smoothly.
Conclusion
There you have it – everything you need to make absolutely stunning, bakery-worthy zebra brownies right in your own kitchen! These beautiful swirled treats are proof that impressive desserts don’t have to be complicated. With just a few simple ingredients and one clever swirling technique, you can create something that looks like it came from a fancy pastry shop.
The best part about this recipe is how it combines the best of both worlds – rich, fudgy brownies and creamy, tangy cheesecake in every single bite. Whether you’re baking for a special celebration, bringing dessert to a potluck, or just treating yourself on a regular Tuesday, these brownies never disappoint. And bonus: they actually taste even better the next day, so they’re perfect for make-ahead baking!
I hope you love this recipe as much as my family does. We’ve been making these for years, and they never get old. Every time I bring them somewhere, I’m asked for the recipe – and now you have it too!
Ready to bake? Head to your kitchen and give these zebra brownies a try. Don’t forget to let them cool completely before slicing (I know, it’s torture!), and snap a photo of your beautiful creation before everyone devours them.
I’d love to hear from you! After you make these, come back and leave a comment telling me how they turned out. Did you try any of the variations? What did your family think? And if you share your zebra brownies on Pinterest or Instagram, tag me so I can see your gorgeous creation!
Happy baking, friends! 🍫✨