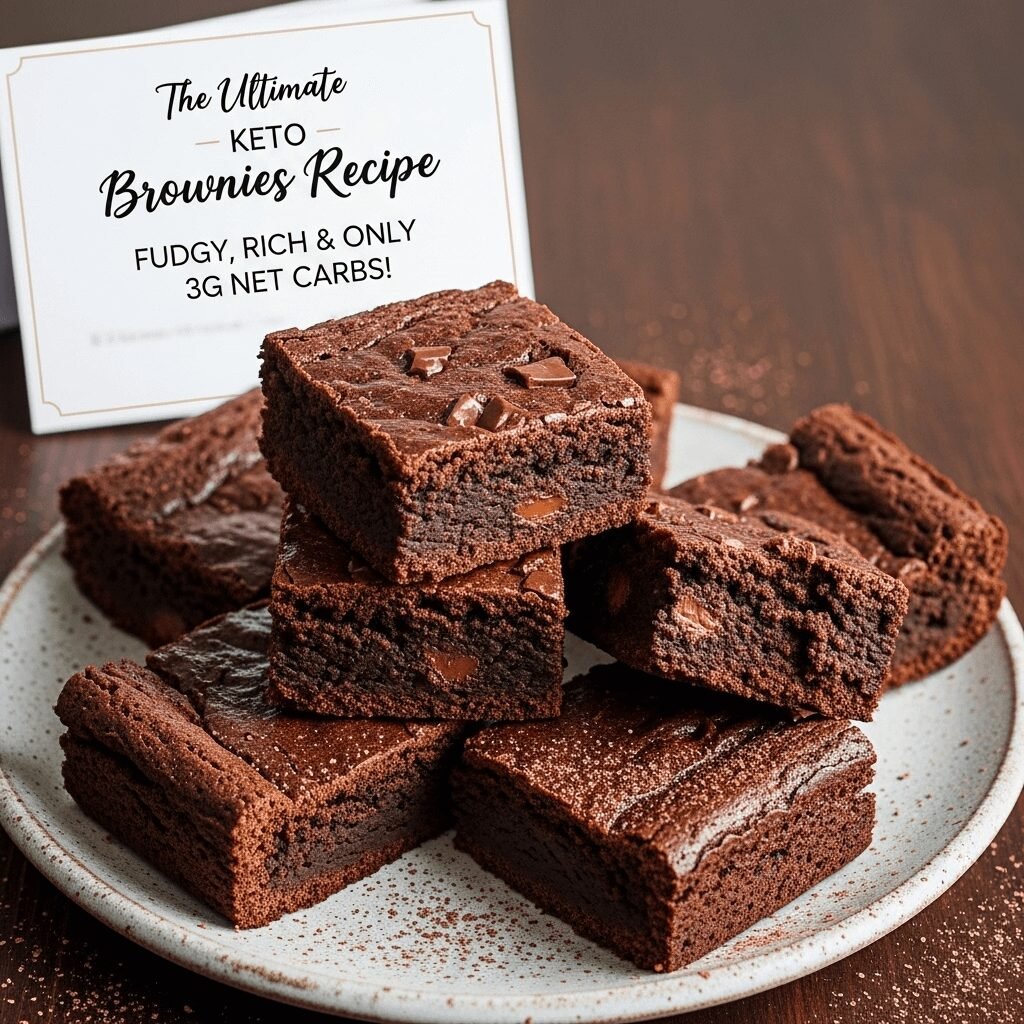
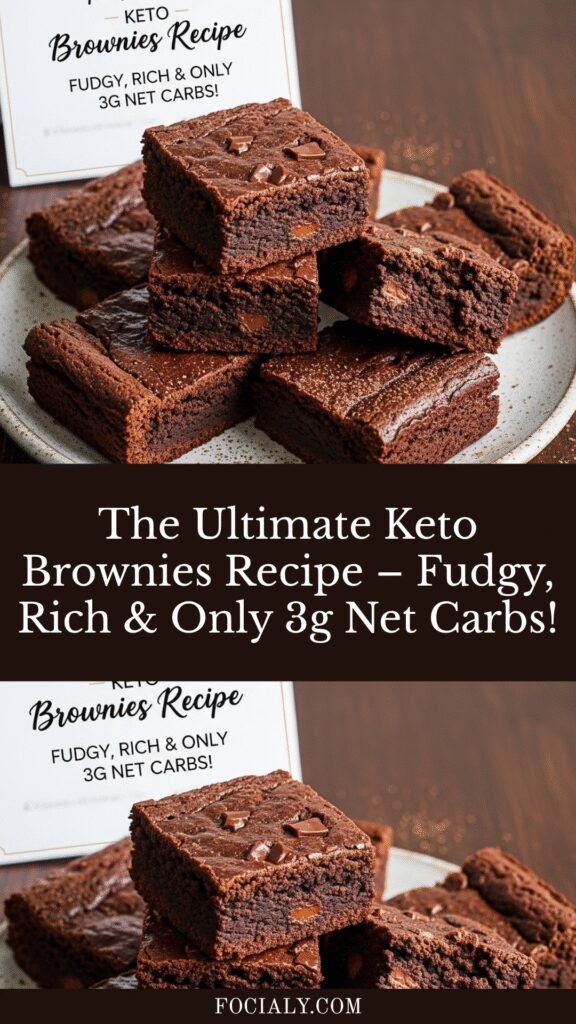
The Ultimate Keto Brownies Recipe – Fudgy, Rich & Only 3g Net Carbs!
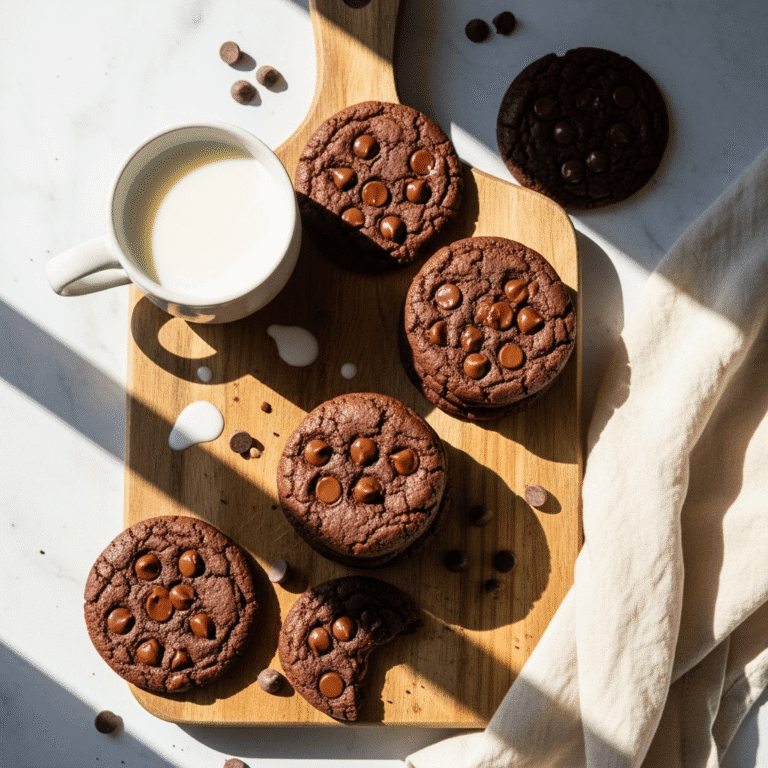
If you’ve been craving rich, fudgy brownies but thought they were off-limits on your keto journey, I have the most amazing news for you! These Keto Brownies are everything you love about traditional brownies – that deep chocolate flavor, the perfectly crackly top, and that dense, fudgy center – but without all the sugar and carbs that usually come with them.
What makes these brownies truly special is that they don’t taste “diet-y” at all. Your non-keto family members won’t even realize they’re eating a low-carb dessert! They’re perfect for satisfying those chocolate cravings, serving at parties (yes, keto desserts can be party-worthy!), packing in lunchboxes, or simply enjoying as an afternoon treat with your coffee. Whether you’re strictly keto, simply reducing carbs, or just looking for a healthier brownie option, this recipe is going to become your new go-to chocolate fix.
These brownies are incredibly versatile too – serve them warm with a dollop of sugar-free whipped cream, freeze them for a firmer texture similar to fudge, or simply enjoy them at room temperature straight from the pan. They’re rich enough that a small square is truly satisfying, making them perfect for portion control without feeling deprived.
History / Background
Brownies have been an American dessert staple since the late 19th century, with their exact origin being somewhat of a delicious mystery. The most popular legend credits a chef at Chicago’s Palmer House Hotel who created them in 1893 for the World’s Columbian Exposition. The request was for a dessert that was easier to eat than cake but more elegant than cookies – and thus, the brownie was born!
Traditional brownies are loaded with sugar, flour, and carbs – typically containing 25-30g of carbohydrates per serving. When the ketogenic diet gained mainstream popularity in the 2010s (though it was originally developed in the 1920s as a medical treatment for epilepsy), dessert lovers everywhere mourned the loss of their favorite chocolate treats.
But the keto community is nothing if not creative! Home bakers and food bloggers began experimenting with alternative flours and sweeteners, determined to recreate beloved classics without the carb overload. The journey to the perfect keto brownie involved countless experiments with almond flour, coconut flour, various sugar substitutes, and different fat ratios.
What emerged was something remarkable – brownies that not only fit perfectly into a ketogenic lifestyle but often tasted even better than their high-carb counterparts. The higher fat content required by keto baking actually produces an incredibly fudgy, rich texture that traditional brownies can sometimes lack. Using quality cocoa powder and sugar-free chocolate creates an intense chocolate flavor that’s truly addictive.
Today, keto brownies have become one of the most searched and beloved recipes in the low-carb community, proving that you absolutely don’t have to sacrifice dessert to maintain a healthy, low-carb lifestyle. They’ve helped countless people stick to their health goals without feeling deprived, and they’ve shown up at potlucks and family gatherings where they’re devoured by keto and non-keto folks alike!
Why You’ll Love This Recipe
These Keto Brownies have become my most-requested dessert recipe for good reason. They deliver everything you want in a brownie – that intense chocolate flavor, fudgy texture, and satisfying richness – while keeping your macros in check. Let me tell you why this recipe is about to become your new favorite:
First, these brownies are incredibly simple to make. Unlike some keto baking that requires precise measurements and complicated techniques, this recipe is forgiving and straightforward. If you can stir ingredients together in a bowl, you can make these brownies. There’s no mixer required, no fancy techniques, and definitely no culinary degree needed!
Here’s why you’ll absolutely love this recipe:
- Seriously Fudgy Texture – These aren’t cakey brownies (unless you prefer that – I’ll show you how to adjust!). They’re dense, fudgy, and incredibly rich, with that perfect slightly gooey center that makes brownies so irresistible.
- Only 3g Net Carbs Per Serving – Compared to traditional brownies that pack 25-30g of carbs per serving, these keep you firmly in ketosis while satisfying your chocolate cravings completely.
- No Weird Aftertaste – I’ve tested this recipe with multiple sweeteners to ensure there’s no chemical or bitter aftertaste. Just pure chocolate deliciousness that your taste buds will thank you for.
- Budget-Friendly Ingredients – While some keto recipes require expensive specialty ingredients, this one uses pantry staples that won’t break the bank. Almond flour is the priciest ingredient, but it goes a long way.
- Family-Approved – This is huge! Non-keto family members genuinely love these brownies. You’re not making a separate dessert for yourself – everyone can enjoy these together.
- Perfect for Meal Prep – Make a batch on Sunday and have dessert sorted for the entire week. They store beautifully and some would argue they taste even better after a day or two!
- Naturally Gluten-Free – No wheat flour means these are perfect for friends and family members who are gluten-sensitive or celiac.
- Customizable – Want to add sugar-free chocolate chips? Pecans? A cream cheese swirl? This recipe is your canvas for creativity!
Ingredient Notes
Let’s talk about what goes into these amazing brownies and why each ingredient matters. Understanding your ingredients will help you make substitutions when needed and troubleshoot if anything goes differently than expected.
Almond Flour – This is your base flour and the key to achieving that tender, fudgy texture. I strongly recommend using blanched, finely ground almond flour (not almond meal, which is coarser and includes skins). Bob’s Red Mill and Anthony’s are reliable brands. The finer texture gives you brownies that are closer to traditional ones. If you need a nut-free option, sunflower seed flour works, though it may turn slightly green due to a harmless chemical reaction with baking soda – still perfectly safe to eat!
Cocoa Powder – Use unsweetened, high-quality cocoa powder for the best flavor. Dutch-processed cocoa gives a darker, more mellow chocolate flavor, while natural cocoa powder is slightly more acidic and intense. Either works beautifully here! I prefer Dutch-processed for a deeper, more sophisticated chocolate taste, but I’ve made these with natural cocoa countless times with delicious results.
Erythritol or Monk Fruit Sweetener – The type of sweetener you choose significantly impacts the final texture and taste. Granulated erythritol works great but can crystallize slightly when cool. Powdered erythritol (or confectioner’s style) gives the smoothest texture. Monk fruit sweetener blends are excellent and tend to have less cooling aftertaste. I recommend Swerve or Lakanto brands. Avoid liquid sweeteners here as they’ll throw off the texture. If using straight erythritol, you might want to add a tiny pinch of stevia to boost sweetness since erythritol is only about 70% as sweet as sugar.
Butter – Real, full-fat butter is essential for that rich, decadent flavor and fudgy texture. Don’t substitute with margarine or low-fat spreads. If you’re dairy-free, coconut oil works as a 1:1 substitute, though it will add a slight coconut flavor (which honestly pairs beautifully with chocolate!). Make sure your butter is fully melted and slightly cooled before mixing with eggs.
Eggs – Eggs provide structure and help bind everything together. They should be at room temperature for best results – cold eggs can cause your melted butter to solidify into little chunks. To quickly bring eggs to room temperature, place them in a bowl of warm water for 5-10 minutes.
Sugar-Free Chocolate Chips (Optional) – Lily’s brand is my favorite for these. They use stevia and erythritol and have an excellent chocolate flavor without any weird aftertaste. ChocZero is another great option. These add extra pockets of melty chocolate throughout your brownies and make them feel even more indulgent. You can also chop up a Lily’s chocolate bar for larger chocolate chunks.
Vanilla Extract – Pure vanilla extract enhances the chocolate flavor and adds depth. Don’t skip it! Vanilla is one of those magical ingredients that makes everything taste better.
Salt – Just a pinch of salt balances the sweetness and intensifies the chocolate flavor. Even if you use salted butter, add a bit more salt to the batter.
Baking Powder – A small amount gives the brownies a slight lift and lighter texture. Too much will make them cakey rather than fudgy, so measure carefully!
Espresso Powder (Optional but Recommended) – This is my secret weapon! A tiny bit of espresso powder doesn’t make the brownies taste like coffee – instead, it amplifies and deepens the chocolate flavor. If you don’t have espresso powder, a teaspoon of very strong brewed coffee works too.
Equipment Needed
The beautiful thing about this recipe is that you don’t need any fancy equipment! Here’s everything you’ll need to make perfect keto brownies:
- 8×8-inch Baking Pan – This is the standard size for this recipe. A 9×9-inch pan will work but will give you slightly thinner brownies. Metal pans conduct heat better than glass, giving you better edge texture, but both work perfectly fine.
- Parchment Paper – Line your pan with parchment paper with some overhang on the sides. This makes removing the brownies incredibly easy and ensures clean edges. You can also use aluminum foil sprayed with cooking spray, but parchment is my preference.
- Large Mixing Bowl – For combining your dry ingredients and mixing the batter. Glass or stainless steel works great.
- Medium Mixing Bowl or Microwave-Safe Bowl – For melting your butter and chocolate if you’re not doing it on the stovetop.
- Whisk – For mixing the batter until smooth. A fork can work in a pinch, but a whisk does a better job of eliminating lumps.
- Rubber Spatula – Essential for scraping down the sides of your bowl and ensuring every bit of that delicious batter makes it into your pan.
- Measuring Cups and Spoons – Accurate measurements matter in baking! Use proper measuring cups for dry ingredients (the kind you can level off with a knife) and liquid measuring cups for liquids.
- Toothpick or Cake Tester – For checking doneness. A butter knife works in a pinch too.
- Cooling Rack – Allows air to circulate around your pan, helping the brownies cool evenly.
- Sharp Knife – For cutting your cooled brownies into perfect squares. A plastic knife actually works surprisingly well and prevents sticking!
Optional but Helpful:
- Kitchen Scale – For the most precise measurements, especially with almond flour, which can vary significantly in how it’s packed into measuring cups.
- Offset Spatula – Makes spreading the batter evenly in the pan easier.
- Electric Hand Mixer – Not necessary, but if you want an extra-smooth, well-incorporated batter, it helps!
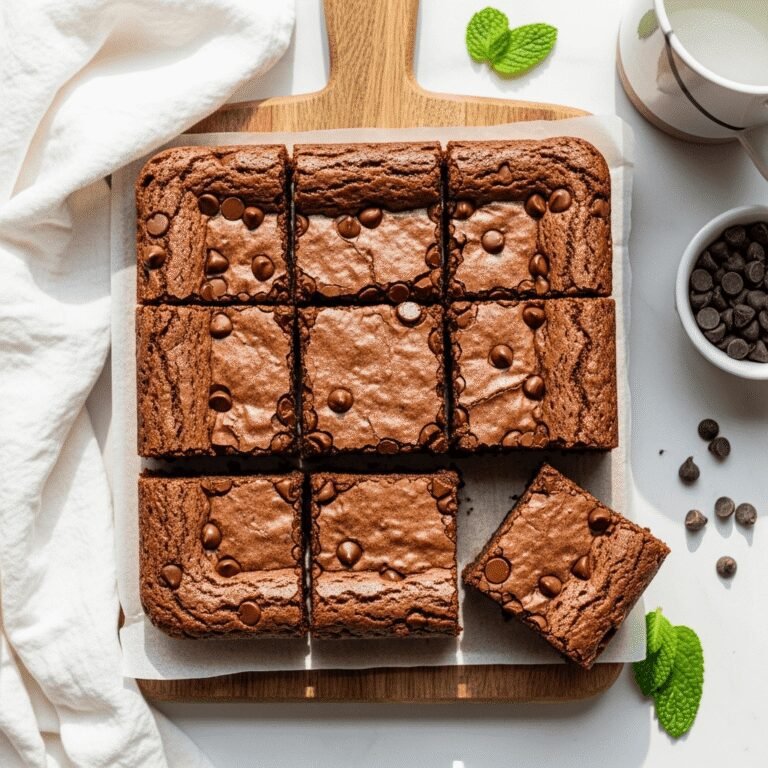
Keto Brownies Recipe

These incredibly fudgy Keto Brownies are rich, chocolatey, and absolutely indulgent with only 3g net carbs per serving! Made with almond flour and sugar-free sweetener, they’re the perfect low-carb dessert that tastes just like traditional brownies. No one will guess they’re keto!
- Prep Time: 10 minutes
- Cook Time: 25 minutes
- Total Time: 35 minutes
- Yield: 16 brownies 1x
- Category: Dessert
- Method: Baking
- Cuisine: American
- Diet: Gluten Free
Ingredients
Dry Ingredients:
- 1½ cups blanched almond flour (150g)
- ½ cup unsweetened cocoa powder (50g)
- ¾ cup granulated erythritol or monk fruit sweetener (150g)
- ½ teaspoon baking powder
- ¼ teaspoon salt
- ½ teaspoon espresso powder (optional but recommended)
Wet Ingredients:
- ½ cup unsalted butter, melted (113g / 1 stick)
- 3 large eggs, room temperature
- 2 teaspoons pure vanilla extract
Mix-ins (Optional):
- ½ cup sugar-free chocolate chips (Lily’s or ChocZero brand)
- ½ cup chopped pecans or walnuts
Instructions
Step 1: Prepare Your Pan and Preheat Preheat your oven to 350°F (175°C). Line an 8×8-inch baking pan with parchment paper, leaving an overhang on two opposite sides for easy removal. Spray lightly with cooking spray or brush with butter. This preparation step is crucial for achieving clean edges and easy removal!
Step 2: Mix Dry Ingredients In a large mixing bowl, whisk together the almond flour, cocoa powder, erythritol, baking powder, salt, and espresso powder (if using). Make sure to break up any lumps in the almond flour or cocoa powder. Whisk thoroughly for about 30 seconds until everything is evenly combined and uniform in color. This ensures your sweetener and leavening agent are evenly distributed.
Step 3: Combine Wet Ingredients In a separate medium bowl, whisk together the melted butter (make sure it’s not too hot), eggs, and vanilla extract. Whisk vigorously for about 1 minute until the mixture is smooth, slightly thickened, and well emulsified. The mixture should look glossy and cohesive, not separated.
Step 4: Combine Wet and Dry Pour the wet ingredients into the bowl with the dry ingredients. Using a rubber spatula or wooden spoon, fold everything together gently but thoroughly. Mix until just combined and no dry streaks remain – the batter should be thick, glossy, and smooth. Don’t overmix, but make sure there are no pockets of dry flour. The batter will be thicker than traditional brownie batter – this is exactly what you want!
Step 5: Add Optional Mix-ins If using chocolate chips or nuts, fold them into the batter now, reserving a small handful to sprinkle on top for a prettier presentation.
Step 6: Transfer to Pan Pour the batter into your prepared pan. Use your spatula to spread it evenly into all corners and smooth the top. The batter will be quite thick, so take your time spreading it evenly – this ensures even baking. Tap the pan gently on the counter a few times to release any air bubbles. If you reserved some chocolate chips or nuts, sprinkle them on top now.
Step 7: Bake Bake in the preheated oven for 23-27 minutes. The brownies are done when the edges are set and pulling away slightly from the pan, the top has a beautiful crackly appearance, and a toothpick inserted 1-2 inches from the edge comes out with a few moist crumbs (but not wet batter). The very center might look slightly underdone – that’s perfect! Remember, brownies continue cooking as they cool. For fudgier brownies, err on the side of underbaking slightly.
Step 8: Cool Completely This is the hardest step – waiting! Remove the pan from the oven and place it on a cooling rack. Let the brownies cool in the pan for at least 30 minutes before attempting to remove them. For the fudgiest texture and cleanest cuts, allow them to cool completely (about 2 hours) or even refrigerate for 1 hour. The longer they cool, the easier they are to cut cleanly.
Step 9: Cut and Serve Using the parchment paper overhang, carefully lift the entire brownie slab out of the pan and place it on a cutting board. Using a sharp knife (wipe it clean between cuts for the neatest squares), cut into 16 equal squares. For the cleanest cuts, you can also use a plastic knife, which prevents sticking!
Notes
- Measuring Almond Flour: Spoon the almond flour into your measuring cup and level it off with a knife. Don’t pack it down, or you’ll end up with too much flour and dry brownies. Better yet, use a kitchen scale for precision.
- Sweetener Notes: If using erythritol and you find it has a cooling aftertaste, try powdered erythritol (confectioner’s style) or add a tiny pinch of stevia extract to enhance sweetness. Different brands vary in sweetness, so taste your batter (it’s safe to eat raw) and adjust if needed.
- Fudgy vs. Cakey: For extra-fudgy brownies, slightly underbake and use the full amount of butter. For cakier brownies, bake an extra 2-3 minutes and reduce butter to 6 tablespoons.
- Don’t Skip Cooling: These brownies are very delicate when warm and will firm up significantly as they cool. Cutting them too early will result in a mess! Trust the process.
- Altitude Adjustments: If you’re at high altitude (over 3,000 feet), reduce baking powder to ¼ teaspoon and increase oven temperature by 15-25°F.
- Dairy-Free Option: Replace butter with an equal amount of coconut oil (melted and slightly cooled). This adds a subtle coconut flavor that complements the chocolate beautifully.
- Make Them Look Professional: For bakery-style brownies with a shiny top, whisk the eggs and butter together vigorously for 2-3 minutes before adding to the dry ingredients. This incorporates air and creates that classic crackly, shiny top.
Nutrition
- Serving Size: 1 brownie (1/16 of recipe)
- Calories: 142
- Sugar: 1g
- Sodium: 65mg
- Fat: 13g
- Saturated Fat: 5g
- Unsaturated Fat: 7g
- Trans Fat: 0g
- Carbohydrates: 6g
- Fiber: 3g
- Protein: 4g
- Cholesterol: 48mg
Note: Nutrition information is calculated using powdered erythritol, which is not included in net carb calculations as it doesn’t impact blood sugar. If using other sweeteners, carb counts may vary. Nutrition facts are estimates and can vary based on specific brands used.
Tips & Variations
One of the best things about this brownie recipe is how adaptable it is! Here are some of my favorite ways to customize these brownies to suit your preferences:
Peanut Butter Swirl Brownies: Before baking, drop spoonfuls of natural peanut butter (or almond butter) on top of the batter and swirl gently with a butter knife. Add 2-3g net carbs per serving.
Mint Chocolate Brownies: Add ½ teaspoon peppermint extract to the batter along with the vanilla. Top with sugar-free dark chocolate and let it melt over the warm brownies for a mint-chocolate ganache effect!
Cream Cheese Swirl: Beat 4 oz softened cream cheese with 2 tablespoons sweetener and 1 egg yolk. Drop spoonfuls over the brownie batter and swirl. This creates a gorgeous marbled effect and adds tangy richness.
Salted Caramel Brownies: Drizzle sugar-free caramel sauce over the brownies before baking and sprinkle with flaky sea salt. Heavenly!
Double Chocolate Chunk: Chop up a Lily’s chocolate bar into large chunks instead of using chips for bigger pockets of melty chocolate.
Brownie Sundae: Serve warm brownies with a scoop of low-carb vanilla ice cream, sugar-free whipped cream, and a few fresh raspberries for a restaurant-quality dessert.
Espresso Brownies: Increase the espresso powder to 1 tablespoon for a pronounced coffee-chocolate flavor that’s incredibly sophisticated.
Coconut Brownies: Add ½ cup unsweetened shredded coconut to the batter and top with more coconut before baking for a twist on Almond Joy.
Raspberry Brownies: Gently fold in ½ cup fresh or frozen raspberries (thawed and patted dry) for a fruity twist. The tartness perfectly balances the rich chocolate.
Individual Brownie Cups: Divide batter among 12 lined muffin cups and bake for 15-18 minutes for portable, portion-controlled brownies perfect for lunch boxes.
Spicy Mexican Brownies: Add ½ teaspoon cinnamon and ¼ teaspoon cayenne pepper to the dry ingredients for a warming kick.
Protein-Packed Brownies: Add 2 scoops of chocolate protein powder and reduce almond flour to 1 cup. You may need to add 1-2 tablespoons of almond milk to maintain the right consistency.
Pro Chef Tips
Want bakery-quality brownies? Here are my professional secrets:
Room Temperature Ingredients Are Key: Eggs and butter should be at similar temperatures so they emulsify properly. Cold eggs mixed with warm butter create lumps, while room-temperature ingredients blend into a silky, uniform batter that bakes more evenly.
The Toothpick Test Location Matters: Always test doneness 1-2 inches from the edge, never in the very center. The center should still look slightly underdone when you remove the pan from the oven – carryover cooking will finish the job as they cool.
Create That Crackly Top: The signature crackly, shiny brownie top comes from properly beaten eggs. Whisk your eggs vigorously with the melted butter for 2-3 minutes before adding to the dry ingredients. This incorporates air and creates that beautiful glossy crust.
Low and Slow for Maximum Fudginess: If you have time, bake at 325°F for 30-35 minutes instead. The lower temperature allows the brownies to set more slowly, creating an even denser, fudgier texture throughout.
The Refrigerator Is Your Friend: For the cleanest cuts and fudgiest texture, refrigerate your brownies for at least an hour before cutting. Cold brownies slice beautifully with sharp, clean edges. Let them come back to room temperature (or eat them cold – they’re amazing that way too!).
Sift Your Cocoa Powder: Cocoa powder tends to clump. Sifting it with the other dry ingredients ensures no bitter pockets of pure cocoa in your brownies and creates a smoother batter.
Don’t Over-Grease Your Pan: Too much cooking spray or butter can cause the edges to fry rather than bake, creating overly crispy edges. A light coating on your parchment paper is plenty.
Know Your Oven: All ovens are different! If your brownies consistently overbake or underbake, get an oven thermometer. I’ve found many ovens run 25°F hotter or cooler than the dial indicates.
Use Quality Chocolate: If you’re adding chocolate chips or making a ganache topping, use the best quality sugar-free chocolate you can afford. Lily’s Extra Dark is exceptional and has a deep, complex chocolate flavor.
The “Thwack” Test: When brownies are done, gently shake the pan. The center should still jiggle very slightly, like set Jell-O. If it’s completely firm, they’re overdone. If it jiggles like liquid, give them more time.
Common Mistakes to Avoid
Even experienced bakers make mistakes with brownies! Here are the most common issues and how to prevent them:
Mistake #1: Cutting Them Too Soon I know it’s torture to wait, but cutting brownies while they’re still warm is the quickest path to a crumbly mess. Brownies need time to firm up as they cool. The fats solidify, the structure sets, and everything comes together perfectly. Wait at least 30 minutes, preferably until completely cool. If you absolutely must have a warm brownie, scoop one out with a spoon rather than trying to cut neat squares!
Mistake #2: Overbaking This is the number one reason brownies turn out dry and cakey instead of fudgy. Remember, erythritol-based keto baked goods can go from perfectly done to overdone very quickly. Set your timer for the minimum baking time and check frequently. When in doubt, slightly underbake – you can always pop them back in for a minute or two, but you can’t undo overbaking.
Mistake #3: Using Almond Meal Instead of Almond Flour Almond meal (made from almonds with skins on, ground coarsely) will give you gritty, denser brownies with dark specks throughout. You want finely ground, blanched almond flour for the smoothest, most brownie-like texture. The fine texture mimics all-purpose flour much better.
Mistake #4: Not Measuring Almond Flour Correctly Almond flour compacts easily, so scooping it directly with your measuring cup can result in using 20-30% more flour than intended, leading to dry, crumbly brownies. Always spoon it into your measuring cup and level it off, or better yet, use a kitchen scale. One cup should weigh about 100-110g depending on the brand.
Mistake #5: Skipping the Parchment Paper Even if your pan is non-stick, parchment paper is essential for easy removal and clean edges. Trying to cut brownies in the pan is messy, and flipping the entire pan to remove them risks breakage. The parchment overhang makes lifting them out effortless.
Mistake #6: Using Too Large a Pan If you use a 9×13 pan instead of an 8×8, your brownies will be thin, dry, and overbake quickly. Pan size truly matters for achieving the right thickness and texture. If you want to double the recipe, use a 9×13 pan. For the standard recipe, stick with 8×8.
Mistake #7: Not Letting Ingredients Come to Room Temperature Cold eggs mixed into melted butter can cause the butter to seize and form little clumps throughout your batter. This creates an uneven texture. Take eggs out of the fridge 30 minutes before baking, or place them in warm water for 10 minutes.
Storage & Meal Prep
One of the best things about these keto brownies is how well they store, making them perfect for meal prep and make-ahead desserts!
Room Temperature Storage: These brownies will keep at room temperature in an airtight container for 3-4 days. Layer them with parchment paper to prevent sticking. Room temperature storage keeps them at their fudgiest! However, if your kitchen is very warm (over 75°F), they might get a bit too soft and are better refrigerated.
Refrigerator Storage: For longer storage, refrigerate brownies in an airtight container for up to 10 days. They’ll become firmer and even fudgier when chilled – almost fudge-like in texture. Some people actually prefer them cold! Let them sit at room temperature for 10-15 minutes before serving if you prefer a softer texture, or eat them straight from the fridge for a firmer, candy-bar-like experience.
Preventing Sticking: Layer brownies between sheets of parchment paper or wax paper when storing to prevent them from sticking together. You can also wrap individual brownies in plastic wrap for grab-and-go portions throughout the week.
Reheating Tips: These brownies are delicious at any temperature, but if you want to recreate that fresh-from-the-oven experience:
- Microwave Method: Heat individual brownies for 10-15 seconds. Be careful not to overheat, as they can become tough.
- Oven Method: Wrap brownies in foil and warm in a 300°F oven for 5-7 minutes for that just-baked texture.
- Toaster Oven: Perfect for reheating 1-2 brownies without firing up your full oven. 2-3 minutes at 300°F does the trick.
Portioning for Meal Prep: Cut your brownies into 16 pieces and store 4 brownies per container for easy grab-and-go treats throughout the week. This prevents you from having to cut brownies multiple times and keeps them fresher.
Make-Ahead & Freezer Notes
These brownies are incredibly freezer-friendly, making them perfect for meal prep and always having a keto dessert on hand!
Make-Ahead Instructions: You can make the batter up to 24 hours in advance and store it covered in the refrigerator. Let it sit at room temperature for 15-20 minutes before spreading in the pan and baking – cold batter spreads more easily but may need an extra 2-3 minutes of baking time. This is perfect if you want to prep on a weeknight and bake fresh brownies for weekend guests!
Freezing Baked Brownies: These brownies freeze beautifully for up to 3 months! Here’s my foolproof method:
- Let brownies cool completely (this is crucial – any warmth creates condensation and ice crystals).
- Cut into individual portions.
- Wrap each brownie individually in plastic wrap, pressing out as much air as possible.
- Place wrapped brownies in a freezer-safe container or freezer bag with all the air pressed out.
- Label with the date!
Freezing the Entire Batch: Alternatively, you can freeze the entire uncut brownie slab. Line a freezer-safe container with parchment, place the whole brownie inside, cover with another layer of parchment, and seal tightly. This method keeps them extra fresh and prevents freezer burn.
Thawing and Serving:
- Room Temperature Thawing: Remove brownies from the freezer and let them thaw at room temperature for 2-3 hours. They’ll be perfectly fudgy and soft.
- Refrigerator Thawing: For a slower thaw, move them to the refrigerator overnight. This method prevents any condensation.
- Quick Thaw: Unwrap and microwave frozen brownies for 20-30 seconds for a warm, just-baked taste. Perfect when you need a chocolate fix RIGHT NOW!
- Frozen Treat: Some people love eating these straight from the freezer! They have an amazing fudge-like, almost truffle-like texture when frozen solid.
Pro Freezer Tip: Freeze brownies on a parchment-lined baking sheet for 1-2 hours first (flash freezing), then transfer to a container. This prevents them from sticking together and allows you to grab just one or two at a time without thawing the whole batch.
Freeze Unbaked Batter? While you technically can freeze the batter, I don’t recommend it. The leavening agents can lose potency, and the texture might be slightly different. It’s much better to freeze baked brownies – they maintain their perfect texture and flavor beautifully!
Serving Suggestions
These keto brownies are delicious on their own, but here are some amazing ways to serve them that will take them to the next level:
Classic Dessert Pairings:
- À La Mode: Serve warm brownies with a scoop of low-carb vanilla ice cream (Rebel or Enlightened brands are excellent) for a restaurant-quality dessert.
- With Coffee: These brownies pair beautifully with black coffee, bulletproof coffee, or a rich espresso. The bitter notes of coffee complement the sweet chocolate perfectly.
- Whipped Cream: A generous dollop of sugar-free whipped cream (homemade or store-bought) adds a light, creamy contrast to the dense, fudgy brownies.
Elevated Presentations:
- Brownie Sundae Bar: Set out warm brownies with various toppings like sugar-free whipped cream, sugar-free caramel sauce, chopped nuts, sugar-free chocolate chips, and fresh berries. Let everyone build their own sundae!
- Ganache-Topped: Melt ½ cup sugar-free chocolate chips with 2 tablespoons heavy cream and pour over cooled brownies for an elegant, glossy finish.
- Dusted with Powdered Sweetener: Lightly dust with powdered erythritol through a fine-mesh sieve for a pretty, bakery-style presentation.
- With Fresh Berries: Serve alongside fresh raspberries, strawberries, or blackberries. The tartness of berries balances the rich chocolate beautifully and adds a pop of color.
Beverage Pairings:
- Red Wine: A full-bodied red wine like Cabernet Sauvignon or Merlot pairs surprisingly well with these rich chocolate brownies.
- Keto Hot Chocolate: Make it an extra-special treat by serving with homemade keto hot chocolate topped with whipped cream.
- Herbal Tea: Mint tea or cinnamon tea provides a refreshing contrast to the dense, chocolatey brownies.
- Keto Milkshake: Blend a brownie with unsweetened almond milk, ice, and a scoop of low-carb ice cream for an incredible brownie milkshake.
Creative Serving Ideas:
- Brownie Trifle: Layer crumbled brownies with sugar-free whipped cream and sugar-free chocolate pudding in parfait glasses for an impressive layered dessert.
- Brownie Bites with Peanut Butter: Cut brownies into small squares and top each with a tiny dollop of natural peanut butter for a chocolate-peanut butter treat.
- Warmed with Butter: My personal favorite – warm a brownie
and add a small pat of butter on top. The butter melts into the warm brownie creating an incredibly rich, indulgent experience.
- Brownie Ice Cream Sandwiches: Place a scoop of low-carb ice cream between two brownie squares and wrap in parchment paper. Freeze for an hour for amazing ice cream sandwiches!
Party and Entertaining:
- Dessert Board: Include these brownies on a keto dessert board with sugar-free chocolates, macadamia nuts, berries, and keto cookies for variety.
- Plated Dessert: Serve on individual dessert plates with a raspberry coulis (puree fresh raspberries with a bit of sweetener), a mint leaf garnish, and a dusting of cocoa powder for an elegant presentation.
- Gift Giving: Wrap individual brownies in cellophane bags tied with ribbon for homemade keto-friendly gifts that anyone would appreciate!
FAQs Section
Q: Can I taste the erythritol/artificial sweetener in these brownies? A: When baked, erythritol blends beautifully into the chocolate and you really don’t notice any “artificial” taste. I recommend using powdered erythritol or Swerve/Lakanto brands, which have minimal aftertaste. The rich cocoa powder and vanilla also mask any slight cooling sensation. My non-keto family members have never detected anything unusual about the sweetener!
Q: Why are my brownies dry and crumbly instead of fudgy? A: This usually happens for one of three reasons: (1) Overbaking – keto brownies need to be slightly underbaked for that fudgy texture; (2) Too much almond flour – make sure you’re measuring correctly by spooning flour into the cup rather than scooping; (3) Your oven runs hot – try reducing temperature by 25°F next time. Remember, the brownies firm up significantly as they cool, so they should look slightly underdone when you remove them from the oven.
Q: Can I use coconut flour instead of almond flour? A: Unfortunately, no. Coconut flour absorbs much more moisture than almond flour (about 4 times as much!), so a direct substitution won’t work. If you need to use coconut flour, you’d need to use about ⅓ cup coconut flour and add extra eggs and butter, making it essentially a different recipe. For nut-free brownies, sunflower seed flour works as a 1:1 substitute for almond flour, though it may give the brownies a slight greenish tint (totally safe and normal!).
Q: My brownies have a greenish tint. Are they safe to eat? A: Yes, absolutely safe! This happens when sunflower seed flour (if you used it as a nut-free substitute) reacts with the baking powder. It’s a harmless chemical reaction called chlorogenic acid turning green when it contacts baking soda. The taste and texture are completely unaffected. You can reduce this by using cream of tartar instead of baking powder, or simply embrace the green color!
Q: How do I know when the brownies are perfectly done? A: Look for these signs: (1) Edges are set and pulling away slightly from the pan; (2) Top has a slight crackly appearance; (3) A toothpick inserted 1-2 inches from the edge comes out with a few moist crumbs (not wet batter, but not completely clean); (4) The center jiggles very slightly when you gently shake the pan. Remember, brownies continue cooking as they cool, so slightly underdone in the oven = perfect when cooled!
Q: Can I make these dairy-free? A: Yes! Replace the butter with an equal amount (½ cup) of melted coconut oil. The brownies will have a very subtle coconut flavor that actually pairs wonderfully with chocolate. Make sure the coconut oil is melted but not hot when you mix it with the eggs. Coconut oil solidifies faster than butter when cooled, so these dairy-free brownies will be extra firm from the refrigerator – let them sit at room temperature for 10 minutes before serving.
Q: Will these brownies kick me out of ketosis? A: At only 3g net carbs per brownie, these fit easily into most people’s keto macros! Most people following a ketogenic diet aim for 20-50g net carbs per day, so one brownie uses only a small portion of your daily carb allowance. Erythritol doesn’t raise blood sugar or impact ketosis for most people. However, everyone’s body is different, so if you’re concerned, you can test your blood glucose/ketones after eating one to see how your body responds.
Q: Can I double this recipe? A: Absolutely! Double all ingredients and use a 9×13-inch pan. The baking time will increase to 30-35 minutes. This is perfect for parties, meal prep, or if you just love having lots of brownies on hand (no judgment!). You can also make a double batch and freeze half for later.
Conclusion
There you have it – the ultimate keto brownie recipe that proves you absolutely don’t have to give up your favorite desserts when you’re eating low-carb! These fudgy, rich, chocolatey squares deliver everything you crave in a brownie while keeping you firmly in ketosis. At only 3g net carbs per serving, you can satisfy your sweet tooth without derailing your health goals.
What I love most about this recipe is how it brings people together. You can serve these at parties, share them with non-keto friends and family, pack them in lunchboxes, or simply enjoy them as your personal after-dinner treat. No one will ever guess they’re keto, gluten-free, and sugar-free – they’ll just think you’re an amazing baker!
The best part? Once you master this base recipe, you can customize it endlessly. Add peanut butter swirls, cream cheese layers, different nuts, sugar-free caramel – let your creativity run wild! These brownies are your canvas for creating the perfect keto dessert that suits your personal taste.
I genuinely hope this recipe becomes a staple in your keto kitchen like it has in mine. There’s something so satisfying about having a reliable dessert recipe that works every single time and makes you feel like you’re not missing out on anything.
Now it’s your turn! I’d absolutely love to hear how your brownies turn out. Did you add any fun mix-ins? Did your family devour them? Do you prefer them warm or cold? Leave a comment below and let me know! And if you loved this recipe, please give it a 5-star rating and share it on Pinterest so other keto friends can enjoy these amazing brownies too. Your support helps me keep creating delicious low-carb recipes for you!
Happy baking, and here’s to enjoying chocolate without the guilt! 🍫✨