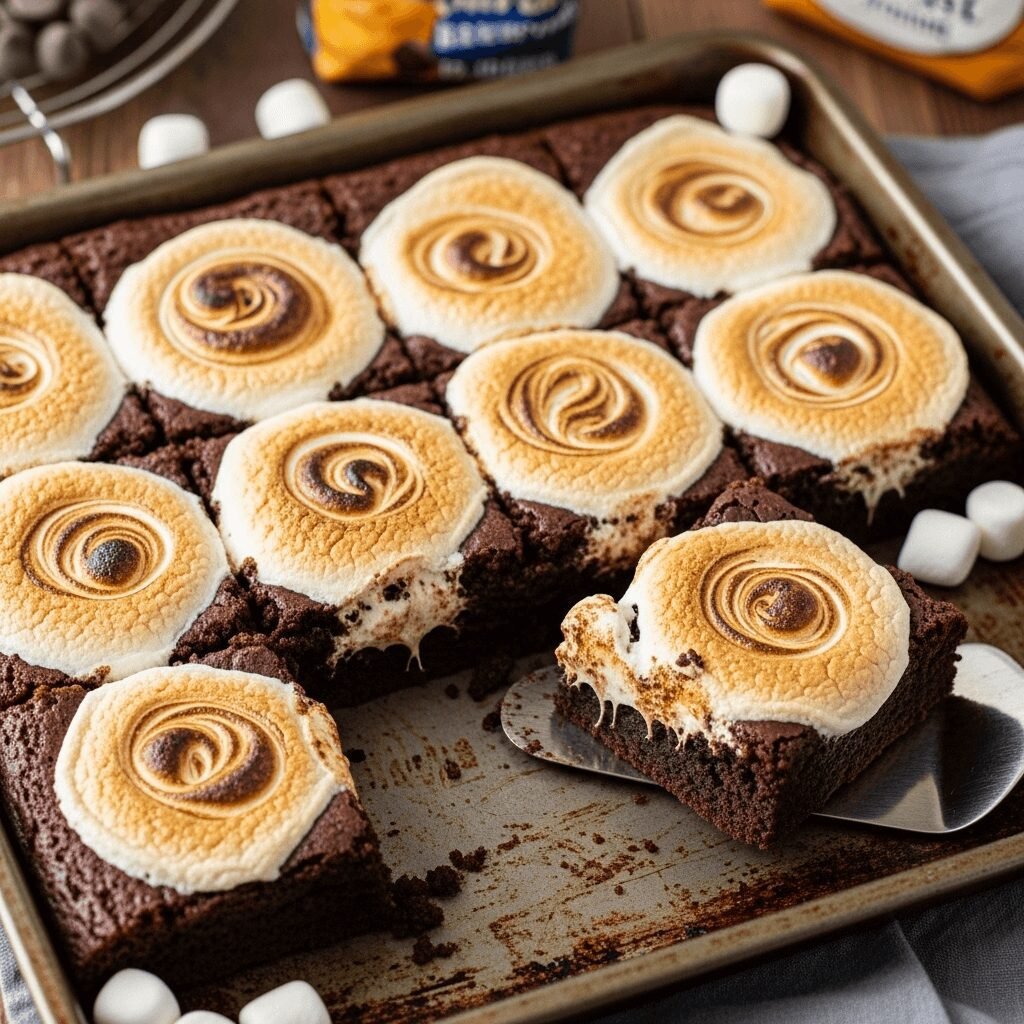
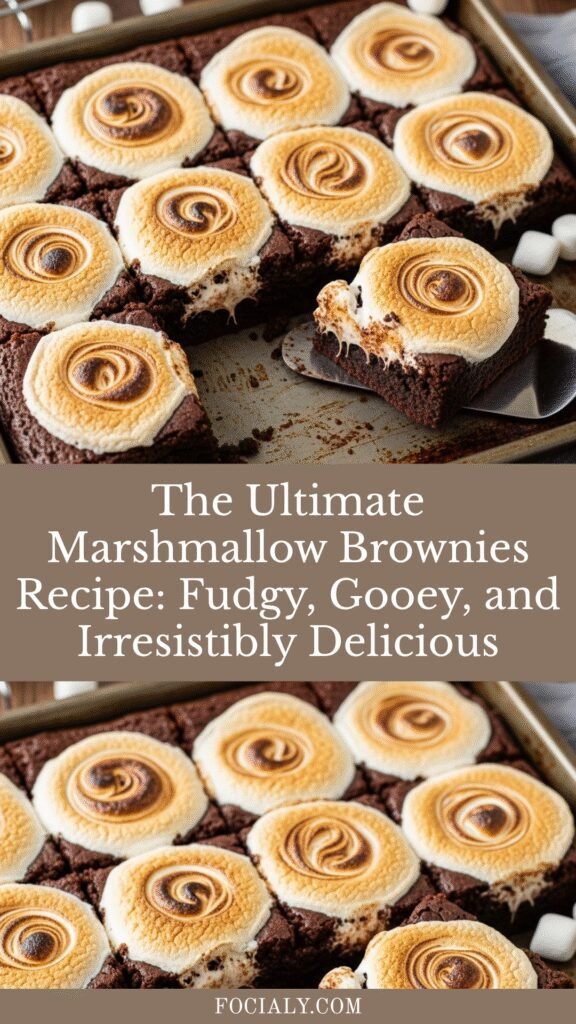
The Ultimate Marshmallow Brownies Recipe: Fudgy, Gooey, and Irresistibly Delicious
If you’ve ever dreamed of combining rich, fudgy brownies with pillowy marshmallows and a silky chocolate frosting, then these marshmallow brownies are about to become your new obsession. This decadent dessert takes classic brownies to the next level with a layer of toasted marshmallows and a glossy chocolate topping that creates the perfect balance of textures and flavors in every bite.
Perfect for potlucks, birthday parties, bake sales, or just because you deserve something special, these marshmallow brownies are guaranteed crowd-pleasers. They’re surprisingly easy to make, yet they look and taste like they came from a fancy bakery. Whether you’re serving them at a summer barbecue, holiday gathering, or bringing them to your next family reunion, these brownies will have everyone asking for the recipe.
What makes these brownies truly special is the contrast between the dense, chocolatey base, the gooey marshmallow middle, and the smooth chocolate frosting on top. Each layer complements the others perfectly, creating a dessert that’s both nostalgic and indulgent. And the best part? You don’t need to be an expert baker to pull off this impressive treat.
History & Background: A Mid-Century American Classic
Marshmallow brownies, sometimes called “frosted brownies” or “Mississippi mud brownies” (though slightly different), have been a beloved American dessert since the mid-20th century. This recipe represents the golden era of American home baking when convenience met creativity, and home cooks began experimenting with ways to elevate simple recipes into something extraordinary.
The combination of chocolate and marshmallows has deep roots in American dessert culture, dating back to when marshmallows first became commercially available in the early 1900s. However, the specific concept of marshmallow-topped brownies gained popularity in the 1950s and 1960s, when cake mixes and brownie mixes became household staples, and home bakers started getting creative with add-ins and toppings.
These brownies represent the quintessential potluck dessert that grandmothers across America perfected and passed down through generations. They were featured in community cookbooks, church fundraisers, and family recipe boxes, with each family adding their own special touch. The marshmallow layer was often made with miniature marshmallows that would melt and toast slightly under the broiler, creating a golden, sticky layer that everyone loved.
Today, marshmallow brownies remain a nostalgic favorite that bridges generations. They remind us of simpler times, school bake sales, and the joy of sharing homemade treats with the people we love. This recipe honors that tradition while ensuring foolproof results every time.
Why You’ll Love This Marshmallow Brownies Recipe
These marshmallow brownies are everything you want in a chocolate dessert and more. They deliver on flavor, texture, and visual appeal, making them perfect for both everyday treats and special occasions.
Here’s why this recipe will become your go-to brownie recipe:
- Triple-layer perfection – Dense fudgy brownies, gooey marshmallows, and silky chocolate frosting create an unforgettable texture experience
- Impressive but easy – Looks bakery-quality but uses simple ingredients and straightforward techniques
- Perfect for crowds – Makes a 9×13 pan that serves 24 people, ideal for parties and potlucks
- Kid-approved – Children absolutely love the marshmallow surprise, making this a family favorite
- Make-ahead friendly – Can be prepared a day in advance, actually tastes better the next day
- Budget-friendly – Uses affordable pantry staples without any expensive or hard-to-find ingredients
- Customizable – Easy to adapt with different frosting flavors, add-ins, or dietary modifications
- Nostalgic charm – Brings back memories of childhood while creating new ones
- No mixer required – Can be made entirely by hand, no special equipment needed
- Freezer-friendly – Freezes beautifully for up to 3 months, perfect for meal prep
Whether you’re a beginner baker or an experienced home cook, this recipe delivers consistent, delicious results every single time.
Ingredient Notes: What You’ll Need and Why
Understanding your ingredients helps you make the best marshmallow brownies possible. Here’s what goes into each layer and why it matters.
For the Brownie Base:
- Unsalted butter – Provides richness and that classic brownie texture; you can substitute with coconut oil for a dairy-free option
- Granulated sugar – Creates the shiny, crackly top and adds sweetness; don’t reduce or your brownies will be dense and bitter
- Large eggs – Bind everything together and create structure; make sure they’re room temperature for better incorporation
- Vanilla extract – Enhances the chocolate flavor; use pure vanilla, not imitation, for best results
- Unsweetened cocoa powder – The chocolate foundation; Dutch-process cocoa creates a darker, richer brownie while natural cocoa gives a more traditional flavor
- All-purpose flour – Provides structure; measure correctly by spooning into the cup and leveling off
- Salt – Balances sweetness and intensifies chocolate flavor; don’t skip it
- Baking powder – Just a touch helps create a slightly lighter texture without making them cakey
For the Marshmallow Layer:
- Mini marshmallows – Create that signature gooey middle layer; mini marshmallows melt more evenly than large ones, but you can use large marshmallows cut into pieces if needed
For the Chocolate Frosting:
- Butter – Makes the frosting smooth and spreadable
- Cocoa powder – Doubles down on chocolate flavor
- Milk – Thins the frosting to the perfect consistency; use whole milk for richest results, or substitute with heavy cream for extra decadence
- Powdered sugar – Creates a smooth, sweet frosting that sets nicely
- Vanilla extract – Rounds out the chocolate flavor
Substitution Options:
- Make them gluten-free by using a 1:1 gluten-free flour blend
- For dairy-free brownies, use coconut oil and dairy-free butter, plus almond milk in the frosting
- Substitute marshmallows with vegan marshmallows for a fully plant-based dessert
- Use dark cocoa powder for a more intense chocolate experience
Equipment Needed
You don’t need a lot of fancy equipment to make these marshmallow brownies, but having the right tools makes the process easier.
- 9×13-inch baking pan – The standard size for this recipe; metal pans conduct heat better than glass
- Parchment paper or aluminum foil – Line your pan for easy removal and cleanup
- Large mixing bowl – For combining the brownie batter
- Medium saucepan – To melt butter for both the brownies and frosting
- Whisk or wooden spoon – For mixing; no electric mixer needed
- Measuring cups and spoons – Accurate measurements are key to success
- Rubber spatula – For scraping down bowls and spreading batter evenly
- Toothpick or cake tester – To check brownie doneness
- Offset spatula (optional) – Makes frosting easier, but a butter knife works too
- Cooling rack – Allows air circulation for even cooling
Marshmallow Brownies Recipe

These irresistible marshmallow brownies feature a fudgy chocolate base, a layer of melted marshmallows, and a rich chocolate frosting. Perfect for potlucks, parties, or anytime you need a crowd-pleasing dessert that’s both impressive and easy to make.
- Prep Time: 15 minutes
- Cook Time: 35 minutes
- Total Time: 50 minutes (plus cooling time)
- Yield: 24 brownies 1x
- Category: Dessert
- Method: Baking
- Cuisine: American
- Diet: Vegetarian
Ingredients
For the Brownies:
- 1 cup (2 sticks) unsalted butter
- 2 cups granulated sugar
- 4 large eggs, room temperature
- 2 teaspoons vanilla extract
- ¾ cup unsweetened cocoa powder
- 1 cup all-purpose flour
- ½ teaspoon salt
- ½ teaspoon baking powder
For the Marshmallow Layer:
- 3 cups mini marshmallows
For the Chocolate Frosting:
- 6 tablespoons butter
- ⅓ cup unsweetened cocoa powder
- ¼ cup milk
- 3 cups powdered sugar
- 1 teaspoon vanilla extract
Instructions
Step 1: Prepare Your Pan
Preheat your oven to 350°F (175°C). Line a 9×13-inch baking pan with parchment paper, leaving an overhang on two sides for easy removal. Lightly grease the parchment with butter or cooking spray.
Step 2: Make the Brownie Batter
In a medium saucepan over low heat, melt the butter completely. Remove from heat and stir in the sugar until well combined. The mixture will look grainy—this is normal. Add the eggs one at a time, whisking well after each addition. Stir in the vanilla extract.
Step 3: Add Dry Ingredients
Sift the cocoa powder, flour, salt, and baking powder directly into the wet ingredients. Fold gently with a rubber spatula until just combined. Don’t overmix—a few small streaks of flour are okay. Overmixing creates tough, cakey brownies instead of fudgy ones.
Step 4: Bake the Brownies
Pour the batter into your prepared pan and spread evenly with a spatula. Bake for 25-28 minutes, or until a toothpick inserted in the center comes out with just a few moist crumbs (not wet batter). The brownies will continue cooking as they cool, so slightly underbaking ensures fudgy texture.
Step 5: Add the Marshmallow Layer
Remove the brownies from the oven and immediately sprinkle the mini marshmallows evenly over the hot surface. Return to the oven for 2-3 minutes, just until the marshmallows puff up and begin to melt. Don’t leave them too long or they’ll turn golden brown (unless you prefer that look!). Remove and let cool while you make the frosting.
Step 6: Prepare the Chocolate Frosting
In a medium saucepan, melt the butter over low heat. Whisk in the cocoa powder until smooth. Remove from heat and add the milk, stirring to combine. Gradually add the powdered sugar, one cup at a time, whisking until smooth and glossy. Stir in the vanilla extract.
Step 7: Frost and Cool
While the marshmallow layer is still slightly warm and sticky, pour the frosting over the top. Use an offset spatula to spread it evenly, working quickly before the frosting sets. The warmth helps the frosting spread smoothly and creates a beautiful glossy finish. Let the brownies cool completely at room temperature (about 2 hours) or refrigerate for 30-45 minutes to speed up the process.
Step 8: Cut and Serve
Once completely cool, use the parchment overhang to lift the entire brownie slab out of the pan. Place on a cutting board and use a sharp knife (wiped clean between cuts) to slice into 24 squares. For cleanest cuts, chill the brownies before slicing.
Notes
- Room temperature eggs mix more smoothly and create a better texture. Set them out 30 minutes before baking.
- Don’t overbake – The toothpick should have moist crumbs, not come out completely clean, for fudgy brownies.
- Work quickly with frosting – It sets as it cools, so spread it while still warm and pourable.
- For cleaner cuts, refrigerate brownies for 30 minutes before slicing, and use a hot knife (run under hot water and wipe dry between cuts).
- Marshmallow alternatives – If you can’t find mini marshmallows, cut regular marshmallows in half with kitchen scissors sprayed with cooking spray.
Nutrition
- Serving Size: 1 brownie (1/24 of recipe)
- Calories: 245
- Sugar: 32g
- Sodium: 85mg
- Fat: 11g
- Saturated Fat: 7g
- Unsaturated Fat: 3g
- Trans Fat: 0g
- Carbohydrates: 37g
- Fiber: 1g
- Protein: 3g
- Cholesterol: 55mg
Tips & Variations: Make It Your Own
Flavor Variations:
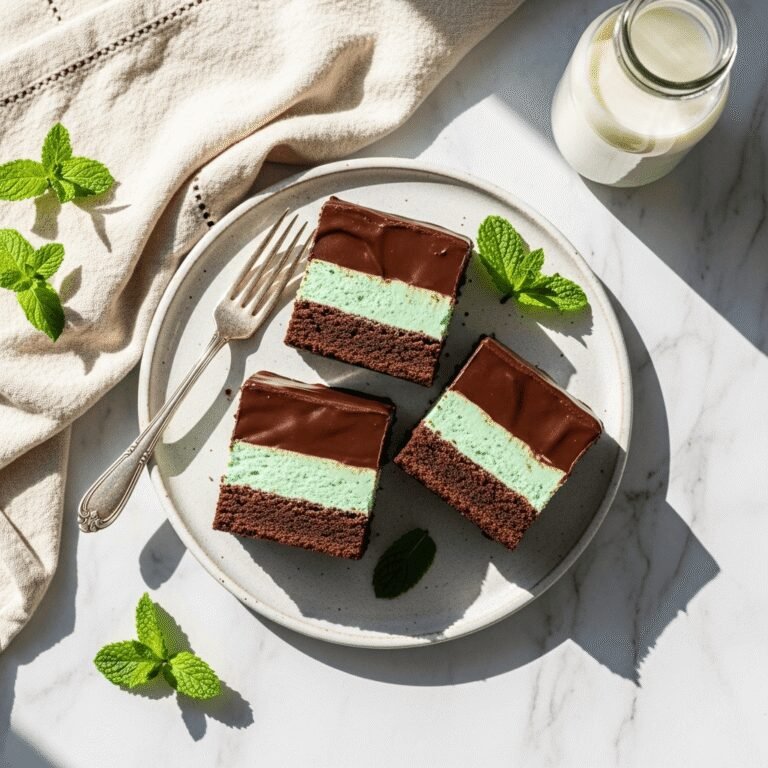
- Mint chocolate – Add ½ teaspoon peppermint extract to the brownie batter and use green food coloring in the marshmallow layer for festive holiday brownies
- Peanut butter swirl – Swirl ½ cup melted peanut butter into the brownie batter before baking
- Espresso brownies – Add 2 teaspoons instant espresso powder to enhance the chocolate flavor
- Rocky road – Mix chopped nuts and chocolate chips with the marshmallows
- S’mores style – Add crushed graham crackers between the brownie and marshmallow layers
Dietary Modifications:
- Gluten-free – Use certified gluten-free 1:1 flour blend and ensure your cocoa powder is gluten-free
- Dairy-free – Replace butter with coconut oil and use almond milk in the frosting
- Reduced sugar – Use a sugar substitute designed for baking, though texture may vary slightly
Texture Adjustments:
- For cakier brownies, add an extra egg and increase baking powder to 1 teaspoon
- For extra fudgy brownies, reduce flour to ¾ cup
- For crackly tops, beat the sugar and eggs vigorously for 2-3 minutes
Pro Chef Tips for Perfect Marshmallow Brownies
1. Temperature is everything – Room temperature eggs incorporate better and create a smoother batter. Cold eggs can cause the melted butter to seize and create a grainy texture.
2. Don’t skip the parchment – Lining your pan makes removal foolproof and cleanup effortless. The overhang acts as handles for easy lifting.
3. Use quality cocoa powder – Since chocolate flavor is paramount, invest in good cocoa. Dutch-process creates deeper flavor, while natural cocoa provides classic brownie taste.
4. The toothpick test is crucial – Pull brownies when the toothpick has moist crumbs, not when it’s completely clean. Carryover cooking will finish the job as they cool.
5. Frost while warm – Spreading frosting over slightly warm marshmallows helps it glide smoothly and creates better adhesion. The warmth also gives that gorgeous glossy finish.
6. Chill before cutting – Cold brownies slice much cleaner than room temperature ones. Pop them in the fridge for 20-30 minutes for bakery-perfect squares.
7. Hot knife trick – Run your knife under hot water, dry it off, then make your cut. Wipe clean and repeat for each cut. This prevents dragging and creates clean edges.
Common Mistakes to Avoid
Mistake #1: Overmixing the batter
Once you add the dry ingredients, mix just until combined. Overmixing develops gluten, creating tough, cakey brownies instead of fudgy ones. A few flour streaks are perfectly fine.
Mistake #2: Overbaking
This is the #1 brownie killer. Brownies continue cooking after you remove them from the oven. Pull them when they still look slightly underdone in the center. They’ll firm up as they cool.
Mistake #3: Skipping the cooling time
I know it’s tempting, but cutting warm brownies creates a messy disaster. Let them cool completely (or chill them) for clean, professional-looking squares.
Mistake #4: Using old leavening agents
Check your baking powder’s expiration date. Old baking powder won’t give you that perfect texture and can affect rise.
Mistake #5: Letting marshmallows brown too much
Watch carefully when you return the pan to the oven. You want puffy, melted marshmallows, not golden brown ones (unless that’s your preference!). Two to three minutes is usually perfect.
Storage & Meal Prep
Room Temperature Storage:
Store marshmallow brownies in an airtight container at room temperature for up to 4 days. Place parchment paper between layers if stacking to prevent sticking. They’ll stay fudgy and delicious.
Refrigerator Storage:
For longer storage, keep brownies in the refrigerator for up to 1 week. Store in an airtight container or cover tightly with plastic wrap. Let them sit at room temperature for 15-20 minutes before serving for best texture and flavor.
Preventing Sogginess:
Make sure brownies are completely cool before covering, or condensation will make them soggy. If transporting, keep them uncovered until you arrive at your destination.
Reheating Tips:
While delicious cold or at room temperature, you can microwave individual brownies for 10-15 seconds to enjoy them warm. The marshmallow layer gets extra gooey and irresistible!
Gifting and Transport:
These brownies travel beautifully. Keep them in the baking pan covered with foil, or arrange individual brownies in a decorative tin with parchment paper between layers.
Make-Ahead & Freezer Notes
Make-Ahead Instructions:
These brownies actually taste better the next day as the flavors meld and the texture becomes even fudgier. Make them a full day ahead and store covered at room temperature. They’ll be perfect when you need them.
You can also bake the brownie base up to 2 days ahead, wrap tightly, and refrigerate. When ready to serve, warm slightly in a 300°F oven for 5 minutes, add marshmallows and complete the recipe as directed.
Freezing Instructions:
Marshmallow brownies freeze exceptionally well for up to 3 months. Freeze the entire uncut slab or individual brownies:
To freeze the whole batch: Let brownies cool completely. Wrap the entire pan tightly in plastic wrap, then aluminum foil. Alternatively, remove from pan using parchment overhang, wrap tightly, and freeze.
To freeze individual brownies: Cut into squares and place on a baking sheet in the freezer until solid (about 1 hour). Transfer frozen brownies to a freezer bag or airtight container with parchment between layers.
Thawing Instructions:
For best results, thaw brownies overnight in the refrigerator, then bring to room temperature before serving. For faster thawing, leave at room temperature for 2-3 hours. Individual brownies can be microwaved from frozen for 20-30 seconds.
Pro tip: Freeze unfrosted brownies (with marshmallow layer) and make fresh frosting when ready to serve for the absolute best texture and appearance.
Serving Suggestions: What Goes With Marshmallow Brownies
These decadent brownies are delicious on their own, but here are some ideas to elevate your dessert experience:
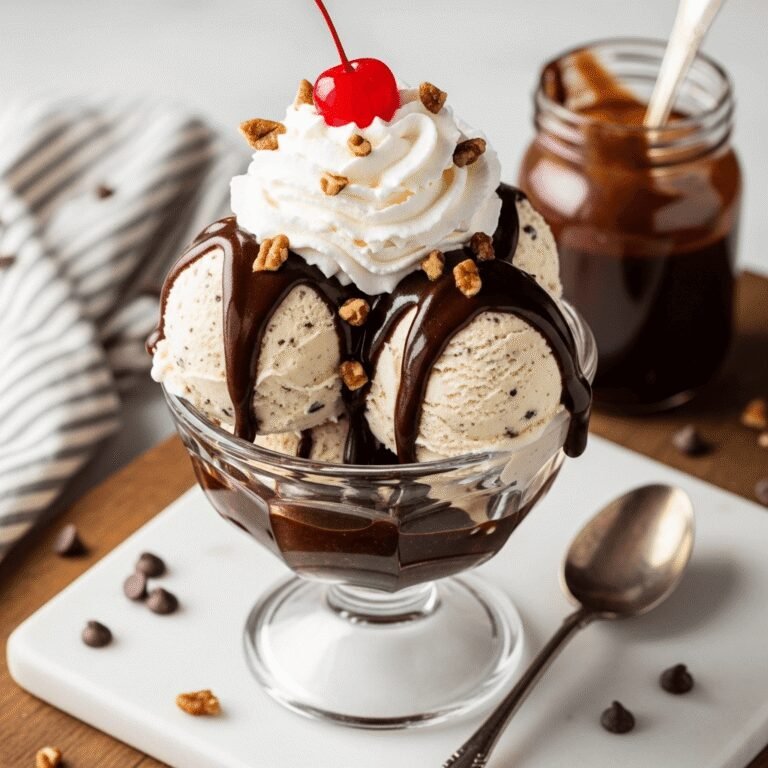
Ice Cream Pairings:
- Vanilla bean ice cream creates a classic combination
- Mint chocolate chip complements the chocolate beautifully
- Salted caramel adds a sophisticated sweet-salty contrast
- Coffee ice cream enhances the chocolate notes
Beverage Pairings:
- Cold milk (the ultimate classic)
- Hot coffee or espresso
- Hot chocolate for maximum indulgence
- Red wine (try a fruity Zinfandel or Port)
Dessert Table Ideas:
- Serve alongside fresh strawberries and whipped cream
- Create a brownie sundae bar with various toppings
- Pair with sugar cookies for variety at parties
- Arrange with chocolate-covered strawberries for elegant presentation
Creative Serving Ideas:
- Crumble over ice cream for a decadent sundae
- Cut into small bites for dessert charcuterie boards
- Warm slightly and serve with hot fudge sauce
- Layer with whipped cream and berries for a trifle
For Special Occasions:
- Add festive sprinkles on top for birthdays
- Use holiday-themed marshmallows for seasonal celebrations
- Cut into heart shapes for Valentine’s Day
- Package individually with ribbon for party favors
Frequently Asked Questions
Q: Can I use a different size pan?
A: The 9×13-inch pan is ideal for the right thickness. If using a smaller pan (like 9×9), you’ll need to adjust the recipe (cut in half) and watch baking time carefully as thicker brownies take longer. A larger pan will create thinner brownies that bake faster.
Q: Why are my brownies cakey instead of fudgy?
A: This usually happens from overbaking, overmixing, or too much flour. Make sure to measure flour correctly (spoon and level, don’t scoop), mix just until combined, and pull brownies from the oven when the toothpick has moist crumbs, not when completely clean.
Q: Can I make these without marshmallows?
A: Absolutely! Simply skip the marshmallow layer and frost the brownies directly after they’ve cooled completely. You’ll have rich, frosted brownies that are still absolutely delicious.
Q: My frosting is too thick/thin. How do I fix it?
A: If frosting is too thick, add milk one teaspoon at a time until you reach desired consistency. If too thin, add more powdered sugar ¼ cup at a time. Remember, the frosting thickens as it cools.
Q: Can I add nuts or chocolate chips?
A: Yes! Fold in 1 cup of chopped walnuts, pecans, or chocolate chips into the brownie batter before baking. You can also sprinkle them over the marshmallow layer before frosting.
Q: How do I know when brownies are done?
A: Insert a toothpick into the center about 2 inches from the edge. It should come out with a few moist crumbs attached—not wet batter, but not completely clean either. The center may look slightly underdone; it will set as it cools.
Q: Can I halve this recipe?
A: Yes, cut all ingredients in half and bake in an 8×8 or 9×9-inch pan. Start checking for doneness at 20 minutes as smaller pans bake faster. You’ll get 9-12 brownies instead of 24.
Q: What’s the best cocoa powder to use?
A: Both natural and Dutch-process cocoa work beautifully. Natural cocoa (like Hershey’s) gives a traditional American brownie flavor. Dutch-process (like Ghirardelli) creates a darker color and richer, more complex chocolate taste. Use what you prefer!
Conclusion: Your New Go-To Dessert Recipe
There you have it—the ultimate marshmallow brownies recipe that combines everything we love about homemade desserts: rich chocolate flavor, gooey marshmallows, silky frosting, and that nostalgic charm that makes every bite feel like a warm hug. These brownies prove that you don’t need fancy ingredients or complicated techniques to create something truly spectacular.
Whether you’re baking for a crowd, treating your family, or simply satisfying your own chocolate cravings, these marshmallow brownies deliver every single time. They’re forgiving enough for beginners yet impressive enough to wow even the toughest critics. And with the make-ahead and freezer-friendly options, you can always have a delicious homemade dessert ready when you need it.
So preheat that oven, gather your ingredients, and get ready to fall in love with these incredible marshmallow brownies. Your kitchen is about to smell absolutely amazing, and your friends and family are about to declare you their favorite baker!
I’d love to hear how your marshmallow brownies turn out! Leave a comment below with your results, any creative variations you tried, or questions you have. And don’t forget to save this recipe to your Pinterest boards so you can find it again when you need an impressive dessert. Happy baking! 🍫✨