Perfect Homemade Blueberry Pie Recipe (Easy & Delicious!)

There’s something magical about a homemade blueberry pie—the way the flaky, buttery crust shatters under your fork, revealing a glossy, jewel-toned filling that’s perfectly balanced between sweet and tart. This classic American dessert is a celebration of summer’s bounty, though it’s delicious year-round thanks to frozen blueberries. Whether you’re baking for a Fourth of July picnic, a Sunday family dinner, or just because you’re craving something special, this blueberry pie recipe delivers every single time.
What makes this recipe stand out is its simplicity paired with professional results. You don’t need fancy equipment or culinary school training—just quality ingredients, a little patience, and the willingness to get your hands a bit floury. The filling strikes that perfect balance where the blueberries hold their shape but create enough syrupy goodness to make every bite satisfying. The crust? Perfectly golden, tender, and flaky with just the right amount of buttery flavor.
This pie serves beautifully at room temperature or slightly warm, ideally with a generous scoop of vanilla ice cream melting into those warm blueberry juices. It’s the kind of dessert that makes people ask for seconds and request the recipe before they’ve even finished their first slice.
History / Background
Blueberry pie holds a treasured place in American culinary history, particularly in New England and the Pacific Northwest where wild blueberries have grown abundantly for centuries. Native Americans were the first to harvest and preserve blueberries, incorporating them into pemican and medicinal remedies long before European settlers arrived. They taught colonists how to identify, gather, and use these nutritious berries, which became a staple in early American cooking.
The transformation of blueberries into pie filling represents a beautiful marriage of Native American ingredients with European baking traditions. As wheat flour, butter, and sugar became more accessible in colonial America, resourceful cooks began experimenting with fruit pies, and blueberries proved to be an ideal candidate. Their natural pectin content helped create beautifully thick fillings, while their sweet-tart flavor profile needed minimal enhancement.
By the 19th century, blueberry pie had become firmly established as an American classic, particularly in Maine, which eventually became known as the “Blueberry Capital of the World.” The state produces nearly 100 million pounds of blueberries annually, and blueberry pie remains Maine’s unofficial state dessert. During the Great Depression, blueberry pies became even more popular because the berries could be foraged for free, providing an affordable treat during difficult times.
Today, blueberry pie represents summertime nostalgia, patriotic celebrations (those red, white, and blue vibes!), and the comfort of home baking. It’s appeared in countless films, novels, and cultural references as the quintessential American dessert—right alongside apple pie. The beauty of this recipe is that it honors that rich tradition while remaining accessible to modern home bakers.
Why You’ll Love This Recipe
This blueberry pie recipe has been tested, tweaked, and perfected to deliver bakery-quality results in your own kitchen. It’s the kind of recipe you’ll return to year after year, becoming your signature dessert that friends and family request by name.
Here’s why this recipe is absolutely worth your time:
- Perfectly balanced filling – Not too sweet, not too tart, with just the right amount of thickening so it slices beautifully without being gummy
- Flaky, buttery crust – Made from scratch with simple ingredients and a foolproof technique that works every time
- Works with fresh or frozen berries – Enjoy this pie year-round without sacrificing flavor or texture
- Make-ahead friendly – You can prepare components in advance, making entertaining stress-free
- Customizable sweetness – Easily adjust sugar levels based on your berries’ natural sweetness and your personal preference
- Impressive but achievable – Looks like you spent hours at pastry school, but the technique is straightforward enough for beginners
- Feeds a crowd – One pie serves 8 generous slices, perfect for gatherings and potlucks
- Freezer-friendly – Both unbaked and baked versions freeze beautifully for up to 3 months
This recipe uses real butter (never shortening) for superior flavor, incorporates a touch of lemon to brighten the berries, and includes tapioca starch for a crystal-clear, glossy filling that holds its shape when sliced. It’s everything a blueberry pie should be.
Ingredient Notes
All-Purpose Flour – The foundation of your pie crust. Use regular all-purpose flour, not bread flour or cake flour. The protein content in all-purpose creates the perfect tender-yet-sturdy structure.
Unsalted Butter – Cold butter is absolutely critical for flaky layers in your crust. Unsalted gives you control over the salt level. European-style butter (with higher fat content) makes an exceptionally rich crust if you want to splurge.
Fresh or Frozen Blueberries – Fresh blueberries are wonderful during peak season (June through August), but frozen work beautifully year-round. Don’t thaw frozen berries before using—add them straight from the freezer to prevent excess liquid.
Granulated Sugar – Sweetens both the filling and crust. You can reduce by up to ¼ cup if your berries are exceptionally sweet or you prefer a more tart pie.
Tapioca Starch (or Quick-Cooking Tapioca) – This is the secret to a perfectly thickened filling that’s glossy rather than cloudy. Cornstarch works in a pinch but can make the filling slightly opaque and starchy-tasting. Tapioca starch gives you that gorgeous, jewel-like clarity.
Lemon Juice and Zest – Brightens the blueberry flavor and adds complexity. The acidity also helps activate the pectin in the berries for better thickening.
Salt – A pinch in the crust and filling enhances all the other flavors. Don’t skip it!
Cinnamon (optional) – Just a dash adds warmth without making the pie taste overtly spiced. It complements blueberries beautifully.
Egg Wash – One beaten egg brushed over the crust before baking gives you that gorgeous golden-brown, glossy finish that looks professionally done.
Substitutions: Use whole wheat pastry flour for half the all-purpose flour for a nuttier crust. Coconut oil can replace butter if you’re dairy-free (though flavor will differ). Arrowroot powder works instead of tapioca starch at a 1:1 ratio.
Equipment Needed
- 9-inch pie dish – Glass or ceramic works best for even browning
- Rolling pin – For rolling out pie dough
- Pastry cutter or fork – To cut butter into flour (or use a food processor)
- Large mixing bowls – At least two for keeping crust and filling separate
- Measuring cups and spoons – Accurate measurements matter in baking
- Pastry brush – For applying egg wash
- Parchment paper or plastic wrap – For wrapping dough while it chills
- Pie crust shields or aluminum foil – To prevent edge burning
- Baking sheet – Place under the pie to catch any drips
- Cooling rack – Essential for proper cooling
- Sharp knife or pizza cutter – For cutting lattice strips if making a lattice top
- Sifter or fine-mesh strainer – For dusting flour on your work surface
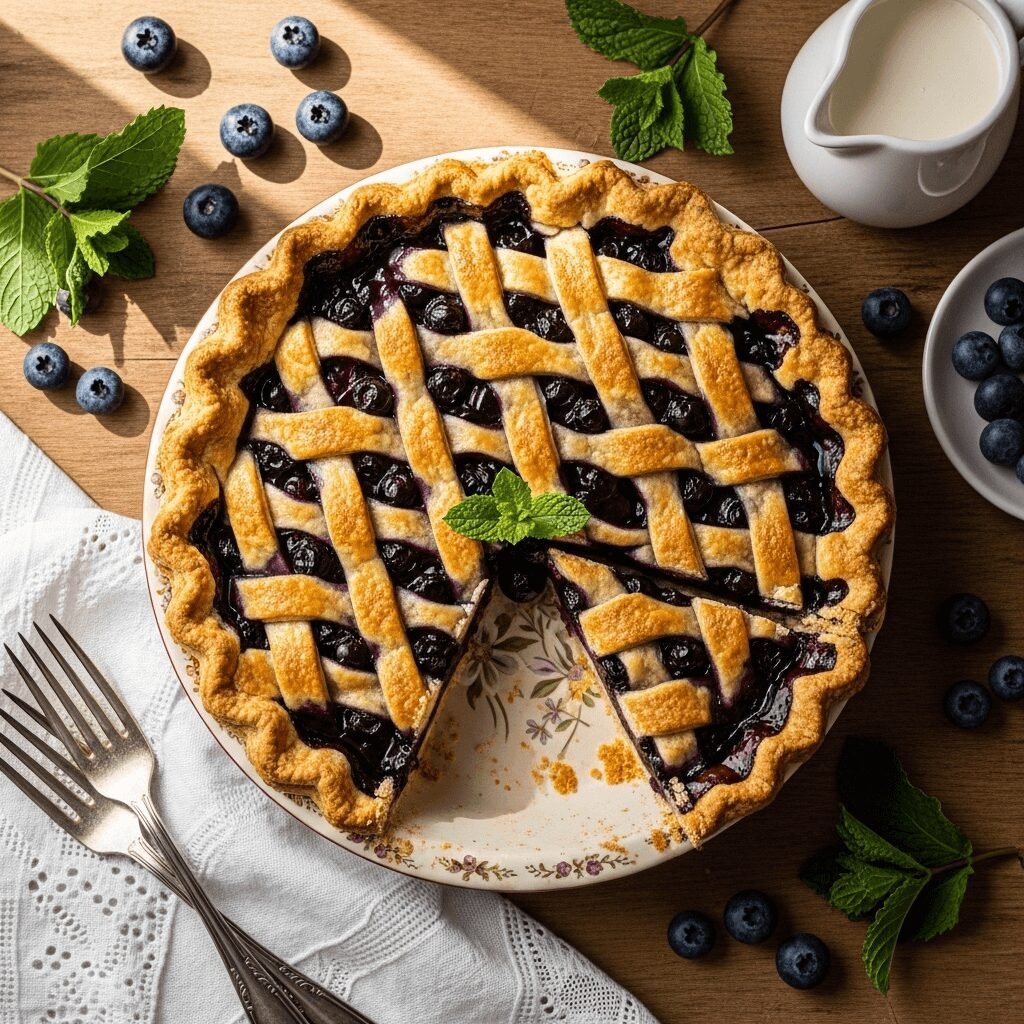
Blueberry Pie Recipe

This classic homemade blueberry pie features a flaky, buttery double crust filled with sweet-tart blueberries in a glossy, perfectly thickened filling. It’s the ultimate summer dessert that’s impressive enough for special occasions but simple enough for any day of the week.
- Prep Time: 30 minutes (plus 1 hour chilling time)
- Cook Time: 55 minutes
- Total Time: 2 hours 25 minutes
- Yield: 8 servings 1x
- Category: Dessert
- Method: Baking
- Cuisine: American
- Diet: Vegetarian
Ingredients
For the Pie Crust:
- 2½ cups all-purpose flour
- 1 tablespoon granulated sugar
- 1 teaspoon salt
- 1 cup (2 sticks) unsalted butter, cold and cubed
- 6-8 tablespoons ice water
For the Blueberry Filling:
- 5 cups fresh or frozen blueberries (about 24 oz)
- ¾ cup granulated sugar
- ¼ cup tapioca starch (or 3 tablespoons quick-cooking tapioca)
- 2 tablespoons fresh lemon juice
- 1 teaspoon lemon zest
- ¼ teaspoon salt
- ¼ teaspoon ground cinnamon (optional)
- 2 tablespoons unsalted butter, cut into small pieces
For Assembly:
- 1 egg, beaten (for egg wash)
- 1 tablespoon coarse sugar (optional, for sprinkling)
Instructions
Step 1: Make the Pie Crust
In a large bowl, whisk together flour, sugar, and salt. Add cold, cubed butter and use a pastry cutter or fork to work the butter into the flour until the mixture resembles coarse crumbs with pea-sized butter pieces remaining. Drizzle in ice water, 1 tablespoon at a time, mixing gently with a fork until the dough just comes together. Divide dough in half, shape each half into a disk, wrap in plastic wrap, and refrigerate for at least 1 hour.
Step 2: Prepare the Filling
In a large bowl, gently combine blueberries, sugar, tapioca starch, lemon juice, lemon zest, salt, and cinnamon (if using). Toss gently to coat the berries evenly. Let the mixture sit for 15 minutes to allow the tapioca to begin absorbing the juices.
Step 3: Roll Out the Bottom Crust
Preheat your oven to 400°F (200°C). On a lightly floured surface, roll one disk of dough into a 12-inch circle, about ⅛-inch thick. Carefully transfer to a 9-inch pie dish, gently pressing into the bottom and sides. Trim excess dough, leaving about a 1-inch overhang. Refrigerate while rolling out the top crust.
Step 4: Roll Out the Top Crust
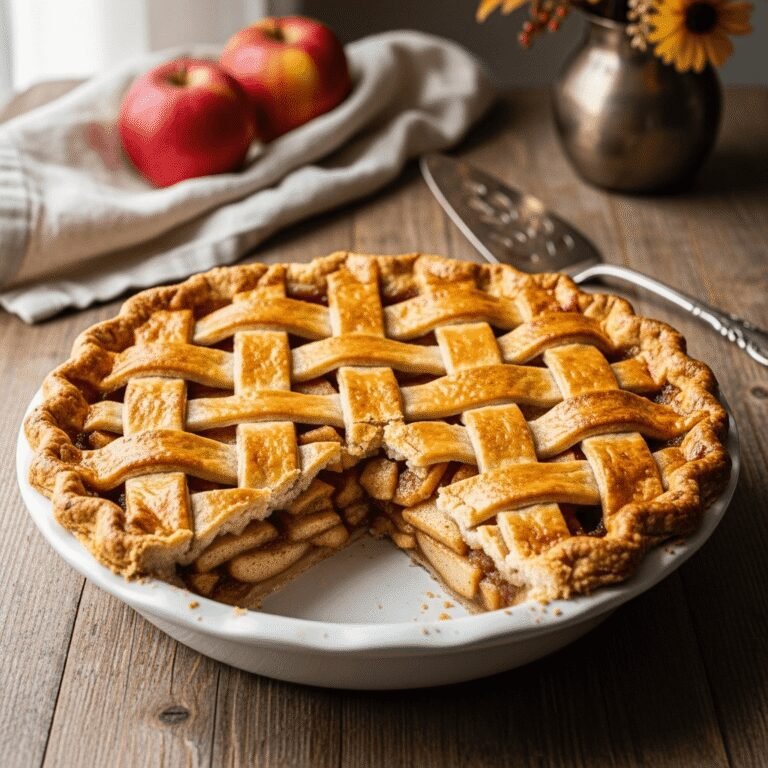
Roll the second disk of dough into another 12-inch circle. You can keep it whole for a full top crust, or cut it into 1-inch strips for a lattice design.
Step 5: Assemble the Pie
Pour the blueberry filling into the prepared bottom crust, spreading it evenly. Dot the top of the filling with small pieces of butter. Place the top crust over the filling (or weave your lattice pattern). Trim excess dough and crimp the edges decoratively to seal. Cut 4-5 small slits in the top crust if using a full crust (to allow steam to escape).
Step 6: Apply Egg Wash
Brush the top crust generously with beaten egg and sprinkle with coarse sugar if desired. This creates that beautiful golden-brown finish.
Step 7: Bake
Place the pie on a baking sheet (to catch drips) and bake at 400°F for 20 minutes. Reduce temperature to 350°F (175°C) and continue baking for 35-40 minutes more, until the crust is deep golden brown and the filling is bubbling through the vents or lattice. If the edges brown too quickly, cover them with foil or a pie shield.
Step 8: Cool Completely
Remove from oven and let the pie cool on a wire rack for at least 4 hours before slicing. This cooling time is crucial—it allows the filling to set properly so your slices hold their shape beautifully.
Notes
- Don’t skip the chilling time for the dough—cold butter creates flaky layers.
- The pie must cool completely before slicing, or the filling will be runny. Patience is key!
- If using frozen blueberries, add them frozen—don’t thaw first.
- For a deeper flavor, add ½ teaspoon vanilla extract or almond extract to the filling.
- Leftover pie can be stored at room temperature for 2 days or refrigerated for up to 5 days.
Nutrition
- Serving Size: 1 slice (⅛ of pie)
- Calories: 445
- Sugar: 28g
- Sodium: 315mg
- Fat: 22g
- Saturated Fat: 13g
- Unsaturated Fat: 7g
- Trans Fat: 0g
- Carbohydrates: 58g
- Fiber: 3g
- Protein: 5g
- Cholesterol: 80mg
Tips & Variations
Spice it Up: Add ¼ teaspoon ground ginger or cardamom to the filling for a warm, aromatic twist that complements the blueberries beautifully.
Mixed Berry Version: Replace 1-2 cups of blueberries with raspberries, blackberries, or sliced strawberries for a mixed berry pie with more complex flavors.
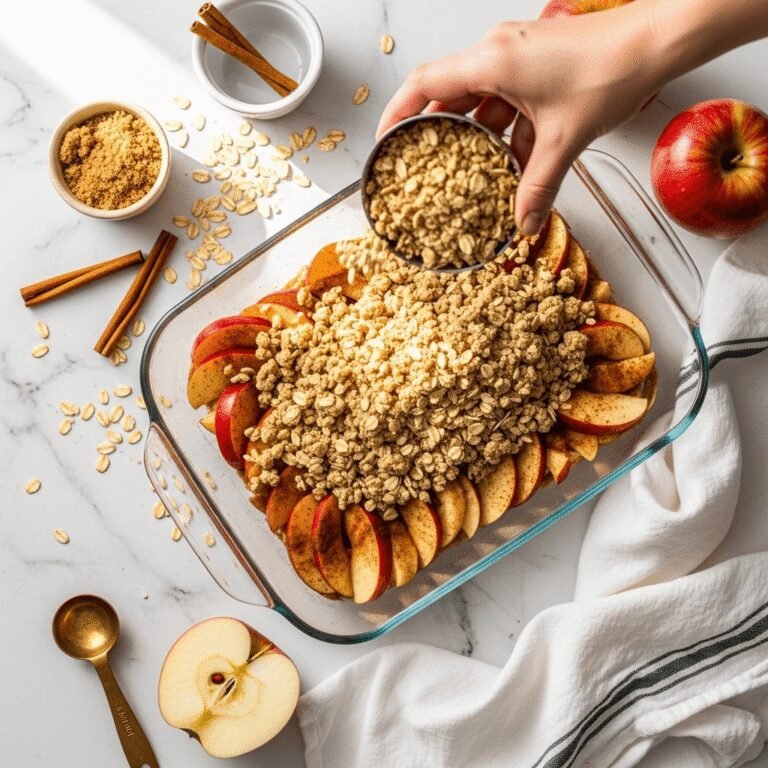
Crumb Topping Alternative: Skip the top crust and add a buttery streusel topping instead—combine ¾ cup flour, ½ cup brown sugar, ½ cup oats, and 6 tablespoons melted butter for an easy crumble topping.
Reduced Sugar Option: Cut the sugar down to ½ cup if your berries are very sweet, or if you prefer a more tart, fruit-forward pie.
Add Citrus Depth: Include orange zest alongside the lemon for a more complex citrus note, or use lime for a tropical twist.
Gluten-Free Adaptation: Use a 1:1 gluten-free flour blend in the crust, adding 1 teaspoon xanthan gum if your blend doesn’t include it.
Individual Hand Pies: Use the same dough and filling to make portable hand pies—perfect for picnics and lunchboxes.
Boozy Upgrade: Add 2 tablespoons of bourbon, rum, or Grand Marnier to the filling for an adult version with enhanced depth.
Pro Chef Tips
Keep Everything Cold: The secret to ultra-flaky pie crust is temperature control. If your kitchen is warm, chill your mixing bowl and even your flour in the freezer for 15 minutes before starting. Work quickly and return the dough to the fridge if it starts feeling soft.
Use a Light Touch: Overworking pie dough develops gluten, which makes it tough. Mix just until the dough comes together, and handle it as little as possible. Those visible butter pieces in the dough? They’re your friends—they’ll create steam pockets and flaky layers.
Blind Bake for Extra Insurance: If you’re nervous about a soggy bottom crust, partially blind bake the bottom crust for 10 minutes before adding the filling. Line with parchment and pie weights, bake, remove weights, then proceed with the recipe.
Thickener Timing Matters: Letting the berry-tapioca mixture sit for 15 minutes before baking gives the starch time to hydrate, which means better thickening and a glossier filling.
Bake Until Truly Bubbling: The filling must reach a full boil (212°F internally) for the tapioca to activate completely. If you pull the pie too early, the filling won’t set. Look for vigorous bubbling in the center, not just around the edges.
Strategic Venting: If making a full top crust, cut generous vents—this isn’t just decorative, it allows steam to escape and prevents a soggy crust. Cut a small X in the center and four smaller vents around it.
The Parchment Trick: For easy lattice work, weave your lattice pattern on parchment paper first, then freeze for 10 minutes. The firm lattice can then be flipped directly onto your pie and will hold its shape perfectly.
Common Mistakes to Avoid
Mistake #1: Slicing Too Soon – This is the number one error! If you cut into the pie while it’s still warm, the filling will be soupy and run all over the plate. You need at least 4 hours cooling time for the filling to set properly. I know it’s torture to wait, but your patience will be rewarded with beautiful, clean slices.
Mistake #2: Using Warm Butter in the Crust – Room temperature butter will blend into the flour instead of staying in distinct pieces. Those butter chunks are essential for flakiness—as they melt in the oven, they create steam pockets that make layers. Keep that butter ice-cold!
Mistake #3: Adding Too Much Water to the Dough – A common impulse is to add more water when the dough looks shaggy, but resist! Too much water makes tough, dense crust. The dough should look a bit dry and shaggy before you press it together—it will come together when you knead it briefly.
Mistake #4: Skipping the Thickener – Some recipes call for just a little flour or no thickener at all, which results in a soupy mess. Tapioca starch is your friend here—it thickens without clouding the beautiful berry color and can handle the high moisture content of blueberries.
Mistake #5: Not Protecting the Crust Edges – Pie edges brown much faster than the center. If you don’t shield them with foil or a pie crust shield after the first 20-30 minutes, they’ll burn while the filling is still undercooked. Check at 25 minutes and cover if needed.
Storage & Meal Prep
Room Temperature Storage: Once completely cooled, your blueberry pie can sit at room temperature, loosely covered with foil or plastic wrap, for up to 2 days. This is ideal for maintaining the crisp crust texture.
Refrigerator Storage: For longer storage, cover the pie tightly and refrigerate for up to 5 days. The crust will soften slightly in the fridge, but you can crisp it back up by warming slices in a 350°F oven for 10 minutes.
Reheating Instructions: Warm individual slices in the microwave for 20-30 seconds, or reheat the whole pie in a 350°F oven for 15-20 minutes. For the best texture, reheat in the oven rather than the microwave.
Best Serving Temperature: While you can serve this pie warm, it actually slices most beautifully at room temperature or slightly chilled. The filling holds together better, and you can really appreciate the texture of the crust.
Leftover Tips: If you have a slice or two left after a few days and the crust has gotten soft, transform it into a blueberry pie parfait—crumble the slice, layer it with whipped cream and fresh berries in a glass, and you’ve got a whole new dessert!
Make-Ahead & Freezer Notes
Pie Dough Advance Prep: Make the dough up to 3 days ahead and keep it refrigerated, or freeze the disks for up to 3 months. Thaw frozen dough overnight in the refrigerator before using. This make-ahead option is a game-changer for holiday baking!
Freeze Unbaked Pie: Assemble the entire pie but don’t brush with egg wash. Wrap tightly in plastic wrap and then aluminum foil, and freeze for up to 3 months. When ready to bake, brush the frozen pie with egg wash and bake directly from frozen, adding 15-20 minutes to the baking time. This method gives you the freshest-tasting pie.
Freeze Baked Pie: Let the baked pie cool completely, then wrap tightly in plastic wrap and aluminum foil. Freeze for up to 3 months. Thaw overnight in the refrigerator, then warm at 350°F for 15-20 minutes before serving.
Best Freezing Method: I prefer freezing unbaked pies because you get that just-baked aroma and texture when you’re ready to serve. However, baked pies are convenient if you’re short on oven space or time on serving day.
Thawing Tips: Never thaw pies at room temperature, as this can create food safety issues and make the crust soggy. Always thaw in the refrigerator overnight.
Assembly Ahead: You can roll out both crusts, place the bottom one in the pie dish, and keep both refrigerated (the bottom in the dish, the top on parchment) for up to 24 hours. Fill and assemble just before baking for maximum freshness.
Serving Suggestions
Blueberry pie is a star that shines brightest with just a few supporting players. Here’s how to serve it for maximum impact:
The Classic: A generous scoop of vanilla bean ice cream melting into the warm pie is traditional for a reason—the cold, creamy vanilla perfectly balances the warm, fruity filling.
Whipped Cream Options: Freshly whipped cream (lightly sweetened with a touch of vanilla) is a lighter alternative to ice cream. For something special, make lemon whipped cream by adding lemon zest and a tablespoon of lemon juice to the cream.
Cheese Pairing: A slice of sharp cheddar cheese alongside blueberry pie is a New England tradition that might sound odd but is absolutely delicious—the savory, salty cheese contrasts beautifully with the sweet berries.
Coffee or Tea: Serve with a strong cup of coffee, Earl Grey tea, or even a berry herbal tea to complement the fruit flavors.
Breakfast Twist: Leftover pie makes an indulgent breakfast with a dollop of Greek yogurt or cottage cheese for protein.
Dessert Board: Feature your pie as the centerpiece of a summer dessert spread alongside fresh berries, lemon bars, and shortbread cookies.
Beverage Pairings: For adult gatherings, pair with sweet dessert wines like late-harvest Riesling, or even a blueberry mojito for a fun, fruity combination.
Garnish Ideas: Add a sprig of fresh mint, a dusting of powdered sugar, or a few fresh blueberries to each plate for a restaurant-quality presentation.
FAQs Section
Q: Can I use frozen blueberries instead of fresh?
A: Absolutely! Frozen blueberries work beautifully in this recipe. Use them straight from the freezer without thawing—this prevents excess moisture from making your filling watery. You might need to add 5-10 minutes to the baking time since the frozen berries need to heat through.
Q: Why is my pie filling runny even after cooling?
A: This usually happens for one of three reasons: the pie didn’t bake long enough for the filling to reach a full boil (it needs to hit 212°F internally), you used too little thickener, or you sliced it before it had fully cooled. Always let the pie cool at least 4 hours, and make sure you see vigorous bubbling in the center before removing from the oven.
Q: How do I prevent a soggy bottom crust?
A: Use a glass or light-colored metal pie pan (dark pans can cause uneven browning), place your pie on the lower oven rack so the bottom gets direct heat, and ensure your oven is fully preheated. You can also brush the bottom crust with a thin layer of egg white before adding the filling to create a moisture barrier. Blind baking the bottom crust for 10 minutes also helps.
Q: Can I make this pie dairy-free?
A: Yes! Replace the butter in the crust with vegetable shortening, coconut oil, or vegan butter. The texture will be slightly different (butter provides unmatched flavor), but you’ll still get a flaky, delicious crust. Omit the butter dots on top of the filling or use vegan butter there too.
Q: What’s the best way to lattice a pie?
A: Cut your top crust into 10-12 strips about ¾-inch wide. Lay half the strips parallel across the pie, spacing them evenly. Fold back every other strip halfway, place a perpendicular strip, then unfold. Repeat this weaving process, working from the center outward. It sounds complicated but becomes intuitive quickly! You can also weave on parchment and freeze before transferring to the pie.
Q: My crust always shrinks—how do I prevent this?
A: Shrinking happens when the dough is overworked or too warm. Make sure to chill your dough thoroughly, avoid stretching it when transferring to the pan (let it fall naturally into the dish), and let the prepared pie crust chill for 15 minutes before baking. These steps allow the gluten to relax and prevent shrinkage.
Q: How ripe should my blueberries be?
A: Use fully ripe, sweet blueberries for the best flavor. Underripe berries will be too tart and won’t soften properly during baking. If your berries aren’t very sweet, taste your filling mixture and add 2-4 more tablespoons of sugar if needed.
Conclusion
There you have it—a complete guide to making an absolutely stunning homemade blueberry pie from scratch! This recipe celebrates everything wonderful about summer baking: fresh, vibrant fruit, a buttery, flaky crust that shatters under your fork, and that deep satisfaction that comes from creating something beautiful with your own hands.
Whether you’re an experienced baker or attempting your first-ever pie, this recipe will guide you to success. The techniques are straightforward, the ingredients are simple and accessible, and the results are genuinely impressive. You’ll be amazed at how a few basic components can transform into something this delicious.
Remember, every great baker started somewhere, and every pie teaches you something new. Don’t worry if your first crust isn’t perfect or your lattice looks a little wonky—it will still taste absolutely incredible. With each pie you make, you’ll develop more confidence and finesse.
I’d love to hear how your blueberry pie turns out! Drop a comment below with your results, any creative variations you tried, or questions you have. And if you loved this recipe, please share it with your friends and family—and don’t forget to pin it to your favorite Pinterest boards so you can find it again next time those summer blueberry cravings hit.
Happy baking, and enjoy every flaky, fruity, delicious bite!