The Ultimate Red Velvet Cake Recipe: Moist, Rich, and Perfect for Every Celebration
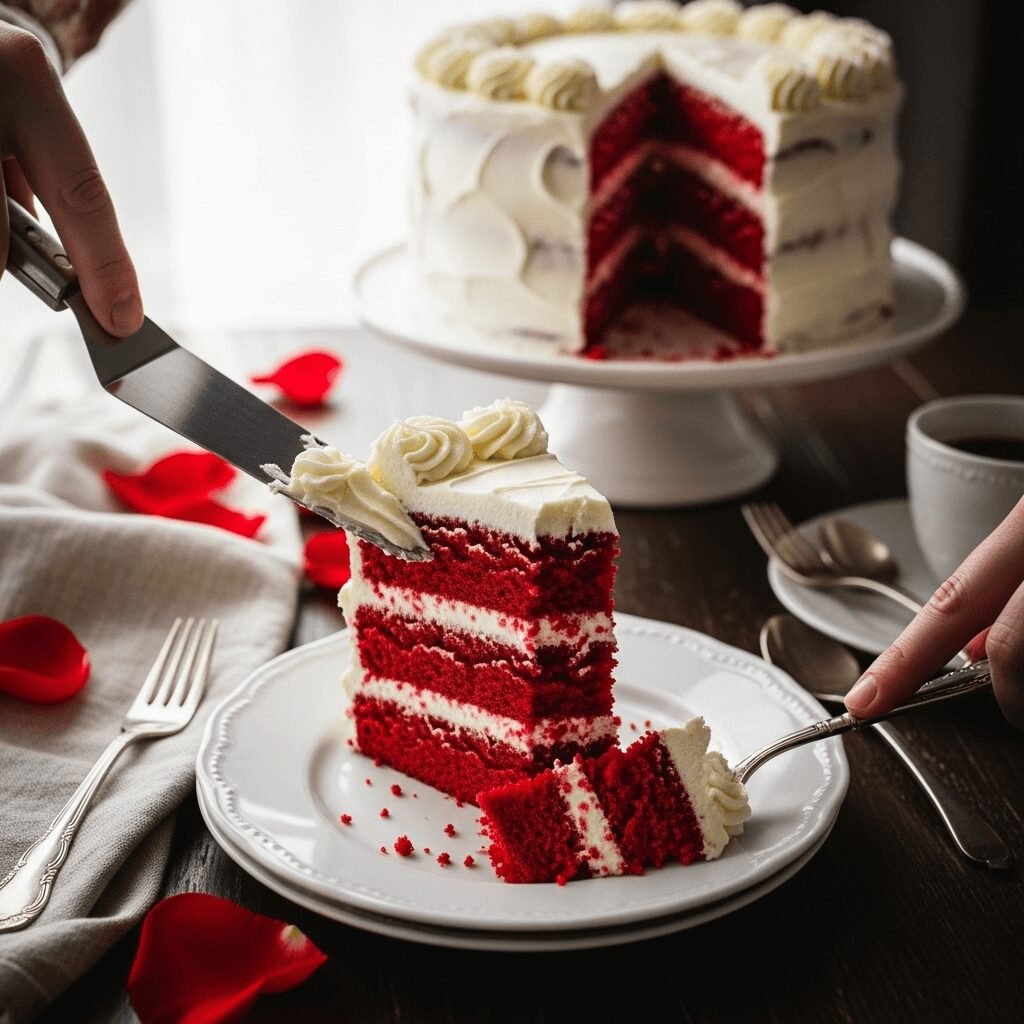
Red velvet cake is the epitome of elegance and indulgence—a stunning dessert with vibrant red layers, subtle cocoa flavor, and a hint of tangy buttermilk, all wrapped up in luscious cream cheese frosting. This classic American cake is perfect for Valentine’s Day, Christmas, birthdays, weddings, or any special occasion that deserves something truly spectacular. The combination of the cake’s tender crumb, rich color, and that iconic tangy-sweet frosting creates a flavor experience that’s both nostalgic and utterly irresistible.
What makes red velvet cake so special isn’t just its dramatic appearance—it’s the unique texture and flavor profile that sets it apart from ordinary chocolate cake. The cake is incredibly moist and velvety (hence the name), with a delicate cocoa flavor that’s enhanced by the acidity of buttermilk and vinegar. When you slice into those gorgeous red layers and see the contrast with the white cream cheese frosting, you’ll understand why this cake has been a Southern favorite for generations and continues to be one of the most requested desserts at bakeries across America.
Whether you’re baking for a romantic dinner, a holiday gathering, or simply want to treat yourself to something special, this homemade red velvet cake recipe delivers bakery-quality results that will have everyone asking for seconds—and the recipe!
History / Background
Red velvet cake has a fascinating and somewhat debated history that spans nearly a century. While the exact origins remain a delicious mystery, most food historians agree that the cake emerged in the early 20th century. The term “velvet cake” was originally used to describe cakes with a fine, tender crumb, and several cake recipes using this terminology appeared in cookbooks from the Victorian era.
The red color, however, has an interesting evolution. In the late 1800s and early 1900s, “devil’s food cake” recipes sometimes produced a reddish tint due to a chemical reaction between natural cocoa powder (which is acidic) and other acidic ingredients like buttermilk and vinegar. This reaction would bring out the red anthocyanin compounds naturally present in cocoa. Some bakers also used beets to enhance moisture and add a subtle red hue.
The modern red velvet cake as we know it—with its brilliant red color—gained popularity during the Great Depression. According to popular legend, the Adams Extract Company began selling red food coloring and promoted a “Red Velvet Cake” recipe using their products as a marketing strategy. They even distributed recipe cards at grocery stores, and the cake quickly became a sensation. The Waldorf-Astoria Hotel in New York also claims to have popularized the cake, though this story is less documented.
Red velvet cake became deeply associated with Southern cuisine, particularly during the mid-20th century. It was considered a luxury dessert, reserved for special occasions, church gatherings, and celebrations. The traditional cream cheese frosting—smooth, tangy, and perfectly complementing the cake’s subtle sweetness—became the standard topping, replacing earlier versions that used ermine or buttercream frosting.
Today, red velvet cake is an American classic that transcends regional boundaries. It’s the go-to cake for Valentine’s Day, Christmas dessert tables, elegant weddings, and romantic celebrations. The cake has also inspired countless variations, from red velvet cupcakes and cookies to pancakes and lattes, but the classic layer cake remains the most beloved version.
Why You’ll Love This Recipe
This homemade red velvet cake recipe is everything you want in a special occasion dessert—impressive to look at, wonderful to eat, and surprisingly achievable even for intermediate bakers. The cake layers are incredibly moist and tender, with that signature velvety texture that melts in your mouth. Unlike some recipes that can be dry or too chocolatey, this version strikes the perfect balance of flavors.
Here’s why this recipe will become your favorite:
- Bakery-quality results with a tender, moist crumb that stays fresh for days
- Perfect red color that’s vibrant and Instagram-worthy without being artificial-tasting
- Foolproof cream cheese frosting that’s smooth, tangy, and pipes beautifully
- Traditional authentic flavor with subtle cocoa and tangy buttermilk notes
- Impressive presentation that looks like it came from an expensive bakery
- Makes a 3-layer cake perfect for feeding a crowd at celebrations
- Detailed instructions that walk you through every step, even if you’re new to layer cakes
- Room temperature ingredients blend easily for a smooth, lump-free batter
- Versatile recipe that works for cupcakes, sheet cakes, or bundt cakes too
- Special occasion showstopper that photographs beautifully and tastes even better
- Not overly sweet with a sophisticated flavor profile adults and kids both love
Ingredient Notes
For the Cake:
- All-Purpose Flour – The foundation of your cake structure. Measure using the spoon-and-level method for accurate results. Cake flour makes it even more tender, but all-purpose works perfectly.
- Granulated Sugar – Provides sweetness and helps create that tender crumb. Don’t reduce the sugar or the cake will be dry.
- Unsalted Butter – Must be at room temperature (not melted) so it creams properly with the sugar. This creates the cake’s tender texture.
- Eggs – Room temperature eggs incorporate better and create more volume. Large eggs are standard for this recipe.
- Buttermilk – The secret to red velvet’s signature tang and moisture. Creates a tender crumb through its acidity. Can substitute by adding 1 tablespoon vinegar or lemon juice to regular milk.
- Vegetable Oil – Adds extra moisture and keeps the cake tender for days. You can use canola or any neutral oil.
- Cocoa Powder – Use natural unsweetened cocoa powder (not Dutch-process). The natural cocoa reacts with the acidic ingredients and enhances the red color.
- Red Food Coloring – Liquid or gel food coloring both work. Gel creates more vibrant color with less product. Use about 2 tablespoons liquid or 1 tablespoon gel.
- White Vinegar – Reacts with baking soda to create lift and enhances the red color. Essential for authentic red velvet.
- Vanilla Extract – Use pure vanilla extract for best flavor. Imitation vanilla can taste artificial in delicate cakes.
- Baking Soda – The leavening agent that reacts with acidic ingredients to make the cake rise.
- Salt – Enhances all the flavors and balances the sweetness.
For the Cream Cheese Frosting:
- Cream Cheese – Must be full-fat brick-style cream cheese, softened to room temperature. Don’t use spreadable or whipped varieties.
- Unsalted Butter – Also room temperature and softened. Cold butter won’t cream properly and will result in lumpy frosting.
- Powdered Sugar – Also called confectioners’ sugar. Sift it if lumpy for ultra-smooth frosting.
- Vanilla Extract – Rounds out the frosting flavor and adds depth.
- Heavy Cream or Milk – Thins the frosting to perfect spreading consistency. Add gradually until you reach desired texture.
- Salt – Just a pinch to balance the sweetness and enhance the tangy cream cheese flavor.
Equipment Needed
- Three 9-inch round cake pans
- Parchment paper
- Large mixing bowls (2-3)
- Electric hand mixer or stand mixer
- Measuring cups and spoons
- Liquid measuring cup
- Rubber spatula
- Wire cooling racks
- Toothpicks or cake tester
- Small bowls for mixing wet ingredients
- Offset spatula or butter knife (for frosting)
- Cake turntable (optional but helpful for frosting)
- Cake leveler or serrated knife
- Cake board or serving plate
The Ultimate Red Velvet Cake Recipe: Moist, Rich, and Perfect for Every Celebration

Classic homemade red velvet cake with three moist, tender layers and rich cream cheese frosting. This Southern favorite features vibrant red color, subtle cocoa flavor, and tangy buttermilk for that signature velvety texture. Perfect for Valentine’s Day, birthdays, weddings, and special celebrations.
- Prep Time: 30 minutes
- Cook Time: 28 minutes
- Total Time: 2 hours
- Yield: 12-16 servings (one 3-layer 9-inch cake) 1x
- Category: Dessert
- Method: Baking
- Cuisine: American
- Diet: Vegetarian
Ingredients
For the Red Velvet Cake:
- 2½ cups all-purpose flour
- 1½ cups granulated sugar
- 1 teaspoon baking soda
- 1 teaspoon salt
- 1 teaspoon natural unsweetened cocoa powder
- 1½ cups vegetable oil
- 1 cup buttermilk, room temperature
- 2 large eggs, room temperature
- 2 tablespoons red food coloring (liquid) or 1 tablespoon gel
- 1 teaspoon white vinegar
- 1 teaspoon vanilla extract
For the Cream Cheese Frosting:
- 16 ounces (two 8-oz blocks) cream cheese, softened
- ¾ cup unsalted butter, softened
- 5 cups powdered sugar, sifted
- 2 teaspoons vanilla extract
- ¼ teaspoon salt
- 2-3 tablespoons heavy cream or milk (as needed)
Instructions
- Preheat and Prep: Preheat oven to 350°F (175°C). Grease three 9-inch round cake pans with butter or baking spray. Line the bottoms with parchment paper circles and grease again. Lightly flour the pans, tapping out excess.
- Mix Dry Ingredients: In a large bowl, sift together flour, sugar, baking soda, salt, and cocoa powder. Whisk to combine evenly and set aside.
- Combine Wet Ingredients: In another large bowl, whisk together the oil, buttermilk, eggs, food coloring, vinegar, and vanilla extract until well combined and smooth. The mixture should be vibrant red.
- Combine Wet and Dry: Pour the wet ingredients into the dry ingredients. Using an electric mixer on medium speed (or whisk vigorously by hand), beat until just combined and smooth, about 1-2 minutes. Don’t overmix. The batter will be thin—this is normal and correct.
- Divide and Bake: Divide the batter evenly among the three prepared pans (about 2 cups batter per pan for even layers). Tap pans gently on the counter to release air bubbles. Bake for 25-28 minutes, or until a toothpick inserted in the center comes out clean or with just a few moist crumbs.
- Cool the Cakes: Remove from oven and let cakes cool in pans for 10 minutes on wire racks. Run a knife around the edges, then invert onto racks, peel off parchment paper, and let cool completely (about 1 hour). Cakes must be completely cool before frosting.
- Make the Frosting: In a large bowl using an electric mixer, beat the softened cream cheese and butter together on medium-high speed until smooth and creamy, about 3 minutes. Reduce speed to low and gradually add the powdered sugar, one cup at a time, beating well after each addition.
- Finish the Frosting: Add vanilla extract and salt. Beat on low, then increase to medium-high and beat for 2-3 minutes until light and fluffy. If frosting is too thick, add heavy cream 1 tablespoon at a time until you reach a spreadable consistency.
- Level the Cakes: If your cake layers have domed tops, use a cake leveler or serrated knife to carefully trim them flat for even stacking.
- Assemble the Cake: Place the first cake layer on your serving plate or cake board. Spread about 1 cup of frosting evenly on top. Place the second layer on top and add another cup of frosting. Add the final layer and spread a thin “crumb coat” of frosting all over the cake. Refrigerate for 15-20 minutes to set.
- Final Frosting: Remove from refrigerator and spread the remaining frosting over the entire cake, creating smooth sides and top. Use an offset spatula and rotating cake stand for best results. Decorate as desired with piped frosting borders or cake crumbs.
- Serve: Let cake sit at room temperature for 20-30 minutes before slicing for the best texture. Slice with a sharp knife, wiping clean between cuts.
Notes
- All ingredients should be at room temperature for best results
- Don’t use Dutch-process cocoa—natural cocoa powder is essential for color and flavor
- Gel food coloring produces more vibrant color than liquid
- Cake layers can be baked a day ahead and wrapped tightly
- For cupcakes, bake at 350°F for 18-22 minutes (makes about 30)
- Store frosted cake covered in the refrigerator but bring to room temp before serving
Nutrition
- Serving Size: 1 slice (1/12 of cake)
- Calories: 685
- Sugar: 68g
- Sodium: 380mg
- Fat: 38g
- Saturated Fat: 15g
- Unsaturated Fat: 21g
- Trans Fat: 0g
- Carbohydrates: 82g
- Fiber: 1g
- Protein: 6g
- Cholesterol: 95mg
Tips & Variations
Flavor Variations:
- Blue Velvet Cake – Use blue food coloring instead of red for a fun twist, perfect for baby showers or gender reveals
- Pink Velvet Cake – Use less red food coloring or add pink for Valentine’s Day or bridal showers
- Red Velvet Cheesecake Cake – Add a layer of no-bake cheesecake between cake layers
- Chocolate Cream Cheese Frosting – Add ½ cup cocoa powder to the frosting for chocolate lovers
- Southern Ermine Frosting – Try the traditional cooked milk frosting instead of cream cheese for vintage authenticity
- Red Velvet Cupcakes – Divide batter into lined muffin tins, bake 18-22 minutes
- Red Velvet Sheet Cake – Bake in a 9×13 pan for 35-40 minutes for easier serving
Customization Options:
- Add ½ teaspoon almond extract to the cake batter for subtle nutty flavor
- Fold in ½ cup mini chocolate chips to the batter
- Toast pecans or walnuts and press into the frosted sides for texture
- Reduce food coloring to 1 tablespoon for a more subtle, natural color
- Use natural red coloring from beet powder (though color will be less vibrant)
- Make it a 2-layer cake with thicker layers for rustic presentation
Frosting Alternatives:
- Classic buttercream if you prefer sweeter, less tangy frosting
- White chocolate cream cheese frosting (add 4 oz melted white chocolate)
- Whipped cream cheese frosting (fold in whipped cream for lighter texture)
- Reduce frosting by half for naked cake or semi-naked style
Pro Chef Tips
Room Temperature Matters: This is critical for both cake and frosting. Room temperature ingredients emulsify better, creating a smoother batter and frosting. Take butter, eggs, cream cheese, and buttermilk out of the fridge 1-2 hours before baking.
Don’t Overmix the Batter: Once you combine wet and dry ingredients, mix just until incorporated. Overmixing develops gluten, which makes the cake tough and dense instead of tender and velvety. A few small lumps are okay.
The Secret to Vibrant Color: Use gel food coloring for the most vibrant red without adding excess liquid. Liquid food coloring works too but requires more volume. The vinegar and buttermilk also help set and brighten the red color.
Buttermilk Chemistry: The combination of buttermilk, vinegar, and baking soda creates a chemical reaction that makes the cake rise beautifully and stay incredibly moist. Don’t skip the vinegar—it’s essential to authentic red velvet.
Perfect Frosting Consistency: Your cream cheese and butter must be softened but not melted or warm. If too cold, the frosting will be lumpy; if too warm, it will be soupy. Aim for the texture of softened butter that holds a finger indent.
Crumb Coat Technique: Apply a thin first layer of frosting all over the cake and refrigerate for 15-20 minutes. This seals in crumbs and creates a smooth foundation for your final frosting layer. This professional technique makes your cake look bakery-perfect.
Even Baking: Use an oven thermometer to ensure accurate temperature. Rotate pans halfway through baking if your oven has hot spots. All three layers should bake at the same time on the center rack for even results.
Testing for Doneness: Insert a toothpick in the center—it should come out clean or with a few moist crumbs. If it comes out wet with batter, bake 2-3 more minutes. Don’t overbake or the cake will be dry.
Common Mistakes to Avoid
1. Using Cold Ingredients
This is the number one mistake! Cold eggs, buttermilk, and butter won’t emulsify properly, resulting in a dense, uneven cake texture. Always bring dairy and eggs to room temperature—it makes a dramatic difference in the final product.
2. Overmixing the Batter
Once you add the wet ingredients to dry, mix just until combined. Overmixing develops too much gluten, making your cake tough and chewy instead of tender and velvety. Mix on low speed and stop as soon as you don’t see dry flour.
3. Using the Wrong Cocoa Powder
Natural unsweetened cocoa powder is essential—Dutch-process cocoa has been alkalized and won’t react properly with the acidic ingredients. This affects both the color and the rise of your cake. Check your cocoa label carefully.
4. Skipping the Parchment Paper
Always line your pans with parchment paper circles, even if you grease and flour them. Red velvet cake can be delicate, and parchment paper ensures clean release every time. This prevents your beautiful layers from breaking.
5. Frosting Warm Cake
If you frost the cake while it’s even slightly warm, the frosting will melt, slide off, and turn into a soupy mess. Patience is crucial—let cakes cool completely (at least 1 hour) before frosting. You can refrigerate them to speed this up.
6. Making Frosting Too Soft
If your kitchen is warm or you over-soften the cream cheese and butter, your frosting will be too loose to hold its shape. If this happens, refrigerate the frosting for 15-20 minutes and beat again. Make sure ingredients aren’t too warm to start.
Storage & Meal Prep
Room Temperature Storage:
Due to the cream cheese frosting, this cake is best stored in the refrigerator, but it can sit at room temperature for up to 4 hours for serving. Always return leftovers to the fridge promptly.
Refrigerator Storage:
Store the frosted cake in an airtight container or cover well with plastic wrap. Refrigerate for up to 5 days. The cake actually tastes better the second day as the flavors meld together. Bring to room temperature 30 minutes before serving for best texture and flavor.
Serving Cold vs. Room Temperature:
While the cake is safe to eat cold, the texture and flavor are significantly better at room temperature. The frosting softens, the cake becomes more tender, and the flavors bloom. Plan ahead and let it sit out 30-60 minutes before serving.
Unfrosted Cake Storage:
Baked cake layers can be stored unfrosted at room temperature, tightly wrapped in plastic wrap, for up to 2 days. For longer storage, refrigerate wrapped layers for up to 1 week or freeze for up to 3 months.
Protecting from Odors:
If storing in the refrigerator, ensure the cake is well-covered as it can absorb odors from other foods. Use an airtight cake carrier or cover thoroughly with plastic wrap.
Make-Ahead & Freezer Notes
Baking Layers in Advance:
Bake cake layers up to 2 days ahead. Once completely cooled, wrap each layer tightly in plastic wrap, then in aluminum foil. Store at room temperature for 24 hours or refrigerate for up to 2 days. Bring to room temperature before assembling.
Freezing Cake Layers:
Wrap cooled, unfrosted cake layers in plastic wrap, then foil, then place in freezer bags. Freeze for up to 3 months. Thaw overnight in the refrigerator, still wrapped, then bring to room temperature before frosting. Frozen layers actually thaw beautifully and can be easier to frost.
Make-Ahead Frosting:
Make cream cheese frosting up to 3 days ahead and refrigerate in an airtight container. When ready to use, let come to room temperature and beat with a mixer for 1-2 minutes to restore fluffy texture. The frosting may look separated when cold—this is normal.
Freezing Frosted Cake:
Yes, you can freeze the assembled, frosted cake! Place the frosted cake in the freezer uncovered for 1 hour until the frosting is firm. Wrap tightly in plastic wrap, then foil. Freeze up to 2 months. Thaw overnight in the refrigerator, still wrapped, then bring to room temperature before serving.
Freezing Individual Slices:
Wrap individual slices in plastic wrap and freeze in a freezer bag for up to 3 months. Perfect for portion control or having cake on hand for unexpected guests. Thaw in the refrigerator overnight or at room temperature for 2-3 hours.
Best Practices:
When freezing, make sure everything is wrapped airtight to prevent freezer burn. Label with the date so you know when it was frozen. Frozen cake tastes remarkably fresh when properly thawed.
Serving Suggestions
Red velvet cake is a versatile dessert that shines in various settings and pairs beautifully with many accompaniments:
Classic Presentation:
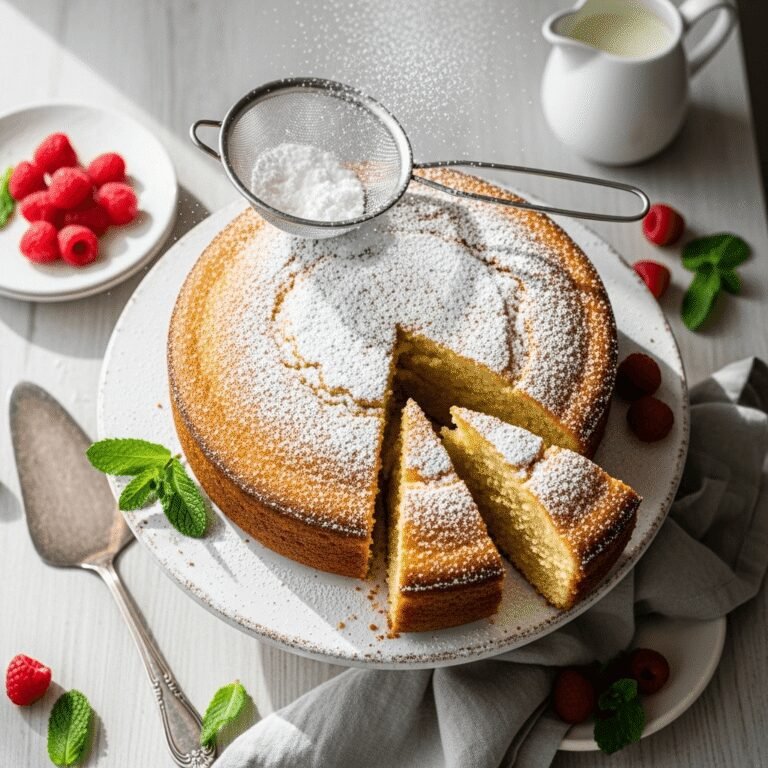
Serve generous slices on white dessert plates to make the red color pop. Garnish with a light dusting of powdered sugar, fresh raspberries, or a mint leaf for elegant presentation. The contrast of the red cake with white frosting is naturally stunning.
Beverage Pairings:
- Hot coffee or espresso (the classic choice)
- Cold milk (especially for kids)
- Champagne or sparkling wine for celebrations
- Sweet dessert wine like Moscato
- Irish coffee for adults-only gatherings
- Hot chocolate or mocha
- Southern sweet tea for authentic regional pairing
Special Occasion Serving:
- Valentine’s Day: Add heart-shaped chocolate decorations and rose petals
- Christmas: Garnish with white chocolate shavings and fresh cranberries
- Weddings: Elegant piped borders and fresh flowers make it reception-worthy
- Birthdays: Add colorful sprinkles, candles, and personalized cake toppers
- Baby Showers: Use pink or blue velvet for gender reveals
Complementary Sides:
While cake is typically served alone, consider offering:
- Vanilla ice cream or whipped cream on the side
- Fresh berries (strawberries, raspberries, or blackberries)
- Hot fudge or chocolate sauce for extra indulgence
- Caramel sauce drizzle
- Candied pecans for crunch
Leftover Ideas:
Turn leftover cake into cake truffles by mixing crumbled cake with frosting, rolling into balls, and dipping in chocolate. Make red velvet cake parfaits by layering cake pieces with whipped cream and berries in glasses.
FAQs Section
What makes red velvet cake different from chocolate cake?
Red velvet cake is not simply chocolate cake with red food coloring. While it does contain cocoa powder, it uses much less than chocolate cake (usually just 1-2 tablespoons) and includes buttermilk and vinegar, which create a unique tangy flavor and tender, velvety crumb. The texture is lighter and more delicate than chocolate cake, and the flavor profile is subtle cocoa with tangy notes rather than rich chocolate.
Can I make this cake without food coloring?
Yes, though you won’t get that signature vibrant red color. The cake will be brown or reddish-brown, depending on your cocoa powder. Historically, red velvet had a natural reddish tint from the reaction between cocoa and acidic ingredients. You can use beet powder for natural coloring (about 2-3 tablespoons), though the color will be more maroon than bright red.
Why is my red velvet cake brown instead of red?
This usually happens because either you didn’t use enough food coloring, or you used Dutch-process cocoa powder instead of natural cocoa. Dutch-process cocoa is darker and can muddy the red color. Make sure you’re using natural unsweetened cocoa powder and enough food coloring (liquid or gel).
Can I use a different frosting besides cream cheese?
While cream cheese frosting is traditional and highly recommended because its tang complements the cake perfectly, you can use alternatives. Classic buttercream, ermine frosting (traditional Southern choice), or whipped cream frosting all work. However, cream cheese frosting is most authentic and beloved.
How do I prevent my cake layers from sticking to the pans?
Properly prepare your pans by greasing with butter or baking spray, lining the bottoms with parchment paper circles, then greasing again and lightly flouring. Let cakes cool in pans for exactly 10 minutes (not longer), then run a knife around edges before inverting. The parchment paper is key for clean release.
Can I make this as cupcakes instead of a layer cake?
Absolutely! This recipe makes about 28-30 cupcakes. Line muffin tins with paper liners, fill each about ⅔ full, and bake at 350°F for 18-22 minutes. Cupcakes are done when a toothpick comes out clean. Let cool completely before frosting with a piping bag or offset spatula.
Why is my frosting too runny or too thick?
Frosting consistency depends on temperature and beating time. If too runny, your cream cheese or butter was too warm, or you added too much liquid. Refrigerate for 15-20 minutes and beat again. If too thick, add heavy cream 1 teaspoon at a time until spreadable. Make sure all ingredients start at proper room temperature (soft but not warm).
Conclusion
There’s something truly magical about slicing into a homemade red velvet cake—those stunning red layers contrasting with the snowy white cream cheese frosting, the tender crumb that practically melts on your tongue, and that perfect balance of subtle cocoa and tangy buttermilk flavors. This isn’t just any cake; it’s a showstopping dessert that makes every occasion feel special and memorable.
While red velvet cake has a reputation for being fancy and complicated, this recipe proves that with the right instructions and a little patience, anyone can create bakery-worthy results at home. Yes, it requires some time and a few specific ingredients, but every minute is worth it when you see the faces of your friends and family light up at the sight (and taste!) of this gorgeous cake. The best part? It actually tastes even better than it looks.
Whether you’re baking for Valentine’s Day, a birthday celebration, holiday dessert table, or simply because you deserve something wonderful, this red velvet cake recipe delivers on every level. The moist, tender layers stay fresh for days (if it lasts that long!), the cream cheese frosting is absolute perfection, and the overall presentation is stunning enough for any special occasion.
So preheat that oven, grab your mixing bowls, and get ready to create some delicious memories! Your kitchen will smell amazing, your cake will look incredible, and your taste buds will thank you. Don’t forget to take photos before everyone devours it!
Ready to bake this stunning red velvet cake? Save this recipe to your Pinterest boards so you can find it easily! I’d love to see your beautiful creations—tag me in your photos and leave a comment below telling me what occasion you made it for. Happy baking! 🍰❤️