Easy Homemade Chocolate Truffles Recipe: Elegant Treats That Look Store-Bought
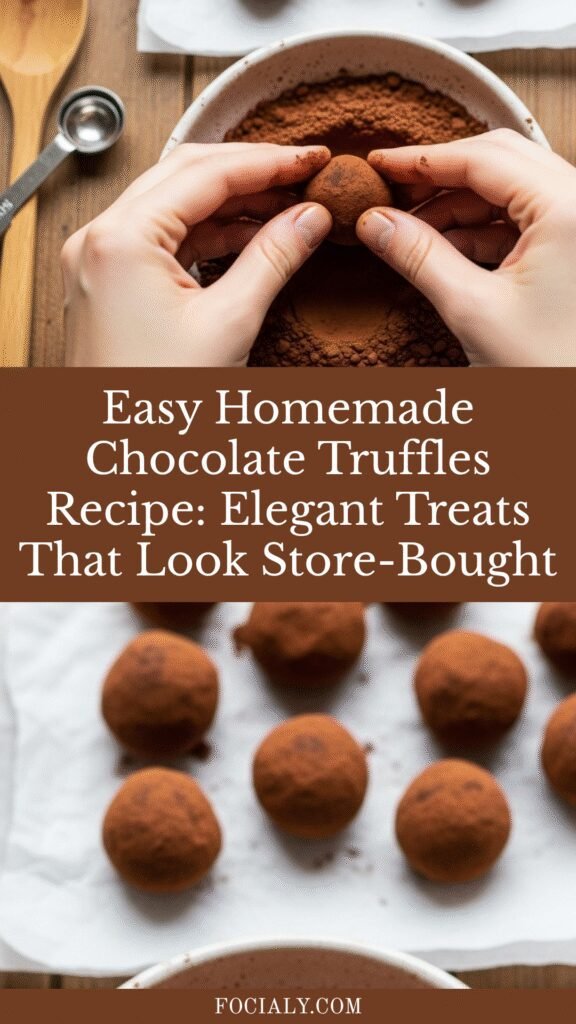
Chocolate truffles are one of the most elegant desserts you can make at home, yet they’re surprisingly simple to create. These decadent little spheres of pure chocolate bliss are perfect for gifting, entertaining, or simply indulging yourself on a quiet evening. What makes homemade chocolate truffles so special is that they taste like you spent hours in a fancy patisserie, when in reality, you can make a batch in less than 30 minutes of active time.
Whether you’re looking to impress guests at a dinner party, create a memorable gift for someone special, or just satisfy a chocolate craving, homemade chocolate truffles are the answer. They’re versatile enough to customize with different flavors, coatings, and toppings, yet the basic technique remains wonderfully foolproof. Plus, when you make them yourself, you know exactly what’s going into each truffle—no mystery ingredients or additives.
History and Background of Chocolate Truffles
The story of chocolate truffles begins in France, where confectioners sought to create a refined chocolate confection that would rival the elegance of fine jewelry. The truffle was born in the 1920s in France, though some claim its origins trace back even further to the royal courts of Europe. The name “truffle” comes from their resemblance to the prized fungi of the same name—those rare, earthy delicacies that are worth their weight in gold to chefs around the world.
The classic French truffle is made with a ganache center (a silky blend of chocolate and cream) and is typically rolled in cocoa powder, giving it that rustic, bumpy appearance that echoes the truffles found in forests. What started as a luxury item reserved for royalty and the ultra-wealthy has evolved into a beloved treat that home bakers everywhere can recreate in their own kitchens.
Truffles gained international popularity during the mid-20th century as chocolate confectionery techniques became more accessible. Today, artisanal truffle-making is celebrated worldwide, with chocolatiers creating elaborate flavor combinations and stunning presentations. The beauty of this recipe is that you don’t need professional training or expensive equipment to create truffles that taste just as good as those from a high-end chocolate shop.
Why You’ll Love This Homemade Chocolate Truffle Recipe
Making chocolate truffles at home is an absolute joy for so many reasons. This isn’t just about the end result—though that ganache center is absolutely divine—it’s about the entire experience and the confidence boost you’ll get when you realize you can make confectionery-quality treats in your own kitchen.
Here’s what makes this chocolate truffles recipe a must-try:
- Surprisingly easy: With just a few quality ingredients and minimal steps, anyone can make these. Even beginner bakers have success on the first try.
- Impressive results: Your finished truffles will look and taste like they came from a boutique chocolate shop, impressing everyone who tries them.
- Customizable: Start with the basic technique and then experiment with flavored ganaches, unique coatings, and creative toppings.
- Budget-friendly luxury: You’ll save money compared to buying premium truffles from specialty shops while actually enjoying better quality.
- Perfect gift option: Homemade truffles in a beautiful box are a thoughtful, memorable gift that shows you put in effort and care.
- Make-ahead friendly: Prepare them days in advance, store them properly, and they’re ready whenever you need them.
- No special equipment required: You probably already have everything you need in your kitchen right now.
Ingredient Notes for Chocolate Truffles
The beauty of this truffle recipe lies in its simplicity—you’re working with just a handful of quality ingredients. Let me break down what each one does and why it matters:
Chocolate (semi-sweet or dark chocolate, chopped) This is the star of your show. Using good-quality chocolate is non-negotiable here because there’s nowhere for inferior ingredients to hide. Aim for chocolate with at least 50% cocoa content. Semi-sweet chocolate gives you classic truffle flavor, while dark chocolate (60-70% cocoa) offers a more intense, sophisticated taste. You can also use milk chocolate if you prefer something sweeter, but semi-sweet is the goldilocks choice for most people. Don’t use chocolate chips; they contain stabilizers that won’t melt as smoothly as chopped chocolate bars.
Heavy cream This is what transforms chocolate into that luxurious ganache. The fat in heavy cream creates a silky, smooth texture that’s the hallmark of a quality truffle. Don’t substitute with lighter creams or milk, as the fat content is crucial for achieving that melt-in-your-mouth quality.
Butter A small amount of butter adds richness and helps the ganache set to the perfect consistency for rolling. It also improves the mouthfeel, making the truffle feel more decadent on your tongue.
Cocoa powder (unsweetened) This is your coating and also adds deep chocolate flavor. Dutch-process cocoa powder creates a slightly darker, more sophisticated appearance, while natural cocoa powder looks lighter and more rustic. Either works beautifully.
Optional vanilla extract, liqueur, or flavorings Here’s where you can get creative. Pure vanilla extract adds classic warmth, while coffee extract intensifies the chocolate flavor. Liqueurs like Cointreau, Grand Marnier, or even salted caramel syrup can elevate your truffles into grown-up territory.
Substitution notes: If you can’t find good chocolate, quality chocolate chips will work in a pinch, though the texture won’t be quite as smooth. For a dairy-free version, substitute the heavy cream with full-fat coconut milk or cashew cream (blend soaked cashews with water). Coconut oil can replace butter if you’re dairy-free.
Equipment Needed for Making Chocolate Truffles
You likely have everything you need already, but here’s the full list:
- Microwave-safe bowl or double boiler for melting chocolate
- Saucepan (if using double boiler method)
- Whisk or fork for combining ganache
- Measuring cups and spoons for accuracy
- Spoon or small cookie scoop for portioning ganache
- Parchment paper or wax paper for setting truffles
- Shallow bowls for rolling coatings (cocoa powder, sprinkles, etc.)
- Fork or dipping tool for rolling truffles (optional but helpful)
- Baking sheet or plate for arranging finished truffles
- Airtight container for storage
That’s genuinely it! No fancy truffle tools or chocolate tempering equipment needed.
PrintEasy Homemade Chocolate Truffles Recipe: Elegant Treats That Look Store-Bought
These easy homemade chocolate truffles are a luxurious no-bake dessert that looks and tastes like it came straight from a Parisian chocolate shop. Made with just five basic ingredients, they’re perfect for gift-giving, entertaining, or satisfying serious chocolate cravings. Customize with different coatings and flavors for endless variations!
- Prep Time: 15 minutes
- Cook Time: 2-4 hours
- Total Time: 2 hours 15 minutes (plus chilling)
- Yield: 24 truffles 1x
- Category: Dessert
- Method: No-Bake / Stovetop
- Cuisine: French
- Diet: Vegetarian
Ingredients
- 8 oz semi-sweet or dark chocolate, finely chopped
- ½ cup heavy cream
- 2 tablespoons unsalted butter
- ½ teaspoon pure vanilla extract (optional but recommended)
- ¼ teaspoon sea salt (optional, enhances chocolate flavor)
- ⅓ cup unsweetened cocoa powder (for rolling)
- Additional coatings: crushed nuts, sprinkles, shredded coconut, or melted chocolate for dipping
Instructions
Step 1: Heat the cream. Pour the heavy cream into a small saucepan and heat over medium heat until it just begins to steam and small bubbles form around the edges. Don’t let it boil. Remove from heat immediately.
Step 2: Create the ganache. Place your chopped chocolate in a heat-safe bowl. Pour the hot cream over the chocolate and let it sit undisturbed for 2-3 minutes. This allows the heat to gently melt the chocolate. Whisk until the mixture is completely smooth and silky.
Step 3: Add butter and flavor. While the ganache is still warm, whisk in the butter, vanilla extract, and sea salt (if using). Mix until everything is fully incorporated and the ganache is glossy.
Step 4: Chill the ganache. Cover the bowl and refrigerate for 1-2 hours until the ganache is firm enough to scoop but still soft enough to roll. You want it similar to cookie dough consistency. It shouldn’t be rock hard or it will be difficult to roll.
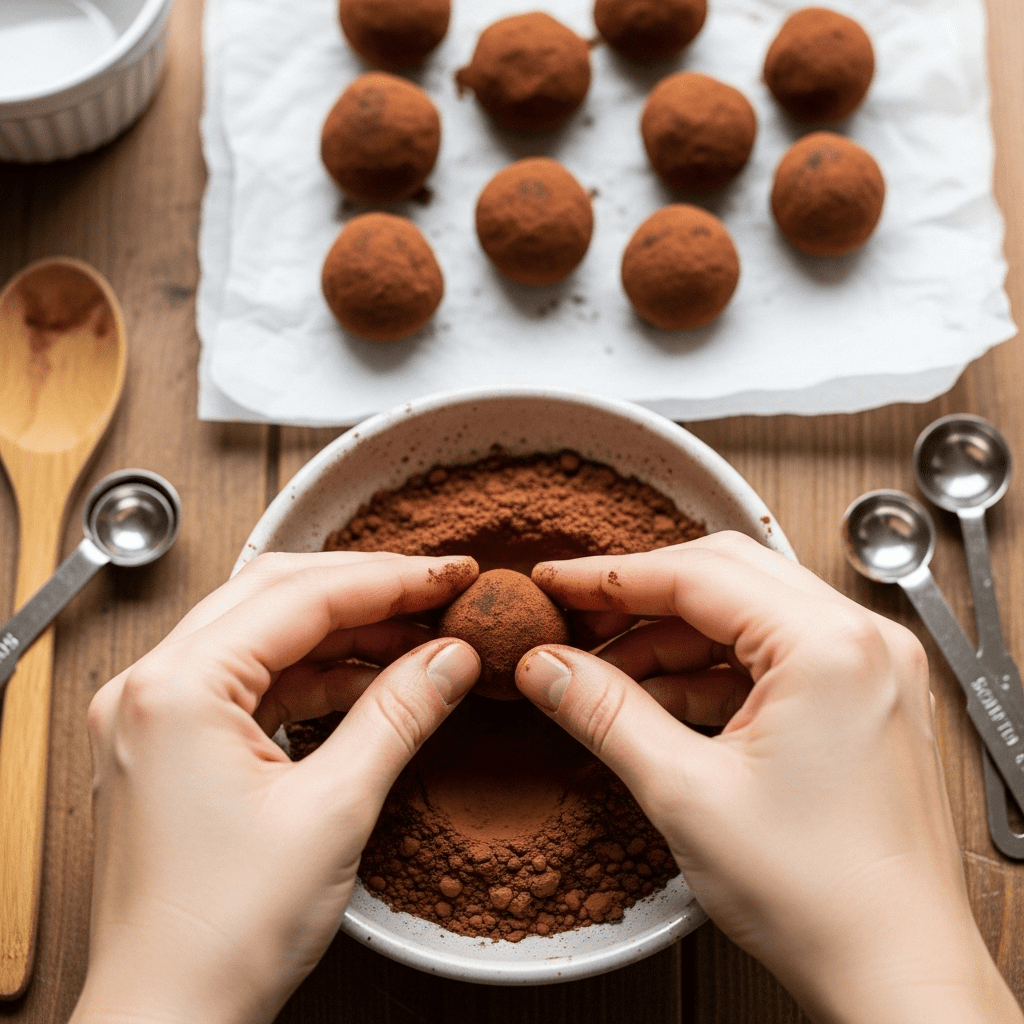
Step 5: Scoop and roll. Line a baking sheet with parchment paper. Using a small cookie scoop, melon baller, or spoon, form the ganache into small balls (about the size of a walnut). Place each on the prepared baking sheet. Work quickly as your hands will warm the ganache.
Step 6: Coat your truffles. Pour cocoa powder into a shallow bowl. Using a fork, gently roll each truffle in the cocoa powder, rotating to coat all sides evenly. Place back on the parchment paper.
Step 7: Chill and enjoy. Refrigerate finished truffles for at least 30 minutes before serving. They’re ready to eat, gift, or store!
Notes
- Don’t rush the ganache—proper chilling ensures perfect rolling consistency
- Slightly warm hands help truffles roll smoothly without cracking
- Create variety by coating different truffles with cocoa powder, crushed pistachios, sprinkles, or toasted coconut
- These truffles are best served at room temperature for the most luxurious melt-in-your-mouth experience
- For a fluffier texture, whip the cooled ganache before rolling (creates a mousse-like truffle)
- Work in a cool kitchen for easier handling1 truffle (approximately 13g)
Nutrition
- Serving Size: 1 truffle (approximately 13g)
- Calories: 65
- Sugar: 5g
- Sodium: 15mg
- Fat: 5g
- Saturated Fat: 3g
- Unsaturated Fat: 2g
- Trans Fat: 0g
- Carbohydrates: 7g
- Fiber: 1g
- Protein: 1g
- Cholesterol: 8mg
Note: Nutrition values are approximate and based on standard ingredients. Values may vary depending on specific brands and optional ingredients used.
Tips & Variations for Easy Chocolate Truffles
The basic truffle recipe is your canvas for creativity. Here are some delicious directions you can take this recipe:
Flavor Variations: Create an espresso version by adding ½ teaspoon of instant espresso powder dissolved in the vanilla extract—the coffee and chocolate combination is absolutely magical. For a peppermint truffle, replace vanilla with peppermint extract and coat with crushed candy canes. Make a salted caramel version by swirling salted caramel sauce into your ganache before chilling. Try a liqueur version by replacing some of the vanilla with a splash of your favorite liqueur (Grand Marnier, Cointreau, or Bailey’s Irish Cream all work wonderfully).
Coating Creativity: Beyond cocoa powder, roll your truffles in crushed toasted nuts (pistachios, almonds, hazelnuts), shredded toasted coconut, colorful sprinkles, or crushed freeze-dried berries. For a more elegant finish, dip half of each truffle in melted white chocolate and let it set before coating.
Texture Variations: For a lighter texture, whip your cooled ganache with an electric mixer for 3-5 minutes before rolling—this creates a mousse-like truffle that’s less dense. Add a tablespoon of cocoa powder to your ganache for an intensified chocolate flavor and darker color.
Dietary Adaptations: Make these dairy-free by using full-fat coconut milk instead of heavy cream and coconut oil instead of butter. For a lower-sugar version, use dark chocolate (which has less sugar than milk or semi-sweet) and a sugar-free sweetener mixed into your cocoa coating.
Pro Chef Tips for Perfect Chocolate Truffles
Invest in quality chocolate: This isn’t the place to pinch pennies. Quality chocolate melts smoothly, tastes better, and sets beautifully. Lindt, Ghirardelli, or Callebaut are all excellent choices available at most grocery stores.
Temperature matters: Your ganache should be warm when you whisk it but cool when you roll it. If it’s too warm, it’ll be too soft to hold its shape. If it’s too cold, it’ll be crumbly. Aim for that sweet spot—similar to thick pudding.
Use a cookie scoop: This small tool (usually available for under $5) changes the game. It ensures consistent sizing and makes the job much faster and easier than using a spoon. You’ll use it again and again.
Work with cool hands: If your hands are warm, the chocolate will melt faster than you can roll. Try chilling your hands under cool water and drying them completely before rolling a batch. Some bakers even wear cotton gloves to manage this.
Add a pinch of salt: A tiny amount of sea salt or fleur de sel dramatically enhances the chocolate flavor by providing a subtle counterpoint to the sweetness. You won’t taste it as salt—you’ll just think the chocolate tastes richer and more complex.
The emulsion principle: When you’re whisking the cream into the chocolate, you’re creating an emulsion. Whisk gently but thoroughly to create a smooth, silky texture. If your ganache is grainy, you likely need to whisk more or your cream was too hot.
Common Mistakes to Avoid When Making Chocolate Truffles
Mistake #1: Using chocolate chips instead of chopped chocolate. Chocolate chips contain additives that prevent them from melting as smoothly as bar chocolate. Always chop a chocolate bar or block for the best results.
Mistake #2: Skipping the ganache chilling step. I know you’re eager to get rolling, but this step is non-negotiable. If you skip it and the ganache is too warm, you’ll end up with chocolate pudding instead of truffles. Be patient—it’s worth it.
Mistake #3: Overheating the cream. If your cream boils, it can break the ganache or change its texture. Heat until it’s steaming and small bubbles form around the edges, then stop. The residual heat will gently melt your chocolate perfectly.
Mistake #4: Adding cold ingredients to hot ganache. Always ensure all your additions (butter, vanilla, etc.) are at room temperature. Cold ingredients added to hot ganache can cause seizing or lumpy texture.
Mistake #5: Not preparing your cooling situation in advance. Have your parchment paper, coating bowls, and refrigerator shelf ready before you start the ganache. Once that ganache is chilled and ready, you want to work efficiently.
Storage and Meal Prep for Chocolate Truffles
Proper storage keeps your truffles fresh and delicious for as long as possible. Store finished truffles in an airtight container in the refrigerator for up to 10 days. They can also be kept at cool room temperature (below 68°F) for 3-5 days, depending on your climate. In warmer environments or during summer months, the refrigerator is your best friend.
Shelf life insights: Chocolate truffles with cream and butter are best consumed within a week or two for optimal flavor and texture. They do stay safe longer, but the texture gradually changes and the flavors fade slightly. For best results, plan to eat them within 5-7 days of making them.
Preventing bloom: That white, dusty coating that sometimes appears on chocolate is called bloom and is harmless but not aesthetically pleasing. Prevent it by storing truffles in consistent, cool temperatures away from humidity. Never move them from cold to warm repeatedly.
Airtight is essential: Store your truffles in an airtight container with parchment between layers. This prevents them from drying out and keeps them from absorbing odors from your refrigerator.
Make-Ahead and Freezer Notes
One of the best things about homemade chocolate truffles is that they’re incredibly make-ahead friendly. You can make them up to a week in advance, store them in an airtight container in the refrigerator, and they’ll be ready whenever you need them.
Freezer storage: Yes, you can absolutely freeze truffles! Store them in an airtight container with parchment between layers for up to 3 months. Frozen truffles are actually wonderful because they release their chocolate flavor more slowly as they thaw on your tongue, creating an extended decadent experience.
Thawing instructions: Remove truffles from the freezer and let them come to room temperature for about 30 minutes. Don’t unwrap them while thawing, as condensation can form on the surface. Once thawed, they taste identical to freshly made truffles.
Ganache make-ahead: You can prepare the ganache base up to 3 days in advance and store it covered in the refrigerator. When you’re ready, simply scoop, roll, and coat. This is perfect if you want homemade truffles for an event but don’t want to do everything in one session.
Serving Suggestions for Chocolate Truffles
Chocolate truffles are elegant on their own, but here are some beautiful ways to present and serve them:
For entertaining: Arrange truffles in a decorative box or on a small plate with fresh berries (raspberries and strawberries are gorgeous with chocolate). Add a small decorative pick or fork for guests to use.
With coffee or tea: Serve truffles alongside espresso, cappuccino, or a smooth medium-roast coffee. They’re also delightful with chamomile tea or hot chocolate on a cool evening.
Pairing with wine: Truffles pair beautifully with dessert wines like Port, Moscato, or sparkling rosé. For red wine pairings, serve with darker chocolate truffles alongside a full-bodied wine like Cabernet Sauvignon.
For gift baskets: Nestle truffles into a pretty gift box with:
- A handwritten card sharing the recipe
- Small bottles of liqueurs for making flavored versions
- Fresh berries or candied fruit
- A beautiful cloth napkin
As part of a dessert board: Combine your truffles with other treats like fresh berries, honey, nuts, and maybe a selection of different chocolates for an elegant after-dinner spread.
For holidays: Package truffles in clear cellophane bags tied with ribbon as small gifts or stocking stuffers. They’re especially popular during Christmas and Valentine’s Day but work for any occasion.
FAQs About Homemade Chocolate Truffles
Q: Can I use milk chocolate for this recipe? A: Absolutely! Milk chocolate will create sweeter, creamier truffles. Just know that milk chocolate has a lower melting point than dark or semi-sweet, so your ganache might be slightly softer. It’ll still work beautifully.
Q: What if my ganache breaks or gets grainy? A: This usually happens from temperature extremes. If your ganache seems broken, try adding a tablespoon of cream and gently whisking it with a fork over a warm water bath. Sometimes this brings it back together.
Q: Do I have to use vanilla extract? A: Vanilla is optional but highly recommended—it adds a subtle sophistication to the chocolate. If you don’t have it, the truffles will still be delicious without it.
Q: Can I make these without a refrigerator? A: Technically yes, but it’s challenging. You need the ganache to firm up enough to hold its shape when rolled. In a hot kitchen, you might need to chill it in a cool basement or use a regular freezer set to its warmest setting.
Q: How do I keep my hands from getting messy while rolling? A: Wear food-safe cotton gloves, chill your hands regularly under cool water, or use a fork to roll the truffle in cocoa powder instead of your hands. You can also use a small cookie scoop to place them directly into the cocoa powder and roll with a fork.
Q: What’s the difference between a truffle and a bonbon? A: Truffles are made from ganache (chocolate and cream) while bonbons can have various fillings. Truffles are typically coated in cocoa powder or chocolate, while bonbons have more decorative coatings and are often dipped in chocolate.
Q: Can I double this recipe? A: Yes, this recipe doubles beautifully. Just scale up all ingredients proportionally. The process remains the same.
Conclusion: Make Your Own Luxurious Chocolate Truffles
Making homemade chocolate truffles is one of those cooking achievements that feels far more difficult than it actually is. Once you realize how simple the technique truly is, you’ll find yourself whipping up batches regularly for special occasions, gift-giving, or those moments when you need a truly decadent treat.
The fact that you can create confectionery-quality chocolates in your own kitchen using just a handful of ingredients is genuinely empowering. You’re not just making dessert—you’re creating a little moment of joy and elegance that will delight everyone who tastes one.
I absolutely encourage you to start with this classic cocoa-coated version, then branch out into your own flavor adventures. Try that espresso version, experiment with different coatings, or create your signature truffle. Each batch teaches you something new about chocolate, flavor, and the satisfaction of creating something beautiful with your own hands.
Have you made chocolate truffles before? I’d love to hear about your experience and any flavor variations you’ve tried! Drop a comment below, and if you try this recipe, please share a photo on Pinterest and tag me—I absolutely love seeing your creations come to life. And if you haven’t pinned this recipe yet, please do! It’s the perfect resource to come back to whenever you want to create something luxurious at home.
Happy truffle-making! 🍫