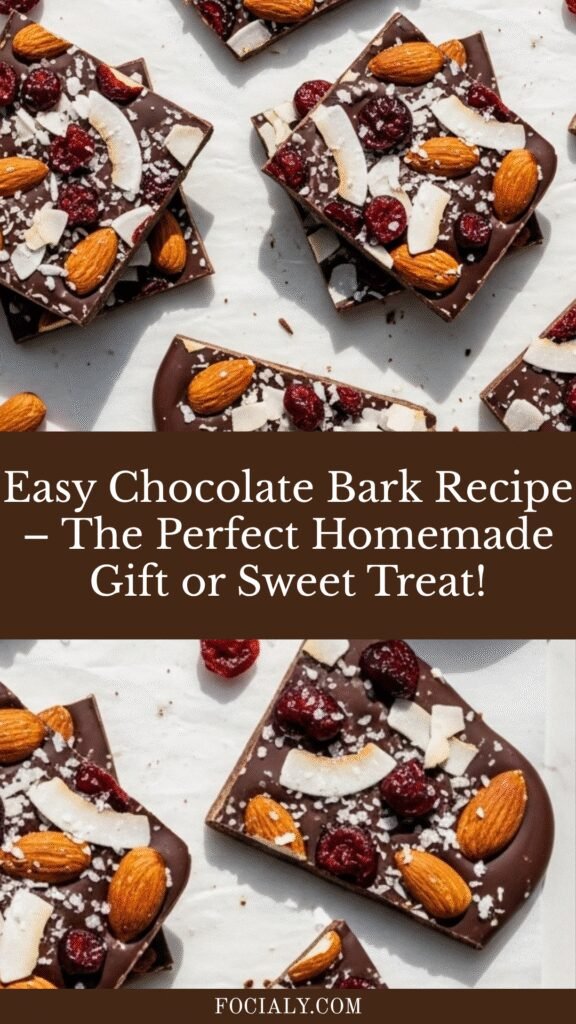
Easy Chocolate Bark Recipe – The Perfect Homemade Gift or Sweet Treat!
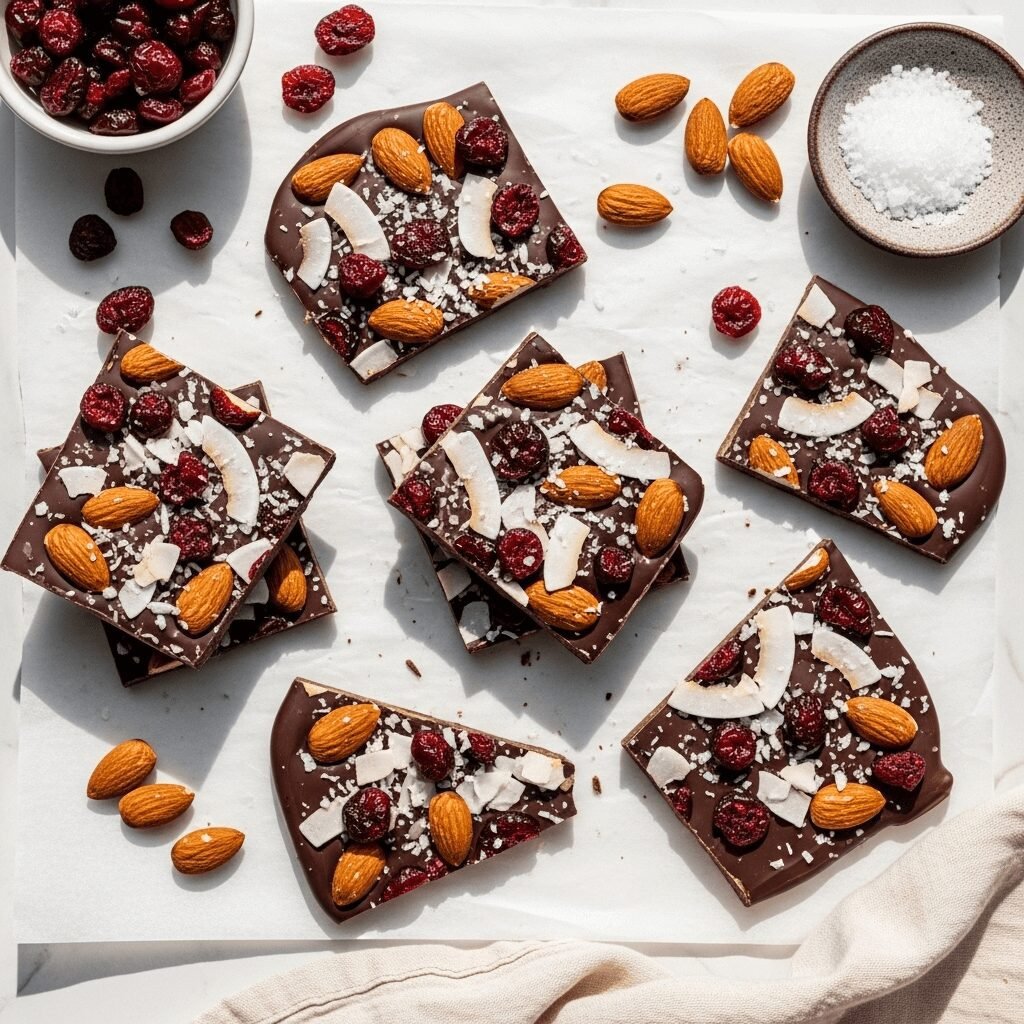
There’s something truly magical about chocolate bark – those gorgeous, irregular pieces of chocolate studded with nuts, dried fruits, candies, or whatever your heart desires. This Easy Chocolate Bark Recipe is one of those wonderful no-bake treats that looks incredibly impressive but requires minimal effort and zero baking skills. Whether you’re looking for a last-minute holiday gift, a beautiful dessert for your next gathering, or simply craving something sweet and satisfying, chocolate bark delivers every single time.
What makes chocolate bark so beloved is its incredible versatility and foolproof nature. You can customize it endlessly with your favorite toppings, create it in any flavor combination you dream up, and it always looks like you spent hours in the kitchen – even though you’ll only need about 15 minutes of actual hands-on time. Serve it at Christmas parties, Valentine’s Day celebrations, Easter brunches, or any random Tuesday when you need a little sweetness in your life. Package it up in clear cellophane bags tied with pretty ribbons for teacher gifts, neighbor treats, or hostess presents that everyone will rave about.
The best part? You don’t need any special equipment or fancy culinary techniques. If you can melt chocolate and spread it on a pan, you can make professional-looking chocolate bark that rivals anything you’d find at a specialty chocolate shop. It’s the perfect recipe for beginner cooks, busy parents, and anyone who wants maximum impact with minimal effort.
History / Background
Chocolate bark has an interesting history that connects to the early days of American candy-making. The name “bark” comes from its resemblance to tree bark – those irregular, broken pieces with rough, natural edges. While the exact origin is debated, chocolate bark became particularly popular in the United States during the 19th century when chocolate became more accessible to home cooks.
Traditional bark recipes often featured simple combinations like chocolate with nuts, which made sense during times when exotic ingredients were harder to come by. Almond bark and peppermint bark became Christmas classics, with many families passing down their special recipes through generations. The concept likely evolved from chocolatiers’ practices of using leftover chocolate and candy pieces to create “scrap” confections that were too delicious to waste.
During the Great Depression, chocolate bark experienced a surge in popularity because it allowed families to stretch expensive chocolate further by mixing it with more affordable ingredients like peanuts or popcorn. Home cooks could make a little chocolate go a long way, creating treats that felt special during difficult times.
In recent years, chocolate bark has experienced a major renaissance thanks to Pinterest, Instagram, and the artisan food movement. Modern versions feature everything from freeze-dried strawberries and sea salt to pretzel pieces and crushed cookies. Specialty chocolate shops now sell elaborate barks for premium prices, but the beauty is that you can create equally stunning versions right in your own kitchen for a fraction of the cost.
The tradition of giving homemade chocolate bark as gifts remains strong, especially during the holiday season. It’s become a canvas for creativity, with home bakers inventing new flavor combinations every year – from s’mores bark to birthday cake bark to tropical coconut versions. This simple confection has truly stood the test of time, evolving while maintaining its essential charm and accessibility.
Why You’ll Love This Recipe
This chocolate bark recipe is about to become your new go-to sweet treat, and here’s why: it’s genuinely one of the easiest desserts you’ll ever make, yet it looks like you attended culinary school. The combination of simplicity and stunning presentation makes it perfect for both everyday snacking and special occasions.
Here’s what makes this recipe absolutely irresistible:
- No baking required – just melting and spreading, which means no oven preheating, no temperature watching, and no chance of burning anything
- Ready in under 30 minutes – including cooling time, so you can satisfy chocolate cravings almost instantly
- Endlessly customizable – swap toppings based on dietary needs, seasonal ingredients, or whatever’s in your pantry
- Budget-friendly – costs a fraction of store-bought gourmet chocolate bark while tasting infinitely better
- Kid-friendly activity – children love helping choose toppings and sprinkling them on the chocolate
- Makes gorgeous gifts – package it beautifully for presents that people actually want to receive
- Minimal cleanup – just one bowl, one pan, and a spatula to wash
- Crowd-pleaser – I’ve never met anyone who doesn’t love chocolate bark
- Foolproof results – there’s virtually no way to mess this up, even if you’re a complete beginner
- Allergy-adaptable – easily made dairy-free, nut-free, or vegan depending on your needs
- Stays fresh for weeks – perfect for making ahead for parties or gifts
Whether you’re an experienced home cook or someone who usually avoids the kitchen, this recipe will make you feel like a chocolatier. The satisfaction of breaking that first piece of perfectly set bark is truly unmatched!
Ingredient Notes
Let’s talk about what goes into creating the perfect chocolate bark. The beauty of this recipe is its simplicity – the ingredients are straightforward, but choosing quality options makes all the difference.
Chocolate (Dark, Milk, or White): The star of the show! Use good-quality chocolate chips, baking chocolate bars, or chocolate melting wafers. I prefer chocolate chips for convenience, but chopped chocolate bars give a more professional finish. For the smoothest melting, look for chocolate with a higher percentage of cocoa butter. Dark chocolate provides a rich, sophisticated flavor, milk chocolate offers creamy sweetness, and white chocolate creates a beautiful canvas for colorful toppings. You can also create layered bark using multiple chocolate types. Substitution: Vegan chocolate chips work perfectly for dairy-free versions.
Toppings (Nuts, Dried Fruit, Candy, etc.): This is where your creativity shines! Classic options include chopped almonds, pecans, walnuts, pistachios, dried cranberries, raisins, shredded coconut, crushed candy canes, pretzels, toffee bits, mini marshmallows, or crushed cookies. Choose 2-4 toppings for visual interest without overwhelming the chocolate. Make sure any add-ins are dry (not fresh fruit, which adds moisture) and roughly the same size for even distribution. Substitution: Use whatever you love or need to use up – that’s the magic of bark!
Sea Salt (Optional but Recommended): A light sprinkle of flaky sea salt elevates chocolate bark from good to extraordinary. It enhances the chocolate’s flavor, adds sophisticated contrast, and makes each bite more interesting. Use flaky varieties like Maldon or fleur de sel rather than regular table salt. This small addition makes people ask “What’s your secret ingredient?”
Coconut Oil or Shortening (Optional): Adding a teaspoon of coconut oil or vegetable shortening to your melted chocolate creates a thinner, more spreadable consistency and gives the finished bark a beautiful shine. This is especially helpful if your chocolate seems thick or isn’t spreading smoothly. Note: This is completely optional – pure chocolate bark is equally delicious!
Equipment Needed
You’ll need very minimal equipment for this recipe, which is part of its charm. Here’s what to gather before starting:
- Baking Sheet or Jelly Roll Pan – a rimmed sheet pan (9×13 inches or similar) works perfectly for spreading your chocolate
- Parchment Paper or Silicone Baking Mat – absolutely essential for easy removal and cleanup; don’t skip this!
- Microwave-Safe Bowl – for melting chocolate; glass or ceramic bowls work best
- Rubber Spatula or Offset Spatula – for spreading chocolate evenly across the pan
- Measuring Cups and Spoons – for portioning ingredients accurately
- Sharp Knife or Pizza Cutter – for breaking bark into pieces (though honestly, hands work too!)
- Storage Container or Cellophane Bags – for keeping bark fresh or packaging as gifts
Optional but helpful:
- Double Boiler – if you prefer stovetop melting over microwave
- Cooling Rack – to elevate your pan for faster cooling
- Refrigerator or Freezer Space – speeds up the setting process significantly
That’s it! No stand mixers, no special molds, no complicated gadgets. This is truly kitchen minimalism at its finest.
PrintEasy Chocolate Bark Recipe – The Perfect Homemade Gift or Sweet Treat!
This Easy Chocolate Bark Recipe creates beautiful, customizable chocolate treats perfect for gifting or snacking. Simply melt your favorite chocolate, spread it on a pan, add delicious toppings, and let it set. The result is professional-looking bark that tastes incredible and requires no baking skills whatsoever!
- Prep Time: 10 minutes
- Cook Time: 15-20 minutes
- Total Time: 30 minutes
- Yield: 16-20 pieces 1x
- Category: Dessert, Candy, Snack
- Method: No-Bake
- Cuisine: American
- Diet: Vegetarian
Ingredients
- 12 oz (340g) chocolate chips or chopped chocolate (dark, milk, or white chocolate)
- 1 teaspoon coconut oil or vegetable shortening (optional, for shine)
- ½ cup chopped nuts (almonds, pecans, walnuts, or pistachios)
- ¼ cup dried cranberries or raisins
- ¼ cup shredded coconut (sweetened or unsweetened)
- 2 tablespoons crushed candy canes or toffee bits (optional)
- ½ teaspoon flaky sea salt
- Additional toppings as desired: mini chocolate chips, crushed cookies, pretzels, etc.
Instructions
- Prepare Your Pan: Line a baking sheet (approximately 9×13 inches) with parchment paper or a silicone baking mat, making sure it covers the entire bottom and slightly up the sides. Set aside.
- Melt the Chocolate: Place chocolate chips and coconut oil (if using) in a microwave-safe bowl. Microwave in 30-second intervals, stirring thoroughly between each interval, until chocolate is completely smooth and melted. This usually takes 1-2 minutes total. Be careful not to overheat – chocolate can burn quickly. Alternatively, melt chocolate using a double boiler over simmering water, stirring constantly.
- Spread the Chocolate: Pour the melted chocolate onto the prepared baking sheet. Use a rubber spatula or offset spatula to spread it into an even layer about ¼-inch thick. You can spread it to the edges for uniform pieces or leave it more organic-shaped for rustic bark. Work relatively quickly as chocolate begins setting.
- Add Toppings: Immediately sprinkle your chosen toppings evenly over the melted chocolate. Press them down gently with your hands or the back of a spoon so they stick when the chocolate hardens. This is your moment to be creative – make patterns, create sections with different toppings, or go wild with a mix of everything!
- Season with Salt: Sprinkle flaky sea salt lightly across the entire surface. Don’t skip this step – it really makes the flavors pop!
- Set the Bark: Place the baking sheet in the refrigerator for 15-20 minutes, or in the freezer for about 10 minutes, until the chocolate is completely firm and set. You’ll know it’s ready when it’s hard to the touch and no longer glossy.
- Break Into Pieces: Once fully hardened, lift the bark off the pan using the parchment paper. Break it into irregular pieces with your hands, or use a sharp knife for more uniform pieces. The irregular, natural breaks are part of bark’s charm!
- Serve or Store: Enjoy immediately or store in an airtight container with parchment paper between layers if stacking.
Notes
- Chocolate Quality Matters: Use good-quality chocolate for best results. Avoid “chocolate-flavored” products.
- Don’t Overheat: Overheated chocolate becomes grainy and seizes. Heat gently and stir frequently.
- Topping Timing: Add toppings immediately after spreading – chocolate sets quickly!
- Layered Bark: Create two-tone bark by melting dark and white chocolate separately, spreading one layer, letting it set slightly, then adding the second layer.
- Storage: Keep bark in a cool, dry place. Avoid humid environments which can cause chocolate to “bloom” (develop white spots – still safe to eat but less attractive).
- Gift Packaging: Package bark in clear cellophane bags, mason jars, or decorative tins for beautiful homemade gifts.
Nutrition
- Serving Size: 1 piece (approximately 1 oz)
- Calories: 145
- Sugar: 12g
- Sodium: 45mg
- Fat: 9g
- Saturated Fat: 5g
- Unsaturated Fat: 3.5g
- Trans Fat: 0g
- Carbohydrates: 15g
- Fiber: 2g
- Protein: 2g
- Cholesterol: 3g
Note: Nutrition information is approximate and varies depending on chocolate type and toppings used. Calculated using dark chocolate and mixed nut toppings.
Tips & Variations
The wonderful thing about chocolate bark is how easily you can customize it to match any occasion, dietary need, or flavor preference. Here are some creative ways to make this recipe your own:
Flavor Variations:
- Peppermint Bark: Use white chocolate and top with crushed candy canes for a classic holiday treat
- S’mores Bark: Mix in mini marshmallows, graham cracker pieces, and extra chocolate chips
- Tropical Bark: Add dried pineapple, macadamia nuts, and toasted coconut
- Birthday Cake Bark: Use white chocolate, add sprinkles, and crushed vanilla cookies
- Peanut Butter Bark: Swirl melted peanut butter into chocolate before adding toppings
- Trail Mix Bark: Load it up with dried fruits, seeds, and various nuts
- Espresso Bark: Add 1 teaspoon instant espresso powder to melted chocolate
- Orange Chocolate Bark: Add orange zest and dried orange slices
- Salted Caramel Bark: Drizzle with caramel sauce and sprinkle with sea salt
Dietary Adaptations:
- Vegan: Use dairy-free chocolate chips and avoid milk chocolate
- Gluten-Free: Most chocolate bark is naturally gluten-free; just check labels on mix-ins
- Nut-Free: Replace nuts with seeds (pumpkin, sunflower), popcorn, or crushed pretzels
- Sugar-Free: Use sugar-free chocolate and fresh berries or unsweetened coconut
Texture Additions:
- Add crispy rice cereal for crunch
- Include crushed potato chips for sweet-salty contrast
- Mix in dried fruit for chewy texture
- Sprinkle on toasted coconut flakes for tropical flair
- Add freeze-dried fruit for intense flavor and color
Visual Enhancements:
- Create swirled bark by melting two chocolate types and swirling together with a knife
- Make layered bark with distinct chocolate layers
- Use cookie cutters before chocolate sets completely for shaped pieces
- Create geometric patterns with your toppings for Instagram-worthy results
Pro Chef Tips
Want to take your chocolate bark from homemade to artisan-level? Here are professional techniques that make all the difference:
Temperature Control is Everything: The ideal temperature for working with melted chocolate is between 88-90°F for dark chocolate, 86-88°F for milk chocolate, and 82-84°F for white chocolate. While you don’t need a thermometer for basic bark, knowing this helps you understand why slightly cooled chocolate spreads better and has better snap.
Temper for Professional Results: If you want shiny, snappy bark with a professional finish, properly tempered chocolate is key. This involves carefully heating and cooling chocolate to specific temperatures to stabilize cocoa butter crystals. While not necessary for delicious bark, it prevents bloom and creates that satisfying snap. For casual home cooks, adding coconut oil mimics some benefits of tempering without the fuss.
Layer Strategically: When using multiple toppings, consider their visual and textural balance. Place larger pieces first, fill gaps with medium items, then finish with small garnishes like sea salt or edible flowers. This creates professional-looking depth and ensures every piece has good coverage.
Texture Contrast is Key: The best bark combines multiple textures – smooth chocolate with crunchy nuts, chewy dried fruit, and perhaps something crispy like pretzel or toffee. This complexity makes each bite interesting and prevents palate fatigue.
Toast Your Nuts: Taking two extra minutes to toast nuts in a dry skillet transforms them from good to incredible. Toasting releases oils and intensifies flavor, making your bark taste exponentially better. Cool nuts completely before adding to chocolate.
Mind the Thickness: Aim for chocolate about ¼-inch thick. Thinner bark breaks too easily and doesn’t have enough chocolate to balance toppings. Thicker bark becomes overwhelming and harder to break cleanly. Quarter-inch is the sweet spot for perfect chocolate-to-topping ratio.
Cool Gradually: While it’s tempting to freeze bark for quick results, refrigeration produces better texture. Rapid temperature changes can cause chocolate to develop condensation when brought to room temperature, creating a dull appearance. Refrigerate for best results, freeze only if rushed.
Break with Confidence: Don’t use a knife unless you want uniform pieces. The beauty of bark is its irregular, organic shape. Breaking by hand creates natural edges that look artisan and rustic. Embrace imperfection!
Common Mistakes to Avoid
Even though chocolate bark is beginner-friendly, a few pitfalls can affect your results. Here’s what to watch out for:
Mistake #1: Getting Water in the Chocolate
Even a single drop of water causes chocolate to “seize” – becoming grainy, thick, and unworkable. Ensure all bowls and utensils are completely dry. Don’t cover melting chocolate with a lid (condensation drips back in). If chocolate does seize, whisk in coconut oil or vegetable shortening one teaspoon at a time to smooth it out.
Mistake #2: Overheating the Chocolate
Chocolate burns easily and there’s no fixing it once it happens. Always melt in short intervals (30 seconds in microwave), stirring between each. Remove from heat when there are still a few small lumps – residual heat will finish melting them. Burnt chocolate tastes bitter and grainy.
Mistake #3: Using Poor-Quality Chocolate
“Chocolate-flavored” coating or low-quality chocolate produces waxy, artificial-tasting bark. Invest in real chocolate with cocoa butter as the primary fat. You’ll taste the difference dramatically. Check ingredient lists – chocolate, sugar, and cocoa butter should be the first ingredients.
Mistake #4: Adding Toppings Too Late
Chocolate begins setting within minutes, especially in cool kitchens. Have all toppings prepped and ready before you start melting chocolate. If you wait too long, toppings won’t stick properly and will fall off when bark is broken.
Mistake #5: Storing Incorrectly
Chocolate absorbs odors from the refrigerator and nearby foods. Always store bark in an airtight container. If stacking pieces, place parchment paper between layers to prevent sticking. Store in a cool, dry place – not necessarily the refrigerator unless your kitchen is very warm.
Mistake #6: Ignoring Humidity
High humidity is chocolate’s enemy. It causes “bloom” – those white, dusty spots that appear on chocolate’s surface. While still safe to eat, bloomed chocolate looks less appetizing. Make bark on low-humidity days when possible, and store in airtight containers with low moisture.
Mistake #7: Overloading with Toppings
More isn’t always better! Too many toppings overwhelm the chocolate and prevent pieces from breaking cleanly. Aim for roughly 50-60% chocolate coverage visible on top. The chocolate should be the star, with toppings as supporting players.
Storage & Meal Prep
Proper storage keeps your chocolate bark fresh, crispy, and delicious for weeks. Here’s everything you need to know:
Room Temperature Storage:
Store bark in an airtight container at cool room temperature (below 70°F) for up to 3 weeks. Layer pieces between parchment paper to prevent sticking. Keep away from heat sources, direct sunlight, and humidity. This is ideal if you’re eating it within a few weeks and your home isn’t too warm.
Refrigerator Storage:
For longer storage or in warm climates, refrigerate bark in an airtight container for up to 6 weeks. Let it come to room temperature before serving for best texture and flavor. Be aware that removing from cold storage to warm rooms can cause condensation – unwrap only when it reaches room temperature.
Preventing Sticking:
Always place parchment or wax paper between layers when stacking bark pieces. Without this barrier, chocolate can stick together, especially in warm conditions. Individual wrapping in wax paper makes for easy grabbing and portion control.
Shelf Life Indicators:
Fresh bark should be shiny (if tempered) or slightly matte, with good snap when broken. Signs of age include: white or grayish bloom (still safe but less attractive), soft or bendy texture instead of crisp snap, or stale-tasting nuts. The chocolate itself rarely spoils but mix-ins can go rancid.
Meal Prep Applications:
Make large batches on Sunday for week-long snacking. Portion into small containers for lunch boxes, afternoon treats, or post-dinner desserts. Having homemade bark on hand prevents impulse buys of less healthy sweets. It’s also wonderful to have ready for unexpected guests.
Gift Packaging Storage:
If making bark for gifts, store unpackaged in airtight containers until right before giving. Package 1-2 days before giving at most. Cellophane bags, while pretty, aren’t airtight – bark will stay fresher in proper containers until the last minute.
Make-Ahead & Freezer Notes
Chocolate bark is perfect for advance preparation, making it ideal for holiday baking marathons, gift-giving seasons, or whenever you want treats ready to go.
Make-Ahead Timeline:
Bark can be made up to 1 month in advance when stored properly. Make it during a free afternoon, store it correctly, and you’re set for spontaneous gifts, parties, or cravings. This makes holiday prep significantly less stressful – knock out your bark weeks before December chaos hits.
Freezing Instructions:
Yes, chocolate bark freezes beautifully! Place broken bark pieces in a single layer on a baking sheet and freeze until solid (about 1 hour). Transfer to a freezer-safe airtight container or heavy-duty freezer bags, placing parchment paper between layers. Properly stored bark keeps in the freezer for up to 3 months without quality loss.
Thawing Recommendations:
Remove the desired amount of bark from the freezer and let it thaw in its container at room temperature for about 30 minutes. Don’t unwrap until it reaches room temperature to prevent condensation from forming on the chocolate (which causes that white bloom). Never microwave frozen bark to thaw – it will start melting unevenly.
Freezing for Gifting:
Freeze bark in gift-sized portions in small containers or bags. When you need a last-minute gift, pull out a portion, let it thaw, transfer to pretty packaging, and you have an impressive homemade present ready in under an hour.
Best Practices for Frozen Bark:
Avoid frequent temperature changes – take out only what you’ll use. Label containers with date and flavor combinations. Choose freezer bags specifically designed for food storage (they’re thicker and prevent freezer burn). Squeeze out excess air before sealing to maintain freshness.
What Freezes Well (and What Doesn’t):
Most bark freezes perfectly, but bark with fresh fruit or fresh herbs won’t freeze well. Stick to dried fruits, nuts, candies, and cookies. Bark with caramel or marshmallows may have slight texture changes but still tastes delicious. Simple dark chocolate nut bark freezes absolutely perfectly with zero texture change.
Serving Suggestions
Chocolate bark is incredibly versatile and fits into so many occasions. Here are creative ways to serve and present your homemade creation:
Dessert Presentations:
- Serve alongside coffee or espresso as an after-dinner treat
- Create a chocolate board with various bark flavors, fresh berries, and whipped cream
- Crush bark and sprinkle over ice cream sundaes
- Arrange pieces on a slate board with fresh figs and cheese for elegant entertaining
- Garnish individual dessert plates with small bark pieces for restaurant-style plating
Beverage Pairings:
- Hot chocolate – add a piece as a stirrer that melts into your drink
- Coffee drinks – the perfect accompaniment to cappuccinos and lattes
- Red wine – particularly dark chocolate bark pairs beautifully with Cabernet
- Port or dessert wines for elegant after-dinner service
- Milk – keeping it simple for family snacking
Party Ideas:
- Create a “bark bar” where guests customize their own with various chocolates and toppings
- Package in cellophane bags with ribbon for party favors
- Arrange on tiered serving stands for elegant dessert tables
- Crush and rim chocolate martini glasses for cocktail parties
- Use as edible place cards by writing names on parchment beneath each piece
Gift Presentations:
- Layer in mason jars with pretty fabric toppers
- Arrange in decorative tins for holiday giving
- Package in clear boxes tied with ribbon to show off the beautiful toppings
- Create variety packs with multiple bark flavors
- Include recipe cards so recipients can make their own
Everyday Enjoyment:
- Keep a container at your desk for afternoon pick-me-ups
- Pack in lunch boxes for special treats
- Set out during movie nights with popcorn
- Enjoy with tea during afternoon breaks
- Share at book club meetings or casual gatherings
Complementary Sides: Fresh strawberries, orange segments, salted nuts, biscotti, shortbread cookies, cheese (especially aged cheddar with dark chocolate bark), dried apricots, fresh mint leaves, or whipped cream all pair wonderfully with chocolate bark.
FAQs Section
Q: Can I use chocolate chips or do I need to buy baking chocolate?
A: Chocolate chips work perfectly fine! While some purists prefer chopped chocolate bars for smoother melting, quality chocolate chips produce excellent bark. Just avoid “chocolate-flavored” chips which contain other fats instead of cocoa butter. Semi-sweet, dark, milk, or white chocolate chips all work beautifully.
Q: Why did my chocolate seize up and become grainy?
A: Chocolate seizes when it comes in contact with even tiny amounts of water. This happens if your bowl was damp, condensation dripped in, or steam from a double boiler touched the chocolate. To rescue seized chocolate, whisk in vegetable shortening or coconut oil one teaspoon at a time until smooth again. Prevention is key – ensure everything is bone dry.
Q: How do I prevent the white coating (bloom) on my chocolate bark?
A: Chocolate bloom occurs due to temperature fluctuations or humidity. Store bark in airtight containers in cool, consistent temperatures. When removing from refrigerator, let it come to room temperature before unwrapping to prevent condensation. While bloom is harmless and doesn’t affect taste, proper storage prevents it. Adding a teaspoon of coconut oil to melted chocolate also helps prevent bloom.
Q: Can I make this dairy-free or vegan?
A: Absolutely! Use dairy-free chocolate chips (many dark chocolate varieties are naturally dairy-free – check labels). Enjoy Life, Hu Kitchen, and Trader Joe’s all make excellent dairy-free chocolate. Ensure your toppings are also vegan (some dried fruits are processed with honey). The result is just as delicious as traditional bark.
Q: How thin or thick should I spread the chocolate?
A: Aim for about ¼-inch thickness. This is thick enough to break into substantial pieces and support toppings, but not so thick it becomes overwhelming to eat. Too thin (⅛-inch or less) makes bark fragile and doesn’t provide enough chocolate to balance toppings. Too thick (½-inch or more) becomes hard to bite and unbalanced.
Q: My toppings fell off when I broke the bark. What went wrong?
A: This happens when toppings are added after chocolate begins to set. Chocolate hardens quickly, so have all toppings prepared before you start melting. Add them immediately after spreading chocolate on the pan, and press gently so they stick. Work in a cool kitchen if possible to give yourself more working time.
Q: Can I use fresh fruit as a topping?
A: Fresh fruit isn’t recommended because its water content doesn’t mix well with chocolate and it spoils quickly. However, you can use freeze-dried fruit (strawberries, raspberries, bananas) which provides intense flavor and color without moisture issues. Dried fruits like cranberries, apricots, or cherries work perfectly.
Q: How do I create swirled or marbled bark?
A: Melt two types of chocolate separately (like dark and white). Pour both onto your prepared pan, then use a knife or skewer to swirl them together in figure-eight motions. Don’t over-mix or you’ll lose the marbled effect. Add toppings immediately and proceed as usual. This creates stunning visual appeal!
Conclusion
There you have it – everything you need to know about making absolutely gorgeous, delicious chocolate bark right in your own kitchen! This simple recipe proves that impressive results don’t require complicated techniques or professional equipment. With just quality chocolate, your favorite toppings, and about 30 minutes, you can create treats that rival anything from fancy chocolate shops.
The beauty of chocolate bark lies in its versatility and accessibility. Whether you’re an experienced baker or someone who usually avoids the kitchen, this recipe welcomes you. It’s forgiving, customizable, and practically foolproof. Even better, it’s the kind of recipe that invites creativity – every batch can be different based on your mood, the season, or whatever’s in your pantry.
I hope this recipe brings joy to your kitchen and smiles to everyone who gets to enjoy your homemade bark. There’s something special about sharing treats you’ve made yourself, and chocolate bark makes that so easy and affordable.
Now it’s your turn! Gather your chocolate and favorite toppings, and give this recipe a try. I’d absolutely love to hear how it turns out for you! What topping combinations did you create? Did you make any fun variations? Leave a comment below sharing your experience, and don’t forget to rate this recipe. Your feedback helps other home cooks and makes this community so valuable.
And please, save this recipe to your Pinterest boards! Pin it to your dessert boards, gift idea boards, or holiday baking collections so you can find it easily whenever chocolate cravings strike. Share it with friends who love easy, impressive treats. The more people making homemade chocolate bark, the sweeter the world becomes!
Happy chocolate making, friends! 🍫