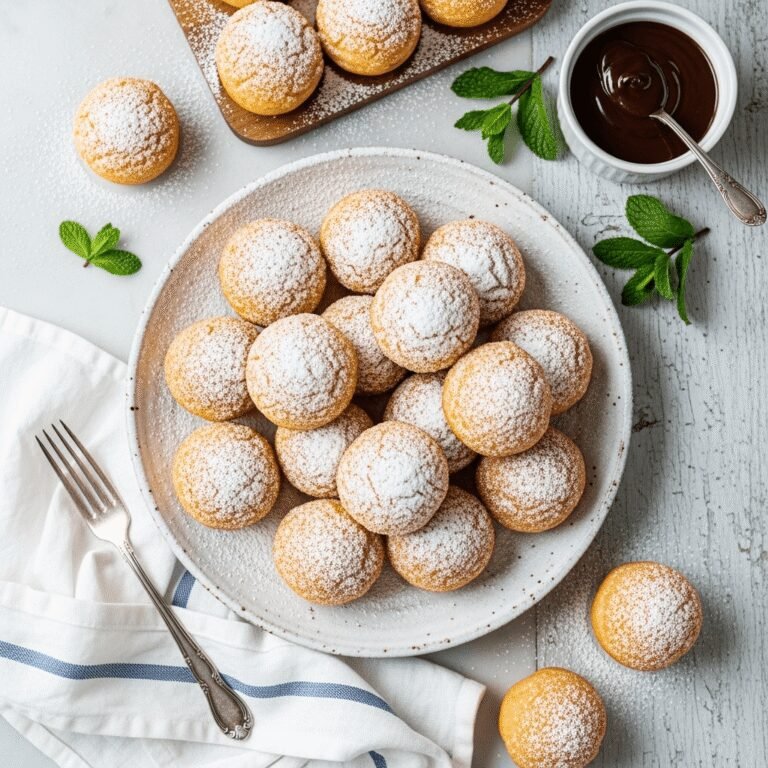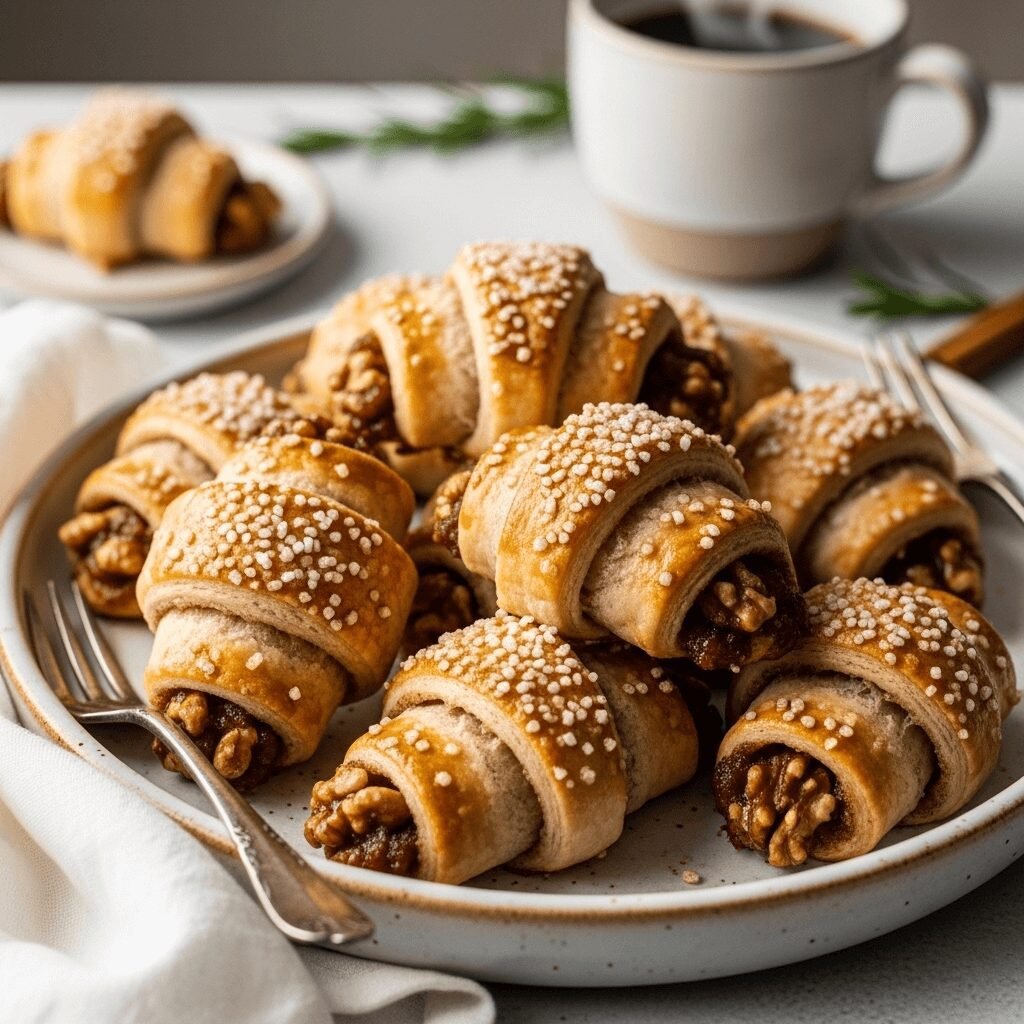
The Ultimate Rugelach Recipe – Buttery, Flaky Cookies with a Sweet Filling

If you’ve never experienced the sheer joy of biting into a freshly baked rugelach, you’re in for an absolute treat! These delightful crescent-shaped cookies are the perfect combination of buttery, flaky pastry wrapped around sweet, cinnamon-spiced fillings. Whether you’re looking for an impressive dessert for your holiday table, a special treat for afternoon tea, or simply want to master a classic Jewish bakery favorite at home, this rugelach recipe will become your go-to. The dough is surprisingly easy to work with, and the result is bakery-quality cookies that taste like they came straight from a fancy New York delicatessen. These cookies are perfect for gift-giving, cookie swaps, or simply enjoying with a hot cup of coffee on a cozy afternoon.
History / Background
Rugelach (pronounced “roo-guh-lakh” or “rug-ah-lah”) has a rich and fascinating history that spans continents and centuries. The word “rugelach” comes from the Yiddish word meaning “little twists” or “little horns,” referring to their distinctive crescent shape. These beloved cookies originated in the Jewish communities of Poland and Central Europe, though their exact birthplace is debated among food historians.
The traditional Eastern European rugelach was made with a yeast-based dough and featured simpler fillings like nuts, raisins, and cinnamon. However, when Jewish immigrants brought their treasured recipes to America in the late 19th and early 20th centuries, rugelach underwent a delicious transformation. American bakers, particularly those in New York City, began experimenting with a cream cheese-enriched dough that created an even flakier, more tender pastry. This cream cheese version, which many believe was popularized in the 1940s and 1950s, has become the gold standard for rugelach in the United States.
Today, rugelach holds a special place in Jewish-American baking tradition, particularly during holidays like Hanukkah and Rosh Hashanah, though they’re enjoyed year-round. You’ll find them in nearly every Jewish bakery from Manhattan to Los Angeles, and they’ve become beloved by cookie enthusiasts of all backgrounds. The beauty of rugelach lies in its versatility – while traditional fillings include cinnamon-sugar with walnuts, raisins, or apricot jam, modern variations feature everything from chocolate chips to Nutella to savory options with cheese and za’atar.
Why You’ll Love This Recipe
This rugelach recipe strikes the perfect balance between authentic tradition and modern convenience, delivering bakery-quality results that will make you feel like a professional pastry chef. The cream cheese dough is remarkably forgiving and creates the most incredible tender-flaky texture that simply melts in your mouth.
Here’s why this recipe will become a family favorite:
- Impressive but approachable – These look incredibly sophisticated, but the technique is surprisingly simple once you get the hang of rolling and shaping
- Make-ahead friendly – The dough actually needs to chill, making this perfect for breaking up the work over two days
- Customizable fillings – Use the classic cinnamon-walnut combination or get creative with your favorite flavors
- Perfect for gifting – These cookies transport beautifully and make thoughtful, delicious gifts
- Crowd-pleaser – The buttery, slightly sweet flavor appeals to nearly everyone, even those who’ve never tried rugelach before
- Freezer-friendly – Make a double batch and freeze half for unexpected guests or holiday entertaining
- No special equipment needed – You probably have everything you need already in your kitchen
Ingredient Notes
For the Cream Cheese Dough:
- Unsalted butter – Must be cold but slightly softened (not room temperature). This creates those beautiful flaky layers. European-style butter with higher fat content will give you even richer results.
- Cream cheese – Full-fat cream cheese is essential here; don’t substitute with low-fat versions or the dough won’t have the right texture. It should be slightly softened but still cool.
- All-purpose flour – Provides structure without making the cookies tough. Measure accurately by spooning into your measuring cup and leveling off.
- Granulated sugar – Just a touch in the dough balances the flavors without making them too sweet.
- Salt – Enhances all the flavors and balances the sweetness.
For the Classic Cinnamon-Walnut Filling:
- Walnuts – Toast them first for deeper flavor! Pecans work beautifully too.
- Granulated sugar – Combined with cinnamon for that classic sweet-spiced flavor.
- Ground cinnamon – Use fresh cinnamon for the best flavor; old cinnamon loses its potency.
- Apricot preserves or raspberry jam – Adds moisture and a fruity tang. Seedless jam works best for easier spreading.
- Mini chocolate chips – Optional but highly recommended for chocolate lovers!
For Finishing:
- Egg wash – One egg beaten with a splash of water or milk gives that gorgeous golden sheen.
- Coarse sugar – Sparkling sugar or turbinado sugar adds a delightful crunch and sparkle.
Substitution Options:
- Use pecans, almonds, or hazelnuts instead of walnuts
- Swap apricot jam for raspberry, strawberry, or even fig preserves
- Try brown sugar instead of white for a deeper, caramel-like flavor
- Add dried cranberries or raisins to the filling for extra texture
Equipment Needed
- Stand mixer or hand mixer – For creaming the butter and cream cheese together
- Food processor – Optional but helpful for finely chopping the nuts
- Rolling pin – A regular rolling pin works fine; a French-style tapered pin gives you more control
- Large mixing bowls
- Measuring cups and spoons
- Plastic wrap or parchment paper – For wrapping the dough during chilling
- Pizza cutter or sharp knife – For cutting the dough circles into triangles
- Baking sheets – At least two half-sheet pans
- Parchment paper or silicone baking mats – Prevents sticking and makes cleanup easy
- Pastry brush – For applying the egg wash
- Offset spatula – Helpful for spreading the jam
- Bench scraper – Optional but useful for working with the dough
Rugelach Recipe

Buttery, flaky rugelach cookies filled with cinnamon, walnuts, and jam – a classic Jewish bakery treat that’s perfect for holidays, cookie swaps, or afternoon tea. This cream cheese dough creates the most tender, melt-in-your-mouth pastries.
- Prep Time: 30 minutes (plus 2+ hours chilling time)
- Cook Time: 22-25 minutes
- Total Time: 3 hours
- Yield: 48 cookies (4 dozen) 1x
- Category: Dessert
- Method: Baking
- Cuisine: Jewish-American
- Diet: Vegetarian
Ingredients
For the Cream Cheese Dough:
- 8 oz (226g) unsalted butter, cold but slightly softened, cut into tablespoon-sized pieces
- 8 oz (226g) full-fat cream cheese, cold but slightly softened, cut into chunks
- 2 cups (250g) all-purpose flour, plus more for dusting
- 2 tablespoons granulated sugar
- 1/4 teaspoon salt
For the Filling:
- 1 1/2 cups (180g) walnuts, finely chopped (about 6 oz)
- 2/3 cup (135g) granulated sugar
- 1 1/2 tablespoons ground cinnamon
- 2/3 cup (200g) apricot preserves or raspberry jam, seedless if possible
- 1/2 cup (85g) mini chocolate chips (optional but delicious)
For Assembly:
- 1 large egg
- 1 tablespoon water or milk
- 3-4 tablespoons coarse sugar or sparkling sugar
Instructions
Step 1: Make the Cream Cheese Dough
In a stand mixer fitted with the paddle attachment (or using a hand mixer and large bowl), beat together the butter and cream cheese on medium speed until well combined and smooth, about 2-3 minutes. The mixture should be creamy and uniform with no visible lumps. In a separate bowl, whisk together the flour, sugar, and salt. With the mixer on low speed, gradually add the flour mixture to the butter mixture, mixing until just combined and the dough starts to come together. Don’t overmix – a few flour streaks are fine.
Step 2: Divide and Chill the Dough
Turn the dough out onto a lightly floured surface and gently knead 2-3 times until it forms a cohesive ball. Divide the dough into 4 equal portions (about 6 oz/170g each). Shape each portion into a flat disk about 1 inch thick, wrap tightly in plastic wrap, and refrigerate for at least 2 hours or up to 3 days. The dough must be thoroughly chilled before rolling, or it will be too sticky to work with.
Step 3: Prepare the Filling
While the dough chills, make your filling. In a medium bowl, stir together the finely chopped walnuts, sugar, and cinnamon until well combined. If you’re using chocolate chips, you can either mix them in now or sprinkle them on separately. Set aside. Place the jam in a small bowl and stir it to loosen it up, making it easier to spread.
Step 4: Roll Out the First Disk
When ready to assemble (the dough can be chilled overnight), preheat your oven to 350°F (175°C). Line two baking sheets with parchment paper. Remove one disk of dough from the refrigerator and let it sit at room temperature for about 5 minutes – it should be cold but pliable enough to roll. On a lightly floured surface, roll the disk into a 9-inch circle about 1/8 inch thick. Use a bench scraper or offset spatula to help lift the dough if it starts to stick, adding a light dusting of flour as needed.
Step 5: Add the Filling
Using an offset spatula or the back of a spoon, spread about 2 1/2 tablespoons of jam evenly over the entire circle of dough, leaving a tiny border around the edge. Sprinkle about 1/3 cup of the cinnamon-walnut mixture evenly over the jam, pressing down gently so it adheres. If using chocolate chips as a separate addition, sprinkle about 2 tablespoons over the nut mixture.
Step 6: Cut into Triangles
Using a pizza cutter or sharp knife, cut the circle into 12 equal wedges (like cutting a pizza). Start by cutting the circle in half, then cut each half into thirds, then cut each section in half again to create 12 triangular pieces. This may seem like a lot of cookies, but they’re meant to be petite pastries perfect for snacking.
Step 7: Shape the Rugelach
Starting from the wide outer edge, roll each triangle toward the point to create a crescent shape. Place each rugelach on the prepared baking sheet point-side-down, spaced about 1 inch apart (they don’t spread much). Curve the ends slightly inward to create that classic crescent shape. Don’t worry if some filling escapes – it happens to everyone!
Step 8: Repeat with Remaining Dough
Repeat the rolling, filling, cutting, and shaping process with the remaining three disks of dough. You should end up with 48 rugelach total.
Step 9: Apply Egg Wash and Sugar
In a small bowl, whisk together the egg and water until smooth. Using a pastry brush, gently brush the top of each rugelach with the egg wash, then sprinkle with coarse sugar for that beautiful sparkle and crunch.
Step 10: Bake to Golden Perfection
Bake for 22-25 minutes, rotating the pans halfway through, until the rugelach are golden brown and the bottoms are crisp. Some of the filling will bubble out during baking – this is normal and creates delicious caramelized edges. Let the cookies cool on the baking sheets for 5 minutes, then carefully transfer to a wire rack using a thin spatula. The jam will be molten hot at first but will set as the cookies cool.
Notes
- Chilling is crucial: Don’t skip the chilling time – warm dough will be impossible to work with and will result in tough cookies.
- Work quickly: If the dough becomes too soft while rolling, pop it back in the fridge for 10 minutes.
- Uniform pieces: Try to cut your triangles as evenly as possible so they bake uniformly.
- Filling spillage: Some filling will inevitably leak out during baking – this is normal and creates delicious crispy edges. Use parchment paper for easy cleanup.
- Check your oven: Ovens vary, so start checking at 20 minutes. The bottoms should be golden brown.
- Kosher version: Use kosher-certified ingredients and substitute margarine for butter if keeping dairy-free for kosher purposes.
Nutrition
- Serving Size: 2 cookies (about 2 oz)
- Calories: 285
- Sugar: 18g
- Sodium: 55mg
- Fat: 16g
- Saturated Fat: 8g
- Unsaturated Fat: 7g
- Trans Fat: 0g
- Carbohydrates: 32g
- Fiber: 1.5g
- Protein: 4g
- Cholesterol: 45mg
Nutrition information is approximate and will vary based on specific ingredients used and portion sizes.
Tips & Variations
Flavor Variations to Try:
- Chocolate Lovers: Use Nutella instead of jam and add extra chocolate chips for an ultra-decadent version
- Tropical Twist: Fill with pineapple or mango jam, coconut flakes, and macadamia nuts
- Fall Harvest: Use pumpkin butter, add dried cranberries, and substitute pecans for walnuts
- Savory Option: Try a filling of pesto, sun-dried tomatoes, and finely grated Parmesan cheese for an unexpected appetizer
- Cinnamon Roll Style: Use more cinnamon and add a cream cheese glaze after baking
- Berry Bliss: Mix raspberry and blueberry jam with almond slivers instead of walnuts
- Middle Eastern Inspired: Fill with date paste, pistachios, and a hint of cardamom or orange zest
Dietary Modifications:
- Gluten-Free: Substitute a 1:1 gluten-free flour blend (though texture will be slightly different)
- Vegan: Use vegan butter and vegan cream cheese alternatives (results may vary)
- Lower Sugar: Reduce the filling sugar by half and use sugar-free jam
- Nut-Free: Omit the nuts and double up on the chocolate chips or dried fruit
Pro Chef Tips
Temperature is everything: Professional bakers know that keeping ingredients at the right temperature is crucial for flaky pastry. Your butter and cream cheese should be cold but pliable – if they’re too warm, you’ll lose those beautiful layers. If they’re too cold, they won’t cream properly. Aim for about 60-65°F.
Toast your nuts: Taking 5 minutes to toast your walnuts in a 350°F oven transforms their flavor from bland to complex and nutty. Spread them on a baking sheet and toast for 5-7 minutes until fragrant, then let cool completely before chopping. This single step elevates your rugelach from good to exceptional.
The flour matters: While all-purpose flour works perfectly, some professional bakers use a blend of 75% all-purpose and 25% cake flour for an even more tender result. The lower protein content in cake flour creates a more delicate crumb.
Roll between parchment: If you’re struggling with the dough sticking or getting too warm, roll it between two sheets of parchment paper. This eliminates the need for extra flour (which can make the dough tough) and makes it easier to achieve a perfect circle.
Freeze before baking: For the absolute flakiest rugelach, assemble them completely, then freeze the shaped cookies for 15-20 minutes before brushing with egg wash and baking. This keeps the layers distinct and prevents too much spreading.
Use high-quality jam: Since jam is a primary flavor component, splurge on good-quality preserves. Look for brands with high fruit content and minimal added sugar – the flavor difference is remarkable.
Common Mistakes to Avoid
1. Overworking the dough: Mixing the dough too much or kneading it excessively will develop the gluten, resulting in tough, dense cookies instead of tender, flaky ones. Mix just until combined and handle the dough as little as possible.
2. Skipping the chilling time: I know you’re excited to bake, but warm dough is nearly impossible to roll and shape. It will stick to everything, tear easily, and result in tough cookies. Properly chilled dough is actually easier to work with and produces far better results.
3. Rolling the dough too thin: While you want the dough relatively thin (about 1/8 inch), rolling it paper-thin will cause it to tear and won’t give you those lovely flaky layers. If you can see through the dough, it’s too thin.
4. Overfilling: It’s tempting to pack in more filling, but too much will make the rugelach difficult to roll and will cause excessive leakage during baking. A thin, even layer is perfect – the filling is meant to complement, not overwhelm, the buttery pastry.
5. Baking at the wrong temperature: Too hot and the outsides burn before the insides cook; too cool and you won’t get that golden color and crisp bottom. An oven thermometer is your friend here – many home ovens run 25 degrees off in either direction.
6. Not letting them cool properly: The jam filling is molten lava when fresh from the oven. Give the cookies at least 5 minutes on the pan to set up before moving them, or they’ll fall apart.
Storage & Meal Prep
Room Temperature Storage:
Once completely cooled, store rugelach in an airtight container at room temperature for up to 5 days. Layer them between sheets of parchment or wax paper to prevent sticking. They actually taste even better on day two after the flavors have had time to meld!
Refrigerator Storage:
While not necessary, you can refrigerate rugelach in an airtight container for up to 2 weeks. Let them come to room temperature before serving for the best texture and flavor, or warm them briefly in a 300°F oven for 5 minutes to refresh.
Freezing Baked Cookies:
Rugelach freeze beautifully! Once completely cooled, arrange them in a single layer on a baking sheet and freeze until solid (about 2 hours). Transfer to a freezer-safe container or bag, layering with parchment paper, and freeze for up to 3 months. Thaw at room temperature for about 30 minutes before serving, or warm frozen cookies in a 325°F oven for 8-10 minutes.
Reheating Tips:
To recapture that just-baked freshness, warm rugelach in a 300°F oven for 5-7 minutes until the pastry is crisp again. Don’t use the microwave – it will make them soggy!
Make-Ahead & Freezer Notes
Dough Preparation:
The cream cheese dough actually benefits from being made ahead! You can prepare the dough, divide it into disks, wrap tightly, and refrigerate for up to 3 days before rolling and baking. For longer storage, freeze the wrapped dough disks for up to 3 months. Thaw overnight in the refrigerator before using.
Assembled but Unbaked:
This is my favorite make-ahead method! Shape all the rugelach completely, place them on parchment-lined baking sheets, and freeze until solid (about 2 hours). Transfer to freezer bags and freeze for up to 2 months. When ready to bake, arrange frozen rugelach on baking sheets, brush with egg wash, sprinkle with sugar, and bake directly from frozen, adding 2-3 minutes to the baking time. This method gives you fresh-baked rugelach anytime!
Holiday Prep Strategy:
Make the dough a week ahead and keep it refrigerated, or make it a month ahead and freeze it. Two days before your event, roll and shape the rugelach and freeze them assembled. The day before, bake them and store in airtight containers. The morning of, arrange on a pretty platter. This spreads the work across multiple days and reduces holiday stress!
Best Reheating Method After Freezing:
For baked, frozen rugelach, thaw at room temperature for 30 minutes, then crisp in a 300°F oven for 5-7 minutes. For unbaked frozen rugelach, bake directly from frozen at 350°F for 24-27 minutes until golden brown.
Serving Suggestions
Rugelach are incredibly versatile and perfect for so many occasions! Here are some wonderful ways to serve these delightful cookies:
Classic Pairings:
- Hot coffee or espresso – the bitterness balances the sweetness perfectly
- Black tea or Earl Grey tea for an elegant afternoon tea service
- Hot chocolate or chai latte for a cozy winter treat
- Cold milk for dunking (especially popular with kids!)
Occasion-Specific Serving Ideas:
For a dessert platter, arrange rugelach alongside other cookies like hamantaschen, mandel bread, or butter cookies. Add fresh berries and a small bowl of whipped cream or crème fraîche for dipping.
For holiday entertaining, create a beautiful cookie tray with several varieties of rugelach (try different fillings) arranged in a circular pattern. Garnish with fresh rosemary sprigs and sugared cranberries for a festive look.
For brunch service, pair rugelach with a cheese platter featuring cream cheese, sharp cheddar, and Brie, along with fresh fruit and bagels. The combination of savory and sweet is delightful.
For gift-giving, arrange rugelach in a decorative tin or glass jar lined with tissue paper. Include a copy of the recipe and serving suggestions for a thoughtful personal touch.
Accompaniments that Shine:
- Fresh fruit compote or berry sauce for dipping
- Vanilla ice cream or gelato for a decadent dessert
- Mascarpone or crème fraîche whipped with a little honey
- A cheese board with aged cheddar, gruyere, or goat cheese
- Fruit salad with mint for a lighter option
FAQs Section
Q: Can I make rugelach without a stand mixer?
Absolutely! While a stand mixer makes the process easier, you can definitely make rugelach by hand or with a hand mixer. Just beat the butter and cream cheese together in a large bowl until smooth and creamy (this takes a bit of elbow grease), then stir in the flour mixture with a wooden spoon until just combined. The dough might require a bit more kneading to come together smoothly.
Q: Why is my dough too sticky to work with?
The dough hasn’t been chilled long enough or your kitchen is very warm. Rugelach dough must be thoroughly chilled – at least 2 hours and preferably overnight. If your dough becomes too soft while rolling, pop it back in the fridge for 10-15 minutes. You can also roll it between two sheets of parchment paper to minimize sticking without adding excess flour.
Q: Can I use a different type of nut or make them nut-free?
Yes! Pecans, almonds, and hazelnuts all work beautifully in place of walnuts. For a nut-free version, simply omit the nuts and increase the chocolate chips or add dried fruit like chopped dried apricots, cranberries, or raisins. The cookies will still be delicious, just with a different texture.
Q: My filling keeps leaking out during baking – what am I doing wrong?
Some filling leakage is completely normal and actually creates those delicious caramelized edges! However, excessive leaking usually means you’re using too much filling or not rolling the cookies tightly enough. Use a thin, even layer of jam (about 2 1/2 tablespoons per disk) and roll from the wide end to the point with firm, even pressure. Also make sure your dough isn’t rolled too thin.
Q: Can I make rugelach ahead for a party?
Yes! Rugelach are actually ideal make-ahead cookies. You can bake them up to 5 days in advance and store in an airtight container, or freeze baked cookies for up to 3 months. Alternatively, shape them completely, freeze unbaked on a baking sheet, then transfer to freezer bags and bake from frozen when needed. This gives you fresh-baked cookies anytime!
Q: What’s the difference between rugelach and croissants?
While both are flaky, crescent-shaped pastries, they’re quite different! Croissants are made with a laminated yeast dough that requires folding butter into the dough multiple times to create hundreds of layers. Rugelach use a quick cream cheese dough with no yeast and no lamination process, making them much easier and faster to make. Rugelach are also smaller, sweeter, and have a filling rolled inside, while croissants are typically plain or filled after baking.
Q: Can I make these dairy-free or vegan?
You can attempt a dairy-free version using vegan butter and vegan cream cheese alternatives. However, I must be honest – the results won’t be quite the same as traditional rugelach. The cream cheese is really what gives rugelach their distinctive tender-flaky texture. That said, some vegan bakers have had success with brands like Kite Hill or Miyoko’s. The texture may be slightly different, but they’ll still be tasty!
Conclusion
There’s something truly magical about pulling a tray of golden, fragrant rugelach from your oven – the buttery aroma, the promise of that first crispy-tender bite, and the satisfaction of creating a bakery-quality treat in your own kitchen. These cookies represent so much more than just a recipe; they’re a connection to generations of bakers, a symbol of celebration and tradition, and a testament to how simple ingredients can create something extraordinary.
Whether you’re baking these for the first time or the fiftieth, whether you’re honoring your family’s traditions or starting new ones of your own, I hope this recipe brings joy to your kitchen and smiles to the faces of everyone lucky enough to taste your creation. Don’t be intimidated by the steps – take your time, embrace the process, and remember that even imperfectly shaped rugelach taste absolutely delicious!
I’d love to hear about your rugelach adventures! Did you stick with the classic cinnamon-walnut filling or get creative with your own variations? How did they turn out? Please leave a comment below sharing your experience, and don’t forget to save this recipe to your Pinterest boards so you can find it again when the baking mood strikes. If you snap a photo of your gorgeous rugelach, tag me on social media – I genuinely love seeing your creations come to life!
Happy baking, and may your kitchen always smell like butter, cinnamon, and sweet possibilities! 🥐✨