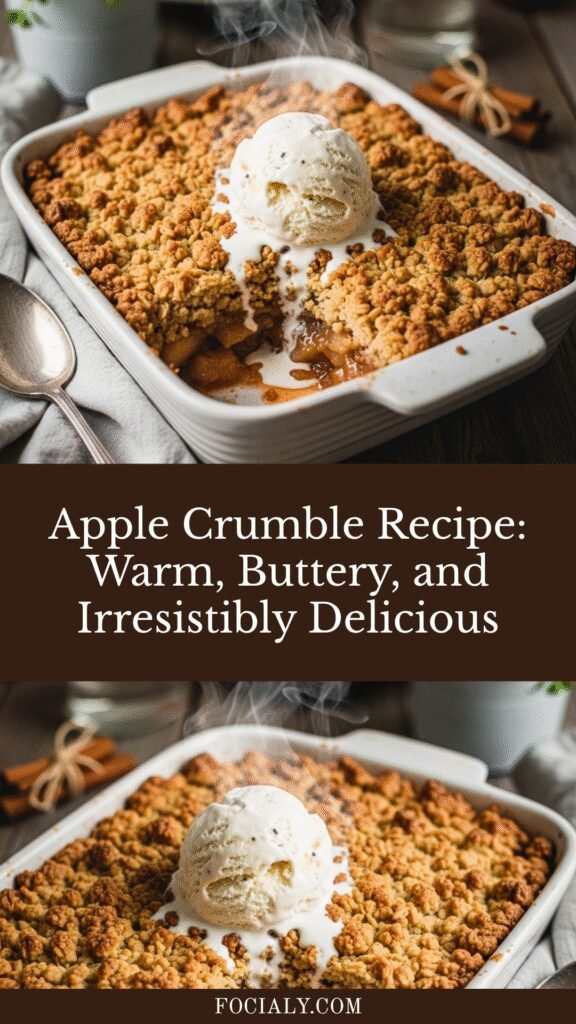
Apple Crumble Recipe: Warm, Buttery, and Irresistibly Delicious
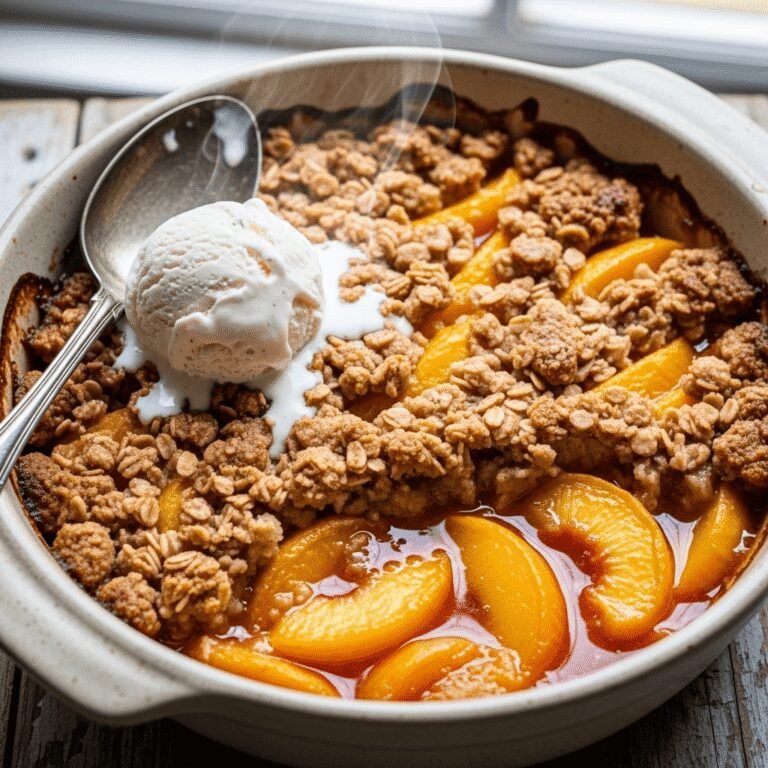
There’s something magical about a warm apple crumble fresh from the oven—the sweet-tart apples bubbling beneath a golden, buttery topping that’s crispy on top and tender underneath. This classic dessert is the definition of comfort food, perfect for those cozy autumn evenings, Thanksgiving gatherings, or any time you’re craving something sweet and satisfying without spending hours in the kitchen.
Apple crumble is beloved for good reason: it’s incredibly forgiving, wonderfully versatile, and requires no fancy techniques or special skills. Unlike apple pie with its finicky crust, apple crumble celebrates simplicity. You just toss sliced apples with warm spices, top them with a buttery, crumbly mixture, and let the oven work its magic. The result? A dessert that tastes like you spent all day baking but actually took less than an hour from start to finish.
Whether you’re serving it at a family dinner, bringing it to a potluck, or simply treating yourself on a Wednesday night, this apple crumble recipe delivers every single time. Serve it warm with a scoop of vanilla ice cream melting into those tender apples, or enjoy it for breakfast the next morning with a dollop of Greek yogurt—no judgment here!
History / Background
Apple crumble has a fascinating history that speaks to resourcefulness and the evolution of home baking. While fruit crumbles have roots in British cuisine, the dessert as we know it today gained popularity during World War II. With strict rationing making traditional pastry ingredients like butter and flour scarce, British home cooks needed an alternative to their beloved fruit pies. Enter the crumble: a simpler topping that required fewer ingredients and no rolling pin.
The beauty of crumble lies in its adaptability. Unlike the precise measurements needed for pastry, the crumbly topping is forgiving and can be adjusted based on what you have on hand. This made it perfect for wartime kitchens where cooks had to make do with whatever was available.
As British immigrants brought their food traditions to America, apple crumble found a welcoming home. Americans already had a deep love affair with apple desserts—after all, “as American as apple pie” is a saying for a reason. The crumble offered a rustic, homestyle alternative that fit perfectly with American comfort food traditions.
Today, apple crumble (sometimes called apple crisp in the United States, though purists will tell you there are subtle differences) remains a cherished dessert on both sides of the Atlantic. It represents the best of simple, honest cooking: taking seasonal fruit at its peak and transforming it into something warm, comforting, and utterly delicious. The dessert has transcended its humble wartime origins to become a staple at holiday tables, farm-to-table restaurants, and everywhere in between.
Why You’ll Love This Recipe
This apple crumble recipe has been tested and perfected to give you the best possible results every single time. It strikes the perfect balance between sweet and tart, with a topping that’s genuinely crumbly yet holds together beautifully. The apples cook down to tender perfection without turning mushy, and the warm spices create an aroma that will have everyone wandering into your kitchen asking, “What smells so amazing?”
Here’s why this recipe will become your go-to apple dessert:
- Foolproof and beginner-friendly – No special techniques, no fancy equipment, and virtually impossible to mess up
- Ready in under an hour – From start to finish, you’ll have a warm dessert on the table in about 50 minutes
- Uses simple, pantry-staple ingredients – No searching for exotic items or making a special grocery run
- Naturally customizable – Easy to adjust the sweetness, spice level, or even make it gluten-free
- Perfect for any occasion – Casual enough for weeknight dessert, impressive enough for holiday entertaining
- Budget-friendly – Apples are affordable year-round, and the topping uses basic baking ingredients
- Makes your home smell incredible – The combination of baking apples, cinnamon, and butter is pure aromatherapy
- Feeds a crowd easily – One pan serves 6-8 people, and it’s easy to double for larger gatherings
- Tastes even better the next day – If there are leftovers (big if!), they reheat beautifully
Ingredient Notes
Let’s break down what makes this apple crumble so delicious, ingredient by ingredient. Understanding what each component does will help you make smart substitutions and adjustments.
Apples: The star of the show! I recommend using a mix of tart and sweet apples for the best flavor complexity. Granny Smith apples provide tanginess and hold their shape beautifully during baking, while Honeycrisp or Gala apples add natural sweetness. Avoid Red Delicious, which turn mushy and lack flavor. If you only have one variety on hand, don’t stress—any baking apple will work. You’ll need about 6-7 medium apples (roughly 2.5-3 pounds).
All-Purpose Flour: Used in both the filling and the crumble topping. The flour in the filling helps thicken the apple juices as they cook, preventing a soggy bottom. For the topping, it provides structure. You can substitute with a 1:1 gluten-free baking flour if needed.
Granulated Sugar and Brown Sugar: We use granulated sugar to sweeten the apples, while brown sugar in the topping adds moisture and a lovely caramel note. The molasses in brown sugar creates that irresistible chewy-crispy texture. Light or dark brown sugar both work—dark will give you a deeper flavor.
Butter: Unsalted butter is crucial for the topping, creating those buttery pockets of crumbly goodness. It must be cold for the best texture! If you only have salted butter, reduce the added salt in the recipe slightly.
Oats: Old-fashioned rolled oats add wonderful texture and a subtle nuttiness to the topping. Don’t use instant oats or steel-cut oats—they won’t give you the right consistency. If you want a more traditional British crumble without oats, simply increase the flour in the topping.
Cinnamon and Nutmeg: These warm spices are classic with apples. Cinnamon is essential, while nutmeg adds depth. Freshly grated nutmeg is noticeably better than pre-ground, but use what you have.
Lemon Juice: A splash of fresh lemon juice brightens the apple filling and prevents the apples from browning. It also balances the sweetness perfectly.
Salt: Just a pinch enhances all the other flavors and keeps the dessert from tasting one-dimensional.
Vanilla Extract (optional): A touch of vanilla in the apple filling adds warmth and complexity, though it’s absolutely optional.
Equipment Needed
The beauty of apple crumble is that it requires minimal equipment—nothing fancy or specialized! Here’s what you’ll need:
- 9×13-inch baking dish (or similar 3-quart baking dish) – This size is perfect for serving 6-8 people. You can also use a 9×9-inch dish for a thicker crumble
- Large mixing bowl – For combining the crumble topping ingredients
- Medium mixing bowl – For tossing the apples with sugar and spices
- Peeler and sharp knife – For preparing the apples (or use an apple peeler/corer if you have one)
- Cutting board – A stable surface for apple prep
- Measuring cups and spoons – For accurate measurements
- Pastry cutter or fork – To cut the butter into the flour mixture (your fingers work too!)
- Wooden spoon or spatula – For mixing
- Oven mitts – Because safety first!
Apple Crumble Recipe

This classic apple crumble features tender, spiced apples topped with a golden, buttery crumble that’s crispy on the outside and tender within. Simple to make yet impressive to serve, it’s the perfect comfort dessert for any occasion.
- Prep Time: 20 minutes
- Cook Time: 40-45 minutes
- Total Time: 1 hour 5 minutes
- Yield: 8 servings 1x
- Category: Dessert
- Method: Baking
- Cuisine: British-American
- Diet: Vegetarian
Ingredients
For the Apple Filling:
- 6-7 medium apples (about 2.5-3 lbs), peeled, cored, and sliced ¼-inch thick
- ⅓ cup granulated sugar
- 2 tablespoons all-purpose flour
- 1 tablespoon fresh lemon juice
- 1 teaspoon ground cinnamon
- ¼ teaspoon ground nutmeg
- ½ teaspoon vanilla extract (optional)
- Pinch of salt
For the Crumble Topping:
- 1 cup all-purpose flour
- 1 cup old-fashioned rolled oats
- ¾ cup packed light brown sugar
- ½ teaspoon ground cinnamon
- ¼ teaspoon salt
- ½ cup (1 stick) unsalted butter, cold and cubed into small pieces
Instructions
- Preheat your oven to 350°F (175°C). Lightly grease a 9×13-inch baking dish with butter or non-stick spray and set aside.
- Prepare the apple filling: In a large bowl, combine the sliced apples, granulated sugar, flour, lemon juice, cinnamon, nutmeg, vanilla (if using), and a pinch of salt. Toss everything together until the apples are evenly coated. Transfer the apple mixture to your prepared baking dish, spreading it out in an even layer.
- Make the crumble topping: In a separate large bowl, whisk together the flour, oats, brown sugar, cinnamon, and salt until well combined.
- Cut in the butter: Add the cold, cubed butter to the flour mixture. Using a pastry cutter, two forks, or your fingertips, work the butter into the dry ingredients until the mixture resembles coarse crumbs with pea-sized pieces of butter throughout. The mixture should be crumbly but hold together when squeezed. Don’t overmix—you want those buttery pockets!
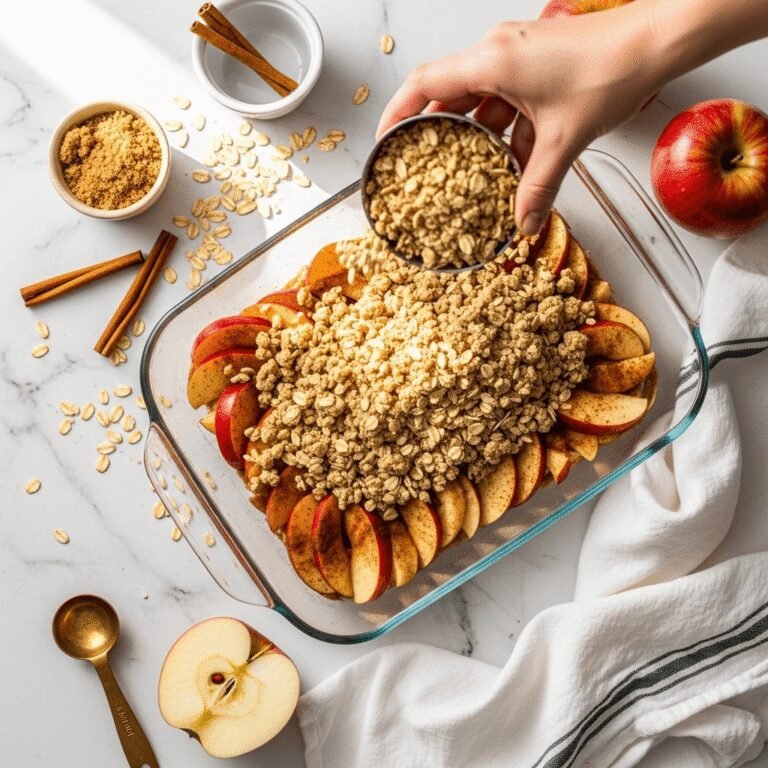
- Assemble the crumble: Sprinkle the crumble topping evenly over the apples, covering them completely. Don’t press it down—let it sit loosely on top for maximum crispiness.
- Bake: Place the baking dish on the center rack of your preheated oven and bake for 40-45 minutes, or until the topping is golden brown and the apples are bubbling around the edges. If the topping is browning too quickly, tent it loosely with aluminum foil for the last 10-15 minutes.
- Cool slightly: Remove from the oven and let the crumble cool for at least 10-15 minutes before serving. This allows the filling to thicken slightly and makes serving easier.
- Serve and enjoy: Scoop generous portions into bowls and serve warm with vanilla ice cream, whipped cream, or a drizzle of caramel sauce.
Notes
- Apple varieties: For best results, use a combination of tart and sweet apples. Granny Smith, Honeycrisp, Braeburn, and Gala all work wonderfully.
- Don’t skip the lemon juice: It prevents browning and balances the sweetness perfectly.
- Cold butter is key: Make sure your butter is cold when making the topping. This creates the best crumbly texture.
- Customize the sweetness: If your apples are very tart, add an extra tablespoon or two of sugar to the filling. If they’re super sweet, reduce the sugar slightly.
- Gluten-free option: Use a 1:1 gluten-free flour blend and ensure your oats are certified gluten-free.
Nutrition
- Serving Size: 1 slice (⅛ of recipe)
- Calories: 342
- Sugar: 38g
- Sodium: 148mg
- Fat: 12g
- Saturated Fat: 7g
- Unsaturated Fat: 4g
- Trans Fat: 0g
- Carbohydrates: 58g
- Fiber: 4g
- Protein: 3g
- Cholesterol: 30mg
Note: Nutrition information is approximate and calculated without optional toppings like ice cream.
Tips & Variations
One of the best things about apple crumble is how easily you can make it your own! Here are some delicious ways to customize this recipe:
Add nuts for extra crunch: Fold ½ cup of chopped pecans, walnuts, or sliced almonds into the crumble topping for added texture and a nutty flavor that pairs beautifully with apples.
Make it extra spicy: Love warm spices? Add a pinch of ground ginger, cardamom, or allspice to the apple filling for a more complex spice profile. You could also add ½ teaspoon of pumpkin pie spice.
Reduce the sugar: If you’re watching your sugar intake or prefer a less sweet dessert, you can easily reduce the sugar in the filling by 2-3 tablespoons. The natural sweetness of the apples will still shine through.
Create a berry-apple hybrid: Mix in 1 cup of fresh or frozen cranberries, blueberries, or blackberries with the apples for a delightful twist. The berries add beautiful color and a tart pop.
Go for a caramel apple version: Drizzle 3-4 tablespoons of caramel sauce over the apples before adding the crumble topping. The caramel melts into the filling as it bakes, creating an indulgent treat.
Make it vegan: Substitute the butter with cold coconut oil or vegan butter. The texture will be slightly different but still delicious.
Add dried fruit: Toss in ½ cup of raisins, dried cranberries, or chopped dates with the apples for extra sweetness and chew.
Create individual servings: Divide the apple mixture and crumble topping among 6-8 ramekins for individual apple crumbles—perfect for dinner parties!
Try a streusel-style topping: Add ½ cup of chopped pecans and reduce the oats to ½ cup for a more traditional streusel texture.
Pro Chef Tips
Want to take your apple crumble from good to absolutely phenomenal? Here are some professional tricks:
Use a mix of apple varieties: Professional bakers rarely use just one type of apple. Combining tart apples (like Granny Smith) with sweet apples (like Honeycrisp or Fuji) creates a more complex, interesting flavor profile. The tart apples also hold their shape better, preventing mushy filling.
Don’t overwork your crumble topping: When cutting the butter into the flour, stop as soon as you have pea-sized butter pieces throughout. Overworking creates a tough, dense topping instead of a light, crumbly one. Those visible butter pieces are what create those irresistible crispy pockets.
Slice apples uniformly: Take the extra minute to slice your apples to a consistent ¼-inch thickness. This ensures even cooking—no crunchy undercooked pieces mixed with mushy overcooked ones.
Let the filling macerate: If you have time, toss the apples with the sugar, spices, and lemon juice and let them sit for 10-15 minutes before baking. This draws out some of the juice and helps the apples cook more evenly. Drain excess liquid if it seems very watery.
Bake until properly bubbling: The crumble is done when you see thick, bubbling juices around the edges. This means the filling has thickened properly and won’t be watery when you serve it.
Rest before serving: Patience is hard when something smells this good, but letting the crumble rest for 10-15 minutes allows the filling to set up. It’ll still be warm, but you’ll get clean slices instead of soup.
Boost the butter flavor: Use European-style butter (which has higher fat content) for an even richer, more flavorful topping. The difference is subtle but noticeable.
Toast your oats: For an extra depth of flavor, toast the oats in a dry skillet for 3-4 minutes before adding them to the topping. This brings out their natural nuttiness.
Common Mistakes to Avoid
Even with a forgiving recipe like apple crumble, there are a few pitfalls that can affect your results. Here’s what to watch out for:
Using warm or softened butter in the topping: This is the #1 mistake! Soft butter will make your topping greasy and flat instead of crumbly and textured. Always use cold butter straight from the refrigerator, and work quickly so it doesn’t warm up from your hands.
Slicing apples too thick: Quarter-inch slices are ideal. Anything thicker won’t cook through in time, leaving you with crunchy apples beneath that golden topping. If your slices are too thin, they’ll turn to mush.
Not draining watery apples: Some apple varieties (especially if they’re not super fresh) release a lot of liquid. If your apple mixture looks very watery after tossing, drain off some of that excess liquid before baking. Too much liquid means a soggy crumble.
Packing the topping down: When you sprinkle the crumble topping over the apples, leave it loose and fluffy. Pressing it down compacts it and prevents it from getting that crispy, crumbly texture we’re after.
Underbaking: A pale, blonde topping means underbaked crumble. Wait until the topping is deeply golden brown and you can see thick bubbles breaking through around the edges. Underbaked crumble will be doughy and disappointing.
Skipping the cooling time: I know it’s tempting to dive right in, but serving it immediately means super-runny filling that slides everywhere. Just 10-15 minutes makes a huge difference in texture.
Using instant oats: Instant oats turn mushy when baked. Always use old-fashioned rolled oats for proper texture.
Storage & Meal Prep
Apple crumble keeps beautifully, making it a great make-ahead dessert or a treat to enjoy over several days.
Room temperature: If you plan to eat the crumble within a day, you can keep it covered at room temperature. The topping will stay crispier this way, though the filling won’t be food-safe beyond 2 hours if you live in a warm climate.
Refrigerator storage: Cover the baking dish tightly with plastic wrap or aluminum foil, or transfer portions to an airtight container. The crumble will keep for 4-5 days in the refrigerator. The topping will soften in the fridge, but reheating brings back some of the crispness.
Reheating instructions: For best results, reheat individual portions in the microwave for 30-60 seconds, or reheat the entire dish in a 350°F oven for 15-20 minutes until warmed through. The oven method will crisp up the topping better than the microwave.
Portion control tip: Cut and portion the crumble after it’s completely cooled, then store portions in individual containers. This makes grabbing a quick dessert super convenient!
Make-Ahead & Freezer Notes
Apple crumble is wonderfully freezer-friendly, making it perfect for planning ahead or preserving that autumn apple bounty.
Freezing unbaked crumble: Assemble the entire dish (apples in the pan, topping sprinkled over), but don’t bake it. Cover tightly with plastic wrap, then aluminum foil. Freeze for up to 3 months. When ready to bake, remove the plastic wrap, re-cover with foil, and bake frozen at 350°F for 60-70 minutes, removing the foil for the last 15 minutes to brown the top.
Freezing baked crumble: Let the baked crumble cool completely, then wrap tightly and freeze for up to 2 months. Thaw in the refrigerator overnight, then reheat in a 350°F oven for 20-25 minutes until warmed through.
Make-ahead tips: You can prepare the apple mixture and crumble topping separately up to 24 hours in advance. Keep the apples in the refrigerator (toss with a little extra lemon juice to prevent browning), and store the crumble topping in the fridge in a sealed container. Assemble and bake when ready.
Best reheating method after freezing: Thaw in the refrigerator overnight if possible, then reheat covered with foil at 350°F for about 20 minutes, removing the foil for the last 5 minutes. This prevents the topping from burning while ensuring the filling heats through.
Freezing individual portions: Once baked and cooled, cut into portions and wrap each one tightly in plastic wrap, then place in a freezer bag. Grab a single serving whenever a craving hits! Microwave from frozen for 2-3 minutes, checking and stirring the apples halfway through.
Serving Suggestions
Apple crumble is delicious on its own, but the right accompaniments take it from wonderful to absolutely extraordinary. Here are my favorite ways to serve it:
Classic vanilla ice cream: This is the traditional choice for good reason! The cold, creamy ice cream melting into the warm, spiced apples creates an incredible temperature contrast. Go for a high-quality vanilla bean ice cream for the best experience.
Whipped cream: Fresh whipped cream (either homemade or store-bought) adds a light, airy element that doesn’t compete with the dessert’s flavors. For an extra touch, add a splash of vanilla or a sprinkle of cinnamon to your whipped cream.
Caramel sauce: A generous drizzle of warm caramel sauce transforms this into a true showstopper. The caramel’s buttery sweetness complements the apples beautifully.
Custard or crème anglaise: Very British and absolutely delicious! Warm custard poured over apple crumble is traditional in the UK and creates an incredibly comforting dessert.
Greek yogurt: For a slightly healthier option, a dollop of thick Greek yogurt adds creaminess and a pleasant tang that balances the sweetness. This is especially nice for breakfast or brunch!
Sharp cheddar cheese: Don’t knock it until you’ve tried it! A slice of sharp cheddar alongside warm apple desserts is a traditional pairing, especially in New England. The savory, tangy cheese is surprisingly wonderful with sweet apples.
Beverages: Serve with hot apple cider, spiced chai, coffee, or a glass of dessert wine for a complete experience.
Make it a breakfast: Leftover crumble makes a fantastic breakfast! Warm it up and top it with yogurt, granola, and a drizzle of honey.
FAQs Section
Can I use frozen apples for this recipe?
Yes! Frozen apple slices work well for crumble. You don’t need to thaw them first, but add an extra 10-15 minutes to the baking time. Also, add an extra tablespoon of flour to the filling since frozen apples release more liquid as they cook.
What’s the difference between apple crumble and apple crisp?
The terms are often used interchangeably, but traditionally, apple crisp includes oats in the topping while apple crumble does not. This recipe is technically a crisp since it contains oats, but many people call anything with this type of streusel topping a “crumble.”
Do I have to peel the apples?
For the best texture, yes. Apple peels can be tough and chewy after baking, which interrupts the tender filling. However, if you don’t mind the texture (and want the extra fiber and nutrients), you can leave the peels on. Just scrub the apples well first.
Why is my crumble topping soggy?
This usually happens when the butter is too warm when you make the topping, or if there’s too much liquid in the apple filling. Always use cold butter and don’t be afraid to drain excess liquid from your apples before baking. Also, make sure you’re baking it long enough—the filling needs to bubble to thicken properly.
Can I make apple crumble in a cast iron skillet?
Absolutely! A 10-inch cast iron skillet works beautifully for this recipe. It creates a rustic presentation and helps the bottom crisp up nicely. Just follow the recipe as written, using the skillet instead of a baking dish.
How do I know when the apple crumble is done?
Look for these signs: the topping should be deeply golden brown (not pale), the filling should be bubbling around the edges with thick juices (not thin and watery), and a knife inserted into the apples should slide in easily, showing they’re tender.
Can I make apple crumble without oats?
Yes! For a traditional British crumble without oats, simply replace the 1 cup of oats with an additional ½ cup of flour. You’ll get a more sandy, cookie-like topping that’s equally delicious.
Conclusion
There you have it—everything you need to make the most incredible, crowd-pleasing apple crumble! This recipe truly is one of those keeper recipes that you’ll return to again and again, whether you’re baking for your family on a Tuesday night or preparing dessert for a special holiday meal.
What I love most about apple crumble is how it brings people together. There’s something about that combination of tender, spiced apples and golden, buttery topping that makes everyone smile. It’s nostalgic and comforting, yet impressive enough to serve to guests. Plus, with all the tips and variations I’ve shared, you can make this recipe your own and adapt it to whatever apples you have on hand or dietary needs you’re accommodating.
So grab those apples, preheat your oven, and get ready to fill your home with the most amazing aroma. Trust me—once you pull this beauty out of the oven and hear those first appreciative mmm’s from your family or friends, you’ll understand why apple crumble has been a beloved dessert for generations.
I’d love to hear how your apple crumble turns out! Leave a comment below and let me know if you tried any of the variations, and don’t forget to rate the recipe. If you loved it (and I know you will!), please save this recipe to your Pinterest boards so you can find it easily for your next baking session. Happy baking, friends! 🍎✨