Brookies Recipe: Half Brownie, Half Cookie, 100% Delicious
Have you ever found yourself torn between baking a batch of fudgy brownies or chewy chocolate chip cookies? Well, what if I told you that you never have to choose again? Enter the brookie – the genius dessert hybrid that combines the best of both worlds into one irresistible treat.
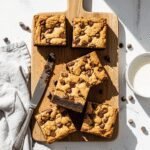
Brookies are exactly what they sound like: a magical mashup where rich, gooey brownie batter meets classic chocolate chip cookie dough, baked together in perfect harmony. The result? A dessert that delivers the dense, chocolatey satisfaction of a brownie on one side and the buttery, chip-studded sweetness of a cookie on the other. It’s like having your cake and eating it too – or in this case, your brownie and your cookie!
This show-stopping dessert is perfect for just about any occasion. Serve them at birthday parties, potlucks, bake sales, or game day gatherings. They’re also an excellent solution when you’re entertaining guests with different dessert preferences. Kids and adults alike go absolutely crazy for these dual-textured treats. Plus, they photograph beautifully, making them Instagram and Pinterest gold when you want to show off your baking prowess.
History / Background
The brookie is a relatively modern invention born from America’s love affair with dessert mashups. While the exact origin is somewhat murky (as many home-baked creations are), brookies began gaining serious traction in the early 2010s when food bloggers and home bakers started experimenting with combination desserts.
This trend coincided with the rise of “hybrid desserts” that dominated bakeries and social media feeds – think cronuts (croissant-donuts), duffins (donut-muffins), and towies (tart-brownies). Brookies emerged as one of the most beloved and enduring of these creative combinations, likely because both brownies and chocolate chip cookies are quintessentially American treats with massive fan bases.
The genius of the brookie lies in its simplicity. Unlike some hybrid desserts that require complicated techniques or special equipment, brookies are remarkably straightforward. You’re essentially making two beloved recipes and baking them side by side. Some bakers layer them, others swirl them together, and many simply place them next to each other in the pan.
Brookies have become a staple at bakeries across the United States, and they’re particularly popular in cities known for their dessert scenes like New York, Los Angeles, and Chicago. What started as a home baker’s experiment has evolved into a legitimate dessert category, with countless variations now including everything from peanut butter swirls to salted caramel additions.
The beauty of brookies is that they celebrate the best characteristics of both parent desserts without compromise. You don’t have to sacrifice the crispy edges of a cookie or the fudgy center of a brownie – you get both in every single piece.
Why You’ll Love This Recipe
This brookie recipe has been tested, tweaked, and perfected to give you the absolute best texture contrast and flavor balance. Unlike some versions that end up with one side overpowering the other, this recipe ensures both the brownie and cookie components shine equally.
Here’s why this recipe will become your new favorite:
- Best of both worlds – Satisfy two cravings with one bake, perfect for indecisive sweet tooths
- Crowd-pleaser guaranteed – I’ve never met anyone who didn’t love these; they’re universally adored
- Easy enough for beginners – If you can make brownies and cookies separately, you can make brookies
- Impressive presentation – They look like you spent hours in the kitchen when they’re actually simple
- Perfectly balanced textures – Fudgy meets chewy in every bite, with the ideal ratio
- Customizable – Easy to adapt with your favorite mix-ins, nuts, or chocolate varieties
- Make-ahead friendly – The dough and batter can both be prepared in advance
- Budget-friendly – Uses common pantry staples without any expensive specialty ingredients
- Great for parties – Cuts into neat squares that are easy to serve and eat
- Freezer-friendly – Make a double batch and freeze half for whenever cravings strike
Ingredient Notes
Understanding your ingredients is the key to baking success. Here’s what you’ll need and why each component matters:
For the Brownie Layer:
Unsalted butter – Provides richness and helps create that signature fudgy texture. Using unsalted lets you control the salt level. You can substitute with coconut oil for a dairy-free version, though the flavor will be slightly different.
Granulated and brown sugar – The combination gives you sweetness plus moisture and chewiness from the brown sugar’s molasses content. Don’t skip the brown sugar; it’s essential for texture.
Cocoa powder – Use Dutch-process for a deeper, more sophisticated chocolate flavor, or natural cocoa for a brighter, more acidic taste. Quality matters here – splurge a little on good cocoa.
Eggs – Bind everything together and contribute to the fudgy texture. Make sure they’re at room temperature for better incorporation.
Vanilla extract – Enhances all the chocolate flavors. Pure vanilla is worth it here.
All-purpose flour – Provides structure. Don’t overmix once you add it to avoid tough brownies.
Salt – A small amount amplifies the chocolate flavor dramatically.
For the Cookie Layer:
Unsalted butter – Should be softened to room temperature for proper creaming. This creates air pockets that make cookies tender.
Granulated and brown sugar – More brown sugar in cookies than brownies gives you those chewy edges and soft centers.
Eggs – Just one is enough for cookies; too many would make them cakey.
Vanilla extract – The classic cookie flavor you know and love.
All-purpose flour – The foundation of your cookie structure.
Baking soda – Helps cookies spread and creates those beautiful crackly tops.
Salt – Balances sweetness and enhances flavor.
Chocolate chips – Semi-sweet is classic, but feel free to use milk chocolate, dark chocolate, or a combination. You can also use chunks for more dramatic chocolate pockets.
Equipment Needed
Having the right tools makes baking brookies a breeze. Here’s everything you’ll need:
- 9×13-inch baking pan – The standard size for perfect brookies with even layers
- Parchment paper or aluminum foil – Line your pan for easy removal and cleanup
- Two large mixing bowls – One for brownie batter, one for cookie dough
- Medium mixing bowl – For combining dry ingredients
- Electric mixer (handheld or stand) – Makes creaming butter and sugar effortless
- Whisk – For mixing dry ingredients and some wet ingredients
- Rubber spatula – Essential for scraping bowls and spreading batters
- Measuring cups and spoons – Accuracy is crucial in baking
- Small saucepan – For melting butter (or use microwave)
- Cooling rack – Allows air circulation for even cooling
- Sharp knife or bench scraper – For cutting clean squares
- Toothpick or cake tester – To check doneness
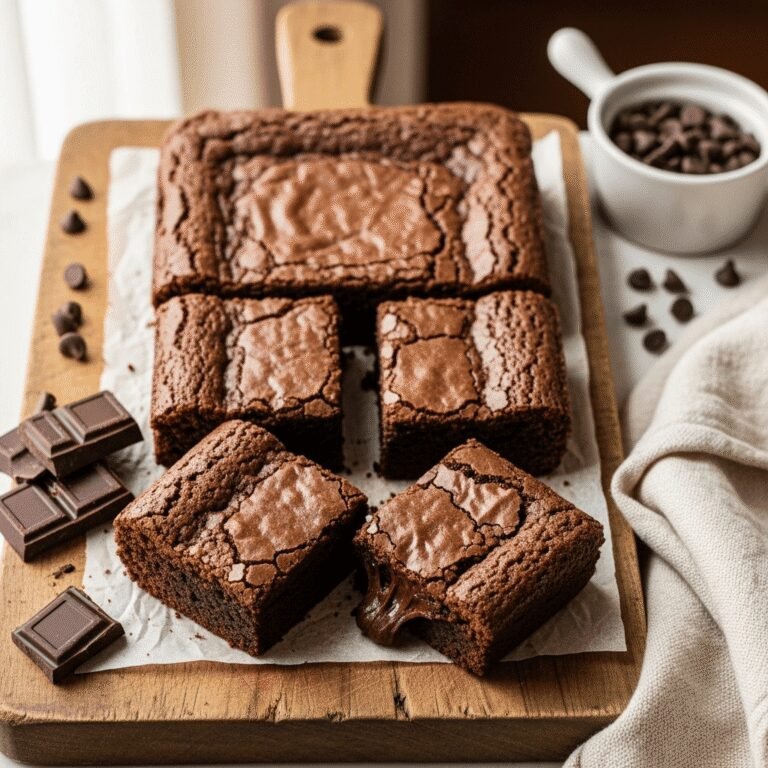
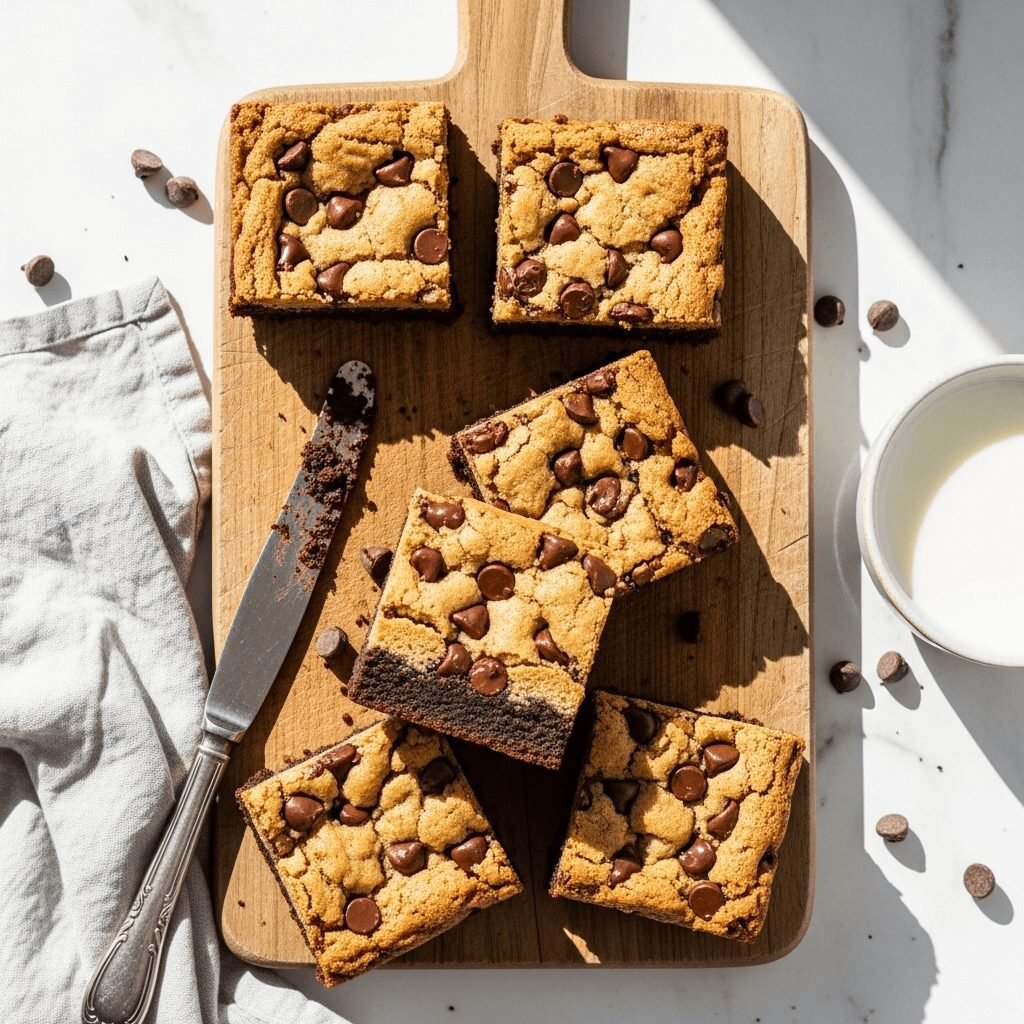
Brookies Recipe
These incredible brookies combine fudgy chocolate brownies with chewy chocolate chip cookies in one pan for the ultimate dessert experience. Perfect for parties, gifts, or satisfying any sweet tooth!
- Prep Time: 20 minutes
- Cook Time: 35 minutes
- Total Time: 55 minutes (plus cooling)
- Yield: 16-20 squares 1x
- Category: Dessert
- Method: Baking
- Cuisine: American
- Diet: Vegetarian
Ingredients
Brownie Layer:
- ½ cup (115g) unsalted butter, melted
- 1 cup (200g) granulated sugar
- ⅓ cup (67g) packed light brown sugar
- ½ cup (50g) unsweetened cocoa powder
- 2 large eggs, room temperature
- 1 teaspoon vanilla extract
- ¾ cup (95g) all-purpose flour
- ¼ teaspoon salt
Cookie Layer:
- ½ cup (115g) unsalted butter, softened
- ½ cup (100g) granulated sugar
- ¾ cup (150g) packed light brown sugar
- 1 large egg, room temperature
- 2 teaspoons vanilla extract
- 1¾ cups (220g) all-purpose flour
- 1 teaspoon baking soda
- ½ teaspoon salt
- 1½ cups (255g) semi-sweet chocolate chips
Instructions
Step 1: Prepare Your Pan
Preheat your oven to 350°F (175°C). Line a 9×13-inch baking pan with parchment paper, leaving an overhang on two sides for easy removal. Lightly spray with cooking spray.
Step 2: Make the Brownie Batter
In a large bowl, whisk together the melted butter, granulated sugar, and brown sugar until smooth. Add the cocoa powder and whisk until no lumps remain. Add eggs and vanilla, whisking until the mixture is glossy and well combined. Gently fold in the flour and salt just until incorporated. Don’t overmix! Set aside.
Step 3: Prepare the Cookie Dough
In a separate large bowl, cream together the softened butter, granulated sugar, and brown sugar using an electric mixer on medium speed for 2-3 minutes until light and fluffy. Beat in the egg and vanilla until smooth.
Step 4: Combine Cookie Dry Ingredients
In a medium bowl, whisk together flour, baking soda, and salt. Add to the butter mixture and mix on low speed just until combined. Fold in the chocolate chips with a spatula.
Step 5: Layer in the Pan
Spread the brownie batter evenly across the bottom of your prepared pan. Drop spoonfuls of cookie dough over the brownie layer, then gently spread it out to cover as much surface as possible. Don’t worry if you can’t cover every spot perfectly – a little brownie peeking through is fine and creates a beautiful marbled effect.
Step 6: Bake
Bake for 32-37 minutes, or until a toothpick inserted into the center comes out with just a few moist crumbs (not wet batter). The cookie top should be golden brown. The center may look slightly underdone, but it will continue cooking as it cools.
Step 7: Cool Completely
Let the brookies cool in the pan on a cooling rack for at least 30 minutes, then use the parchment overhang to lift them out. Let cool completely before cutting – this ensures clean cuts and prevents crumbling.
Step 8: Cut and Serve
Using a sharp knife, cut into 16-20 squares. Wipe your knife clean between cuts for the neatest edges. Serve and watch them disappear!
Notes
- Don’t overbake! Brookies are best when slightly underdone in the center. They’ll firm up as they cool.
- Room temperature ingredients mix more smoothly and create better texture.
- For extra-thick brookies, use a 9×9-inch pan and increase baking time by 8-10 minutes.
- The brownie layer can spread slightly during baking, creating swirls with the cookie – this is perfectly normal and delicious.
- Let brookies cool completely before cutting to prevent them from falling apart.
Nutrition
- Serving Size: 1 square
- Calories: 245
- Sugar: 23g
- Sodium: 125mg
- Fat: 12g
- Saturated Fat: 7g
- Unsaturated Fat: 4g
- Trans Fat: 0g
- Carbohydrates: 33g
- Fiber: 1.5g
- Protein: 3g
- Cholesterol: 45mg
Tips & Variations
Flavor Variations:
- Peanut Butter Brookies – Swirl ½ cup peanut butter into the brownie layer before adding cookie dough
- Mint Chocolate – Add ½ teaspoon peppermint extract to the brownie batter and use mint chocolate chips
- S’mores Brookies – Add mini marshmallows and crushed graham crackers on top for the last 5 minutes of baking
- Nutty Brookies – Fold 1 cup chopped walnuts or pecans into either or both layers
- White Chocolate Raspberry – Use white chocolate chips and swirl raspberry jam through the brownie layer
- Espresso Brookies – Add 1 tablespoon instant espresso powder to the brownie batter for deeper chocolate flavor
- Salted Caramel – Drizzle with caramel sauce and sprinkle with flaky sea salt after baking
Dietary Adaptations:
- Gluten-Free – Use a 1:1 gluten-free flour blend in place of all-purpose flour
- Dairy-Free – Substitute butter with coconut oil or vegan butter and use dairy-free chocolate chips
- Reduced Sugar – Cut sugar by ¼ cup in each layer (they’ll be less sweet but still delicious)
Pro Chef Tips
Temperature is everything – Overbaked brookies are dry and disappointing. Pull them from the oven when they still look slightly underdone in the center. The residual heat will finish cooking them perfectly.
Chill your cookie dough – If your cookie dough is too soft to spread, refrigerate it for 15 minutes. This makes layering much easier and prevents the layers from mixing too much.
Use quality chocolate – Since chocolate is a star ingredient, using good chocolate chips or chopping your own from a quality bar makes a noticeable difference in flavor.
Line your pan properly – Use parchment paper with enough overhang to act as handles. This makes removing and cutting brookies infinitely easier and gives you cleaner edges.
Let them cool completely – I know it’s tempting, but warm brookies are nearly impossible to cut cleanly. Patience pays off with beautiful, Instagram-worthy squares.
Score before cutting – Once cooled, use a knife to lightly score the top where you plan to cut. This prevents the cookie layer from cracking when you make your final cuts.
Calibrate your oven – Oven temperatures can vary by 25°F or more. Use an oven thermometer to ensure accuracy, especially for baking.
Common Mistakes to Avoid
Mistake #1: Overmixing the batter – Once you add flour to either mixture, mix just until combined. Overmixing develops gluten, making your brookies tough and cakey instead of fudgy and chewy.
Mistake #2: Using cold ingredients – Cold eggs and butter don’t incorporate smoothly, leading to lumpy batter and uneven texture. Let everything come to room temperature for about 30 minutes before starting.
Mistake #3: Not lining the pan – Skipping parchment paper makes removal nearly impossible and guarantees you’ll lose the corners and edges. Always line your pan!
Mistake #4: Cutting too soon – Warm brookies crumble and fall apart. They need time to set up as they cool. Wait at least 30 minutes, preferably until completely cool.
Mistake #5: Uneven layers – If your brownie layer is thicker on one side, that side will be gooier while the thin side might overbake. Spread evenly for consistent results throughout the pan.
Storage & Meal Prep
Room Temperature Storage:
Store brookies in an airtight container at room temperature for up to 4 days. Place parchment paper between layers to prevent sticking. They’ll stay soft and delicious when properly sealed.
Refrigerator Storage:
Refrigerated brookies will last up to 1 week in an airtight container. The texture becomes slightly firmer when cold, which some people actually prefer! Let them sit at room temperature for 10 minutes before serving for the best texture.
Reheating Tips:
Warm individual brookies in the microwave for 10-15 seconds for that fresh-from-the-oven experience. You can also warm them in a 300°F oven for 5-7 minutes. The chocolate gets melty and wonderful!
Keeping Them Fresh:
The key to maintaining freshness is preventing air exposure. Press plastic wrap directly onto the surface of remaining brookies before sealing the container. This prevents them from drying out.
Make-Ahead & Freezer Notes
Make-Ahead Options:
Both the brownie batter and cookie dough can be prepared up to 24 hours in advance and stored separately in the refrigerator. When ready to bake, let them sit at room temperature for 15 minutes, then layer and bake as directed. This is perfect for party prep!
Freezing Unbaked:
You can assemble the entire pan, cover tightly with plastic wrap and aluminum foil, and freeze for up to 2 months. Bake directly from frozen, adding 10-15 minutes to the baking time. No thawing needed!
Freezing Baked Brookies:
Fully baked and cooled brookies freeze beautifully for up to 3 months. Wrap individual squares in plastic wrap, place in a freezer bag, and squeeze out excess air. This way you can grab one whenever a craving hits.
Best Thawing Method:
For frozen baked brookies, thaw at room temperature for 1-2 hours, or microwave for 20-30 seconds. They taste remarkably fresh! For best results, let them come to room temperature naturally – this preserves the texture better than microwaving.
Freezing Pro Tip:
Flash-freeze cut brookies on a baking sheet for 1 hour before wrapping individually. This prevents them from sticking together and makes grabbing a single serving much easier.
Serving Suggestions
Brookies are delicious on their own, but these pairings take them to the next level:
Classic Accompaniments:
- Vanilla ice cream or gelato – the cold creaminess against warm brookies is unbeatable
- Whipped cream with a dusting of cocoa powder
- Cold glass of milk – the traditional and still the best for many
- Hot coffee or espresso for adults – the slight bitterness complements the sweetness perfectly
Gourmet Presentations:
- Drizzle with warm chocolate ganache or caramel sauce
- Top with fresh raspberries or strawberries for a fruit contrast
- Serve with a dollop of mascarpone cream
- Add a scoop of peanut butter or Nutella on the side
- Dust with powdered sugar and serve with chocolate sauce for dipping
Party Ideas:
- Create a brookie sundae bar with various toppings
- Serve on a wooden board with fresh berries and mint garnish
- Cut into smaller pieces and serve as part of a dessert platter
- Warm and serve in bowls with ice cream for a skillet-style dessert
- Package individually in clear bags tied with ribbon for party favors
FAQs Section
Q: Can I use boxed brownie mix and cookie dough to make brookies?
A: Absolutely! This is a great shortcut. Prepare one box of brownie mix and one package of refrigerated cookie dough according to package directions, then layer and bake. You may need to adjust baking time slightly, so start checking at 30 minutes.
Q: Why is my brownie layer rising to the top?
A: This happens when the brownie batter is too thin or warm, or if the cookie dough layer is too heavy. Make sure your cookie dough is at the right consistency and spread the brownie layer evenly. Some marbling is normal and actually looks beautiful!
Q: How do I know when brookies are done?
A: Insert a toothpick into the center – it should come out with a few moist crumbs, not wet batter. The cookie top should be golden brown. Remember, they’ll continue cooking as they cool, so slightly underdone is better than overbaked.
Q: Can I make these in a different pan size?
A: Yes! For an 8×8-inch pan, halve the recipe and bake for 25-30 minutes. For a 9×9-inch pan, reduce the recipe by ⅓ and bake for 28-32 minutes. Thicker brookies in smaller pans will need more baking time.
Q: My cookie layer is spreading into the brownie layer – is that okay?
A: Perfectly fine! Some mixing and marbling is expected and creates a beautiful, rustic look. For more distinct layers, chill the cookie dough for 15 minutes before spreading it over the brownie batter.
Q: Can I make these nut-free for allergies?
A: Yes! This recipe is already nut-free as written. Just ensure your chocolate chips are processed in a nut-free facility if you have severe allergies.
Q: Why are my brookies dry?
A: The most common cause is overbaking. Remove them when they still look slightly underdone in the center. Also, make sure you’re measuring flour correctly – too much flour makes them dry. Spoon flour into measuring cups and level off rather than scooping.
Conclusion
There you have it – the ultimate brookie recipe that brings together two beloved desserts into one incredible treat! Whether you’re a brownie loyalist, a cookie devotee, or someone who simply can’t choose between the two, these brookies offer the best of both worlds in every single bite. The contrast between the fudgy, rich brownie layer and the chewy, chip-studded cookie top creates a textural experience that’s simply unmatched.
The beauty of this recipe is its versatility. You can dress it up for special occasions, keep it simple for weeknight treats, customize it with your favorite mix-ins, or make it ahead for stress-free entertaining. It’s one of those recipes that looks impressively complex but is actually wonderfully straightforward, making you look like a baking genius without the fuss.
I’d love to hear how your brookies turn out! Did you add any creative mix-ins? Serve them with ice cream? Give them as gifts? Drop a comment below and share your experience. And if you love this recipe as much as I do, please save it to your Pinterest boards so you can find it again and share it with other dessert lovers!
Happy baking, and enjoy every fudgy, chewy, chocolatey bite! 🍫🍪