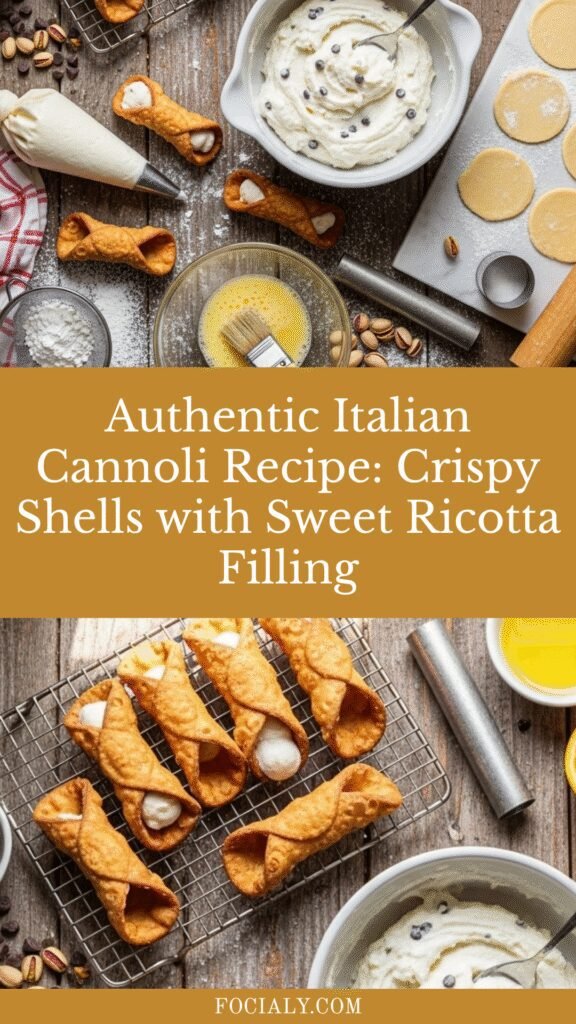
Authentic Italian Cannoli Recipe: Crispy Shells with Sweet Ricotta Filling
There’s something absolutely magical about biting into a freshly filled cannoli—that satisfying crunch of the crispy shell giving way to the cool, creamy ricotta filling dotted with chocolate chips and kissed with hints of citrus and vanilla. Cannoli are more than just a dessert; they’re a celebration of Italian-American culinary tradition and one of the most beloved pastries in the world.
These iconic Sicilian treats have captured hearts (and taste buds) across America, becoming a staple at Italian bakeries, restaurants, and family gatherings. The beauty of homemade cannoli lies in the contrast of textures—the delicate, fried shell that shatters with each bite paired with the lusciously smooth, slightly sweet ricotta cream. Unlike store-bought versions that can sit for hours becoming soggy, homemade cannoli filled just before serving deliver that perfect textural experience that makes them so irresistible.
Cannoli are perfect for special occasions like holidays, dinner parties, Italian feast celebrations, weddings, or whenever you want to impress guests with an authentic Italian dessert. They’re also surprisingly fun to make at home! While the process requires a few steps, none of them are particularly difficult, and the results are absolutely worth the effort. Your guests will be blown away when you tell them these restaurant-quality cannoli came from your own kitchen.
History / Background
Cannoli have a rich history that dates back over a thousand years to the beautiful island of Sicily. The name “cannoli” comes from the Italian word “canna,” meaning reed or tube, referring to the cylindrical shape of these beloved pastries. The singular form is actually “cannolo,” though most Americans use “cannoli” for both singular and plural.
The exact origins of cannoli are somewhat debated, but most food historians trace them back to Palermo, Sicily, during the Arab rule of the island (827-1091 AD). Some legends suggest that cannoli were originally created by women in Sicilian convents, possibly as a fertility symbol during Carnevale celebrations. Others believe they evolved from Arab pastries that used similar frying techniques and sweet fillings.
What we do know is that cannoli became deeply embedded in Sicilian culture, particularly around the town of Piana degli Albanesi near Palermo, which is still considered the cannoli capital of Sicily. Traditionally, cannoli were a Carnevale treat, enjoyed during the festive period before Lent. However, their popularity quickly spread beyond seasonal celebrations to become an everyday indulgence.
Cannoli made their way to America with the great wave of Italian immigration in the late 19th and early 20th centuries. Sicilian immigrants brought their treasured recipes and traditions, opening bakeries and pastry shops in Italian-American neighborhoods across the country. Cities like New York, Boston, and Philadelphia became famous for their cannoli, with bakeries competing to create the best version.
The classic Sicilian cannoli filling uses sheep’s milk ricotta, which has a slightly different flavor and texture than the cow’s milk ricotta commonly found in America. In Sicily, the shells are often larger and less sweet than American versions, allowing the ricotta filling to truly shine. Regional variations exist throughout Sicily—some areas prefer their cannoli dusted with pistachios, others with chocolate chips, and some garnished with candied citrus peel.
Today, cannoli remain one of the most iconic Italian desserts worldwide. They’ve been featured in countless movies (who can forget that famous line from “The Godfather”?), TV shows, and have become synonymous with Italian-American cuisine. Making cannoli at home connects you to this centuries-old tradition and brings a taste of Sicily to your kitchen.
Why You’ll Love This Recipe
This authentic cannoli recipe delivers that perfect combination of crispy, flaky shells and creamy, dreamy ricotta filling that makes these pastries so addictive. I’ve tested and refined every detail to ensure your homemade cannoli turn out just as delicious as those from the best Italian bakeries.
Here’s why this homemade cannoli recipe will become your go-to impressive dessert:
- Authentic Italian Flavor: Made with traditional ingredients and techniques for genuine Sicilian taste
- Incredible Texture Contrast: Crispy shells stay crunchy when filled just before serving—unlike pre-filled bakery versions
- Impressive Yet Achievable: Looks fancy and professional but uses straightforward techniques any home cook can master
- Customizable Fillings: Easily adapt the ricotta filling with different flavors, mix-ins, and garnishes
- Make-Ahead Friendly: Shells can be made days in advance, filling comes together in minutes
- Perfect for Entertaining: Makes 12-16 cannoli, ideal for dinner parties and celebrations
- Fresher Than Store-Bought: No preservatives, fresher ingredients, and infinitely better taste
- Fun to Make: The process of forming and frying shells is actually quite enjoyable and therapeutic
- Budget-Friendly Elegance: Impressive results without expensive ingredients or equipment
Ingredient Notes
Let’s break down what makes authentic Italian cannoli so special. Each ingredient plays a crucial role in creating that perfect balance of flavors and textures.
For the Cannoli Shells:
All-Purpose Flour: Forms the base of the dough, creating structure and that signature crispy texture when fried. Bread flour can be substituted for an even crispier shell, though all-purpose works beautifully.
Granulated Sugar: Just a small amount (2-3 tablespoons) adds subtle sweetness to the shells without making them dessert-like. The shells should complement, not compete with, the sweet filling.
Unsalted Butter: Adds richness and helps create a tender, flaky texture in the fried dough. Make sure it’s cold when incorporating into the flour for best results.
Egg and Egg Yolk: Binds the dough together and contributes to browning during frying. The extra yolk adds richness and helps create those beautiful bubbles on the shells.
White Wine or Marsala: This is the secret ingredient that gives cannoli shells their distinctive flavor and helps create the perfect texture. The alcohol evaporates during frying, leaving behind subtle complexity. Dry white wine, Marsala, or even white vinegar mixed with water works well.
Salt and Cinnamon: Small amounts enhance all the other flavors. Cinnamon adds traditional warmth that pairs perfectly with the ricotta filling.
Vegetable Oil for Frying: You’ll need several cups for deep frying. Vegetable oil, canola oil, or peanut oil all work well due to their high smoke points and neutral flavors.
For the Ricotta Filling:
Whole Milk Ricotta: The star of the show! Use the highest quality full-fat ricotta you can find—it makes all the difference. Avoid low-fat or part-skim versions as they’ll produce a watery, less flavorful filling. For the most authentic taste, seek out sheep’s milk ricotta if available, or try draining regular ricotta overnight for a thicker consistency.
Powdered Sugar: Sweetens the filling and dissolves completely into the ricotta without adding graininess. The amount can be adjusted to your taste, but typically ¾ to 1 cup is perfect.
Vanilla Extract: Adds aromatic sweetness and depth. Use pure vanilla extract, never imitation, for the best flavor.
Citrus Zest: Orange or lemon zest is traditional and adds bright, fresh notes that balance the richness. This is non-negotiable in authentic Sicilian cannoli!
Mini Chocolate Chips: The classic addition to cannoli filling! Use mini chips so they distribute evenly and don’t overwhelm. Some traditionalists leave them out entirely, while others swear by them.
Optional Additions: Candied citrus peel, chopped pistachios, or a splash of liqueur like rum or amaretto can elevate your filling even further.
Equipment Needed
Making cannoli at home requires some specific tools, but nothing too specialized or expensive:
For the Shells:
- Cannoli Tubes/Forms: These metal tubes (usually 4-5 inches long and about 1 inch in diameter) are essential for shaping the shells. You can find sets of 4-6 tubes online or at kitchen supply stores for $10-20. Stainless steel tubes work best.
- Rolling Pin: For rolling the dough thin—preferably a thinner French-style rolling pin for better control.
- 3-4 inch Round Cookie Cutter or Glass: To cut perfect circles from the dough.
- Pastry Wheel or Pizza Cutter: Optional but helpful for trimming edges cleanly.
- Large, Heavy Pot or Deep Fryer: For deep frying the shells. The pot should be deep enough to hold 3-4 inches of oil safely.
- Candy/Deep Fry Thermometer: Essential for maintaining the correct oil temperature (350-365°F).
- Spider Strainer or Slotted Spoon: For safely removing shells from hot oil.
- Paper Towels and Wire Rack: For draining fried shells.
For the Filling:
- Large Mixing Bowl: For preparing the ricotta filling.
- Fine-Mesh Strainer or Cheesecloth: If you need to drain excess moisture from ricotta.
- Electric Mixer or Wooden Spoon: For beating the filling until smooth and creamy.
- Piping Bag or Large Zip-Top Bag: Makes filling the shells quick and neat.
- Large Round Piping Tip: Optional but helpful for clean filling.
General Kitchen Tools:
- Measuring Cups and Spoons: For accurate ingredient measurements.
- Food Processor: Optional but makes dough mixing faster.
- Plastic Wrap: For wrapping dough while it rests.
Authentic Italian Cannoli Recipe: Crispy Shells with Sweet Ricotta Filling
Authentic Italian cannoli with crispy fried shells and sweet, creamy ricotta filling. These homemade Sicilian pastries rival any bakery version with their perfect texture and traditional flavors!
- Prep Time: 45 minutes (plus 1 hour dough rest time)
- Cook Time: 30 minutes
- Total Time: 2 hours 15 minutes
- Yield: 12-14 cannoli 1x
- Category: Dessert
- Method: Frying
- Cuisine: Italian, Sicilian
- Diet: Vegetarian
Ingredients
For the Cannoli Shells:
- 2 cups all-purpose flour, plus more for dusting
- 2 tablespoons granulated sugar
- ¼ teaspoon salt
- ½ teaspoon ground cinnamon
- 2 tablespoons cold unsalted butter, cut into small pieces
- 1 large egg
- 1 egg yolk
- ½ cup dry white wine or Marsala wine
- Vegetable oil for frying (about 4 cups)
- 1 egg white, lightly beaten (for sealing shells)
For the Ricotta Filling:
- 2 cups (16 ounces) whole milk ricotta cheese, drained if watery
- ¾ cup powdered sugar, sifted
- 1 teaspoon pure vanilla extract
- 1 teaspoon orange zest (or ½ teaspoon lemon zest)
- ⅓ cup mini chocolate chips
- Pinch of salt
For Garnish:
- Powdered sugar for dusting
- Chopped pistachios (optional)
- Candied cherries (optional)
- Additional mini chocolate chips (optional)
Instructions
Make the Cannoli Shells:
- Prepare the Dough: In a large bowl or food processor, combine flour, sugar, salt, and cinnamon. Add the cold butter pieces and work them into the flour using your fingertips or pulse in the processor until the mixture resembles coarse crumbs.
- Add Wet Ingredients: In a small bowl, whisk together the egg, egg yolk, and wine. Add to the flour mixture and stir (or pulse) until a shaggy dough forms. If the dough seems too dry, add wine one teaspoon at a time. If too wet, add flour one tablespoon at a time.
- Knead the Dough: Turn the dough onto a lightly floured surface and knead for 8-10 minutes until smooth, elastic, and only slightly sticky. The dough should be firm but pliable. Shape into a disc, wrap tightly in plastic wrap, and refrigerate for at least 1 hour (or up to overnight).
- Roll the Dough: Remove dough from refrigerator and let sit for 10 minutes. On a lightly floured surface, roll the dough very thin—about ⅛ inch thick or thinner if possible. The thinner the dough, the crispier the shells. If you have a pasta machine, roll to setting 6 or 7.
- Cut Circles: Using a 3½ to 4-inch round cutter or glass, cut circles from the dough. Gather scraps, re-roll once, and cut more circles. You should get 12-14 circles total.
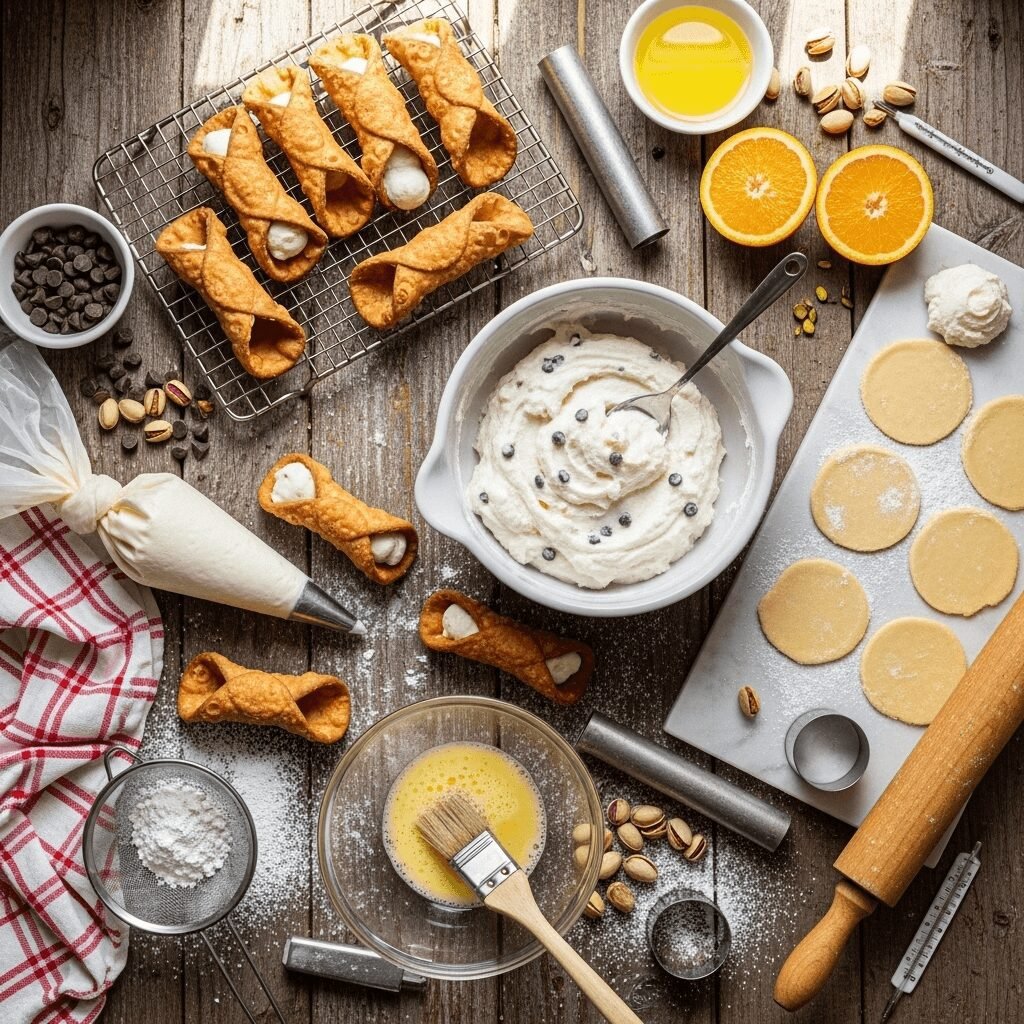
- Form the Shells: Lightly brush one edge of a dough circle with beaten egg white. Wrap the circle around a cannoli tube, overlapping the edges where you brushed the egg white. Press gently to seal. The dough should be snug but not stretched. Repeat with remaining circles—you’ll fry in batches based on how many tubes you have.
- Heat the Oil: In a large, heavy pot, heat 3-4 inches of oil to 350-365°F. Use a thermometer to monitor temperature—this is crucial for perfectly crispy shells.
- Fry the Shells: Carefully lower 2-3 dough-wrapped tubes into the hot oil. Fry for 2-3 minutes, turning occasionally with tongs or a spider strainer, until deep golden brown and crispy with bubbles all over. Don’t overcrowd the pot or the temperature will drop.
- Drain and Cool: Using tongs or a spider strainer, carefully remove the tubes from oil and place on paper towels. Let cool for about 1 minute until you can handle them, then gently slide the shells off the tubes using a clean kitchen towel to grip them. Place shells on a wire rack to cool completely. The tubes will be very hot—be careful! Wipe tubes clean and let them cool slightly before forming more shells.
- Repeat: Continue forming and frying shells until all dough circles are used. Let all shells cool completely before filling.
Make the Ricotta Filling:
- Drain Ricotta: If your ricotta seems watery, place it in a fine-mesh strainer lined with cheesecloth set over a bowl. Refrigerate for 30 minutes to 2 hours to remove excess moisture.
- Beat the Filling: In a large bowl, beat the drained ricotta with an electric mixer on medium speed (or stir vigorously with a wooden spoon) for 1-2 minutes until smooth and creamy. Add powdered sugar, vanilla extract, citrus zest, and salt. Beat until completely combined and fluffy, about 2 more minutes.
- Add Mix-Ins: Gently fold in the mini chocolate chips. Cover and refrigerate the filling until ready to use (at least 30 minutes for best texture). The filling can be made up to 24 hours ahead.
- Fill the Shells: This step should be done just before serving! Transfer the ricotta filling to a piping bag or large zip-top bag with one corner snipped off. Pipe filling into one end of a cannoli shell, then flip and pipe from the other end until completely filled. Alternatively, use a small spoon to carefully fill from both ends.
- Garnish: Dip the ends of filled cannoli in chopped pistachios, extra mini chocolate chips, or leave plain. Dust generously with powdered sugar. Optionally, place a small piece of candied cherry on one end for traditional presentation.
- Serve Immediately: Cannoli are best enjoyed within 1-2 hours of filling while the shells are still crispy. Arrange on a platter and watch them disappear!
Notes
- The dough must rest for at least 1 hour to develop gluten and become easier to roll thin.
- Shells can be made 2-3 days ahead and stored in an airtight container at room temperature.
- Never fill cannoli more than 2 hours before serving or the shells will become soggy.
- If you don’t have cannoli tubes, you can carefully shape aluminum foil into tubes, though metal tubes work much better.
- Maintaining proper oil temperature (350-365°F) is critical—too hot and shells burn, too cool and they absorb oil and become greasy.
- For extra-crispy shells, fry them a bit longer until they’re a deep golden brown.
Nutrition
- Serving Size: 1 cannoli
- Calories: 285
- Sugar: 16g
- Sodium: 125mg
- Fat: 14g
- Saturated Fat: 6g
- Unsaturated Fat: 7g
- Trans Fat: 0g
- Carbohydrates: 32g
- Fiber: 1g
- Protein: 8g
- Cholesterol: 65mg
Tips & Variations
Once you master basic cannoli, the variations are endless! Here are creative ways to customize this classic recipe:
Shell Flavor Variations:
- Chocolate Cannoli Shells: Add 2 tablespoons cocoa powder to the dough for rich chocolate shells
- Lemon Shells: Add 1 tablespoon lemon zest to the dough for bright citrus flavor
- Spiced Shells: Increase cinnamon and add a pinch of nutmeg or cardamom
Filling Flavor Twists:
- Chocolate Ricotta: Fold 3 tablespoons cocoa powder into the ricotta filling
- Pistachio Cannoli: Blend ½ cup roasted pistachios into the filling for vibrant color and nutty flavor
- Coffee Cannoli: Add 1-2 tablespoons espresso powder for sophisticated mocha flavor
- Lemon Ricotta: Use lemon zest instead of orange and add a teaspoon of lemon juice
- Amaretto Cannoli: Replace vanilla with amaretto liqueur for almond flavor
- Cannoli Chip Variations: Try white chocolate chips, dark chocolate, or cinnamon chips instead of semi-sweet
Garnish Options:
- Crushed pistachios on the ends (classic Sicilian style)
- Finely chopped candied orange peel
- Toasted sliced almonds
- Shaved dark chocolate
- Candied cherries (traditional)
- Crushed freeze-dried strawberries for color
Dietary Adaptations:
- Reduced Sugar: Cut powdered sugar in filling to ½ cup for less sweet version
- Lighter Filling: Use part-skim ricotta and reduce chocolate chips (though it won’t be quite as rich)
- Gluten-Free: Use a gluten-free flour blend for the shells (texture will differ slightly)
Size Variations:
- Mini Cannoli: Use 2-inch cutters and smaller tubes for bite-sized versions perfect for parties
- Cannoli Dip: Skip the shells entirely and serve the filling as a dip with broken pizzelle cookies or graham crackers
Pro Chef Tips
After making hundreds of cannoli, I’ve learned these professional secrets that guarantee perfect results:
Temperature Control is Everything: Keep your oil between 350-365°F consistently. Too hot and the shells will brown before cooking through, developing a raw, doughy taste. Too cool and they’ll absorb oil, becoming greasy and heavy. Invest in a good thermometer and adjust heat frequently to maintain the sweet spot.
Roll Dough Super Thin: This is the #1 tip for achieving restaurant-quality cannoli shells! The dough should be thin enough to almost see through—about 1/16 inch if possible. Thin dough creates those delicate, shattering-crisp shells that make cannoli special. Don’t be afraid to roll it thinner than you think you should.
Don’t Skip the Dough Rest: Resting the dough for at least 1 hour (preferably 2-3 hours or overnight) allows the gluten to relax, making it much easier to roll thin without springing back. Rushed dough will fight you and produce tough shells.
Drain Your Ricotta: Even if your ricotta doesn’t look watery, draining it for at least 30 minutes improves the filling texture dramatically. Excess moisture will make the filling runny and cause shells to soften faster. For the absolute best texture, drain overnight in the refrigerator.
Fill Just Before Serving: This cannot be emphasized enough! The contrast between crispy shell and creamy filling is what makes cannoli magical. Pre-filled cannoli become soggy within hours. If serving at a party, set up a filling station and fill batches as needed, or fill all at once right before guests arrive.
Use a Piping Bag: While you can spoon filling into shells, a piping bag gives you much better control and cleaner results. Pipe from both ends toward the middle to avoid air pockets and ensure the filling reaches all the way through.
Beat the Ricotta: Beating or whisking the ricotta filling vigorously makes it incredibly smooth and creamy rather than grainy. This step is often overlooked but makes a huge difference in the final texture.
Double-Fry Technique: Some Italian bakeries fry their shells twice—once at a lower temperature to cook through, then a second time at higher heat to crisp up. This creates extraordinarily crispy shells that stay crunchy longer.
Common Mistakes to Avoid
Learn from these common pitfalls so your first batch of cannoli turns out perfectly:
- Filling Shells Too Early: This is mistake #1! Filling cannoli more than 1-2 hours before serving turns crispy shells into soggy disappointments. The moisture from the ricotta filling migrates into the shells, destroying that essential textural contrast. Always fill as close to serving time as possible.
- Not Draining Ricotta Properly: Watery ricotta creates runny filling that not only tastes less rich but also makes shells soggy faster. Even if your ricotta looks thick, take time to drain it in a strainer or cheesecloth for at least 30 minutes. This simple step elevates the filling dramatically.
- Rolling Dough Too Thick: Thick dough produces heavy, bread-like shells instead of delicate, crispy ones. Channel your inner pasta maker and roll that dough thin—you should be able to almost see through it. Yes, it takes elbow grease, but the results are worth it.
- Incorrect Oil Temperature: Frying at the wrong temperature is a recipe for disaster. Too hot (over 375°F) and shells burn on the outside while remaining raw inside. Too cool (under 340°F) and they absorb oil, becoming greasy and heavy. Use a thermometer and adjust heat constantly to maintain 350-365°F.
- Forgetting to Seal the Dough: If you don’t brush egg white on the overlapping edge before wrapping dough around tubes, the shells will unfurl during frying, creating a mess. That thin egg white “glue” is essential for keeping shells intact. Make sure you press the seam well after wrapping.
- Overfilling the Shells: While generous filling is tempting, overstuffing makes cannoli messy to eat and can cause shells to crack. Fill shells completely but stop before filling bulges out excessively. The filling should be flush with or just slightly protruding from the shell ends.
Storage & Meal Prep
Understanding how to store cannoli components properly allows you to enjoy them over several days or prepare ahead for events:
Unfilled Cannoli Shells: Store completely cooled shells in an airtight container at room temperature for up to 3-4 days. Place parchment paper between layers to prevent sticking or breaking. Properly stored shells stay remarkably crispy. Don’t refrigerate shells as moisture will make them soft.
Ricotta Filling: Store filling separately in an airtight container in the refrigerator for up to 3 days. The texture may weep slightly as it sits—simply stir well before using. If liquid has accumulated on top, drain it off or stir it back in.
Filled Cannoli: Once filled, cannoli are best consumed within 1-2 hours for optimal texture. After 2-3 hours, shells begin softening noticeably. If you must store filled cannoli, keep them in the refrigerator loosely covered for up to 4 hours maximum, but understand the shells won’t be as crispy.
Refreshing Softened Shells: If shells have softened slightly, you can crisp them up by placing on a baking sheet in a 350°F oven for 3-5 minutes. Let cool completely before filling.
Room Temperature Serving: Filled cannoli are best served at cool room temperature rather than cold from the refrigerator. The filling tastes sweeter and creamier when not ice-cold. Remove from refrigerator 10-15 minutes before serving if you’ve stored them briefly.
Make-Ahead & Freezer Notes
Cannoli are excellent for make-ahead preparation since shells and filling store separately beautifully:
Make-Ahead Timeline:
- 3 Days Before: Make and fry all cannoli shells. Store in an airtight container at room temperature. This is actually ideal as shells continue to dry out slightly, becoming even crispier.
- 1-2 Days Before: Prepare the ricotta filling and refrigerate in an airtight container. Stir well before using.
- Day Of: Fill shells 30 minutes to 2 hours before serving for best results.
Freezing Cannoli Shells: Unfilled shells freeze excellently! Place cooled shells in a single layer in an airtight container with parchment paper between layers. Freeze for up to 2 months. Thaw at room temperature for 30 minutes before filling. They may lose a tiny bit of crispness but will still be delicious.
Freezing Ricotta Filling: While possible, I don’t recommend freezing ricotta filling as it can become grainy and watery when thawed. The texture changes significantly. If you must freeze it, thaw overnight in the refrigerator and beat vigorously before using.
Freezing Filled Cannoli: Not recommended! The shells become irreversibly soggy when frozen and thawed. If you have leftover filled cannoli, they’re best enjoyed the same day rather than frozen.
Best Make-Ahead Strategy: Make shells several days ahead and keep them at room temperature. Make filling the day before and refrigerate. Fill cannoli the morning of serving or even just 1-2 hours before guests arrive. This approach gives you maximum freshness with minimal last-minute work.
Serving Suggestions
Cannoli are spectacular on their own, but here’s how to present and serve them for maximum impact:
Traditional Presentation:
- Arrange cannoli on a decorative platter dusted with powdered sugar
- Garnish the platter with fresh mint leaves and lemon wedges
- Serve on individual dessert plates with a small fork and espresso spoon
Beverage Pairings:
- Espresso or Strong Coffee: The classic Italian pairing—bitter coffee cuts through the sweet ricotta perfectly
- Cappuccino: Especially popular in the morning or as an afternoon treat
- Sweet Dessert Wine: Moscato d’Asti, Vin Santo, or Marsala complement the sweetness beautifully
- Limoncello: Serve small glasses of this lemon liqueur alongside for authentic Italian flair
- Hot Tea: Earl Grey or chamomile provide a lighter alternative to coffee
Occasion Ideas:
- Italian Dinner Party Finale: The perfect ending to a pasta or risotto feast
- Holiday Dessert Tables: Especially popular for Christmas, Easter, and Italian feast days
- Wedding Desserts: Mini cannoli make elegant wedding favors or dessert table additions
- Graduation Parties: Impressive yet achievable for large gatherings
- St. Joseph’s Day: Traditional Italian celebration where cannoli are customary
Plating Suggestions:
- Dust plates with cocoa powder and place cannoli on top
- Drizzle plates with chocolate or caramel sauce before adding cannoli
- Serve with a small scoop of vanilla gelato or whipped cream
- Add fresh berries (raspberries or strawberries) for color contrast and tartness
- Garnish with a sprig of fresh mint and a twist of orange peel
Serving Size: Cannoli are rich! One per person is usually sufficient, though cannoli enthusiasts may want two. For parties, plan on 1-1½ cannoli per guest.
FAQs Section
Q: Can I make cannoli without cannoli tubes/forms?
A: While metal cannoli tubes are ideal, you can create makeshift tubes from aluminum foil in a pinch. Roll heavy-duty foil around a wooden dowel (about 1 inch diameter) to create tube shapes, then carefully slide off. These work but aren’t as sturdy as proper metal tubes. You can also try using clean, empty metal tubes from paper towel rolls cut to 4-5 inch lengths, wrapped in foil. However, metal cannoli tubes are inexpensive ($10-20 for a set) and reusable, so they’re worth the investment if you plan to make cannoli more than once.
Q: Why are my cannoli shells tough or chewy instead of crispy?
A: This usually happens when the dough is rolled too thick or the oil temperature was too low. Thick dough creates bread-like shells rather than delicate, crispy ones. The dough should be rolled paper-thin—about 1/16 inch or less. Low oil temperature (below 340°F) causes shells to absorb oil and become greasy rather than crispy. Always use a thermometer and maintain 350-365°F for best results.
Q: How do I prevent cannoli shells from becoming soggy?
A: The golden rule: never fill cannoli more than 1-2 hours before serving! Moisture from the ricotta filling migrates into the shells over time. Additionally, drain your ricotta well before making the filling to remove excess moisture. Some bakers brush the inside of shells with melted chocolate before filling, creating a moisture barrier, though this isn’t traditional.
Q: Can I bake cannoli shells instead of frying them?
A: While you can find recipes for baked cannoli shells, they won’t have the same authentic texture, flavor, and appearance as fried shells. Fried shells are delicate, crispy, and bubbly with rich flavor from the oil. Baked versions tend to be harder, cracker-like, and lack that characteristic texture. If you’re uncomfortable with deep frying, you might prefer making cannoli dip served with pizzelle cookies instead.
Q: What’s the best type of ricotta to use?
A: Use whole milk ricotta (full-fat) for the richest, creamiest filling. Avoid low-fat or part-skim ricotta as they produce watery, less flavorful filling. Look for ricotta labeled “whole milk” or “full-fat.” For the most authentic taste, seek out sheep’s milk ricotta (ricotta di pecora) at Italian specialty stores, though cow’s milk ricotta works beautifully too. The brand matters—high-quality ricotta from Italian markets or specialty brands like Calabro or Belgioioso makes a noticeable difference.
Q: Why does my dough keep shrinking when I roll it?
A: This is a classic sign that the gluten hasn’t relaxed enough. Make sure you’re allowing the dough to rest for at least 1 hour after kneading (2-3 hours is even better). If the dough still fights back during rolling, let it rest for another 10-15 minutes covered with plastic wrap, then try again. Proper resting time is essential for easy rolling.
Q: Can I make cannoli ahead for a party?
A: Absolutely! Make the shells 2-3 days ahead and store at room temperature in an airtight container. Make the filling 1-2 days ahead and refrigerate. Set up a filling station at your party and fill cannoli in small batches, or fill all of them 1-2 hours before guests arrive. This strategy gives you that fresh-filled texture guests will rave about.
Q: What can I do with leftover cannoli shells?
A: Unfilled shells keep for days! Store them in an airtight container and fill as desired over the next few days. You can also crush leftover shells and use them as a crunchy topping for ice cream, yogurt, or cannoli dip. They’re also delicious enjoyed plain as a crunchy snack with coffee.
Conclusion
And there you have it—everything you need to create authentic, bakery-quality Italian cannoli right in your own kitchen! I know the process might seem involved at first glance, but I promise that once you make your first batch, you’ll realize it’s actually quite straightforward and incredibly rewarding. There’s something deeply satisfying about creating these iconic pastries from scratch, and the look on people’s faces when they bite into your homemade cannoli is absolutely priceless.
The key to perfect cannoli really comes down to a few critical points: roll that dough super thin for crispy shells, maintain proper oil temperature while frying, drain your ricotta well for thick filling, and most importantly, fill those shells just before serving. Follow these guidelines and you’ll be producing cannoli that rival the best Italian bakeries.