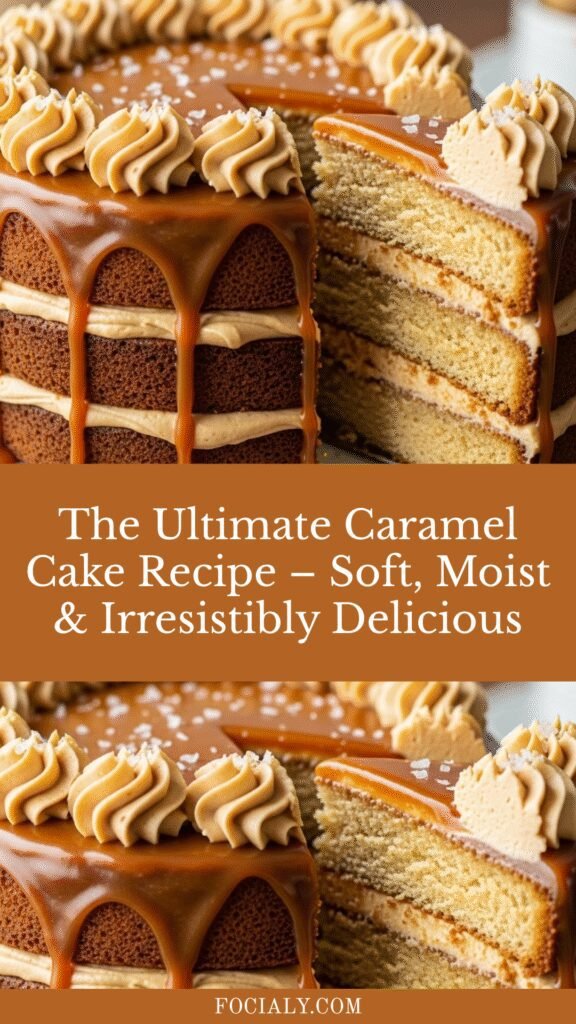
The Ultimate Caramel Cake Recipe – Soft, Moist & Irresistibly Delicious
If you’ve ever dreamed of baking a cake that makes everyone at the table stop mid-conversation and ask for seconds, this caramel cake is your answer. This isn’t just any cake—it’s a towering masterpiece of moist, buttery layers drenched in silky, golden caramel frosting that tastes like pure heaven. Whether you’re celebrating a birthday, hosting a Sunday dinner, or simply treating yourself to something special, this caramel cake delivers that homemade, from-scratch magic that store-bought desserts just can’t match.
What makes this recipe truly special is the caramel frosting. Unlike buttercream or cream cheese frosting, caramel frosting has a deep, toasty sweetness with hints of butterscotch that pairs perfectly with the tender vanilla cake layers. It’s the kind of dessert that becomes a family tradition—the cake everyone requests year after year. And while it looks like something from a fancy bakery, I promise you can absolutely make this at home. Yes, making caramel frosting requires a bit of attention, but I’ll walk you through every step so you feel confident and excited, not intimidated.
This caramel cake is perfect for special occasions, potlucks, church gatherings, or any time you want to impress without spending all day in the kitchen. It feeds a crowd, stays moist for days, and honestly, it gets even better on day two when the flavors have had time to meld together.
History / Background
Caramel cake holds a cherished place in Southern baking tradition, particularly across states like Georgia, Alabama, and the Carolinas. This isn’t a dessert born from fancy French patisseries—it’s a cake rooted in American home kitchens, passed down through generations of grandmothers who knew that the secret to a great celebration was a towering layer cake with homemade frosting.
The origins of caramel cake likely trace back to the late 1800s and early 1900s when home bakers began experimenting with caramelized sugar as a frosting base. Before the convenience of modern buttercream, cooks would cook sugar until it turned golden and fragrant, then carefully add cream and butter to create a pourable, glossy frosting. This technique required skill and patience—you had to watch the sugar like a hawk to prevent burning, and timing was everything.
In the South, caramel cake became synonymous with special occasions. It was the cake for birthdays, weddings, holidays, and church socials. Families would gather around the table, and the caramel cake would be the grand finale—a symbol of love, effort, and celebration. The frosting was often made with a cooked method, sometimes called “boiled frosting” or “caramel icing,” which gave it that distinctive fudgy texture that hardens slightly on the outside while staying creamy within.
What’s beautiful about this cake is how it represents resourcefulness and technique. Early American bakers didn’t have fancy mixers or precise temperature controls, yet they mastered the art of caramelizing sugar on a wood-burning stove. Today, we have the advantage of modern tools, but the soul of the recipe remains the same—simple ingredients transformed through technique into something extraordinary.
Why You’ll Love This Recipe
This caramel cake isn’t just delicious—it’s everything you want in a showstopping dessert. The cake layers are incredibly moist and tender with a fine, velvety crumb that practically melts on your tongue. The caramel frosting is rich and buttery with that perfect balance of sweetness and depth that only real caramelized sugar can provide. Together, they create a dessert that tastes like it came from a professional bakery, but you made it with your own two hands.
Here’s why this recipe will become your new favorite:
- Spectacular presentation – This is a tall, impressive layer cake that looks stunning on any dessert table and photographs beautifully for sharing
- Authentic caramel flavor – Real caramelized sugar gives this frosting a complex, toasty sweetness that artificial caramel flavoring can’t replicate
- Perfect texture – The cake stays incredibly moist for days, and the frosting has that glossy, fudgy quality that’s both spreadable and stable
- Crowd-pleaser guaranteed – I’ve never served this cake to someone who didn’t rave about it and ask for the recipe
- Special occasion worthy – This is the cake you make when you want to show someone you really care
- Great for advance prep – You can bake the cake layers ahead and frost the day of your event
- Southern heritage – There’s something special about making a recipe with such rich tradition and history
Ingredient Notes
Let’s talk about what goes into this beautiful cake and why each ingredient matters. Understanding your ingredients helps you bake with confidence and make smart substitutions when needed.
For the Cake:
All-purpose flour – Provides structure without making the cake tough. I don’t recommend cake flour here because we want a slightly sturdier crumb that can support the heavy caramel frosting.
Unsalted butter – Creaming butter with sugar creates air pockets that make the cake light and tender. Room temperature is crucial—it should be soft enough to leave a fingerprint but not greasy or melted. If you only have salted butter, reduce the added salt by half.
Granulated sugar – Sweetens the cake and helps create that tender, moist texture. Don’t substitute with alternatives like coconut sugar as it will change the flavor and color.
Eggs – Add richness, moisture, and structure. Large eggs at room temperature blend more easily and create better volume. To quickly warm cold eggs, place them in a bowl of warm water for 5 minutes.
Whole milk – Keeps the cake incredibly moist. Buttermilk can be substituted for a slight tang, but whole milk gives the cleanest vanilla flavor that lets the caramel shine.
Vanilla extract – Pure vanilla extract is worth the investment here. It enhances all the other flavors without competing with the caramel.
Baking powder and baking soda – Work together to give the cake a beautiful rise and tender crumb. Make sure yours are fresh (less than 6 months old) for best results.
Salt – Enhances all the flavors and balances the sweetness.
For the Caramel Frosting:
Granulated sugar – This is what we’ll caramelize. As it melts and darkens, complex flavors develop that make this frosting magical.
Heavy cream – Stops the caramelization process and creates that silky, pourable texture. It must be at room temperature or the cold liquid will cause the hot caramel to seize up and crystallize.
Unsalted butter – Adds richness and that glossy, luxurious finish. Use European-style butter if you want extra decadence.
Vanilla extract – A splash of vanilla rounds out the caramel’s deep flavor.
Powdered sugar – Thickens the frosting to spreadable consistency and adds extra sweetness.
Salt – Just a pinch cuts through the sweetness and makes the caramel flavor more complex.
Equipment Needed
Having the right tools makes this recipe so much easier and more enjoyable. Here’s what you’ll need:
- Three 9-inch round cake pans – For classic layer cake presentation
- Parchment paper – Line the bottom of your pans to ensure the cakes release perfectly
- Stand mixer or hand mixer – Essential for creaming butter and sugar and whipping the frosting
- Medium heavy-bottomed saucepan – For making the caramel frosting; heavy-bottom prevents hot spots and burning
- Wooden spoon or silicone spatula – For stirring the caramel
- Candy thermometer (optional but helpful) – Takes the guesswork out of caramel making
- Cooling racks – Allow air to circulate around the cakes so they cool evenly
- Offset spatula – Makes frosting the cake layers smooth and professional-looking
- Cake turntable (optional) – Not essential but makes frosting so much easier
- Measuring cups and spoons – Accurate measurements are crucial in baking
Caramel Cake Recipe
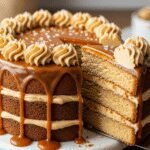
This classic Southern caramel cake features three layers of moist, tender vanilla cake covered in rich, golden caramel frosting made from scratch. The frosting has a silky, fudgy texture with deep caramelized sugar flavor that’s absolutely irresistible. Perfect for birthdays, holidays, and special celebrations.
- Prep Time: 30 minutes
- Cook Time: 35 minutes
- Total Time: 1 hour 30 minutes
- Yield: 12-14 servings 1x
- Category: Dessert
- Method: Baking
- Cuisine: American
- Diet: Vegetarian
Ingredients
For the Cake:
- 3 cups all-purpose flour
- 1 tablespoon baking powder
- ½ teaspoon baking soda
- ¾ teaspoon salt
- 1 cup (2 sticks) unsalted butter, softened to room temperature
- 2 cups granulated sugar
- 4 large eggs, room temperature
- 1 tablespoon pure vanilla extract
- 1½ cups whole milk, room temperature
For the Caramel Frosting:
- 2 cups granulated sugar
- ¾ cup heavy cream, room temperature
- ½ cup (1 stick) unsalted butter, cut into pieces
- 1 teaspoon vanilla extract
- ¼ teaspoon salt
- 2-3 cups powdered sugar (as needed for consistency)
Instructions
For the Cake:
- Prep your pans and oven: Preheat your oven to 350°F (175°C). Grease three 9-inch round cake pans with butter or non-stick spray, line the bottoms with parchment paper circles, and grease the parchment. Lightly dust with flour and tap out the excess. This ensures perfect cake release.
- Mix the dry ingredients: In a medium bowl, whisk together the flour, baking powder, baking soda, and salt. Set aside. This distributes the leavening agents evenly throughout the flour.
- Cream butter and sugar: In a large bowl using a stand mixer or hand mixer, beat the softened butter on medium speed for about 2 minutes until creamy and smooth. Gradually add the sugar and beat on medium-high speed for 4-5 minutes until the mixture is light, fluffy, and pale in color. This incorporates air and creates a tender cake.
- Add eggs and vanilla: Beat in the eggs one at a time, mixing well after each addition and scraping down the sides of the bowl as needed. The mixture might look slightly curdled—that’s okay. Mix in the vanilla extract.
- Alternate wet and dry ingredients: With the mixer on low speed, add the flour mixture in three additions, alternating with the milk in two additions. Begin and end with the flour mixture. Mix each addition just until combined—overmixing creates a tough, dense cake. The batter should be smooth and thick but pourable.
- Divide and bake: Divide the batter evenly among the three prepared pans (about 2⅓ cups batter per pan for even layers). Smooth the tops with a spatula. Bake for 28-35 minutes, or until a toothpick inserted in the center comes out clean or with just a few moist crumbs. The cakes should spring back when lightly pressed.
- Cool completely: Let the cakes cool in the pans on wire racks for 15 minutes. Run a knife around the edges, then invert onto the racks to cool completely before frosting. This is crucial—warm cake will melt the frosting.
For the Caramel Frosting:
- Caramelize the sugar: In a medium heavy-bottomed saucepan, pour the granulated sugar in an even layer. Heat over medium heat without stirring. As the edges begin to melt and turn amber, gently swirl the pan to distribute the heat. Continue cooking until all the sugar has melted and turned a deep amber color (about 350°F if using a candy thermometer). This takes about 8-12 minutes. Watch carefully—caramel can go from perfect to burnt in seconds.
- Add cream carefully: Remove from heat and immediately but slowly pour in the room-temperature heavy cream. The mixture will bubble violently and steam—this is normal. Stir with a wooden spoon until the cream is completely incorporated and the mixture is smooth.
- Add butter and flavorings: Add the butter pieces, vanilla, and salt. Stir until the butter is completely melted and the mixture is silky smooth.
- Thicken the frosting: Let the caramel cool for about 10 minutes, stirring occasionally. Transfer to a mixing bowl and gradually beat in the powdered sugar, one cup at a time, until the frosting reaches a thick, spreadable consistency. You want it thick enough to hold its shape but smooth enough to spread easily. If it’s too thin, add more powdered sugar. If too thick, add a teaspoon of cream at a time.
- Let it set: Allow the frosting to cool and thicken for about 15-20 minutes before frosting the cake. It should be spreadable but not runny.
Assembly:
- Level the cakes: If your cake layers domed during baking, use a serrated knife to carefully level the tops so they stack evenly.
- Frost the layers: Place the first cake layer on your serving plate or cake stand. Spread about ⅔ cup of frosting on top, spreading it to the edges. Place the second layer on top and repeat. Add the final layer and use the remaining frosting to cover the top and sides of the cake. An offset spatula makes this much easier—spread in smooth, even strokes.
- Finishing touches: For a rustic look, leave the frosting slightly textured. For a smoother finish, dip your offset spatula in hot water, dry it, and smooth the frosting in long strokes.
- Set and serve: Let the cake sit at room temperature for at least 30 minutes before slicing to allow the frosting to set slightly. Use a sharp knife dipped in hot water (and wiped clean between slices) for clean, beautiful slices.
Notes
- Room temperature ingredients are crucial for proper mixing and texture
- Don’t skip the caramelization step—the depth of flavor depends on cooking the sugar to a deep amber color
- The frosting thickens as it cools, so frost the cake while it’s still spreadable
- If your frosting becomes too thick, gently warm it in 5-second microwave bursts and stir
- This cake actually tastes better the next day as the flavors develop and the cake absorbs some moisture from the frosting
Nutrition
- Serving Size: 1 slice (1/12 of cake)
- Calories: 620
- Sugar: 68g
- Sodium: 280mg
- Fat: 28g
- Saturated Fat: 17g
- Unsaturated Fat: 9g
- Trans Fat: 0g
- Carbohydrates: 89g
- Fiber: 1g
- Protein: 6g
- Cholesterol: 135mg
Tips & Variations
This recipe is wonderfully versatile once you master the basic technique. Here are some ways to customize it:
Chocolate Caramel Cake: Add ½ cup of cocoa powder to the flour mixture and reduce the flour by ½ cup. The chocolate-caramel combination is divine.
Salted Caramel Cake: Sprinkle flaky sea salt over the frosting after assembling for that trendy salted caramel flavor. You can also add an extra ¼ teaspoon of salt to the frosting itself.
Coffee Caramel Cake: Replace ½ cup of the milk with strong brewed coffee for a subtle mocha flavor that enhances the caramel’s depth.
Caramel Apple Cake: Fold 1 cup of finely diced apples tossed with cinnamon into the batter. Perfect for fall celebrations.
Smaller Cake Option: This recipe can be halved and baked in two 8-inch pans for a smaller gathering.
Cupcake Version: Divide the batter among lined muffin tins and bake for 18-22 minutes. Makes about 30 cupcakes.
Boozy Upgrade: Add 2 tablespoons of bourbon or rum to the frosting for an adult version with extra depth.
Pro Chef Tips
Want bakery-quality results? Here are the professional secrets that make all the difference:
Use a kitchen scale: Measuring flour by weight (rather than volume) ensures consistent results every time. 3 cups of flour should weigh about 360 grams.
Don’t over-cream the butter: While we want it light and fluffy, over-creaming can create too much air that collapses during baking, causing dense spots.
The toothpick test isn’t everything: Your cake is done when it springs back when lightly touched and has just started pulling away from the pan edges. A few moist crumbs on the toothpick are perfect—completely clean means overbaked.
Master the caramel color: The darker the caramel (without burning), the deeper and more complex the flavor. Aim for a color similar to an old penny.
Temperature matters for caramel: Room temperature cream is non-negotiable. Cold cream can cause the caramel to seize into hard lumps. If this happens, return the pan to low heat and whisk vigorously until smooth.
Crumb coat first: For a truly professional look, apply a thin layer of frosting all over the cake and refrigerate for 15 minutes. This seals in crumbs so your final frosting layer is pristine.
Rotate your pans: If your oven has hot spots, rotate the cake pans halfway through baking for even results.
Common Mistakes to Avoid
Even experienced bakers can run into issues with this recipe. Here’s how to avoid the most common pitfalls:
Mistake #1: Frosting a warm cake. This is the fastest way to ruin all your hard work. The frosting will melt, slide off, and look messy. Always let cake layers cool completely—at least 2 hours at room temperature or 30 minutes in the refrigerator.
Mistake #2: Burning the caramel. Caramel goes from perfect to burnt in literal seconds. Never walk away from caramelizing sugar. If you see dark spots forming or smell burning, immediately remove from heat and add the cream. A light-colored, heavy-bottomed pan helps you see the color change clearly.
Mistake #3: Adding cold cream to hot caramel. This causes crystallization and clumping. Always bring your cream to room temperature first. If you forget, warm it in the microwave for 20-30 seconds before adding to the caramel.
Mistake #4: Overmixing the batter. Once you add the flour, mix just until you can’t see dry flour anymore. Overmixing develops gluten, which creates a tough, chewy cake instead of a tender, soft one.
Mistake #5: Using old leavening agents. Baking powder and baking soda lose potency over time. If yours are more than 6 months old, your cake won’t rise properly. To test baking powder, add a teaspoon to hot water—it should bubble vigorously.
Storage & Meal Prep
This caramel cake stores beautifully, which makes it perfect for preparing ahead of gatherings:
Room Temperature Storage: Because of the caramel frosting’s sugar content, this cake can sit at room temperature for up to 2 days. Cover it loosely with a cake dome or place toothpicks in the cake and drape plastic wrap over them so the wrap doesn’t touch the frosting.
Refrigerator Storage: For longer storage, refrigerate the cake in an airtight container for up to 5 days. The frosting will firm up considerably in the fridge. Let slices sit at room temperature for 20-30 minutes before serving for the best texture and flavor.
Freezing Frosted Cake: This doesn’t freeze particularly well once frosted because the texture of the caramel frosting changes upon thawing. However, if needed, you can freeze for up to 1 month. Wrap tightly in plastic wrap, then aluminum foil. Thaw overnight in the refrigerator.
Freezing Unfrosted Layers: This is the best make-ahead strategy. Wrap cooled cake layers individually in plastic wrap, then aluminum foil. Freeze for up to 3 months. Thaw at room temperature while still wrapped, then frost as directed.
Reheating: While this cake is delicious at room temperature, you can microwave individual slices for 10-15 seconds to warm slightly and make the frosting ultra-gooey.
Make-Ahead & Freezer Notes
Planning a party or special event? This cake is perfect for advance preparation:
Two Days Before: Bake the cake layers. Let them cool completely, wrap each layer tightly in plastic wrap, and store at room temperature. This actually helps the cakes stay moist.
One Day Before: Make the caramel frosting and assemble the cake. Store at room temperature under a cake dome or loosely covered with plastic wrap. The flavors will meld beautifully overnight, and the cake will actually taste better the next day.
Week Before: Bake and freeze the cake layers as described in the storage section. Make the frosting the day before or day of serving—it’s quick enough that it doesn’t need to be made far in advance.
Frosting Make-Ahead: You can make the frosting up to 2 days ahead. Store it in an airtight container at room temperature (it will firm up). Before using, beat it with a mixer for 1-2 minutes to restore the spreadable consistency. If needed, add a tablespoon of cream to loosen it.
Best Reheating Method: If you’ve refrigerated the cake, remove it from the fridge 1 hour before serving so it comes to room temperature. The frosting will soften and the cake will taste fresh and moist. For individual slices, a quick 10-second microwave zap makes the caramel frosting gloriously gooey.
Serving Suggestions
This caramel cake is stunning on its own, but here are some delicious ways to serve it:
Classic Presentation: Serve generous slices on dessert plates with a cold glass of whole milk. The richness of the cake is perfectly balanced by cold milk.
With Ice Cream: A scoop of vanilla bean ice cream alongside a slice creates an incredible contrast of temperatures and textures. Salted caramel ice cream would be heaven.
Coffee Pairing: The caramel’s deep, toasty notes are beautiful with a cup of strong black coffee or a latte. Perfect for afternoon gatherings.
Seasonal Garnishes: In fall, add a sprinkle of cinnamon and serve with apple cider. In winter, dust with powdered sugar for a snowy effect. In summer, fresh berries add a bright pop of color and a tart contrast to the sweet frosting.
Fancy It Up: Drizzle extra caramel sauce over each slice, add a dollop of whipped cream, or garnish with candied pecans for an elegant restaurant-style presentation.
Beverage Pairings: Sweet white wine like Moscato, bourbon on the rocks, or even champagne complement the caramel beautifully for adult celebrations.
FAQs Section
Q: Why did my caramel frosting crystallize and turn grainy?
A: Crystallization usually happens when sugar crystals on the side of the pan fall back into the caramel, or when cold cream is added to hot caramel. To prevent this, avoid stirring the sugar while it melts—just swirl the pan. Brush down the sides of the pan with a wet pastry brush to prevent crystals. Always use room-temperature cream. If it happens, add a tablespoon of corn syrup and gently reheat while whisking until smooth.
Q: Can I make this cake without a stand mixer?
A: Absolutely! A hand mixer works perfectly fine—it just takes a bit longer to cream the butter and sugar. You’ll need to beat for an extra minute or two to achieve the same light, fluffy texture. Even a strong wooden spoon and some elbow grease can work if you’re determined, though your arm might get tired.
Q: My cake layers came out dry. What happened?
A: Overbaking is the most common culprit. Every oven is different, so check your cakes at 25 minutes. They’re done when they spring back when touched and a toothpick comes out with moist crumbs (not completely clean). Also ensure your measurements were accurate—too much flour makes dry cake. Finally, make sure your leavening agents are fresh.
Q: Can I use this frosting on other cakes or desserts?
A: Definitely! This caramel frosting is amazing on chocolate cake, spice cake, apple cake, or even spread between graham crackers for a homemade treat. It also makes an incredible filling for sandwich cookies or a topping for brownies. Just remember it sets as it cools, so use it while it’s still spreadable.
Q: How do I know when my caramel is the right color?
A: You’re looking for a deep amber color—think of the color of an old penny or maple syrup. It should smell nutty and toasty, not burnt. If you have a candy thermometer, aim for 350°F. The darker you go (without burning), the more complex and less cloying-sweet the flavor will be. Light caramel tastes more like straight sugar; dark caramel has that wonderful bitter-sweet balance.
Q: My frosting is too thin/thick. How do I fix it?
A: Too thin? Beat in more powdered sugar, ¼ cup at a time, until it reaches spreading consistency. Too thick? Add heavy cream, one teaspoon at a time, and beat until smooth. The frosting thickens as it cools, so give it time to set up before adding too much powdered sugar.
Q: Can I make this cake gluten-free or dairy-free?
A: For gluten-free, substitute with a 1:1 gluten-free baking flour blend (one that contains xanthan gum). The texture will be slightly different but still delicious. For dairy-free, it’s trickier—you’d need to use plant-based butter, milk, and coconut cream, and the frosting’s texture will be different. I haven’t perfected a dairy-free version yet, but many readers have had success using coconut cream for the frosting.
Conclusion
There you have it—the ultimate caramel cake that’s going to make you the star of every gathering you bring it to. I know it might seem a little intimidating at first, especially if you’ve never made caramel from scratch, but I promise that once you make this cake one time, you’ll feel like a baking rockstar. The smell of caramelizing sugar, the satisfaction of spreading that glossy frosting between tender cake layers, and the look on people’s faces when they take that first bite—it’s all so worth it.
This is the kind of cake that creates memories. It’s the cake your family will request every birthday. It’s the cake your friends will talk about for weeks after your dinner party. It’s the cake that makes you feel proud to be a home baker.
So preheat that oven, grab your whisk, and let’s make some magic happen. Don’t forget to take lots of photos for Pinterest—this beauty deserves to be shared! And when you make this caramel cake (notice I said “when,” not “if”), I’d absolutely love to hear how it turned out. Leave a comment below, share your photos, and pin this recipe so you can find it again and again.
Happy baking, friends! Now go make that gorgeous caramel cake and enjoy every single amazing bite. You’ve got this! 🍰