Restaurant-Style Chocolate Lava Cake – Ready in 30 Minutes!

Introduction of Recipe
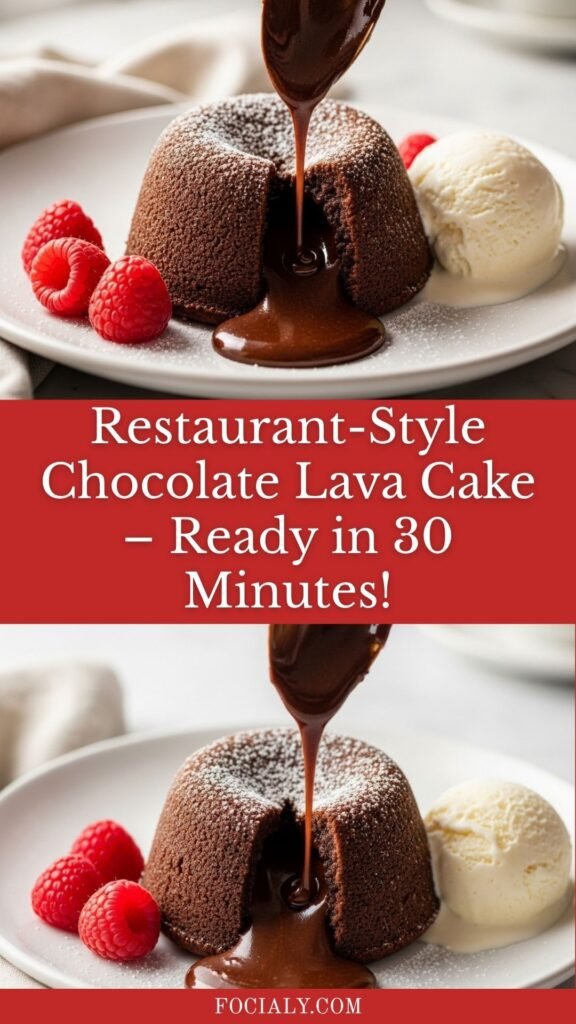
There’s something absolutely magical about cutting into a warm chocolate cake and watching rivers of melted chocolate flow onto your plate. That’s the beauty of chocolate lava cake – a restaurant-quality dessert that looks impressive but is surprisingly simple to make at home. Also known as molten chocolate cake or chocolate fondant, this French-inspired dessert features a tender chocolate cake exterior with a gloriously gooey, liquid chocolate center that oozes out when you take that first bite.
This individual-sized dessert is perfect for date nights, dinner parties, Valentine’s Day, anniversaries, or any time you want to treat yourself to something special. The best part? You can have these elegant desserts ready in under 30 minutes from start to finish. Whether you’re a beginner baker or a seasoned pro, chocolate lava cakes are incredibly forgiving and deliver wow-factor results every single time.
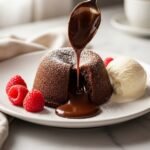
The contrast of textures – that slightly crispy edge, the soft cake layer, and the warm, flowing chocolate center – creates an unforgettable dessert experience. Serve them immediately after baking, topped with vanilla ice cream, fresh berries, or a dusting of powdered sugar, and watch your guests’ faces light up with delight.
History / Background
Chocolate lava cake has one of those culinary origin stories that food lovers debate passionately. The most widely accepted tale credits French chef Michel Bras, who created a similar dessert called “coulant au chocolat” in 1981 in his restaurant in Laguiole, France. Bras spent two years perfecting his version, which featured a frozen chocolate ganache center that would melt during baking, creating that signature molten core.
However, the dessert gained widespread popularity in the United States thanks to chef Jean-Georges Vongerichten, who claims he invented his version accidentally in 1987. According to the story, Vongerichten was developing a chocolate sponge cake recipe in New York City when he pulled a cake from the oven too early. When he tasted it, he discovered the undercooked center was actually a happy accident – the warm, flowing chocolate was absolutely divine.
Regardless of who truly invented it first, chocolate lava cake exploded onto the American dining scene in the 1990s. It became the signature dessert at high-end restaurants, appearing on menus everywhere from Chili’s to Ruth’s Chris Steak House. The dessert symbolized indulgence and sophistication, making it a favorite choice for special occasions.
What makes this dessert so enduringly popular is its theatrical presentation and the element of surprise. Each diner gets their own individual cake, and that moment when the chocolate center flows out never gets old. It’s comfort food meets fine dining – decadent chocolate in its most luxurious form, but served in a way that feels personal and special.
Today, chocolate lava cake remains one of the most searched and pinned dessert recipes online. Home cooks love it because it looks and tastes like something from a fancy restaurant, yet it’s made with simple pantry ingredients and basic baking skills. It’s proof that sometimes the best recipes are the ones that combine simplicity with spectacular results.
Why You’ll Love This Recipe
This chocolate lava cake recipe strikes the perfect balance between impressive presentation and easy execution. I’ve tested this recipe countless times to ensure it works beautifully every single time, whether you’re making it for the first time or the fiftieth. The timing is precise, the method is straightforward, and the results are consistently restaurant-quality.
Here’s why this recipe will become your go-to special occasion dessert:
- Ready in under 30 minutes – From mixing bowl to dessert plate, you’ll have these on the table faster than ordering takeout
- Foolproof technique – Clear instructions and exact timing mean perfect molten centers every time, no guesswork required
- Make-ahead friendly – Prepare the batter, fill the ramekins, and refrigerate until you’re ready to bake (up to 24 hours in advance)
- Minimal ingredients – Just 7 simple ingredients you probably already have in your pantry
- Impressive presentation – Looks like you spent hours on a complicated French pastry technique
- Perfectly portioned – Individual servings mean no messy slicing and everyone gets their own perfect lava cake
- Customizable – Easy to adapt with different flavors, toppings, and variations
- Budget-friendly luxury – Costs just a few dollars per serving compared to $10+ at restaurants
- Great for entertaining – Can be prepared ahead and popped in the oven while you’re enjoying dinner with guests
- Kid and adult approved – Everyone loves warm, gooey chocolate, making this a crowd-pleaser for all ages
This recipe uses the reverse-creaming method with melted chocolate, which creates a more tender crumb and ensures that signature molten center. The key is in the baking time – just long enough to set the outer edges while keeping the center deliciously liquid.
Ingredient Notes
The beauty of chocolate lava cake lies in its simplicity. With just a handful of quality ingredients, you can create something truly spectacular. Here’s what you’ll need and why each ingredient matters:
Dark Chocolate – Use high-quality dark chocolate with 60-70% cocoa content for the best flavor. Chocolate chips work in a pinch, but bar chocolate melts more smoothly. Avoid chocolate above 75% cocoa as it can make the cakes too bitter. Brands like Ghirardelli, Trader Joe’s, or Lindt work beautifully. The chocolate is the star here, so choose one you love eating on its own.
Unsalted Butter – Provides richness, moisture, and helps create that glossy, smooth batter. Unsalted butter lets you control the salt level. Make sure it’s real butter, not margarine, for the best flavor and texture. You’ll use half the butter to grease your ramekins and the rest goes into the batter.
Granulated Sugar – Sweetens the cakes and helps create structure. The amount is carefully balanced so the cakes aren’t overly sweet, letting the chocolate flavor shine. You can reduce by 1-2 tablespoons if you prefer less sweet desserts.
Eggs – Whole eggs plus extra egg yolks create richness and help build structure while keeping the center soft. The extra yolks contribute to that fudgy, molten texture. Use room temperature eggs for better incorporation into the batter.
All-Purpose Flour – Just a small amount provides structure without making the cakes cakey or dry. Measure carefully – too much flour will prevent that molten center from forming properly. You can substitute with almond flour for a gluten-free version (use the same amount).
Vanilla Extract – Pure vanilla enhances the chocolate flavor and adds aromatic depth. Don’t skip this even though it seems minor – it makes a noticeable difference in the final flavor.
Salt – A pinch of salt amplifies the chocolate flavor and balances the sweetness. Essential for depth of flavor, even in desserts.
Optional: Cocoa Powder – For dusting the buttered ramekins instead of flour, which prevents white spots on your finished cakes and adds extra chocolate flavor.
Substitution Tips: Can’t find dark chocolate? Semi-sweet chocolate works well too. Need dairy-free? Use coconut oil instead of butter and dairy-free chocolate. For gluten-free, swap the flour with almond flour or a gluten-free 1:1 baking flour.
Equipment Needed
Having the right tools makes this recipe even easier. Here’s everything you’ll need:
- 4 ramekins (6-ounce capacity) – These individual ceramic baking dishes are essential for the classic lava cake presentation. You can also use 4-inch diameter ceramic or metal molds.
- Baking sheet – To place your ramekins on for easy transfer in and out of the oven.
- Medium microwave-safe bowl or double boiler – For melting the chocolate and butter smoothly without scorching.
- Mixing bowls – At least one medium bowl for whisking eggs and sugar.
- Whisk – For combining eggs and sugar, and for mixing the batter until smooth.
- Rubber spatula – For folding ingredients together and scraping down bowl sides.
- Measuring cups and spoons – Accurate measurements are important for the proper cake-to-molten-center ratio.
- Pastry brush – For brushing butter evenly inside the ramekins (though you can use a paper towel if needed).
- Oven mitts – These come out of the oven extremely hot!
- Cooling rack – For inverting the cakes after a brief rest.
- Small fine-mesh sieve (optional) – For dusting cocoa powder or powdered sugar on the finished cakes.
Most of these tools are basic kitchen staples. If you don’t have ramekins, you can use a muffin tin, though the presentation won’t be quite as elegant and timing may need adjustment.
PrintChocolate Lava Cake
Indulgent chocolate lava cakes with a molten chocolate center that flows out when you cut into them. This restaurant-quality dessert is surprisingly easy to make at home with just 7 simple ingredients. Perfect for special occasions, date nights, or whenever you’re craving something decadent.
- Prep Time: 15 minutes
- Cook Time: 12 minutes
- Total Time: 27 minutes
- Yield: 4 individual lava cakes 1x
- Category: Dessert
- Method: Baking
- Cuisine: French
- Diet: Vegetarian
Ingredients
- 6 ounces (170g) dark chocolate (60-70% cocoa), chopped
- ½ cup (113g) unsalted butter, plus more for greasing
- 2 large eggs, at room temperature
- 2 large egg yolks, at room temperature
- ¼ cup (50g) granulated sugar
- 2 tablespoons all-purpose flour
- 1 teaspoon pure vanilla extract
- Pinch of salt
- Cocoa powder or flour, for dusting ramekins
- Optional toppings: vanilla ice cream, fresh berries, powdered sugar, whipped cream
Instructions
- Preheat and prepare: Preheat your oven to 425°F (220°C). Generously butter four 6-ounce ramekins, making sure to coat the bottom and sides completely. Dust with cocoa powder or flour, tapping out any excess. Place the prepared ramekins on a baking sheet and set aside.
- Melt chocolate and butter: In a microwave-safe bowl, combine the chopped dark chocolate and ½ cup butter. Microwave in 30-second intervals, stirring after each interval, until completely melted and smooth (about 1.5-2 minutes total). Alternatively, melt in a double boiler over simmering water. Set aside to cool slightly for 5 minutes.
- Whisk eggs and sugar: In a medium mixing bowl, whisk together the whole eggs, egg yolks, and granulated sugar vigorously for about 2-3 minutes until the mixture becomes thick, pale, and slightly frothy. This step incorporates air and helps create the perfect texture.
- Combine wet ingredients: Pour the slightly cooled melted chocolate mixture into the egg mixture. Add the vanilla extract and pinch of salt. Whisk gently until completely smooth and well combined, scraping down the sides of the bowl as needed.
- Add flour: Sift the flour over the chocolate mixture. Gently fold it in with a rubber spatula using a figure-eight motion until just combined. Be careful not to overmix – a few small streaks of flour are fine. The batter should be smooth, glossy, and pourable.
- Fill ramekins: Divide the batter evenly among the prepared ramekins, filling each about ¾ full (approximately ⅔ cup of batter per ramekin). Gently tap each ramekin on the counter to release any air bubbles.
- Bake: Place the baking sheet with ramekins in the preheated oven and bake for exactly 12-14 minutes. The edges should be set and slightly pulling away from the sides, while the center should still jiggle slightly when gently shaken. For a more molten center, bake for 12 minutes; for a slightly more set center, go for 13-14 minutes.
- Rest and serve: Remove from the oven and let the cakes rest in the ramekins for exactly 1 minute. This allows the edges to set slightly, making them easier to unmold. Carefully run a thin knife around the edges of each cake to loosen. Place a dessert plate over each ramekin and quickly but carefully invert. Gently lift off the ramekin. The cake should release easily.
- Garnish and enjoy: Serve immediately while hot. Top with a scoop of vanilla ice cream, fresh berries, a dusting of powdered sugar, or a dollop of whipped cream. The molten center will flow out beautifully when you cut into the cake with a spoon or fork.
Notes
- Timing is crucial: The difference between a molten center and a fully cooked cake is just 1-2 minutes, so watch your oven carefully and don’t overbake.
- Oven temperature varies: If your cakes are too runny, bake for 1 additional minute next time. If they’re too set, reduce baking time by 1 minute.
- Make ahead: You can prepare the batter, fill the ramekins, cover with plastic wrap, and refrigerate for up to 24 hours before baking. Add 2-3 extra minutes to the baking time if baking straight from the fridge.
- Room temperature eggs: This helps them incorporate smoothly into the batter and creates a better texture.
- Test one first: If you’re nervous, bake one ramekin first as a test to check your timing before baking the rest.
- Butter matters: Make sure to butter the ramekins thoroughly, especially around the edges and in the corners, for easy release.
Nutrition
- Serving Size: 1 lava cake
- Calories: 485
- Sugar: 28g
- Sodium: 95mg
- Fat: 35g
- Saturated Fat: 21g
- Unsaturated Fat: 12g
- Trans Fat: 0g
- Carbohydrates: 38g
- Fiber: 3g
- Protein: 7g
- Cholesterol: 245mg
Tips & Variations
Flavor Variations:
- Mint Chocolate: Add ½ teaspoon peppermint extract to the batter and place a thin peppermint patty in the center of each ramekin before baking.
- Orange Chocolate: Add 1 tablespoon orange zest and 1 teaspoon orange extract for a sophisticated twist.
- Espresso Chocolate: Dissolve 1 tablespoon instant espresso powder in the vanilla extract before adding to enhance the chocolate flavor.
- Salted Caramel: Place a spoonful of salted caramel sauce in the center of each ramekin before adding batter, and sprinkle with flaky sea salt after unmolding.
- Raspberry: Nestle a few fresh raspberries into the center of each cake before baking for a fruity surprise.
- Peanut Butter: Swirl 1 tablespoon of peanut butter into each ramekin before baking for a Reese’s-inspired version.
- White Chocolate: Use white chocolate instead of dark chocolate for a sweeter, milder flavor (reduce sugar to 3 tablespoons).
Dietary Modifications:
- Gluten-Free: Replace all-purpose flour with almond flour, oat flour, or a gluten-free 1:1 baking flour blend.
- Dairy-Free: Use coconut oil instead of butter and dairy-free dark chocolate.
- Less Sweet: Reduce sugar to 3 tablespoons if you prefer less sweetness and are using darker chocolate.
Presentation Ideas:
- Dust with powdered sugar and cocoa powder through a stencil for an elegant look
- Drizzle with chocolate ganache, caramel sauce, or raspberry coulis
- Serve in the ramekins on decorative plates with a long spoon for a rustic presentation
- Garnish with fresh mint leaves, edible flowers, or chocolate shavings
- Add a quenelle of ice cream (that elegant oval shape) for a professional touch
Pro Chef Tips
Temperature control is everything: The secret to a perfect molten center is getting your oven temperature exactly right. Use an oven thermometer to verify your oven’s actual temperature, as many home ovens run hot or cold by 25°F or more. This small investment will transform your baking results.
The wobble test: Your lava cakes are ready when the edges are set and slightly puffed, but the center still has a distinct wobble when you gently shake the pan. Think of it like Jell-O – there should be movement, but not liquid sloshing around.
Quality chocolate matters: Since chocolate is the star ingredient, using high-quality chocolate makes a noticeable difference in both flavor and texture. Visit a specialty grocery store or splurge on a premium brand. The higher-quality cocoa butter in good chocolate creates a silkier, more luxurious molten center.
Don’t skip the ramekin prep: A thorough coating of butter followed by cocoa powder creates a non-stick barrier and adds flavor. Pay special attention to the corners where the bottom meets the sides – this is where cakes most often stick. Refrigerating the buttered and dusted ramekins for 10 minutes before filling also helps.
Room temperature ingredients mix better: When eggs are at room temperature, they emulsify more easily with the melted chocolate, creating a smoother, more homogeneous batter. This takes just 20-30 minutes on the counter, or you can place them in a bowl of warm water for 5 minutes.
The 60-second rest is critical: This brief resting period after baking allows the outer edges to set just enough to hold their shape when inverted, while the center stays liquid. Less than a minute and they may collapse; more than two minutes and the center will start to set.
Master the inversion technique: Work confidently and quickly. Place your serving plate firmly on top of the ramekin, hold both together tightly, and flip in one swift motion. The cake should drop right out. If it hesitates, give it a gentle shake or tap the bottom of the ramekin.
Serve immediately: These cakes wait for no one! The molten center begins to solidify as soon as they come out of the oven, so have your plates, toppings, and guests ready before you bake. If you absolutely must wait, you can hold them in a warm (200°F) oven for up to 5 minutes, but no longer.
Common Mistakes to Avoid
Overbaking is the number one mistake. Just one or two extra minutes can turn your molten lava cake into a regular chocolate cake. Set a timer and watch them carefully. Remember, you want the center to be liquid, so the edges should be set but the middle should still jiggle when shaken.
Using cold ingredients straight from the fridge. Cold eggs and cold chocolate mixture don’t incorporate well together, leading to a lumpy, uneven batter. Always let your eggs come to room temperature and allow the melted chocolate to cool slightly before combining.
Insufficient greasing of ramekins. Skimping on butter or missing spots when greasing leads to cakes that stick and tear when you try to unmold them. Be generous with the butter and make sure every surface is covered, including the rim.
Overmixing the batter after adding flour. This develops gluten, which makes the cakes tough and cakey rather than tender and fudgy. Fold gently just until the flour disappears. A few small streaks are perfectly fine.
Not preheating the oven properly. Starting with a cold or insufficiently heated oven throws off the precise timing needed for that molten center. Always preheat for at least 15-20 minutes before baking, and use an oven thermometer to verify the temperature.
Using the wrong size ramekins. Ramekins that are too large will result in thin cakes that overcook, while ramekins that are too small will cause overflow and uneven cooking. Stick with 6-ounce (¾ cup) ramekins for this recipe.
Waiting too long to serve. The magic of lava cake is that dramatic molten center, which begins to set as soon as the cakes cool. Have everything ready – plates, toppings, forks, and guests – before you take them out of the oven.
Storage & Meal Prep
Immediate serving: Chocolate lava cakes are absolutely best served hot and fresh from the oven. The molten center is at its peak flowing consistency right after baking, and the temperature contrast with cold ice cream is heavenly.
Short-term holding: If you need to wait a few minutes, you can keep baked lava cakes in a warm oven (200°F) for up to 5-10 minutes. The centers will remain somewhat molten, though they’ll gradually thicken. This works well if you’re waiting for guests to finish dinner.
Leftover storage: While not ideal, leftover lava cakes can be stored covered in the refrigerator for up to 2 days. They’ll solidify completely and lose that signature molten center, but they’re still delicious as regular chocolate cakes.
Reheating leftovers: To reheat refrigerated lava cakes, microwave individual cakes for 20-30 seconds at 50% power. They won’t regain the true molten center, but warming them makes them more enjoyable. Alternatively, reheat in a 350°F oven for 5-7 minutes.
Unbaked batter storage: You cannot store mixed batter for later use as the leavening action begins immediately. However, you can fill the ramekins and refrigerate them before baking (see Make-Ahead section below).
Make-Ahead & Freezer Notes
Preparing ahead (refrigerator method): This is the best make-ahead option! Prepare the batter completely, divide it among buttered and dusted ramekins, cover each tightly with plastic wrap, and refrigerate for up to 24 hours before baking. This is perfect for dinner parties – you can enjoy your meal and simply pop them in the oven when you’re ready for dessert. Add 2-3 minutes to the baking time since they’ll be cold from the fridge.
Freezer method: You can freeze prepared, unbaked lava cakes for up to 1 month. Fill ramekins as directed, cover tightly with plastic wrap and then aluminum foil, and freeze. To bake, you can either thaw them overnight in the refrigerator (then bake as directed, adding 2-3 minutes), or bake directly from frozen by adding 5-7 minutes to the original baking time. Watch them carefully as timing can vary.
Testing frozen cakes: The first time you bake from frozen, it’s smart to test one cake first to dial in the exact timing for your oven. Frozen cakes require careful monitoring as they can go from underdone to overdone quickly.
Freezing baked cakes: While you can freeze baked lava cakes for up to 2 months, they lose that signature molten center and become solid chocolate cakes. If you choose to freeze them, reheat from frozen in a 350°F oven for 12-15 minutes or microwave for 45-60 seconds. They’ll be more like warm chocolate cakes than true lava cakes.
Best practice: For optimal results, I recommend preparing unbaked cakes and refrigerating them for up to 24 hours rather than freezing. This gives you the convenience of make-ahead prep while maintaining the best texture and that perfect molten center.
Serving Suggestions
Chocolate lava cake is a showstopper on its own, but the right accompaniments can elevate it from delicious to absolutely unforgettable. Here are my favorite ways to serve this decadent dessert:
Classic pairings:
- Vanilla ice cream – The cold, creamy vanilla against warm, molten chocolate is a match made in heaven. The temperature contrast is essential to the experience.
- Fresh whipped cream – Lightly sweetened whipped cream adds a cloud-like texture without competing with the chocolate.
- Fresh berries – Raspberries, strawberries, or blackberries add a tart brightness that cuts through the richness perfectly.
- Powdered sugar dusting – A simple, elegant finish that adds visual appeal and a touch of extra sweetness.
Gourmet additions:
- Salted caramel sauce – Drizzle warm caramel around the plate or over the top for sweet-and-salty luxury.
- Raspberry or strawberry coulis – A bright fruit sauce adds color, tartness, and professional plating appeal.
- Crème anglaise – This vanilla custard sauce is classic French pairing with molten chocolate cake.
- Chocolate ganache – For serious chocolate lovers, a drizzle of silky ganache intensifies the decadence.
- Coffee or espresso – Serve alongside a demitasse of strong espresso to enhance the chocolate flavor.
Beverage pairings:
- Dessert wine – Port, late harvest Zinfandel, or chocolate wine complement the richness beautifully.
- Coffee drinks – Cappuccino, espresso, or a rich hot chocolate make perfect accompaniments.
- Milk – Classic cold milk is wonderful with chocolate cake, especially for kids.
- Irish cream liqueur – Bailey’s or Carolans on the rocks alongside the cake for an adults-only treat.
Plating tips: Create restaurant-worthy presentations by dusting powdered sugar through a doily or stencil, adding a sprig of fresh mint, arranging berries artfully around the plate, or creating a swoosh of sauce across the plate before placing the cake. A small quenelle of ice cream positioned next to the cake looks professional and elegant.
FAQs Section
Can I use milk chocolate instead of dark chocolate?
Yes, you can use milk chocolate, but the cakes will be significantly sweeter and less intense in chocolate flavor. If using milk chocolate, reduce the sugar to 3 tablespoons. Keep in mind that milk chocolate has a lower melting point and may affect the texture slightly, potentially creating a more liquid center.
Why did my lava cake not have a molten center?
The most common reason is overbaking. Even 1-2 extra minutes can cause the center to fully set. Make sure your oven is properly preheated to exactly 425°F (use an oven thermometer), and bake for exactly 12-13 minutes. The edges should be set but the center should still wobble when gently shaken. Another reason could be using ramekins that are too shallow, which causes the batter to spread too thin and bake through completely.
Can I make these in a muffin tin instead of ramekins?
Yes, but the results won’t be quite the same. Standard muffin tins are shallow, so you’ll need to reduce the baking time to 8-10 minutes and watch them carefully. The cakes also may not unmold as cleanly. Jumbo muffin tins work better if you have them – fill them halfway and bake for 10-12 minutes.
How do I know when they’re done baking?
The edges should be set and starting to pull away slightly from the sides of the ramekins, while the top should look mostly set with possibly a slightly wet appearance in the very center. When you gently shake the pan, the center should wobble like Jell-O but not slosh like liquid. It takes practice to recognize the right degree of wobble, so don’t worry if your first attempt isn’t perfect!
Can I make one large lava cake instead of individual ones?
It’s possible but tricky. A large lava cake in an 8-inch round pan would need different timing (likely 20-25 minutes), and achieving that perfect molten center throughout becomes more difficult. Individual ramekins are really the best way to ensure even cooking and that signature flowing center in every portion.
My lava cakes stuck to the ramekins. What did I do wrong?
Insufficient greasing is almost always the culprit. Make sure to use plenty of softened butter and coat every surface thoroughly, including the rim. After buttering, dust with cocoa powder and tap out the excess – this creates a non-stick barrier. You can also refrigerate the prepared ramekins for 10 minutes before filling, which helps the butter coating set. Finally, make sure to run a thin knife around the edges immediately before inverting.
Can these be made dairy-free or vegan?
For dairy-free, replace the butter with coconut oil and use dairy-free dark chocolate. For vegan, you’ll need to replace the eggs, which is more challenging because eggs provide essential structure. You can try using flax eggs (1 tablespoon ground flaxseed + 3 tablespoons water per egg, let sit 10 minutes) or commercial egg replacer, but I can’t guarantee the same molten center effect. The texture will be different, though still chocolatey and delicious.
Conclusion
There’s something truly special about cutting into a warm chocolate lava cake and watching that river of molten chocolate flow onto your plate. It’s a moment of pure dessert magic that never gets old, no matter how many times you make it. The beauty of this recipe is that it brings restaurant-level sophistication to your home kitchen without requiring professional skills or complicated techniques.
Whether you’re planning a romantic dinner for two, hosting a dinner party, celebrating a special occasion, or simply treating yourself after a long week, these chocolate lava cakes deliver every single time. The combination of that tender cake exterior and gloriously gooey center creates a dessert experience that’s simply unforgettable. And knowing you can make them in under 30 minutes – or prepare them ahead and bake when ready – makes them even more appealing.
I hope this recipe becomes one of your go-to desserts for impressing guests and satisfying chocolate cravings. The first time you nail that perfect molten center, you’ll understand why this dessert has remained a favorite for decades. Don’t be discouraged if your first attempt isn’t perfect – the slightly imperfect ones still taste absolutely delicious!
Now it’s your turn! I’d love to hear how your chocolate lava cakes turn out. Did you try any of the flavor variations? What did you serve alongside them? Drop a comment below and let me know! And if you love this recipe, please save it to your Pinterest boards so you can find it again – and share it with your fellow chocolate lovers. Happy baking, and enjoy every molten, chocolatey bite!