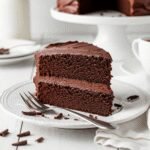
The Ultimate Devil’s Food Cake Recipe – Rich, Moist & Perfectly Decadent

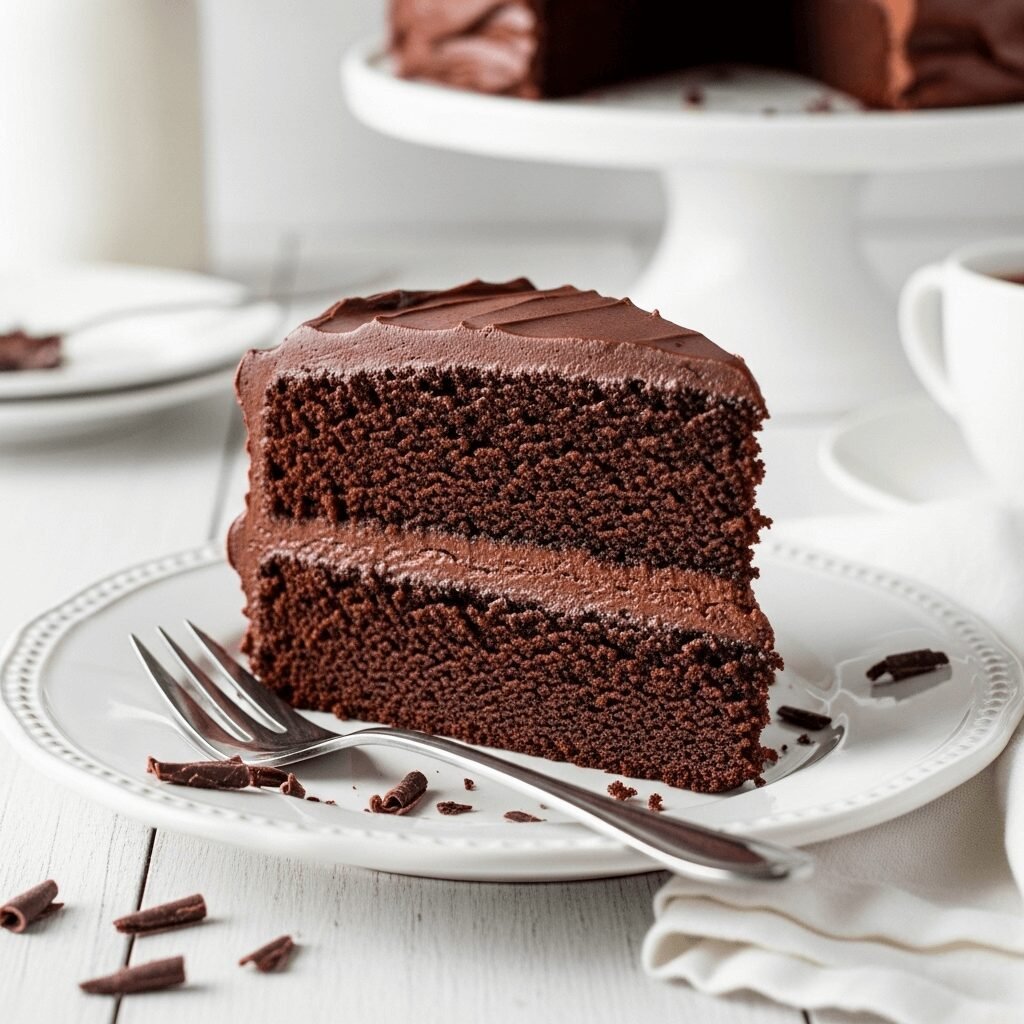
There’s something magical about slicing into a towering Devil’s Food Cake with its deep chocolate layers and velvety frosting. This isn’t just any chocolate cake—it’s the chocolate cake that makes birthdays memorable, celebrations sweeter, and ordinary Tuesdays feel special. With its impossibly moist crumb, intense chocolate flavor, and classic American charm, this Devil’s Food Cake recipe will become your go-to dessert for every occasion.
Introduction of Recipe
Devil’s Food Cake is the crown jewel of American chocolate cakes—a rich, dark, supremely moist layer cake that’s traditionally paired with fluffy frosting or silky chocolate ganache. What sets Devil’s Food Cake apart from regular chocolate cake is its deeper color, more intense chocolate flavor, and incredibly tender texture that practically melts on your tongue. The secret lies in using both cocoa powder and sometimes melted chocolate, along with hot coffee or buttermilk to enhance the chocolate notes and create that signature moistness.
This cake is perfect for birthdays, anniversaries, holiday gatherings, potlucks, or any time you want to impress guests with a show-stopping dessert. It’s equally at home as the centerpiece of an elegant dinner party or as a comfort-food treat enjoyed with a glass of cold milk. The best part? Despite its impressive appearance and restaurant-quality taste, this Devil’s Food Cake is surprisingly approachable for home bakers of all skill levels.
History / Background
The origins of Devil’s Food Cake date back to the early 1900s in the United States, emerging during a time when chocolate was becoming more accessible to American home bakers. The cake’s dramatic name is believed to be a playful contrast to the popular “Angel Food Cake”—a light, white, airy cake that was already a staple in American kitchens. If Angel Food Cake represented heavenly purity, then Devil’s Food Cake was its deliciously sinful counterpart.
The first known published recipe for Devil’s Food Cake appeared in 1905, though food historians believe home cooks were experimenting with similar rich chocolate cakes even earlier. What made Devil’s Food Cake distinct was its use of baking soda, which reacted with acidic ingredients like buttermilk or sour cream to create a reddish tint in the chocolate—giving it an even more “devilish” appearance. Some early recipes even called for red food coloring to enhance this effect.
Throughout the 20th century, Devil’s Food Cake became a beloved American classic, gracing the tables of diners, appearing in church cookbooks, and becoming the chocolate cake of choice for home bakers who wanted something more sophisticated than a simple chocolate cake. Regional variations emerged, with Southern bakers often using buttermilk for extra tang, while Midwestern recipes might incorporate coffee to deepen the chocolate flavor. Today, Devil’s Food Cake remains a testament to American baking traditions—a cake that’s both nostalgic and eternally contemporary.
Why You’ll Love This Recipe
This Devil’s Food Cake recipe delivers everything you want in a chocolate cake and then some. The texture is extraordinarily moist and tender, with a fine crumb that’s never dry or crumbly. The chocolate flavor is deep and complex, not overly sweet but richly satisfying. Each bite melts in your mouth, leaving you reaching for just one more slice.
Here’s what makes this recipe special:
- Foolproof technique that works every time, even for novice bakers
- Intensely chocolatey without being bitter or overwhelming
- Stays moist for days thanks to the perfect balance of ingredients
- Versatile frosting options – pair with buttercream, cream cheese frosting, or ganache
- Budget-friendly ingredients you likely already have in your pantry
- Makes a stunning presentation perfect for special occasions
- Easy to customize with different fillings, frostings, and flavor additions
- Crowd-pleaser guaranteed – even non-chocolate lovers will ask for seconds
- Can be made as layers, sheet cake, or cupcakes depending on your needs
Ingredient Notes
Understanding your ingredients is the key to baking success. Here’s what you need to know about the components that make this Devil’s Food Cake extraordinary:
All-Purpose Flour: The foundation of your cake’s structure. For the most tender crumb, measure flour by spooning it into your measuring cup and leveling off—never pack it down. Cake flour can be substituted for an even more delicate texture.
Dutch-Process Cocoa Powder: This is crucial for authentic Devil’s Food Cake. Dutch-process cocoa has been treated to neutralize its acidity, resulting in a darker color and smoother, more mellow chocolate flavor. Natural cocoa powder can work in a pinch but will produce a lighter, more reddish cake.
Granulated Sugar: Provides sweetness and helps create that tender, moist texture by retaining moisture. Don’t reduce the sugar or you’ll end up with a dry, dense cake.
Baking Soda & Baking Powder: This combination gives the cake its lift and creates that characteristic tender crumb. The baking soda also reacts with acidic ingredients to enhance the chocolate flavor.
Buttermilk: The secret weapon for moisture and tanginess. The acidity tenderizes the gluten and reacts with baking soda for a lighter texture. No buttermilk? Make your own by adding 1 tablespoon of lemon juice or vinegar to 1 cup of regular milk and letting it sit for 5 minutes.
Hot Coffee: Don’t worry—your cake won’t taste like coffee! Hot coffee actually enhances and deepens the chocolate flavor, making it more intense. You can substitute hot water if you prefer, but the coffee makes a noticeable difference.
Vegetable Oil: Creates a moister cake than butter alone because oil is liquid at room temperature. This is why the cake stays tender even when refrigerated.
Eggs: Add structure, richness, and help bind everything together. Use large eggs at room temperature for best results.
Vanilla Extract: Pure vanilla extract is worth the investment—it rounds out the chocolate flavor beautifully.
Equipment Needed
Having the right tools makes baking easier and more enjoyable. Here’s what you’ll need:
- Two 9-inch round cake pans (or three 8-inch pans for taller layers)
- Parchment paper for lining pans
- Large mixing bowl
- Medium mixing bowl
- Electric hand mixer or stand mixer with paddle attachment
- Whisk
- Rubber spatula
- Measuring cups and spoons
- Cooling racks
- Toothpick or cake tester
- Offset spatula for frosting (optional but helpful)
- Cake turntable (optional but makes frosting easier)
Devil Food Cake Recipe
This classic Devil’s Food Cake recipe delivers the ultimate chocolate experience with its deep, rich flavor and incredibly moist texture. Perfect for birthdays, celebrations, or any time you’re craving serious chocolate indulgence.
- Prep Time: 20 minutes
- Cook Time: 30-35 minutes
- Total Time: 55 minutes (plus cooling time)
- Yield: 12-16 servings 1x
- Category: Dessert
- Method: Baking
- Cuisine: American
- Diet: Vegetarian
Ingredients
For the Cake:
- 2 cups (250g) all-purpose flour
- 2 cups (400g) granulated sugar
- ¾ cup (75g) Dutch-process cocoa powder
- 2 teaspoons baking soda
- 1 teaspoon baking powder
- 1 teaspoon salt
- 2 large eggs, room temperature
- 1 cup (240ml) buttermilk, room temperature
- 1 cup (240ml) hot brewed coffee (or hot water)
- ½ cup (120ml) vegetable oil
- 2 teaspoons pure vanilla extract
For the Chocolate Buttercream Frosting:
- 1½ cups (340g) unsalted butter, softened
- 3½ cups (440g) powdered sugar
- ¾ cup (75g) Dutch-process cocoa powder
- ½ cup (120ml) heavy cream
- 2 teaspoons vanilla extract
- ¼ teaspoon salt
Instructions
Prepare the Pans:
- Preheat your oven to 350°F (175°C). Grease two 9-inch round cake pans with butter or cooking spray, then line the bottoms with parchment paper circles. Grease the parchment paper as well. This double-greasing ensures easy cake removal.
Mix Dry Ingredients: 2. In a large mixing bowl, whisk together the flour, sugar, cocoa powder, baking soda, baking powder, and salt until well combined and there are no lumps. This step is important for evenly distributing the leavening agents.
Combine Wet Ingredients: 3. Add the eggs, buttermilk, oil, and vanilla extract to the dry ingredients. Using an electric mixer on medium speed, beat for about 2 minutes until smooth and well combined. The batter will be thick at this point.
Add Hot Coffee: 4. Carefully stir in the hot coffee with a spatula or wooden spoon. The batter will become very thin—this is completely normal and exactly what you want! The thin batter is the secret to the cake’s moist texture.
Bake: 5. Divide the batter evenly between the prepared pans, using a kitchen scale for precision if you have one. Tap the pans gently on the counter a few times to release any air bubbles.
- Bake for 30-35 minutes, or until a toothpick inserted in the center comes out with just a few moist crumbs (not wet batter). The cakes should spring back when lightly touched. Avoid overbaking or the cake will be dry.
Cool: 7. Remove from the oven and let the cakes cool in the pans for 10 minutes. Then carefully run a knife around the edges and invert onto cooling racks. Peel off the parchment paper and let cool completely before frosting—this usually takes about 1-2 hours.
Make the Frosting: 8. While the cakes cool, prepare the frosting. Beat the softened butter on medium-high speed for 3-4 minutes until pale and fluffy.
- Sift together the powdered sugar and cocoa powder to remove lumps. Add to the butter gradually, mixing on low speed to avoid a sugar cloud.
- Add the heavy cream, vanilla, and salt. Beat on low speed until combined, then increase to high speed and beat for 3-4 minutes until light and fluffy. If the frosting seems too thick, add more cream one tablespoon at a time. If too thin, add more powdered sugar.
Assemble: 11. Place one cake layer on your serving plate or cake stand. Spread about 1 cup of frosting evenly over the top. Place the second layer on top, pressing down gently.
- Use the remaining frosting to cover the top and sides of the cake. Start with a thin crumb coat if desired, refrigerate for 15 minutes, then apply a final thick layer of frosting. Use an offset spatula for smooth sides and swirls on top.
Notes
- Room temperature ingredients are crucial for proper mixing. Take eggs and buttermilk out of the fridge 30-60 minutes before baking.
- Don’t skip the hot coffee—it makes the chocolate flavor more intense and complex.
- Thin batter is normal—resist the urge to add more flour. The thin batter creates a moist cake.
- Level your cakes if needed by trimming off any domed tops with a serrated knife for easier stacking.
- Frosting consistency: If your kitchen is warm, refrigerate the frosting for 10-15 minutes before using.
Nutrition
- Serving Size: 1 slice (1/12 of cake)
- Calories: 645
- Sugar: 68g
- Sodium: 425mg
- Fat: 35g
- Saturated Fat: 18g
- Unsaturated Fat: 15g
- Trans Fat: 0g
- Carbohydrates: 82g
- Fiber: 3g
- Protein: 6g
- Cholesterol: 95mg
Note: Nutrition information is approximate and will vary based on specific ingredients used and portion sizes.
Tips & Variations
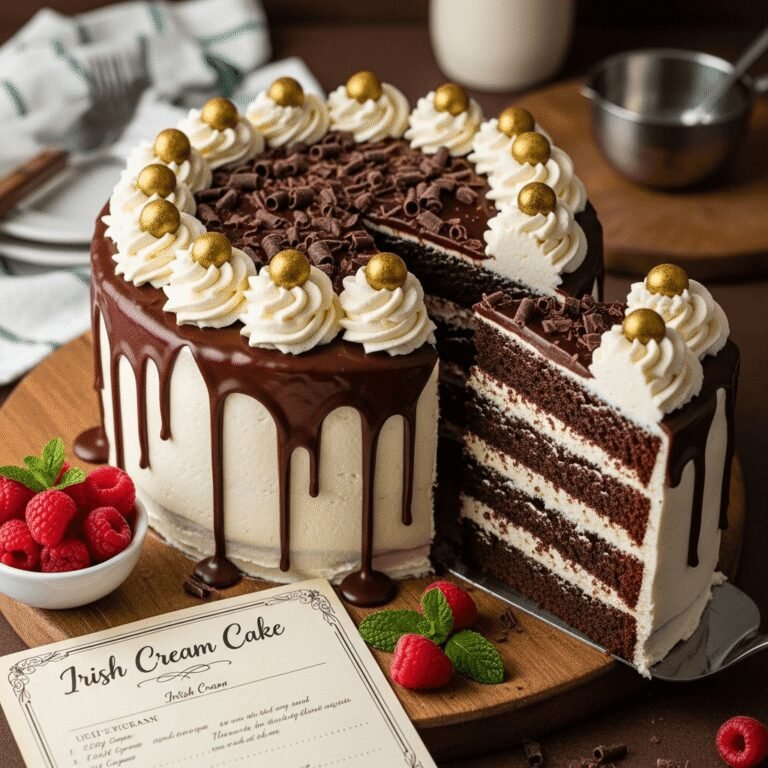
Make it Boozy: Add 2 tablespoons of bourbon, Irish cream, or coffee liqueur to the batter for an adult twist.
Espresso Devil’s Food: Replace the hot coffee with hot espresso and add 1 tablespoon of instant espresso powder to the dry ingredients for an intense mocha flavor.
Mint Chocolate: Add 1 teaspoon of peppermint extract to the batter and use mint buttercream or ganache for frosting. Top with crushed peppermint candies.
Red Velvet Style: Add 1-2 tablespoons of red food coloring to the batter for a more dramatic color contrast with white cream cheese frosting.
Cupcake Version: Pour batter into lined muffin tins, filling 2/3 full. Bake at 350°F for 18-22 minutes. Makes about 24 cupcakes.
Sheet Cake Option: Pour all the batter into a greased 9×13-inch pan and bake for 35-40 minutes. Perfect for casual gatherings and easier to transport.
Healthier Version: Substitute half the oil with unsweetened applesauce and use coconut sugar instead of granulated sugar. The texture will be slightly different but still delicious.
Add Texture: Fold in 1 cup of chocolate chips, chopped nuts, or shredded coconut to the batter before baking.
Pro Chef Tips
Weigh your ingredients: Professional bakers always weigh flour and sugar for consistent results. If you have a kitchen scale, use grams for accuracy.
Bloom your cocoa: Whisk the cocoa powder with the hot coffee before adding it to the batter. This “blooms” the cocoa, intensifying its flavor and preventing lumps.
Use cake strips: Dampen fabric cake strips and wrap around the outside of your pans before baking. This helps cakes bake more evenly with flat tops instead of domed centers.
Bring ingredients to room temperature: This is especially important for eggs and buttermilk. Room temperature ingredients emulsify better, creating a smoother batter and more tender cake.
Don’t overmix after adding flour: Mix just until the flour disappears to avoid developing too much gluten, which can make the cake tough.
Check oven temperature: Use an oven thermometer to ensure your oven is accurate. Even 25 degrees off can affect baking times and texture.
The toothpick test: When testing for doneness, you want a few moist crumbs clinging to the toothpick—not wet batter, but not completely clean either. This ensures a moist cake.
Cool completely before frosting: This is non-negotiable. Even slightly warm cake will melt your frosting and cause it to slide off.
Common Mistakes to Avoid
Using expired leavening agents: Baking soda and baking powder lose potency over time. If yours are more than 6 months old, replace them. Old leaveners result in flat, dense cakes.
Overbaking: This is the number one killer of moist cake. Set a timer for the minimum baking time and check early. Remember, the cake continues cooking slightly from residual heat even after leaving the oven.
Skipping the parchment paper: Even well-greased pans can stick. That parchment circle on the bottom is your insurance policy for easy cake removal.
Opening the oven door too early: Resist the temptation to peek for at least the first 25 minutes. Opening the door causes temperature fluctuations that can make your cake sink in the middle.
Frosting a warm cake: We can’t stress this enough—patience is key. A warm cake will create a melted, sliding mess and mix cake crumbs into your beautiful frosting.
Not measuring accurately: Eyeballing ingredients is fine for some recipes, but baking is chemistry. Too much flour makes a dry cake, too little creates a gummy texture.
Storage & Meal Prep
Room Temperature Storage: If your frosting is buttercream-based (no cream cheese), the frosted cake can sit at room temperature for up to 2 days. Cover loosely with plastic wrap or a cake dome to prevent drying out.
Refrigerator Storage: For longer storage, refrigerate the cake in an airtight container or covered cake plate for up to 5 days. Let it come to room temperature for 30 minutes before serving for the best texture and flavor.
Unfrosted Cake Storage: Wrapped tightly in plastic wrap, unfrosted cake layers stay fresh for 2 days at room temperature or up to 1 week refrigerated.
Reheating: While best served at room temperature, you can briefly microwave individual slices for 10-15 seconds to recreate that just-baked warmth. Be careful not to overheat or it will dry out.
Transporting Tips: If taking this cake to a party, refrigerate it for at least an hour before transport so the frosting sets firm. This makes it much easier to move without disasters.
Make-Ahead & Freezer Notes
Bake Ahead: You can bake the cake layers up to 2 days in advance. Let them cool completely, then wrap tightly in plastic wrap and store at room temperature until ready to frost.
Freeze Unfrosted Layers: For longer storage, wrap cooled cake layers tightly in plastic wrap, then aluminum foil. Freeze for up to 3 months. Thaw overnight in the refrigerator, still wrapped, then bring to room temperature before frosting.
Freeze Frosted Cake: Yes, you can freeze an already frosted cake! First, freeze it uncovered for 1 hour until the frosting is firm (this is called flash-freezing). Then wrap carefully in plastic wrap and foil. Freeze for up to 2 months. Thaw overnight in the refrigerator, then let sit at room temperature for 1 hour before serving.
Make-Ahead Frosting: Buttercream frosting can be made up to 1 week ahead and stored in an airtight container in the refrigerator. Let it come to room temperature, then beat with a mixer for 1-2 minutes to restore its fluffy texture before using.
Best Reheating Method: For frozen cake, always thaw in the refrigerator rather than at room temperature to prevent condensation from making the cake soggy. Plan for at least 6-8 hours of thawing time.
Serving Suggestions
Devil’s Food Cake is rich and satisfying on its own, but these accompaniments take it to the next level:
Beverages: Serve with cold milk (classic!), hot coffee, espresso, or a dessert wine like Port or late-harvest Riesling. For parties, champagne or prosecco provides a delightful contrast to the rich chocolate.
Ice Cream Pairing: Vanilla bean ice cream is traditional, but also try salted caramel, coffee, peppermint, or raspberry ice cream alongside warm cake for an unforgettable dessert.
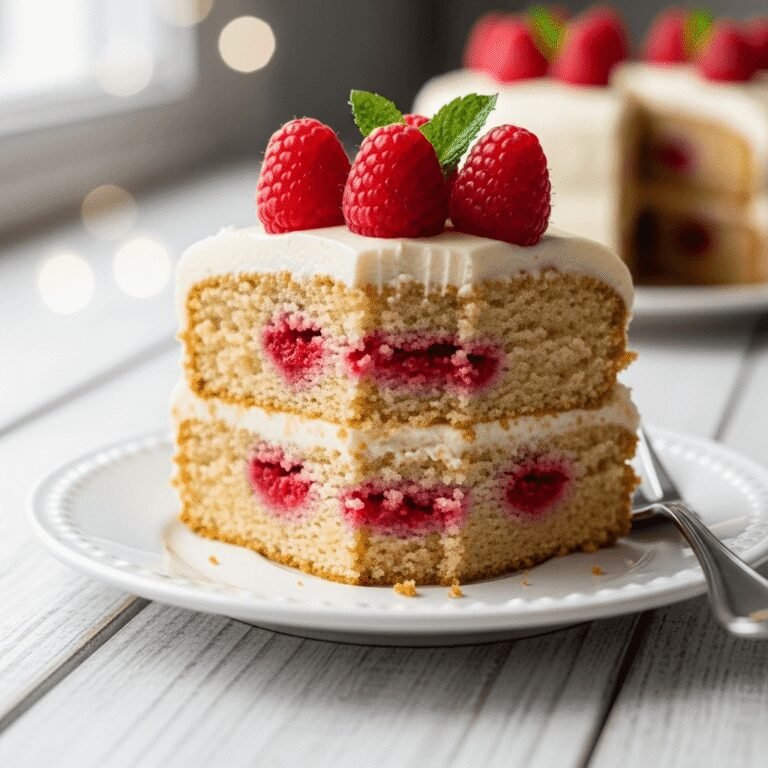
Fresh Fruit: Balance the richness with fresh raspberries, strawberries, or cherries. The tartness of berries cuts through the chocolate beautifully.
Whipped Cream: A dollop of barely sweetened whipped cream or crème fraîche adds elegance and lightness.
Salted Caramel Drizzle: Make or buy salted caramel sauce and drizzle over individual slices. The sweet-salty combination is addictive.
Coffee or Espresso: A shot of espresso poured over a slice creates an Italian-inspired affogato-style dessert.
Occasion Ideas: Perfect for birthdays, anniversaries, Valentine’s Day, Christmas dessert, potlucks, bake sales, wedding showers, or any celebration where you want to make a chocolate-loving crowd very happy.
FAQs Section
Can I use natural cocoa powder instead of Dutch-process?
You can, but the results will be different. Natural cocoa powder is more acidic and will produce a lighter, more reddish-brown cake with a sharper chocolate flavor. Dutch-process cocoa creates the signature dark color and mellow flavor of authentic Devil’s Food Cake. If using natural cocoa, you might also need to adjust leavening agents slightly.
Why did my cake sink in the middle?
Common causes include opening the oven door too early, underbaking (the cake wasn’t set enough), expired baking powder or baking soda, or overmixing the batter which deflates air bubbles. Make sure your oven temperature is accurate and avoid opening the door for at least 25 minutes.
Can I make this cake without eggs?
Yes! For each egg, substitute with one “flax egg” (1 tablespoon ground flaxseed mixed with 3 tablespoons water, let sit 5 minutes) or use a commercial egg replacer. The texture will be slightly different but still delicious.
How do I get my cake layers perfectly flat?
Use baking strips around your pans, don’t overfill the pans (batter should be only 1/2 to 2/3 full), and make sure your oven temperature is accurate. You can also level cakes after cooling using a serrated knife or cake leveler.
Can I substitute the buttermilk?
Absolutely. Make DIY buttermilk by adding 1 tablespoon of white vinegar or lemon juice to 1 cup of regular milk and letting it sit for 5 minutes. You can also use sour cream thinned with a little milk to reach pourable consistency.
Why is my cake dry?
The most common reason is overbaking. Check your cake 5 minutes before the suggested baking time, and remember that a few moist crumbs on the toothpick are perfect—you don’t want it completely clean. Other causes include too much flour (always spoon and level when measuring) or not enough fat/liquid in the recipe.
Can I make this into cupcakes?
Yes! Fill cupcake liners about 2/3 full and bake at 350°F for 18-22 minutes. This recipe makes approximately 24 cupcakes. They’re perfect for parties and easier to portion control.
Conclusion
There’s a reason Devil’s Food Cake has been America’s favorite chocolate cake for over a century—it delivers pure chocolate bliss in every bite. With its tender, moist crumb, deep chocolate flavor, and impressive presentation, this cake turns any occasion into a celebration. Whether you’re baking for a birthday, holiday gathering, or simply because Tuesday deserves something special, this recipe will never let you down.
The beauty of this Devil’s Food Cake is that it tastes like you spent hours in the kitchen, but the actual hands-on time is minimal. Once you’ve made it once, you’ll find yourself returning to this recipe again and again. It’s that reliable friend in your recipe collection that always comes through.
So preheat that oven, grab your mixing bowls, and get ready to create some chocolate magic. Don’t forget to take a photo of your gorgeous creation and share it on Pinterest—your fellow bakers will thank you! And when friends ask for the recipe (they absolutely will), you’ll know where to send them.
Happy baking, and may your cake be as rich and delightful as you deserve! 🍰❤️