Classic Dutch Apple Pie Recipe (With Buttery Streusel Crumb Topping!)

There’s nothing quite like the aroma of a homemade Dutch apple pie baking in the oven—that irresistible combination of cinnamon-spiced apples, buttery crust, and sweet crumbly topping that fills your entire home with warmth and comfort. This traditional Dutch apple pie recipe is the ultimate fall dessert, featuring tender, juicy apple slices nestled in a flaky pie crust and crowned with a generous layer of crispy streusel topping instead of a traditional top crust.
Unlike regular apple pie, this easy Dutch apple pie recipe takes things to the next level with its signature crumb topping that adds incredible texture and an extra dose of buttery sweetness. It’s the perfect balance of tender spiced apples, flaky crust, and crunchy topping that creates a dessert experience everyone adores. Whether you’re celebrating Thanksgiving, hosting a holiday gathering, or simply craving a cozy autumn treat, this homemade apple crumb pie delivers every single time.
This classic apple pie with streusel topping is surprisingly simple to make, even for beginner bakers. With just a handful of basic ingredients and straightforward steps, you’ll have a bakery-worthy pie that looks and tastes absolutely spectacular. It’s the kind of dessert that becomes a family tradition—the recipe you’ll make year after year and pass down through generations. Get ready to create the most delicious, crowd-pleasing Dutch apple pie that’ll have everyone asking for seconds!
History / Background
The Dutch apple pie has a rich and fascinating history that spans centuries and continents, though its name is somewhat misleading—it’s not actually Dutch in origin! The confusion comes from the pie’s Dutch-inspired streusel topping, which reflects the crumb cake traditions popular in the Netherlands and Germany.
Traditional apple pie has been enjoyed in Europe since the Middle Ages, with the first recorded recipe appearing in England in 1381. However, the Dutch apple pie as we know it today—with its distinctive crumb topping—is actually an American creation that gained popularity in Pennsylvania Dutch country during the 18th and 19th centuries. The Pennsylvania Dutch were actually German immigrants (“Deutsch” was mistranslated as “Dutch”), and they brought with them a love of streusel-topped baked goods.
The streusel topping itself comes from the German word “streuseln,” meaning “to sprinkle” or “to strew.” German bakers had long topped coffee cakes and sweet breads with buttery crumb mixtures, and these immigrants adapted this technique to American apple pies. The result was a pie that combined the best of both traditions: the classic American apple pie filling with a European-style crumbly topping.
By the early 20th century, Dutch apple pie had become a beloved staple across America, particularly in regions with strong German heritage. Diners, bakeries, and home kitchens embraced this variation because it was actually easier than making a traditional double-crust pie—no need to roll out a top crust or create fancy lattice work. The streusel topping was simpler, faster, and arguably even more delicious.
Today, Dutch apple pie remains one of America’s favorite desserts, especially during fall and winter holidays. It’s become synonymous with Thanksgiving celebrations, autumn harvest festivals, and cozy family gatherings. The combination of sweet-tart apples, warm spices, and that irresistible crunchy-yet-tender topping has earned this pie a permanent place in American dessert tradition. Many people actually prefer Dutch apple pie to traditional apple pie because of the textural contrast and extra buttery richness the streusel provides.
Why You’ll Love This Recipe
This Dutch apple pie recipe is about to become your go-to fall dessert, and here’s why you’ll absolutely love making it:
This recipe combines everything you love about apple pie with the added bonus of an incredible streusel topping that takes it over the top.
- Easier than traditional apple pie – No need to roll out a top crust or create lattice work; the crumb topping is simple to mix and sprinkle
- Amazing texture contrast – Flaky crust, tender apples, and crunchy streusel create layers of deliciousness in every bite
- Perfect spice blend – Cinnamon, nutmeg, and a hint of lemon create that classic apple pie flavor everyone craves
- Uses everyday ingredients – Made with pantry staples and fresh apples you can find anywhere
- Make-ahead friendly – Can be prepared in stages or even frozen for future enjoyment
- Feeds a crowd – One pie serves 8-10 people generously, perfect for gatherings
- Customizable sweetness – Easy to adjust sugar levels based on your apple variety and personal preference
- Show-stopping presentation – Looks impressive and rustic with minimal effort
- Freezer-friendly – Both baked and unbaked pies freeze beautifully for up to 3 months
- Classic comfort food – That nostalgic, homey flavor that reminds you of grandma’s kitchen
This is the kind of pie that makes your house smell incredible, brings people together, and creates lasting memories around the table. Plus, that streusel topping is legitimately addictive!
Ingredient Notes
Understanding your ingredients ensures perfect Dutch apple pie success. Here’s what you’ll need and why:
For the Pie Crust:
All-Purpose Flour – Creates the structure for a tender, flaky crust. Substitution: You can use a store-bought refrigerated pie crust or frozen crust shell to save time—no shame in that!
Butter (Cold and Cubed) – The key to flaky layers. Cold butter creates steam pockets during baking. Substitution: Vegetable shortening can be used for half the butter for extra flakiness, but butter provides better flavor.
Salt – Enhances flavor and balances sweetness.
Ice Water – Brings the dough together without warming the butter.
For the Apple Filling:
Apples – The star ingredient! Use a mix of tart and sweet varieties like Granny Smith, Honeycrisp, or Braeburn for the best flavor and texture. You’ll need about 6-7 medium apples (approximately 3 pounds). Substitution: Avoid Red Delicious or McIntosh as they become too mushy. Stick with firm, crisp apples that hold their shape during baking.
Granulated Sugar – Sweetens the filling and helps create that delicious syrupy juice. Substitution: You can use a mix of white and brown sugar for deeper flavor.
All-Purpose Flour – Thickens the apple juices and prevents a soggy bottom crust. Substitution: Cornstarch or tapioca starch work well (use 2 tablespoons instead of 3 tablespoons flour).
Ground Cinnamon – The essential warm spice that defines apple pie flavor. Note: Use fresh cinnamon for the best flavor—old cinnamon loses its potency.
Ground Nutmeg – Adds warmth and depth. Just a pinch makes a difference!
Lemon Juice – Brightens the flavors and prevents apples from browning. The acidity balances the sweetness perfectly.
Vanilla Extract – Enhances all the other flavors and adds complexity.
For the Streusel Topping:
All-Purpose Flour – Creates the crumbly texture.
Brown Sugar – Provides caramel-like sweetness and moisture that creates those coveted clumps. Note: Light or dark brown sugar both work; dark creates a more molasses-forward flavor.
Butter (Cold and Cubed) – Brings everything together into that perfect crumbly consistency.
Ground Cinnamon – Ties the topping flavor to the filling.
Salt – A pinch enhances the buttery flavor and balances sweetness.
Equipment Needed
Having the right tools makes this recipe come together smoothly:
- 9-inch pie dish – Glass or ceramic works best for even baking and seeing the bottom crust’s doneness
- Rolling pin – For rolling out the pie dough (if making homemade crust)
- Large mixing bowl – For combining apple filling ingredients
- Medium mixing bowl – For making the streusel topping
- Pastry cutter or fork – For cutting butter into flour for both crust and streusel
- Peeler and apple corer – For preparing the apples efficiently
- Sharp knife – For slicing apples uniformly
- Measuring cups and spoons – For accurate measurements
- Plastic wrap – For wrapping dough during chilling
- Pie weights or dried beans (optional) – For blind-baking if needed
- Aluminum foil – To cover pie edges if they brown too quickly
- Wire cooling rack – For proper cooling after baking
- Pastry brush (optional) – For brushing away excess flour
Dutch Apple Pie Recipe

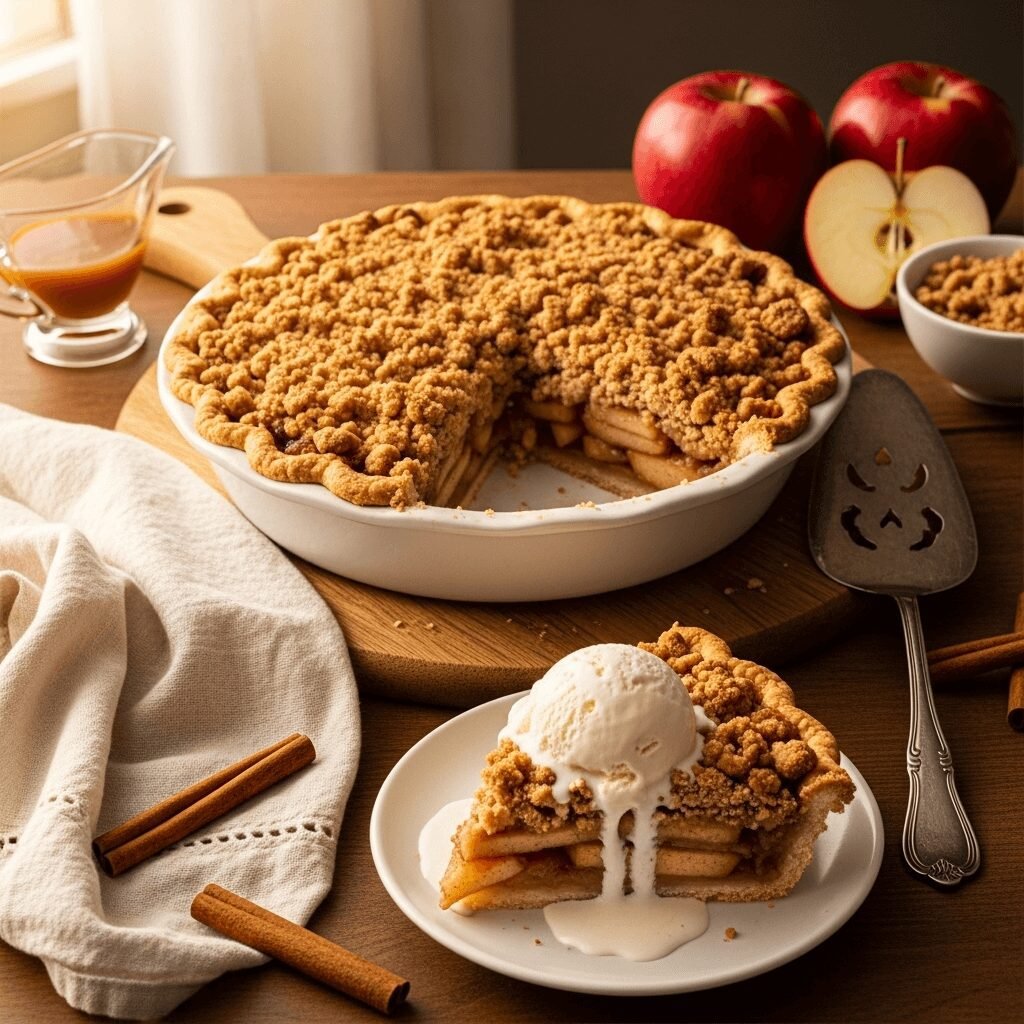
This classic Dutch apple pie features tender cinnamon-spiced apples in a flaky butter crust, topped with a generous layer of buttery streusel crumb topping. It’s easier than traditional two-crust apple pie and absolutely delicious served warm with vanilla ice cream!
- Prep Time: 30 minutes
- Cook Time: 50 minutes
- Total Time: 1 hour 20 minutes (plus cooling)
- Yield: 8-10 servings 1x
- Category: Dessert
- Method: Baking
- Cuisine: American
- Diet: Gluten Free
Ingredients
For the Pie Crust:
- 1¼ cups (160g) all-purpose flour
- ½ teaspoon salt
- ½ cup (115g) cold unsalted butter, cubed
- 3-4 tablespoons ice water
Or use 1 store-bought 9-inch refrigerated pie crust
For the Apple Filling:
- 6-7 medium apples (about 3 lbs), peeled, cored, and sliced ¼-inch thick
- ¾ cup (150g) granulated sugar
- 3 tablespoons all-purpose flour
- 1½ teaspoons ground cinnamon
- ¼ teaspoon ground nutmeg
- 1 tablespoon fresh lemon juice
- 1 teaspoon pure vanilla extract
For the Streusel Topping:
- 1 cup (125g) all-purpose flour
- ½ cup (100g) packed light brown sugar
- ½ cup (115g) cold unsalted butter, cubed
- 1 teaspoon ground cinnamon
- Pinch of salt
Instructions
Make the Pie Crust (or use store-bought):
- Mix dry ingredients: In a large bowl, whisk together flour and salt.
- Cut in butter: Add cold cubed butter and use a pastry cutter or fork to work it into the flour until the mixture resembles coarse crumbs with pea-sized butter pieces remaining. This creates the flaky texture.
- Add water: Drizzle in ice water, 1 tablespoon at a time, mixing gently with a fork until the dough just comes together. You may not need all the water. The dough should hold together when pressed but not be sticky.
- Chill the dough: Form dough into a disk, wrap tightly in plastic wrap, and refrigerate for at least 30 minutes (or up to 2 days). This rest period allows the gluten to relax and the butter to firm up.
- Roll and fit: On a lightly floured surface, roll the chilled dough into a 12-inch circle about ⅛-inch thick. Carefully transfer to a 9-inch pie dish, gently pressing into the bottom and sides. Trim excess dough, leaving a 1-inch overhang, then fold under and crimp the edges decoratively. Prick the bottom with a fork several times. Refrigerate while you prepare the filling.
Prepare the Apple Filling:
- Preheat oven: Preheat your oven to 375°F (190°C). Place a baking sheet on the lower oven rack to catch any drips.
- Combine apples and seasonings: In a large bowl, combine sliced apples, sugar, flour, cinnamon, nutmeg, lemon juice, and vanilla. Toss everything together until apples are evenly coated. The flour will thicken the juices as they bake.
- Fill the crust: Arrange the apple mixture in the prepared pie crust, mounding it slightly in the center. Pack the apples in snugly—they’ll shrink as they bake. Pour any remaining juices from the bowl over the apples.
Make the Streusel Topping:
- Mix streusel ingredients: In a medium bowl, combine flour, brown sugar, cinnamon, and salt. Add cold cubed butter and use a pastry cutter or your fingers to work it in until the mixture forms coarse, pea-sized crumbs that hold together when squeezed. You want a mix of fine crumbs and larger clumps for the best texture.
- Add topping to pie: Sprinkle the streusel mixture evenly over the apples, covering them completely. Press down very gently to help it adhere. Don’t worry about it being perfect—rustic is beautiful!
Bake the Pie:
- Bake: Place the pie on the preheated baking sheet in the oven and bake for 50-60 minutes. The pie is done when the streusel is golden brown, the apples are tender when pierced with a knife, and the juices are bubbling around the edges.
- Protect the edges: If the crust edges or streusel topping start browning too quickly (usually after 30-35 minutes), cover them loosely with aluminum foil or a pie shield.
- Cool: Remove from the oven and let cool on a wire rack for at least 2 hours before slicing. This allows the filling to set properly so slices hold their shape. The pie can be served warm or at room temperature.
Notes
- Apple varieties: A mix of tart and sweet apples creates the best flavor. Try combining Granny Smith with Honeycrisp, Gala, or Jonagold.
- Preventing soggy bottom: Make sure to prick the crust with a fork and bake on a preheated baking sheet. The heat from below helps cook the bottom crust.
- Streusel texture: The key to perfect streusel is cold butter and not overmixing. You want it crumbly, not paste-like.
- Checking doneness: Use a knife to pierce through the topping into an apple piece—if it slides in easily, the apples are tender.
- Storing: Cover and store at room temperature for 2 days or refrigerate for up to 5 days. Reheat slices for best flavor.
Nutrition
- Serving Size: 1 slice (1/10 of pie)
- Calories: 385
- Sugar: 32g
- Sodium: 180mg
- Fat: 18g
- Saturated Fat: 11g
- Unsaturated Fat: 6g
- Trans Fat: 0g
- Carbohydrates: 54g
- Fiber: 3g
- Protein: 3g
- Cholesterol: 46mg
Tips & Variations
Customize your Dutch apple pie to make it uniquely yours:
Apple Variety Combinations:
- Classic: Granny Smith + Honeycrisp for perfect tart-sweet balance
- All-tart: 100% Granny Smith for maximum tang
- Extra sweet: Gala + Fuji for a sweeter, less tart pie
- Complex flavor: Mix 3-4 different varieties for depth
Flavor Variations:
- Caramel Dutch Apple Pie: Drizzle ¼ cup caramel sauce over apples before adding streusel
- Maple Walnut: Replace half the brown sugar in streusel with maple sugar and add ½ cup chopped walnuts
- Apple Cranberry: Mix in 1 cup fresh or frozen cranberries with the apples for tartness
- Bourbon Apple Pie: Add 2 tablespoons bourbon to the apple filling for depth
- Spiced Chai: Add ½ teaspoon cardamom and ¼ teaspoon ground ginger to the filling
Streusel Variations:
- Oat Streusel: Replace ¼ cup flour with old-fashioned oats for texture
- Nutty Topping: Add ½ cup chopped pecans or walnuts to the streusel
- Extra Crunchy: Add 2 tablespoons granulated sugar to the streusel mixture
- Coconut Streusel: Mix in ⅓ cup shredded coconut for tropical flair
Dietary Modifications:
- Gluten-Free: Use gluten-free 1-to-1 baking flour for crust, filling thickener, and streusel
- Reduced Sugar: Cut sugar in filling to ½ cup if using very sweet apples
- Vegan: Use vegan butter substitute and ensure crust is made without animal products
Pro Chef Tips
Elevate your Dutch apple pie with these professional techniques:
- Mix apple varieties for complexity: Professional bakers never use just one type of apple. Combining tart Granny Smiths with sweeter varieties like Honeycrisp or Gala creates layers of flavor and ensures some apples hold their shape while others break down slightly to create that perfect filling consistency.
- Slice apples uniformly: Use a mandoline or take your time with a sharp knife to cut apple slices to an even ¼-inch thickness. Uniform slices cook evenly, preventing some pieces from being mushy while others remain crunchy.
- Don’t skip the chill time: Keeping your dough and butter cold throughout the process is crucial for a flaky crust and crumbly streusel. If the butter warms up too much, the dough becomes difficult to work with and won’t produce those desirable flaky layers. Refrigerate dough between steps if your kitchen is warm.
- Blind-bake for extra insurance: For the crispest bottom crust, partially blind-bake it before adding the filling. Line the crust with parchment paper, fill with pie weights or dried beans, and bake at 375°F for 15 minutes. Remove weights and bake 5 more minutes. Then add your filling and proceed with the recipe.
- Create streusel with varied textures: When making your streusel, don’t mix until it’s uniform. Leave some larger butter chunks and some finer crumbs—this creates that coveted combination of sandy, crumbly areas and larger crunchy clusters on top of your pie.
- Use a baking sheet underneath: Always place your pie on a preheated baking sheet in the oven. This helps the bottom crust cook properly and catches any drips. The direct heat from below prevents the dreaded soggy bottom.
- Test doneness properly: The pie is ready when you can see thick juices bubbling up through the streusel topping and around the edges, and when a knife inserted through the topping slides easily into the apple pieces. If juices aren’t bubbling, the filling hasn’t thickened yet.
Common Mistakes to Avoid
Sidestep these common pitfalls for perfect pie every time:
- Using warm butter: This is the number one mistake in both crust and streusel making. Warm butter gets absorbed into the flour instead of creating pockets, resulting in tough crust and paste-like streusel instead of flaky and crumbly textures. Always use cold butter straight from the refrigerator, and work quickly. If things start warming up, pop everything back in the fridge for 10 minutes.
- Slicing apples too thick: Apple slices thicker than ¼-inch won’t cook through properly in the allotted baking time, leaving you with crunchy, undercooked apples surrounded by overbrowned streusel. Aim for uniform ¼-inch slices—thinner is better than thicker.
- Overfilling the pie: It’s tempting to pile in as many apples as possible, but overfilling causes juices to bubble over excessively, makes the pie difficult to cut cleanly, and can prevent the filling from cooking evenly. The apples should mound slightly above the rim but not tower over it. Remember, they’ll shrink as they bake.
- Not letting the pie cool enough: Cutting into a hot pie results in a runny, soup-like filling that won’t hold its shape. The filling needs at least 2 hours to cool and set properly—the flour or cornstarch can only thicken the juices as the pie cools. I know it’s hard to wait, but patience pays off with clean, beautiful slices!
- Skipping the lemon juice: Some bakers think lemon juice is optional, but it’s actually crucial. Beyond preventing browning, lemon juice brightens the apple flavor, balances sweetness, and helps activate the pectin in apples, which naturally thickens the filling. Don’t skip it!
Storage & Meal Prep
Keep your Dutch apple pie fresh and delicious:
Room Temperature Storage: Freshly baked pie can be stored loosely covered with aluminum foil or a clean kitchen towel at room temperature for up to 2 days. Don’t cover tightly or use plastic wrap while still warm, as trapped steam will make the streusel topping soggy.
Refrigerator Storage: For longer storage, cover the cooled pie with plastic wrap or aluminum foil and refrigerate for up to 5 days. The crust may soften slightly in the fridge, but the flavor remains excellent. Bring to room temperature or warm before serving for the best texture.
Reheating for Best Results: To refresh a refrigerated pie and restore the streusel’s crispness, reheat in a 350°F oven for 15-20 minutes until warmed through. Individual slices can be microwaved for 30-45 seconds, though the topping won’t be as crispy. For extra indulgence, warm slices and top with vanilla ice cream!
Preventing Soggy Crust: If storing for more than a day, the bottom crust can become slightly soft from the filling juices. To prevent this, make sure the pie cools completely on a wire rack (allowing air circulation underneath) before storing, and store it uncovered or loosely covered rather than sealed tightly.
Make-Ahead & Freezer Notes
Dutch apple pie is excellent for advance preparation:
Make-Ahead Pie Crust: Prepare the dough up to 2 days in advance and keep it wrapped tightly in the refrigerator, or freeze for up to 3 months. Thaw frozen dough overnight in the refrigerator before rolling. You can also roll the dough, fit it into the pie dish, and refrigerate overnight covered with plastic wrap.
Make-Ahead Streusel: Mix the streusel topping and store it in an airtight container in the refrigerator for up to 3 days or freeze for up to 1 month. No need to thaw before using—just sprinkle frozen streusel directly over the filling.
Assembling and Freezing Unbaked: Assemble the entire pie (crust, filling, and streusel) but don’t bake it. Wrap tightly with plastic wrap and then aluminum foil. Freeze for up to 3 months. To bake, remove plastic wrap, replace foil loosely, and bake from frozen at 375°F for 75-90 minutes until golden and bubbling. No need to thaw first!
Freezing Baked Pie: Cool the baked pie completely, then wrap tightly in plastic wrap followed by aluminum foil. Freeze for up to 3 months. Thaw overnight in the refrigerator, then reheat at 350°F for 20-25 minutes until warmed through and the streusel crisps up again.
Best Reheating Method for Frozen: Always thaw frozen baked pie in the refrigerator overnight for even thawing. Reheat uncovered at 350°F until the center is warm and the top is crisp, about 20-30 minutes. Cover edges with foil if they’re browning too quickly.
Serving Suggestions
Transform your Dutch apple pie into a complete dessert experience:
Classic Accompaniments:
- Vanilla ice cream – The absolute classic pairing that never disappoints
- Fresh whipped cream – Lightly sweetened for a cloud-like topping
- Caramel sauce – Drizzle warm caramel over slices for extra decadence
- Sharp cheddar cheese – A traditional pairing in New England; the savory-sweet combo is surprisingly delicious
- Crème fraîche or Greek yogurt – For a tangy contrast to the sweet pie
Beverage Pairings:
- Hot coffee or espresso – The perfect afternoon accompaniment
- Hot apple cider or spiced chai – Doubles down on the cozy fall flavors
- Cold milk – Classic and comforting
- Dessert wine – Try a late-harvest Riesling or ice wine for elegant entertaining
- Hot tea – Earl Grey or cinnamon spice tea complements beautifully
Special Occasion Presentations:
- à la Mode: Warm pie slice with a generous scoop of vanilla bean ice cream melting over the top
- Caramel Pecan: Top with caramel sauce and toasted pecans for dinner party elegance
- Breakfast Treat: Serve leftover pie with morning coffee as a special weekend breakfast
- Holiday Spread: Part of a dessert bar with other pies and sweet treats
Casual Serving Ideas:
- Served warm with a dollop of whipped cream for everyday enjoyment
- Cold from the fridge for a quick sweet snack
- Reheated with a pat of butter melting into it (trust me on this!)
- Paired with hot cider for the ultimate autumn experience
FAQs Section
Q: What’s the difference between Dutch apple pie and regular apple pie?
A: The main difference is the topping! Traditional apple pie has a full double crust (top and bottom), while Dutch apple pie has only a bottom crust and is topped with a buttery streusel crumb topping made from flour, butter, sugar, and spices. Many people prefer Dutch apple pie because the streusel adds extra texture and flavor, plus it’s actually easier to make since you don’t need to roll out a top crust.
Q: What are the best apples for Dutch apple pie?
A: The best apples are firm varieties that hold their shape during baking and offer a good balance of sweet and tart. Top choices include Granny Smith (tart), Honeycrisp (sweet-tart), Braeburn (balanced), Jonagold (sweet), and Pink Lady (tart-sweet). Many bakers use a mix of 2-3 varieties for the most complex flavor. Avoid Red Delicious and McIntosh, which become mushy and lose their structure when baked.
Q: Why is my Dutch apple pie so watery?
A: Watery pie usually results from one of these issues: (1) Cutting the pie before it’s fully cooled—the filling needs at least 2 hours to set and thicken; (2) Not using enough thickener (flour or cornstarch) in the filling; (3) Using apples that release too much moisture; or (4) Not baking long enough—the filling needs to bubble and thicken during baking. Make sure you see juices bubbling through the streusel before removing from the oven.
Q: Can I use a store-bought pie crust?
A: Absolutely! Store-bought refrigerated or frozen pie crusts work perfectly and save significant time. Just make sure to let refrigerated crust sit at room temperature for 10-15 minutes before unrolling to prevent cracking. No one will know the difference once it’s filled and baked, especially with that delicious homemade filling and streusel topping!
Q: How do I prevent the edges of my pie crust from burning?
A: Pie crust edges brown faster than the rest of the pie because they’re exposed to direct heat. After 30-35 minutes of baking, loosely cover the edges with strips of aluminum foil or use a silicone pie shield. This protects the edges while allowing the filling and streusel to continue cooking and browning properly. You can also brush the edges with a little milk or egg wash before baking to help them brown more evenly.
Q: Do I need to pre-cook the apples before baking?
A: No, you don’t need to pre-cook the apples for Dutch apple pie. The apples will cook perfectly during the baking time, becoming tender while still maintaining some structure. However, if you’re using particularly firm apples or prefer very soft apples, you can sauté them briefly with the sugar and spices for 5-7 minutes before filling the crust. This also helps reduce the volume if you’re trying to fit in more apples.
Q: Can I make mini Dutch apple pies?
A: Yes! This recipe adapts beautifully to individual servings. Use a muffin tin lined with crust, fill with the apple mixture, and top with streusel. Bake at 375°F for 20-25 minutes. You can also use small 4-inch pie tins for personal-sized pies. Reduce the baking time by about half and watch carefully for golden brown streusel and bubbling juices.
Conclusion
There you have it—everything you need to create a spectacular, bakery-worthy Dutch apple pie that’ll have your entire family asking you to make it again and again! This easy Dutch apple pie with streusel topping combines all the best elements of fall baking: tender spiced apples, a flaky butter crust, and that irresistibly crunchy, buttery crumb topping that makes this pie truly special.
Whether you’re a seasoned baker or attempting your first pie, this homemade apple crumb pie is surprisingly approachable and delivers incredible results. The combination of textures and flavors—the flaky crust against the tender apples and crispy streusel—creates a dessert experience that’s greater than the sum of its parts. And let’s be honest: anything topped with buttery streusel is automatically amazing!
This classic apple pie with streusel topping is perfect for holidays, special occasions, or just because it’s Tuesday and you deserve something wonderful. The aroma alone will fill your home with warmth and comfort, and the taste will create memories that last long after the last slice is gone.
Don’t be intimidated by pie-making—with this detailed recipe and all these tips, you’ve got everything you need for success. Your Dutch apple pie will be the star of any dessert table!
Ready to bake the most delicious Dutch apple pie? Pin this recipe to your Pinterest boards so you’ll have it whenever fall baking calls! After you make it, come back and tell me in the comments—did you go classic or try one of the fun variations? What did your family think? I’d love to hear about your pie-baking adventures!
Happy baking, pie lovers! 🥧🍎