The Ultimate Ganache Recipe: Silky, Rich, and Perfect Every Time
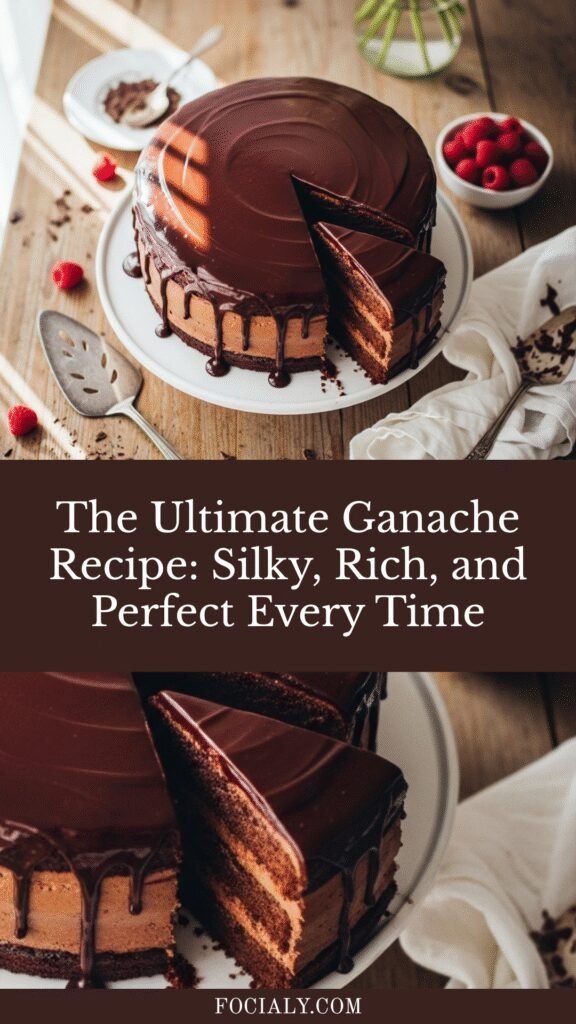
If you’ve ever wondered how professional bakers achieve that impossibly smooth, glossy chocolate coating on cakes and pastries, the answer is ganache. This luxurious French creation is simply a blend of chocolate and cream, but when combined correctly, it transforms into one of the most versatile components in any baker’s arsenal. Whether you’re drizzling it over a bundt cake, using it as a frosting for layer cakes, filling truffles, or creating a mirror-like glaze, ganache delivers that restaurant-quality finish right in your home kitchen.
Ganache is perfect for special occasions like birthdays, anniversaries, and holidays, but it’s also simple enough to make on a regular Tuesday when you want to elevate a simple dessert. The best part? You only need two ingredients to create magic. This recipe will guide you through creating the perfect ganache consistency for any application, from pourable glazes to pipeable frostings and everything in between.
History / Background
Ganache has a delightful origin story that perfectly captures the serendipitous nature of many great culinary discoveries. The word “ganache” actually means “fool” or “idiot” in French, and according to pastry lore, this decadent creation came about through a happy accident in the 1850s at the Parisian chocolatier Siraudin.
As the story goes, a young apprentice accidentally poured hot cream into a bowl of chopped chocolate instead of into the custard mixture he was preparing. The master chocolatier reportedly shouted “Ganache!” (fool!) at the clumsy assistant. However, when they stirred the mixture together, they discovered it created an incredibly smooth, glossy, and delicious chocolate cream unlike anything they’d tasted before.
What started as a mistake quickly became a cornerstone of French patisserie. Throughout the late 19th and early 20th centuries, ganache evolved from a simple chocolate and cream mixture into a sophisticated component used in countless applications. French pastry chefs discovered that by adjusting the ratio of chocolate to cream, they could create everything from soft truffle centers to firm glazes and spreadable frostings.
Today, ganache is a fundamental technique taught in culinary schools worldwide and appears in countless desserts across cultures. While the French perfected it, American bakers have fully embraced ganache, using it to top everything from birthday cakes to brownies, demonstrating that this “foolish” mistake was actually one of the most brilliant discoveries in baking history.
Why You’ll Love This Recipe
Making ganache at home is genuinely one of the most rewarding experiences in baking. Unlike complicated recipes that require precise temperatures and careful timing, ganache is remarkably forgiving while delivering professional-level results. Once you master this technique, you’ll find yourself using it constantly because it elevates even the simplest desserts into something spectacular.
Here’s why this ganache recipe will become your go-to:
- Only 2 ingredients – Just chocolate and heavy cream, nothing fancy or hard to find
- Ready in 15 minutes – From start to finish, including cooling time
- Incredibly versatile – Use it as frosting, glaze, filling, or truffle base
- Tastes better than store-bought – Fresh, rich chocolate flavor without preservatives
- Budget-friendly – Much cheaper than buying pre-made frosting or chocolate decorations
- Foolproof technique – Nearly impossible to mess up once you know the basics
- Impressive results – Makes even simple cakes look bakery-quality
- Customizable – Add flavors like vanilla, espresso, liqueurs, or extracts
- No special equipment needed – Just a bowl, pot, and spoon
- Works with any chocolate – Dark, milk, or white chocolate all create beautiful ganache
Ingredient Notes
The beauty of ganache lies in its simplicity, but choosing quality ingredients makes all the difference in your final result.
Heavy Cream (Heavy Whipping Cream): This is the liquid component that softens the chocolate and creates that silky texture. Heavy cream contains 36-40% fat, which is essential for proper emulsification with the chocolate. Don’t substitute with half-and-half, milk, or light cream, as they don’t have enough fat content and will result in a broken, separated ganache. The cream should be fresh and not close to its expiration date for the best flavor.
Chocolate: The star of the show! You can use dark chocolate, semi-sweet, milk chocolate, or white chocolate depending on your preference. Use high-quality chocolate bars or chips – the better the chocolate, the better your ganache will taste. For dark ganache, choose chocolate with 60-70% cacao content for balanced sweetness and richness. Avoid chocolate chips if possible, as they contain stabilizers that can affect texture. Instead, chop a good chocolate bar into small, even pieces for best melting results.
Substitutions: If you need dairy-free ganache, use full-fat coconut cream (the thick part from a chilled can) instead of heavy cream. For a slightly lighter option, you can use a mixture of 3/4 heavy cream and 1/4 butter, though this changes the texture slightly. Some bakers add a tablespoon of butter to standard ganache for extra shine and a softer texture.
Equipment Needed
One of ganache’s greatest advantages is that it requires minimal equipment:
- Medium saucepan – For heating the cream
- Heat-safe mixing bowl (glass or metal) – To combine chocolate and cream
- Sharp knife and cutting board – For chopping chocolate bars
- Wooden spoon or silicone spatula – For stirring
- Measuring cups – For accurate proportions
- Kitchen thermometer (optional) – Helpful but not essential for monitoring cream temperature
- Fine-mesh strainer (optional) – For ultra-smooth ganache
- Whisk or hand mixer (optional) – If you’re whipping ganache for frosting
- Offset spatula – Useful for spreading ganache on cakes
Ganache Recipe

This classic chocolate ganache recipe creates a silky-smooth mixture perfect for glazing, frosting, or filling cakes and pastries. With just two ingredients and a simple technique, you’ll achieve professional bakery-quality results every time.
- Prep Time: 5 minutes
- Cooling Time: 5 minutes
- Cook Time: 5 minutes
- Total Time: 15 minutes
- Yield: About 2 cups (enough to frost an 8-inch layer cake) 1x
- Category: Dessert Topping
- Method: Stovetop
- Cuisine: French
- Diet: Vegetarian
Ingredients
- 8 ounces (226g) high-quality chocolate, finely chopped (dark, semi-sweet, or milk)
- 1 cup (240ml) heavy whipping cream
- 1 teaspoon vanilla extract (optional)
- Pinch of salt (optional, enhances chocolate flavor)
Instructions
- Prepare the chocolate: Finely chop the chocolate into small, uniform pieces (about the size of chocolate chips). Place the chopped chocolate in a heat-safe bowl. The smaller and more uniform the pieces, the more evenly the chocolate will melt. If using chocolate chips, you can skip this step, though chopped chocolate bars typically yield better results.
- Heat the cream: Pour the heavy cream into a medium saucepan and place over medium heat. Watch the cream carefully and heat until it just begins to simmer around the edges – you’ll see small bubbles forming at the perimeter of the pan. Don’t let it come to a full rolling boil, as this can scorch the cream and affect the flavor. This should take about 3-5 minutes.
- Combine chocolate and cream: Immediately pour the hot cream over the chopped chocolate in the bowl. Make sure all the chocolate pieces are covered with cream. Let this mixture sit undisturbed for 2-3 minutes. This resting period allows the heat from the cream to gently melt the chocolate without any agitation.
- Create the emulsion: After the resting period, begin stirring gently from the center of the bowl, making small circles. Gradually expand your stirring motion outward in wider circles. Continue stirring slowly and steadily until the mixture is completely smooth, glossy, and uniform in color with no streaks of cream or chunks of chocolate remaining. This should take 1-2 minutes. Add vanilla extract and salt if using, stirring to incorporate.
- Adjust consistency: At this point, your ganache is ready but will be quite fluid. For a pourable glaze, use it immediately while still warm. For frosting consistency, let it cool at room temperature for 30-60 minutes, stirring occasionally, until it thickens to a spreadable consistency. For truffle filling, refrigerate for 1-2 hours until firm enough to scoop.
- Apply as desired: Use your ganache according to your needs – pour it warm over cakes for a glossy glaze, spread it at room temperature for frosting, or scoop and roll it when chilled for truffles. If the ganache becomes too firm, gently rewarm it in the microwave in 10-second intervals or over a double boiler.
Notes
- Chocolate to cream ratio: This recipe uses a 1:1 ratio (equal parts chocolate to cream by weight) which creates a versatile ganache. For a thicker frosting, use 2 parts chocolate to 1 part cream. For a thinner glaze, use 1 part chocolate to 2 parts cream.
- Temperature matters: If your ganache seems grainy or separated, it may have gotten too hot or too cold. Gently rewarm it over a double boiler while stirring constantly to bring it back together.
- Whipped ganache: For a fluffy frosting, let ganache cool and thicken completely, then whip it with a hand mixer on medium speed for 2-3 minutes until light and airy.
- Flavor additions: Add extracts, liqueurs, or espresso powder with the vanilla for custom flavors. Start with 1-2 teaspoons of liquid flavoring or 1 teaspoon of powder.
Nutrition
- Serving Size: 2 tablespoons
- Calories: 140
- Sugar: 10g
- Sodium: 10mg
- Fat: 11g
- Saturated Fat: 7g
- Unsaturated Fat: 3g
- Trans Fat: 0g
- Carbohydrates: 12g
- Fiber: 1g
- Protein: 2g
- Cholesterol: 20mg
Note: Nutrition information is approximate and varies based on the type of chocolate used.
Tips & Variations
The basic ganache recipe is just the beginning – here are creative ways to customize it:
Flavor Variations:
- Espresso Ganache: Add 1-2 teaspoons instant espresso powder to the hot cream
- Mint Ganache: Stir in 1/2 teaspoon peppermint extract after mixing
- Orange Ganache: Add 1 teaspoon orange zest and 1 tablespoon orange liqueur
- Salted Caramel Ganache: Drizzle in 2 tablespoons caramel sauce and top with flaky sea salt
- Spiced Ganache: Add 1/2 teaspoon cinnamon or 1/4 teaspoon cayenne for warmth
- Baileys Ganache: Replace 2 tablespoons cream with Baileys Irish Cream
Chocolate Type Variations:
- Dark Chocolate: Creates a rich, sophisticated ganache perfect for adult palates
- Milk Chocolate: Sweeter and creamier, great for kids and those who prefer milder chocolate
- White Chocolate: Requires a 3:1 chocolate-to-cream ratio (use 12 oz chocolate to 1 cup cream) because white chocolate contains more cocoa butter
Dietary Modifications:
- Vegan: Use coconut cream and dairy-free chocolate
- Lower Sugar: Choose 85% dark chocolate or sugar-free chocolate
- Keto-Friendly: Use sugar-free chocolate and heavy cream
Pro Chef Tips
Professional pastry chefs rely on these insider techniques to achieve perfect ganache every time:
Temperature control is everything: The ideal temperature for cream when pouring it over chocolate is between 185-195°F. Too hot and it can scorch the chocolate; too cool and it won’t melt the chocolate completely. If you don’t have a thermometer, bring the cream to just simmering with tiny bubbles around the edges, then remove from heat.
The resting period isn’t optional: Resist the urge to stir immediately after pouring hot cream over chocolate. That 2-3 minute rest allows the chocolate to melt evenly from the heat of the cream. Stirring too early can create a grainy texture because the chocolate hasn’t fully melted.
Stir, don’t whisk: Use a spatula or wooden spoon to stir in smooth, circular motions rather than whisking vigorously. Whisking incorporates too much air, creating bubbles that can affect the smooth finish of your ganache. The goal is a slow, gentle emulsion.
Chop chocolate extra fine: Smaller pieces melt faster and more evenly. If you have large chunks, they may not melt completely and you’ll end up with lumps. Aim for pieces no larger than chocolate chips.
Room temperature matters: If your kitchen is very cold, the ganache will set up quickly. If it’s very warm, it may take longer to thicken. Adjust your expectations and timing accordingly. In summer, you might even need to refrigerate it briefly to get frosting consistency.
Strain for perfection: For ultra-smooth ganache without any possibility of lumps, pour the finished mixture through a fine-mesh strainer before using. This is especially helpful if you’re new to making ganache or if you’ve added mix-ins like citrus zest.
Common Mistakes to Avoid
Even simple recipes have pitfalls – here’s how to sidestep them:
Overheating the cream: Boiling cream can cause the ganache to separate and become oily because excessive heat breaks the emulsion. Heat just until tiny bubbles form around the edges of the pan, then immediately remove from heat.
Using low-quality chocolate: Chocolate is 50% of this recipe, so cheap chocolate means mediocre ganache. Avoid chocolate with vegetable oils or excessive additives. Spring for a good-quality baking bar or high-quality chocolate chips for best results.
Stirring too vigorously or too soon: Over-mixing or whisking creates air bubbles and can break the emulsion, leading to a grainy, separated texture. Always let the chocolate and cream rest first, then stir gently and patiently until smooth.
Using the wrong cream: Light cream, half-and-half, or milk don’t have enough fat content to properly emulsify with chocolate. You must use heavy cream (also called heavy whipping cream) with at least 36% fat content for ganache to work properly.
Not adjusting ratios for white chocolate: White chocolate contains more cocoa butter than dark or milk chocolate, so it requires less cream. If you use the standard 1:1 ratio with white chocolate, your ganache will be too runny and won’t set properly.
Trying to speed up cooling in the refrigerator: While refrigeration seems like a shortcut, it can cause the outside to set while the inside remains liquid, creating an uneven texture. Cool ganache gradually at room temperature, stirring occasionally for even consistency.
Storage & Meal Prep
Ganache stores beautifully, making it perfect for preparing ahead of big baking projects:
Room Temperature Storage: Ganache can sit at room temperature for up to 2 days in a cool kitchen (below 70°F). Cover the surface directly with plastic wrap to prevent a skin from forming. This is ideal if you’re using it within a day or two for frosting cakes.
Refrigerator Storage: Store ganache in an airtight container in the refrigerator for up to 2 weeks. Press plastic wrap directly onto the surface before sealing the container to prevent condensation from affecting the texture. Bring to room temperature before using, or gently rewarm if needed.
Reheating Instructions: To bring cold ganache back to working consistency, scoop it into a bowl and microwave in 10-15 second bursts, stirring between each interval, until smooth and spreadable. Alternatively, place the bowl over a pot of barely simmering water (double boiler method) and stir frequently until melted. Never rush reheating or the ganache may separate.
Texture After Storage: Refrigerated ganache will become quite firm and may need to be rewhipped if you were using it as a whipped frosting. For glazing, you’ll need to rewarm it completely. For spreading, letting it come to room temperature for 30-60 minutes usually does the trick.
Make-Ahead & Freezer Notes
Ganache is one of the most freezer-friendly components in baking, making it perfect for advance preparation:
Freezer Storage: Ganache freezes beautifully for up to 3 months. Pour cooled ganache into a freezer-safe container or heavy-duty freezer bag, removing as much air as possible. Label with the date and type of chocolate used. For easy portioning, freeze ganache in ice cube trays, then transfer the cubes to a freezer bag once solid.
Thawing Instructions: Transfer frozen ganache to the refrigerator and let it thaw overnight (8-12 hours). Then bring it to room temperature on the counter for 1-2 hours before using. Avoid thawing in the microwave, as uneven heating can cause separation.
Make-Ahead Timeline: You can make ganache up to 3-4 days before you need it and store it in the refrigerator. This is actually ideal for events like birthday parties or holidays – make the ganache earlier in the week, then simply bring it to room temperature and use it when you’re ready to assemble your dessert.
Freezing Already-Frosted Cakes: Cakes frosted with ganache freeze exceptionally well. Freeze the frosted cake uncovered for 30 minutes until the ganache is firm, then wrap tightly in plastic wrap and aluminum foil. Freeze for up to 3 months. Thaw overnight in the refrigerator, still wrapped, then unwrap and bring to room temperature before serving.
Best Uses for Frozen Ganache: Frozen ganache works perfectly for truffle-making. Simply thaw until scoopable but still quite firm, scoop into balls, then coat with cocoa powder, nuts, or tempered chocolate.
Serving Suggestions
Ganache’s versatility means it pairs beautifully with countless desserts and applications:
Classic Cake Uses:
- Pour warm ganache over bundt cakes, pound cakes, or angel food cake for an elegant glaze
- Spread room-temperature ganache between cake layers and over the outside for smooth frosting
- Use ganache as a crumb coat before applying buttercream for professional-looking cakes
- Create a drip effect by pouring slightly warm ganache around the edges of a frosted cake
Pastry Applications:
- Fill cream puffs or eclairs with chilled, whipped ganache
- Spread ganache on croissants or pain au chocolat for extra indulgence
- Use as filling for macarons, creating chocolate macarons with ganache centers
- Fill tart shells and top with fresh berries
Simple Dessert Upgrades:
- Drizzle warm ganache over ice cream, brownies, or cheesecake
- Dip strawberries, pretzels, or cookies halfway in ganache
- Layer ganache with whipped cream and crushed cookies for parfaits
- Use as a fondue for fruit and marshmallows
Beverage Pairings:
- Serve ganache-topped desserts with freshly brewed coffee or espresso
- Pair with red wine like Cabernet Sauvignon or Port
- Complement with milk (classic with chocolate) or hot chocolate
- Enjoy alongside dessert cocktails like Irish coffee or chocolate martinis
Garnishing Ideas: Fresh berries, edible flowers, gold leaf, toasted nuts, shaved chocolate, fresh mint leaves, or flaky sea salt all make beautiful finishing touches for ganache-covered desserts.
FAQs Section
Can I use chocolate chips instead of chopped chocolate bars? Yes, you can use chocolate chips, though high-quality chopped chocolate bars typically produce smoother, more luxurious ganache. Chocolate chips contain stabilizers to help them hold their shape during baking, which can slightly affect the texture. If using chips, choose a premium brand without vegetable oils in the ingredients.
Why did my ganache separate or look grainy? Separation usually happens from temperature issues – either the cream was too hot (boiling), causing the emulsion to break, or the mixture wasn’t stirred enough to fully emulsify. To fix separated ganache, add 1-2 tablespoons of warm cream and stir vigorously, or blend with an immersion blender for 30 seconds. Graininess occurs when chocolate isn’t fully melted or when cheap chocolate is used.
How do I make ganache thicker or thinner? To thicken ganache, increase the ratio of chocolate to cream (try 2:1 for firm frosting or truffles). To thin it, add more cream while the ganache is still warm, stirring until incorporated. You can also let ganache sit at room temperature to thicken naturally, or refrigerate to speed up the process. For thinner glaze, gently rewarm and add a splash of warm cream.
Can I make ganache dairy-free or vegan? Absolutely! Replace heavy cream with full-fat coconut cream (not coconut milk, which is too thin). Use the thick, creamy part from the top of a chilled can of coconut cream. Ensure your chocolate is dairy-free as well – many dark chocolates are naturally vegan, but always check the label. The process remains exactly the same.
How far in advance can I make ganache? Ganache can be made 2 weeks ahead and refrigerated, or up to 3 months ahead and frozen. This makes it perfect for planning ahead for parties or events. Just remember to factor in thawing time if frozen (overnight in the fridge) and bringing it to room temperature before use (1-2 hours on the counter).
What’s the difference between ganache and chocolate frosting? Ganache is made simply from chocolate and cream, creating a pure chocolate flavor with a smooth, glossy finish. Traditional chocolate frosting is typically made with butter, powdered sugar, cocoa powder, and milk or cream, resulting in a sweeter, lighter texture. Ganache is richer and more intensely chocolate-flavored, while frosting is fluffier and sweeter.
Can I add butter to ganache? Yes! Adding 1-2 tablespoons of butter to finished ganache creates extra shine and a softer, more luxurious texture. Stir the butter in after the ganache is smooth and emulsified. The butter should be at room temperature for easiest incorporation. This is a professional technique that makes ganache even more decadent.
Conclusion
Congratulations – you now know how to create the same luxurious chocolate ganache that professional pastry chefs rely on every day! This simple two-ingredient recipe opens up endless possibilities for elevating your home baking. Whether you’re preparing an elegant birthday cake, making holiday truffles, or simply want to drizzle something decadent over ice cream, ganache delivers that wow factor with minimal effort.
The beauty of mastering ganache is that it gives you confidence in the kitchen and makes you look like a baking genius with very little actual work. Your friends and family will be amazed at how professional your desserts look and taste, and only you need to know how easy it actually was to achieve those results.
I’d love to hear about your ganache adventures! What will you make first – a drip cake, chocolate truffles, or maybe just a quick glaze for pound cake? Drop a comment below and share your creations. And don’t forget to pin this recipe to your dessert board on Pinterest so you’ll always have it handy when chocolate cravings strike. Happy baking!