The Ultimate Gluten-Free Cookies Recipe: Soft, Chewy & Irresistibly Delicious

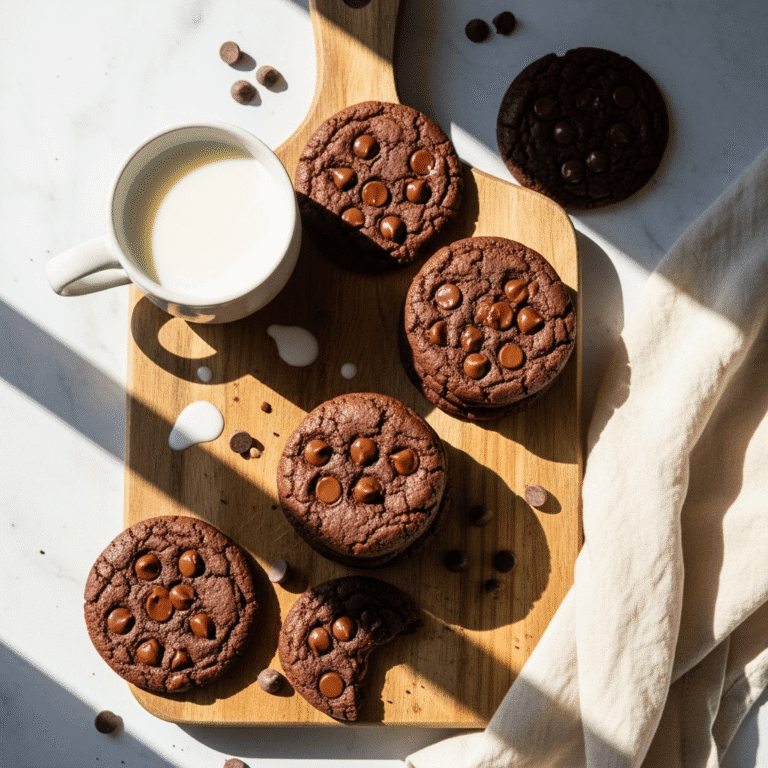
There’s something magical about pulling a tray of freshly baked cookies from the oven—the warm, sweet aroma filling your kitchen, the golden-brown edges promising that perfect chewy texture. Now imagine enjoying all of that without worrying about gluten! These gluten-free cookies are everything a cookie should be: soft and chewy in the center, slightly crisp around the edges, and loaded with chocolatey goodness.
Whether you’re baking for someone with celiac disease, managing a gluten sensitivity, or simply exploring gluten-free baking, this recipe delivers cookies that taste just as amazing as traditional versions. They’re perfect for after-school snacks, holiday cookie exchanges, weekend baking sessions with kids, or anytime you need a comforting sweet treat. The best part? Even your gluten-eating friends won’t believe these cookies are gluten-free—they’re just that good!
This recipe uses simple, accessible ingredients and straightforward techniques that work beautifully every single time. No specialty equipment required, no complicated steps, just delicious homemade cookies that everyone can enjoy together.
History / Background
The story of gluten-free baking is relatively modern, but it’s rooted in necessity and innovation. For centuries, wheat flour was the unquestioned foundation of Western baking, but as medical understanding of celiac disease and gluten intolerance advanced in the 20th century, bakers began experimenting with alternative flours.
Celiac disease was first described in detail by Dr. Samuel Gee in 1888, but it wasn’t until the 1940s that Dutch pediatrician Dr. Willem-Karel Dicke made the connection between wheat consumption and celiac symptoms. This breakthrough opened the door to gluten-free diets as a medical treatment, and with it came the need for gluten-free versions of beloved comfort foods—including cookies.
Early gluten-free cookies were often disappointing: crumbly, dry, or oddly textured. The challenge was that gluten provides structure, elasticity, and that signature chewiness we love in traditional cookies. Without it, bakers had to reimagine everything. Through decades of experimentation, home bakers and professional chefs discovered that blending different gluten-free flours, adding binding agents like xanthan gum, and adjusting fat ratios could recreate that beloved cookie texture.
Today’s gluten-free baking has come incredibly far. With improved flour blends and better understanding of gluten-free chemistry, we can now make cookies that rival any traditional recipe. This particular recipe represents the culmination of that journey—a gluten-free chocolate chip cookie that honors the classic American cookie tradition while being completely accessible to those avoiding gluten.
Why You’ll Love This Recipe
These gluten-free cookies check every box for what makes a cookie truly exceptional. They’re tender yet structured, sweet but not overwhelming, and they deliver that nostalgic cookie experience without any gluten whatsoever.
Here’s why this recipe will become your new favorite:
- Incredible texture – Soft, chewy centers with slightly crisp edges, just like traditional cookies
- Simple ingredients – Uses accessible gluten-free flour blend and pantry staples you likely already have
- Foolproof method – Clear instructions that work every time, perfect for beginner bakers
- No weird aftertaste – Many gluten-free baked goods have an odd flavor, but these taste like classic cookies
- Customizable – Easy to adapt with your favorite mix-ins: chocolate chips, nuts, dried fruit, or candies
- Family-friendly – Kids and adults alike will devour these cookies
- Quick prep – From start to finish, you’re only about 30 minutes away from warm cookies
- Freezer-friendly – Make dough ahead and bake fresh cookies whenever a craving hits
- Budget-conscious – Makes a generous batch without breaking the bank
- Safe for gatherings – Perfect for potlucks, parties, and cookie swaps where dietary restrictions matter
Ingredient Notes
Understanding your ingredients is the key to gluten-free baking success. Here’s what you’ll need and why each component matters:
Gluten-Free Flour Blend: This is your foundation. Use a high-quality 1-to-1 gluten-free baking flour that already contains xanthan gum (like Bob’s Red Mill 1-to-1 or King Arthur Measure for Measure). These blends are formulated to replace all-purpose flour directly. Avoid using single-grain flours like almond flour or coconut flour alone—you need a blend for proper structure. If your blend doesn’t contain xanthan gum, add ¾ teaspoon to the recipe.
Butter: Use real unsalted butter for the best flavor and texture. Butter creates tenderness and rich taste while helping cookies spread properly. Make sure it’s softened to room temperature (should leave a slight indent when pressed). If you’re dairy-free, use a solid dairy-free butter substitute, not oil.
Sugars (Granulated + Brown): The combination is crucial! Granulated sugar helps cookies spread and crisp, while brown sugar adds moisture, chewiness, and a subtle molasses flavor. Don’t replace one with the other—you need both for perfect texture.
Eggs: Eggs provide structure, binding, and moisture. Use large eggs at room temperature (they incorporate better). For egg-free cookies, try flax eggs (1 tablespoon ground flaxseed + 3 tablespoons water per egg, let sit 5 minutes).
Vanilla Extract: Pure vanilla extract adds warmth and enhances the overall flavor. Don’t skip it! Imitation vanilla works in a pinch but won’t taste as rich.
Baking Soda: This leavening agent helps cookies rise and spread. Make sure yours is fresh (test by dropping a bit in vinegar—it should fizz vigorously).
Salt: Essential for balancing sweetness and enhancing all the other flavors. Don’t omit it!
Chocolate Chips: Semi-sweet chocolate chips are classic, but use whatever you love: dark chocolate, milk chocolate, or even white chocolate. Make sure they’re certified gluten-free. You can also substitute with chopped chocolate bars for irregular, melty pockets of chocolate.
Equipment Needed
You don’t need a fancy kitchen to make outstanding gluten-free cookies. Here’s what you’ll need:
- Mixing bowls (1 large, 1 medium)
- Electric mixer (stand mixer or hand mixer—or use a wooden spoon and strong arm!)
- Measuring cups and spoons (accurate measurements matter in gluten-free baking)
- Whisk (for combining dry ingredients)
- Rubber spatula (for scraping bowls and folding in chocolate chips)
- Cookie scoop or tablespoon (for uniform cookies that bake evenly)
- Baking sheets (2 is ideal so you can prep one while another bakes)
- Parchment paper or silicone baking mats (prevents sticking and ensures even browning)
- Wire cooling rack (allows air circulation so cookies don’t get soggy on the bottom)
- Timer (don’t rely on your memory—set a timer!)
Gluten Free Cookies Recipe

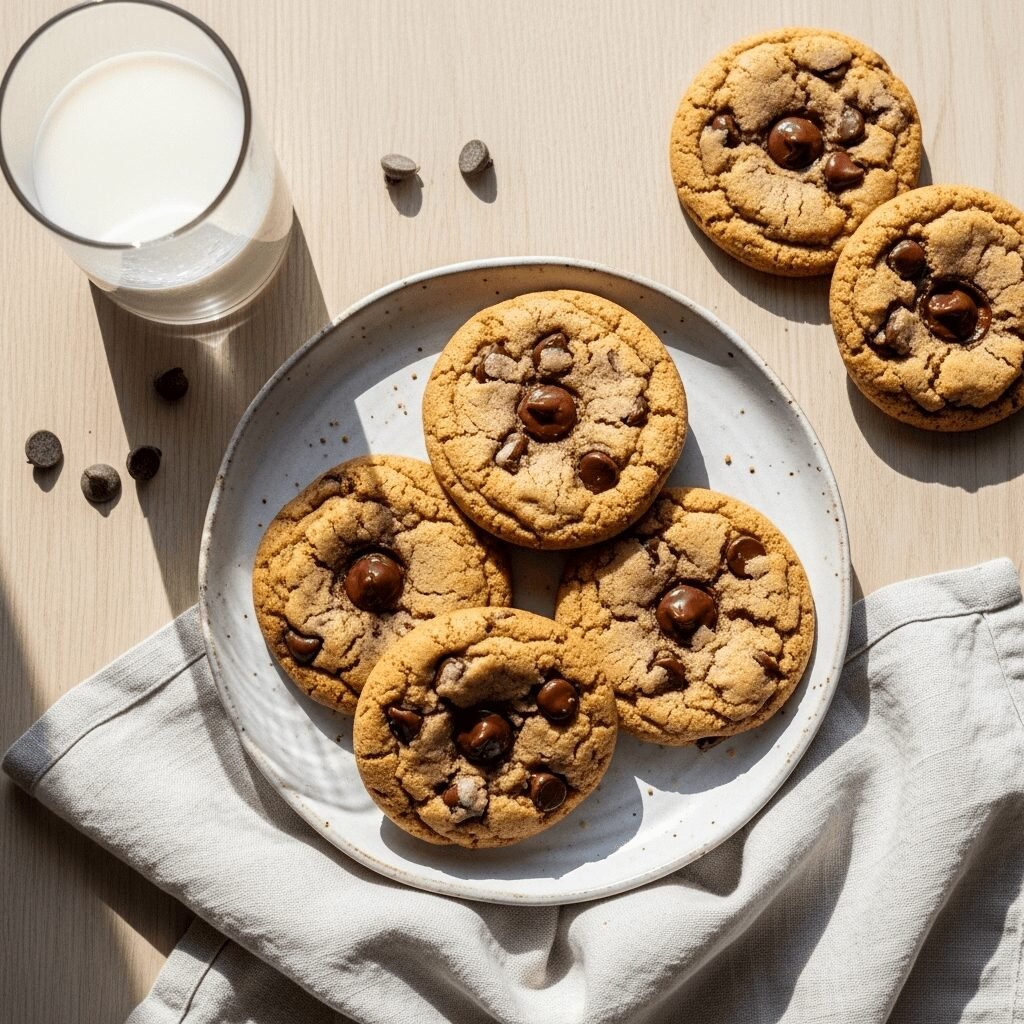
Soft, chewy gluten-free chocolate chip cookies with crispy edges and a tender center. Made with simple ingredients, these cookies taste exactly like traditional chocolate chip cookies—no one will guess they’re gluten-free!
- Prep Time: 15 minutes
- Cook Time: 12 minutes
- Total Time: 27 minutes
- Yield: 24 cookies 1x
- Category: Dessert
- Method: Baking
- Cuisine: American
- Diet: Vegetarian
Ingredients
- 2¼ cups gluten-free 1-to-1 baking flour (with xanthan gum)
- 1 teaspoon baking soda
- 1 teaspoon salt
- 1 cup (2 sticks) unsalted butter, softened to room temperature
- ¾ cup granulated sugar
- ¾ cup packed light brown sugar
- 2 large eggs, room temperature
- 2 teaspoons pure vanilla extract
- 2 cups gluten-free semi-sweet chocolate chips
- ¾ cup chopped walnuts or pecans (optional)
Instructions
- reheat and prepare: Preheat your oven to 375°F (190°C). Line two baking sheets with parchment paper or silicone baking mats and set aside.
- Mix dry ingredients: In a medium bowl, whisk together the gluten-free flour, baking soda, and salt until well combined. This ensures even distribution of leavening agents. Set aside.
- Cream butter and sugars: In a large bowl, use an electric mixer to beat the softened butter, granulated sugar, and brown sugar together on medium-high speed for 3-4 minutes until light and fluffy. This incorporates air and creates a tender texture. Scrape down the sides of the bowl as needed.
- Add eggs and vanilla: Beat in the eggs one at a time, mixing well after each addition. Add the vanilla extract and mix until fully incorporated. The mixture should look smooth and creamy.
- Combine wet and dry: Reduce mixer speed to low. Gradually add the flour mixture to the wet ingredients, mixing just until no flour streaks remain. Don’t overmix, as this can make cookies tough.
- Fold in mix-ins: Using a rubber spatula, gently fold in the chocolate chips (and nuts if using) until evenly distributed throughout the dough.
- Portion the dough: Using a cookie scoop or tablespoon, drop rounded portions of dough onto prepared baking sheets, spacing them about 2 inches apart. For uniform cookies, use a 2-tablespoon cookie scoop.
- Bake: Bake for 10-12 minutes, or until edges are golden brown but centers still look slightly underdone. Don’t overbake! The cookies will continue cooking on the hot pan after removal.
- Cool: Let cookies cool on the baking sheet for 5 minutes (this allows them to set), then transfer to a wire rack to cool completely. They’ll firm up as they cool.
- Enjoy: Serve warm with a glass of cold milk, or store in an airtight container for later enjoyment!
Notes
- Flour matters: Different gluten-free flour blends can produce slightly different results. Stick with 1-to-1 baking blends that contain xanthan gum for best results.
- Don’t overbake: Gluten-free cookies can dry out more easily than traditional cookies. Remove them when centers still look soft.
- Chill dough option: For thicker cookies, refrigerate dough for 30 minutes before baking.
- Check chocolate chips: Always verify your chocolate chips are certified gluten-free, as some brands process them on shared equipment.
Nutrition
- Serving Size: 1 cookie
- Calories: 185
- Sugar: 16g
- Sodium: 145mg
- Fat: 9g
- Saturated Fat: 5g
- Unsaturated Fat: 3.5g
- Trans Fat: 0g
- Carbohydrates: 25g
- Fiber: 1g
- Protein: 2g
- Cholesterol: 30mg
Nutrition information is approximate and based on standard ingredients. Values may vary depending on specific brands used.
Tips & Variations
Make these gluten-free cookies uniquely yours with these delicious variations:
Chocolate Variations:
- Use dark chocolate chunks for a sophisticated, less-sweet cookie
- Mix white and dark chocolate chips for visual appeal
- Add cocoa powder (2 tablespoons) to the dry ingredients for double chocolate cookies
Flavor Twists:
- Substitute 1 teaspoon vanilla with almond or peppermint extract
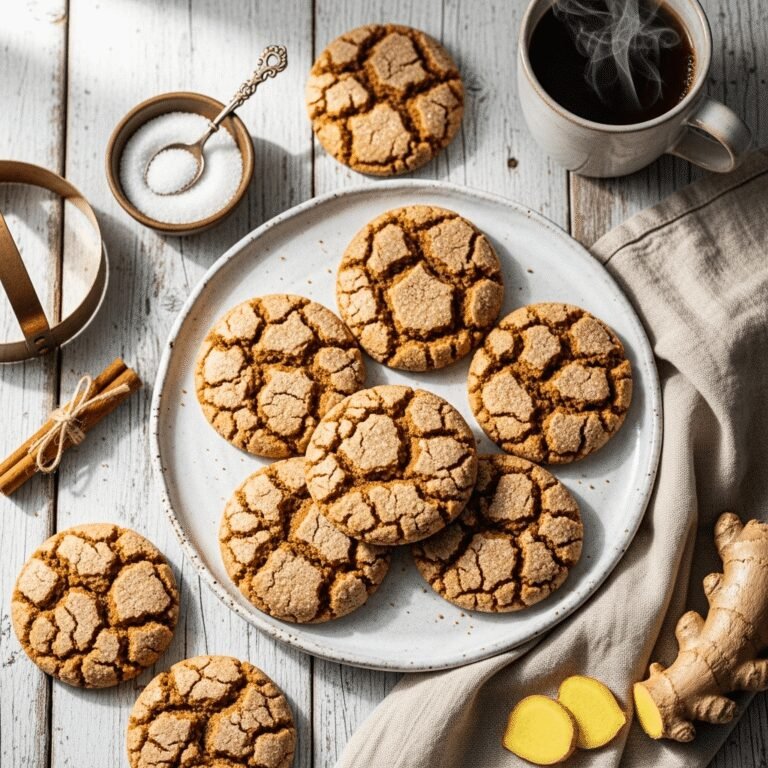
- Add 1 teaspoon cinnamon for warm spiced cookies
- Stir in 1 tablespoon orange zest with the wet ingredients for chocolate-orange cookies
- Mix in 2 tablespoons espresso powder for mocha cookies
Mix-In Options:
- Dried cranberries and white chocolate chips
- Chopped crystallized ginger and dark chocolate
- Butterscotch chips and toasted coconut
- Peanut butter chips and honey-roasted peanuts
- Toffee bits and pecans
Dietary Modifications:
- Dairy-free: Use dairy-free butter and chocolate chips
- Refined sugar-free: Replace with coconut sugar (cookies will be slightly less crispy)
- Lower sugar: Reduce each sugar by ¼ cup (texture will be slightly denser)
- Nut-free: Skip the nuts and add extra chocolate chips
Size Variations:
- Giant cookies: Use ¼ cup dough per cookie, bake 14-16 minutes
- Mini cookies: Use 1 tablespoon dough, bake 8-10 minutes (perfect for parties!)
- Cookie bars: Press dough into a 9×13 pan, bake 25-30 minutes
Pro Chef Tips
Elevate your gluten-free cookies from good to absolutely phenomenal with these professional techniques:
Temperature Control: Room temperature ingredients are crucial. Cold butter won’t cream properly, and cold eggs can cause butter to seize. Plan ahead and leave butter and eggs out for 30-60 minutes before baking.
Brown Your Butter: For next-level flavor, brown the butter first, then let it cool and resolidify in the fridge. Browned butter adds nutty, caramel notes that make cookies irresistible.
Rest the Dough: If you have time, refrigerate the dough for 24-72 hours before baking. This allows the flour to fully hydrate and flavors to develop, resulting in deeper flavor and better texture.
Under-Bake Slightly: The secret to chewy cookies is pulling them when they still look slightly underdone in the center. They’ll finish cooking on the hot pan. Cookies continue baking for 2-3 minutes after removal from the oven.
Use a Kitchen Scale: Measuring flour by weight (255g per cup of GF flour) is more accurate than cups and ensures consistency every time. Gluten-free flour can pack differently, affecting results.
Chill Shaped Dough: After scooping dough onto baking sheets, pop them in the freezer for 10 minutes before baking. This prevents excessive spreading and creates thicker cookies with crispy edges.
Sea Salt Finish: Immediately after removing cookies from the oven, sprinkle them with flaky sea salt. The sweet-salty combination is addictive and restaurant-worthy.
Rotate Your Pans: Halfway through baking, rotate your baking sheet 180 degrees for even browning. Most ovens have hot spots that can cause uneven baking.
Common Mistakes to Avoid
Even experienced bakers can stumble with gluten-free cookies. Here’s what to watch out for:
Using the Wrong Flour: Not all gluten-free flours are created equal. Single-grain flours like almond flour or coconut flour won’t work in this recipe—they have completely different absorption rates and textures. Always use a 1-to-1 gluten-free baking blend designed to replace all-purpose flour. Verify it contains xanthan gum or guar gum (or add your own).
Overmixing the Dough: While traditional cookie dough benefits from gluten development, gluten-free dough doesn’t need (or want) aggressive mixing. Once you add the flour mixture, mix just until combined. Overmixing can lead to tough, dense cookies.
Skipping the Cooling Time on the Pan: This is critical! Gluten-free cookies are more fragile when hot. If you try to transfer them immediately to a cooling rack, they’ll break apart. Let them set on the hot baking sheet for 5 minutes first—they’ll firm up and become easy to handle.
Overbaking: This is the number one gluten-free cookie killer. Gluten-free baked goods dry out more quickly than traditional ones. Remove cookies when the edges are set and golden but centers still look soft and slightly underdone. They’ll continue cooking on the pan.
Not Verifying Gluten-Free Status: Just because something seems naturally gluten-free doesn’t mean it is. Cross-contamination during manufacturing is common. Always check that your chocolate chips, vanilla extract, and other ingredients are certified gluten-free if you’re baking for someone with celiac disease.
Wrong Butter Temperature: Butter should be soft enough to leave an indent when pressed but still hold its shape. If it’s too cold, it won’t cream properly. If it’s too warm or melted, your cookies will spread too thin and turn greasy.
Storage & Meal Prep
Proper storage keeps your gluten-free cookies fresh and delicious for days:
Room Temperature Storage: Store completely cooled cookies in an airtight container at room temperature for up to 5 days. Place parchment paper between layers to prevent sticking. Add a slice of bread to the container—it will keep cookies soft by releasing moisture (replace the bread every couple of days).
Refrigerator Storage: While not necessary, refrigerating cookies can extend their life to 1 week. Bring to room temperature or warm slightly before serving for best flavor and texture.
Reheating: To recapture that fresh-baked magic, microwave individual cookies for 8-10 seconds or warm in a 300°F oven for 3-5 minutes. This softens them and makes the chocolate chips melty again.
Cookie Dough Storage: Unbaked dough can be refrigerated in an airtight container for up to 3 days. In fact, chilling improves flavor! Let dough sit at room temperature for 10 minutes before scooping if it’s too firm.
Keeping Cookies Soft: If your cookies start to harden, place them in an airtight container with a damp paper towel (not touching the cookies) overnight. The cookies will absorb moisture and soften.
Make-Ahead & Freezer Notes
These gluten-free cookies are incredibly freezer-friendly, making them perfect for advance preparation:
Freezing Baked Cookies: Let cookies cool completely, then freeze in a single layer on a baking sheet for 1 hour. Transfer frozen cookies to a freezer-safe bag or container, separating layers with parchment paper. Freeze for up to 3 months. Thaw at room temperature for 30 minutes or microwave for 15-20 seconds.
Freezing Cookie Dough (Recommended!): This is my favorite make-ahead method. Scoop dough into balls and freeze on a parchment-lined baking sheet until solid (about 2 hours). Transfer frozen dough balls to a freezer bag. Freeze for up to 4 months. Bake directly from frozen—just add 1-2 minutes to the baking time. This means you can have fresh-baked cookies anytime with zero extra effort!
Freezing Dough in Bulk: You can also freeze the entire batch of dough in an airtight container or freezer bag. Thaw overnight in the refrigerator, then let sit at room temperature for 15-20 minutes before scooping and baking.
Why Freeze Cookie Dough? Freezing dough actually improves cookies! The cold temperature prevents spreading, creating thicker cookies. Plus, the resting time allows flavors to deepen. Many professional bakeries freeze their cookie dough for this reason.
Emergency Cookies: Keep a stash of frozen dough balls on hand for unexpected guests, sudden cravings, or when you need a quick dessert. You’re always 15 minutes away from warm, homemade cookies!
Serving Suggestions
These gluten-free cookies are delicious on their own, but here are some ways to make them even more special:
Classic Pairings:
- Serve warm with a tall glass of cold milk (dairy or non-dairy)
- Pair with a hot cup of coffee or espresso for an afternoon treat
- Enjoy with herbal tea—chamomile and mint complement chocolate beautifully
Dessert Upgrades:
- Make ice cream sandwiches by sandwiching vanilla or chocolate ice cream between two cookies
- Crumble over vanilla ice cream for an instant sundae
- Serve alongside fresh berries and whipped cream for a simple dessert platter
- Warm and top with a scoop of ice cream for a cookie skillet dessert
Special Occasion Ideas:
- Pack in decorative tins or bags for homemade gifts
- Create a cookie platter with multiple varieties for parties
- Serve with hot chocolate and marshmallows for a cozy winter treat
- Include in dessert charcuterie boards with fresh fruit, chocolate, and nuts
Kid-Friendly Options:
- Lunch box treats (they stay fresh all day)
- After-school snacks with apple slices and peanut butter
- Birthday party dessert that everyone can enjoy
- Bedtime snack with warm milk
Beverage Pairings:
- Rich, bold coffee
- Chai tea or spiced lattes
- Hot chocolate with whipped cream
- Red wine (cabernet sauvignon or merlot pair wonderfully with chocolate)
FAQs Section
Can I use regular all-purpose flour instead of gluten-free flour?
Yes! If you don’t need these cookies to be gluten-free, you can substitute regular all-purpose flour 1:1 for the gluten-free flour blend. The texture will be slightly different (traditional flour creates more chew due to gluten development), but the cookies will still be delicious. Follow the exact same instructions.
Why are my gluten-free cookies crumbly and falling apart?
This usually happens for two reasons: overbaking (gluten-free cookies dry out quickly) or using a flour blend without xanthan gum or guar gum. Make sure your flour blend contains a binding agent, or add ¾ teaspoon xanthan gum to the recipe. Also, let cookies cool completely on the baking sheet before moving them—they’re fragile when warm.
Can I make these cookies without eggs?
Absolutely! For each egg, substitute with a flax egg: mix 1 tablespoon ground flaxseed with 3 tablespoons water, let sit for 5 minutes until gelled. The cookies will be slightly denser but still delicious. Alternatively, try ¼ cup unsweetened applesauce per egg, though this will make softer cookies.
My cookies spread too much. How do I fix this?
Several factors cause excessive spreading: butter that’s too warm, baking at too low a temperature, or not enough flour. Make sure butter is softened but still firm, verify your oven temperature with an oven thermometer (many run cool), and measure flour accurately. The best fix: chill scooped dough balls for 15 minutes in the freezer before baking.
How do I know when gluten-free cookies are done?
Look for golden-brown edges while the centers still appear slightly soft and underdone. Remove them at this point—they’ll continue cooking on the hot baking sheet. If you wait until the centers look fully cooked, they’ll be overbaked and dry once they cool.
Can I reduce the sugar in this recipe?
You can reduce each sugar by up to ¼ cup, but this will affect texture. Sugar doesn’t just add sweetness—it helps cookies spread, crisp, and stay moist. Reduced-sugar cookies will be denser and cakier. If you try it, add 1-2 tablespoons more butter to compensate for lost moisture.
What’s the best gluten-free flour brand for cookies?
Bob’s Red Mill 1-to-1 Baking Flour and King Arthur Measure for Measure Flour are consistently reliable for cookies. Both contain xanthan gum and are specifically designed to replace all-purpose flour. Avoid pure rice flour blends, as they can be gritty.
Conclusion
There you have it—the ultimate gluten-free chocolate chip cookie recipe that delivers everything you crave in a cookie: soft, chewy texture, rich chocolatey goodness, and that irresistible homemade taste. Whether you’re managing celiac disease, avoiding gluten by choice, or simply looking for an amazing cookie recipe, these beauties will not disappoint.
The best part about this recipe is its versatility. Make them exactly as written, or experiment with the variations and tips to create your own signature cookie. Add nuts, swap chocolates, play with extracts—this recipe is forgiving and fun to customize.
I’d love to hear how your cookies turn out! Drop a comment below sharing your experience, and don’t forget to rate this recipe if you try it. Did you add any special mix-ins? Did you make any modifications? Your feedback helps other bakers and inspires new recipe ideas.
Ready to bake? Pin this recipe to your favorite Pinterest board so you can find it whenever a cookie craving strikes. Share it with friends who are gluten-free or anyone who loves a good homemade cookie. Let’s spread the joy of delicious, inclusive baking!
Happy baking, and enjoy every warm, chocolate-chip-studded bite! 🍪