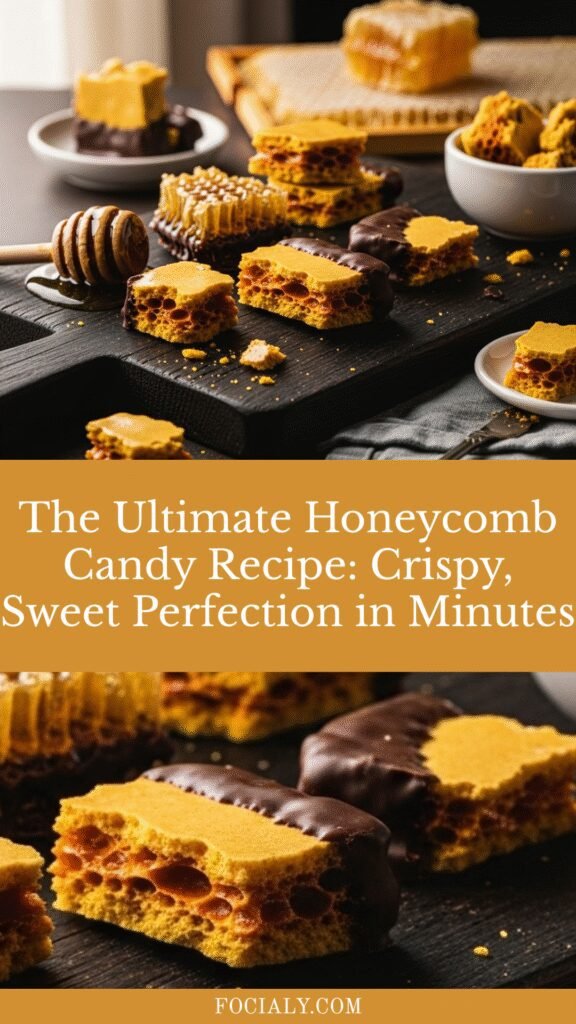
The Ultimate Honeycomb Candy Recipe: Crispy, Sweet Perfection in Minutes
Have you ever bitten into a piece of honeycomb candy and marveled at its magical, airy crunch? This spectacular treat, also known as sponge candy, cinder toffee, or hokey pokey, is one of the most delightful confections you can make at home. With just a handful of simple ingredients and about 15 minutes of your time, you can create this show-stopping candy that looks like it came straight from a gourmet chocolatier.
Honeycomb candy is perfect for gift-giving during holidays, special occasions like birthdays and anniversaries, or simply as a sweet indulgence when you’re craving something truly special. It’s also an incredibly fun project to tackle with kids (with proper supervision around the hot sugar, of course), as they’ll be absolutely amazed watching the mixture bubble up and transform into golden, crunchy perfection. Whether you dip it in chocolate, crumble it over ice cream, or enjoy it plain, this homemade honeycomb candy recipe will become your go-to treat for impressing friends and family.
History / Background
Honeycomb candy has a fascinating history that spans multiple continents and cultures, with each region claiming its own special version of this beloved confection. The treat likely originated in the late 19th century, though pinpointing its exact birthplace is difficult since similar versions appeared simultaneously in different parts of the world.
In the United Kingdom, it’s known as “cinder toffee” or “honeycomb toffee” and has been a traditional sweet shop staple for generations. The name “cinder toffee” comes from its resemblance to volcanic rock or cinders, with its porous, bubbly texture. In New Zealand and parts of Australia, this candy is called “hokey pokey,” and it’s often mixed into vanilla ice cream to create the wildly popular hokey pokey ice cream flavor.
Americans know it as “sponge candy,” particularly popular in Buffalo, New York, where it’s considered a regional specialty. Many Buffalo-area candy shops have been making their own versions for over a century, with family recipes passed down through generations. In South Korea, a version called “dalgona” became internationally famous through the Netflix series “Squid Game,” though their version is slightly different and typically made with just sugar and baking soda.
The science behind honeycomb candy is just as fascinating as its history. When baking soda (sodium bicarbonate) is added to hot sugar syrup, it undergoes thermal decomposition, releasing carbon dioxide gas. These bubbles get trapped in the viscous sugar mixture, creating that signature airy, honeycomb-like structure. It’s a perfect example of kitchen chemistry in action, turning simple pantry staples into something that looks and tastes extraordinary.
Why You’ll Love This Recipe
This homemade honeycomb candy recipe is about to become your new favorite kitchen project, and here’s why: imagine creating a candy that looks incredibly impressive but requires only four basic ingredients and minimal equipment. The transformation from bubbling sugar syrup to crispy, golden candy happens right before your eyes, making it one of the most satisfying recipes you’ll ever make.
Here’s what makes this honeycomb candy recipe absolutely irresistible:
- Incredibly simple with just 4 ingredients – sugar, corn syrup, honey, and baking soda are all you need
- Ready in just 15 minutes from start to finish, making it perfect for last-minute gift-giving
- Kid-friendly project that teaches basic kitchen chemistry while creating something delicious
- Endlessly customizable – dip in chocolate, add flavor extracts, or crush over desserts
- Budget-friendly – costs just pennies per batch using pantry staples you likely already have
- Impressive presentation – looks like expensive gourmet candy but costs a fraction of the price
- No candy thermometer required for beginners, though it does help ensure perfect results
- Perfect for holidays – makes beautiful homemade gifts that everyone will love
- Gluten-free and vegetarian-friendly naturally, accommodating many dietary preferences
- Foolproof texture – follows simple visual cues that guarantee success every time
Ingredient Notes
Let’s break down the simple ingredients that create this magical candy and understand why each one plays such an important role:
Granulated Sugar: This is the foundation of your honeycomb candy, providing the structure and sweetness. The sugar caramelizes as it heats, giving the candy its beautiful golden color and deep, toffee-like flavor. Don’t substitute with coconut sugar or brown sugar, as they contain too much moisture and will prevent proper crystallization.
Light Corn Syrup: This ingredient is crucial for preventing crystallization and ensuring your honeycomb stays smooth rather than grainy. Corn syrup keeps the sugar molecules from bonding together too tightly, resulting in that perfect, glass-like texture. If you can’t find corn syrup, you can substitute with golden syrup or glucose syrup in equal amounts.
Honey: Beyond adding a subtle floral sweetness, honey contributes to the candy’s distinctive flavor and helps with browning. It also adds viscosity to the syrup, which helps trap those carbon dioxide bubbles more effectively. Use any mild-flavored honey; avoid strongly flavored varieties like buckwheat honey, which can overpower the delicate taste.
Baking Soda: This is where the magic happens! Baking soda is absolutely essential and cannot be substituted. When it hits the hot sugar syrup, it immediately starts releasing carbon dioxide gas, creating thousands of tiny bubbles that give honeycomb its signature airy texture. Make sure your baking soda is fresh (less than 6 months old) for the best rise. Sift it beforehand to prevent lumps that could create uneven bubbles.
Equipment Needed
Having the right tools ready before you start is essential for honeycomb candy success, since the process moves quickly once you begin. Here’s everything you’ll need:
- Medium heavy-bottomed saucepan (2-3 quart capacity) – Heavy-bottomed pans distribute heat evenly and prevent hot spots
- Candy thermometer (optional but highly recommended) – Takes the guesswork out of determining when your syrup is ready
- Wooden spoon or heat-resistant silicone spatula – For stirring the sugar mixture
- Whisk – Specifically for quickly incorporating the baking soda
- 9×13-inch baking pan – Or any similar-sized pan with sides
- Parchment paper or silicone baking mat – Essential for easy removal and cleanup
- Measuring cups and spoons – Accuracy matters in candy making
- Fine-mesh sieve – For sifting the baking soda to prevent lumps
- Cooling rack – To place under your pan for air circulation
- Sharp knife or kitchen scissors – For breaking the cooled candy into pieces
Honeycomb Candy Recipe

This homemade honeycomb candy recipe creates perfectly crispy, golden confection with an airy, melt-in-your-mouth texture. Made with just four simple ingredients, this sponge candy is ideal for gift-giving, dessert topping, or enjoying plain as a sweet treat.
- Prep Time: 5 minutes
- Cook Time: 10 minutes
- Total Time: 15 minutes (plus 1 hour cooling time)
- Yield: About 24-30 pieces (approximately 1 pound) 1x
- Category: Dessert, Candy, Confection
- Method: Stovetop, Candy Making
- Cuisine: British, American
- Diet: Vegetarian
Ingredients
- 1 cup (200g) granulated sugar
- ¼ cup (60ml) light corn syrup
- ¼ cup (85g) honey
- 1 tablespoon (15g) baking soda, sifted
Instructions
- Prepare your workspace: Line a 9×13-inch baking pan with parchment paper, allowing overhang on the sides for easy removal. Place the pan on a heat-resistant surface or cooling rack. Have your sifted baking soda measured and ready in a small bowl with a whisk nearby.
- Combine the sugar mixture: In a medium heavy-bottomed saucepan, combine the sugar, corn syrup, and honey. Stir gently with a wooden spoon over medium heat until the sugar completely dissolves, about 2-3 minutes.
- Bring to a boil: Once dissolved, stop stirring and increase heat to medium-high. Allow the mixture to boil without stirring until it reaches 300°F (150°C) on a candy thermometer, about 5-7 minutes. The mixture will bubble vigorously and turn a deep amber color. If you don’t have a thermometer, test by dropping a small amount into cold water – it should form hard, brittle threads.
- Add the baking soda: The moment your mixture reaches 300°F, immediately remove from heat. Working quickly, add the sifted baking soda all at once and whisk vigorously for 3-5 seconds. The mixture will foam up dramatically – this is exactly what you want! Don’t over-mix or you’ll deflate the bubbles.
- Pour immediately: Quickly pour the foaming mixture into your prepared pan. Do not spread it or manipulate it – just let it flow naturally and settle on its own. The candy will continue to expand and bubble for a few seconds.
- Cool completely: Allow the honeycomb to cool at room temperature for at least 1 hour, or until completely hard and cooled through. Don’t move the pan or touch the candy during this time.
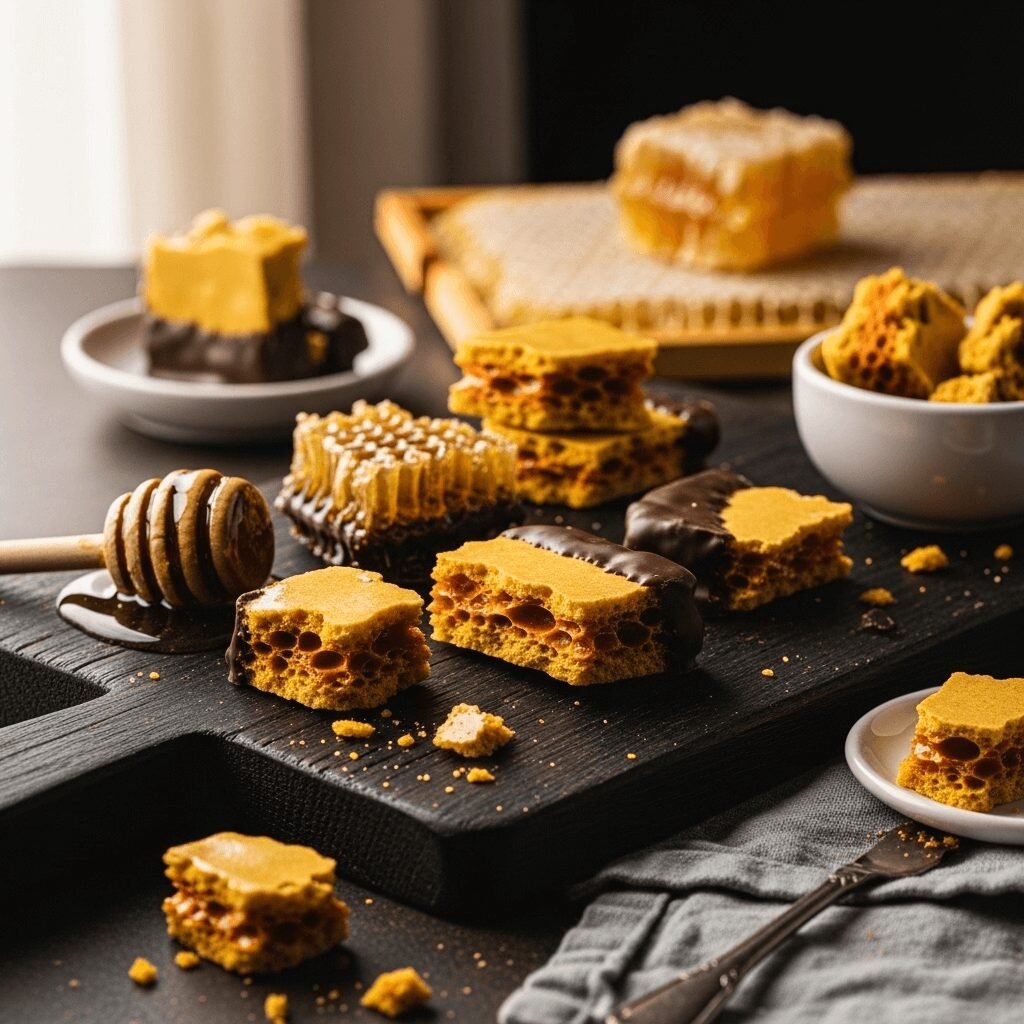
- Break into pieces: Once fully cooled, lift the honeycomb out of the pan using the parchment overhang. Break it into irregular pieces with your hands or use a sharp knife to cut it into more uniform shapes. Store immediately in an airtight container.
Notes
- Temperature is crucial: Under-cooked honeycomb will be sticky and chewy; overcooked will taste burnt. Aim for that perfect 300°F sweet spot.
- Humidity matters: Honeycomb candy is hygroscopic (absorbs moisture from air), so avoid making it on humid days if possible.
- Work quickly: Once you add the baking soda, you have only seconds to pour before it begins to set.
- Fresh baking soda is essential: Old baking soda won’t create enough bubbles for proper texture.
- Don’t double the recipe: The pan size and timing won’t scale well. Make multiple batches instead.
Nutrition
- Serving Size: 2 pieces (approximately 30g) Servings per Recipe: 12-15
- Calories: 145
- Sugar: 28g
- Sodium: 180mg
- Fat: 0g
- Saturated Fat: 0g
- Unsaturated Fat: 0g
- Trans Fat: 0g
- Carbohydrates: 37g
- Fiber: 0g
- Protein: 0g
- Cholesterol: 0mg
Note: Nutrition information is approximate and based on 15 servings.
Tips & Variations
Chocolate-Dipped Honeycomb: Melt 12 ounces of dark, milk, or white chocolate and dip each piece halfway, then place on parchment paper to set. This is absolutely divine and makes the candy look incredibly professional.
Flavored Variations: Add ½ teaspoon of vanilla extract, almond extract, or peppermint extract to the sugar mixture just before adding the baking soda for a flavor twist. Coffee extract creates an amazing mocha honeycomb.
Sea Salt Honeycomb: Sprinkle flaky sea salt over the hot honeycomb immediately after pouring for a sophisticated sweet-and-salty version that rivals any gourmet candy shop.
Crushed Honeycomb Topping: Pulse broken honeycomb pieces in a food processor to create a crunchy topping for ice cream, cupcakes, cheesecakes, or yogurt parfaits.
Honeycomb Bark: Pour melted chocolate over a parchment-lined pan, press honeycomb pieces into it, and let set for an easy, impressive bark-style confection.
Smaller Batch: Halve all ingredients and use an 8×8-inch pan if you want to make less candy, though be extra careful with timing as the smaller amount cooks faster.
Pro Chef Tips
Monitor your weather: Professional candy makers avoid humid days when making honeycomb. If you must make it on a humid day, store the finished candy immediately in an airtight container with a silica gel packet to absorb moisture.
Use a light-colored pan: Dark pans absorb more heat and can cause your sugar to cook unevenly or burn. A heavy stainless steel pan is ideal for even heat distribution.
Don’t scrape the pan: When pouring the foamed mixture into your prepared pan, let it flow naturally and don’t scrape the sides of the saucepan. Those bits that stick are often over-cooked and can create hard, dark spots in your candy.
Create a water bath backup: Keep a large bowl of ice water near your workspace. If your sugar mixture starts smoking or approaching burnt territory, you can immediately plunge the bottom of the pan into the ice water to stop the cooking.
Test your thermometer: Before starting, test your candy thermometer’s accuracy by placing it in boiling water – it should read 212°F (100°C) at sea level. Adjust your target temperature accordingly if it reads differently.
The “cold water test” technique: If you don’t have a thermometer, drop a tiny bit of the syrup into cold water. At the correct temperature (hard crack stage), it should form brittle threads that snap easily.
Add color naturally: For a deeper amber color, let your sugar cook an extra 30 seconds to 1 minute (watch carefully to avoid burning). This also intensifies the caramelized flavor.
Common Mistakes to Avoid
Stirring after the sugar dissolves: Once your sugar mixture comes to a boil, resist the urge to stir! Stirring can cause crystallization, which creates a grainy texture instead of smooth, glass-like candy. Let it boil undisturbed.
Using old baking soda: Baking soda loses its potency over time. If yours is more than six months old, it won’t create enough bubbles, resulting in dense, hard candy instead of light, airy honeycomb. Always use fresh baking soda and sift it to remove any lumps.
Adding baking soda too slowly: When you add the baking soda, dump it in all at once and whisk quickly for just a few seconds. Adding it gradually or mixing too long will deflate the bubbles and ruin the honeycomb texture. Speed is your friend here!
Not preparing everything in advance: Honeycomb making happens fast! If you’re still looking for your parchment paper when the sugar hits temperature, you’re in trouble. Have everything measured, sifted, and in position before you even turn on the stove.
Touching or moving the candy too soon: It’s tempting to poke at the bubbling, expanding candy, but don’t! Let it cool completely undisturbed for at least an hour. Moving it too soon can cause it to collapse or develop a sticky texture.
Making honeycomb on a rainy day: Sugar is hygroscopic, meaning it absorbs moisture from the air. On humid days, your honeycomb will turn sticky and soft much faster. Save this recipe for dry, low-humidity days when possible.
Storage & Meal Prep
Proper storage is absolutely critical for maintaining honeycomb candy’s signature crispy texture. As soon as your candy is completely cooled and broken into pieces, transfer it immediately to an airtight container. Glass jars with tight-fitting lids or plastic containers with snap-on lids work perfectly.
Room Temperature Storage: Honeycomb candy will stay fresh and crispy for up to 2 weeks when stored properly at room temperature in an airtight container. Place parchment paper between layers if stacking to prevent sticking. Keep the container in a cool, dry place away from direct sunlight and definitely away from the stove or any heat sources.
The Moisture Problem: The biggest enemy of honeycomb candy is moisture. Even brief exposure to humid air can make it sticky and chewy. For this reason, don’t store honeycomb in the refrigerator – the cold environment actually contains a lot of moisture that will ruin the texture.
Extending Freshness: If you live in a particularly humid climate, add a food-safe silica gel packet (the kind that comes in vitamin bottles) to your storage container. This will absorb any moisture and help keep your candy crispy longer.
Reheating Tips: If your honeycomb does become slightly sticky, you can try to revive it by spreading pieces on a parchment-lined baking sheet and placing in a 200°F (93°C) oven for 5-10 minutes. Let cool completely before storing again. However, this doesn’t always work perfectly, so prevention through proper storage is best.
Chocolate-Dipped Storage: If you’ve dipped your honeycomb in chocolate, store it the same way but note that it will stay fresh slightly longer (up to 3 weeks) because the chocolate creates an additional barrier against moisture.
Make-Ahead & Freezer Notes
While honeycomb candy is incredibly quick to make, you can definitely prepare it in advance for special occasions or gift-giving.
Making in Advance: Honeycomb candy is actually an ideal make-ahead treat. Prepare it up to 2 weeks before you need it and store it in an airtight container as described above. This makes it perfect for holiday baking marathons – you can check it off your list early and focus on last-minute items later.
Freezing Honeycomb: Here’s the honest truth – freezing honeycomb candy is not recommended. The freezer environment contains moisture, and when you bring the candy to room temperature, condensation will form and make it sticky. Additionally, the extreme temperature changes can cause the delicate structure to crack in unwanted ways.
Gift Packaging Timeline: If you’re making honeycomb for gifts, prepare the candy 1-2 days before packaging. This ensures it’s completely fresh and crispy when you wrap it up. Package it in cellophane bags with tight ties, mason jars with sealed lids, or decorative tins with fitted lids. Include a small silica gel packet if giving as a gift that might sit for a while.
Best Reheating Method: As mentioned in the storage section, if your honeycomb loses its crispness, a brief stint in a low-temperature oven (200°F/93°C for 5-10 minutes) can sometimes restore the texture. However, this is more of a rescue operation than a proper reheating method, as honeycomb is meant to be enjoyed at room temperature, not warm.
Pre-Measuring Ingredients: If you want to prep even further ahead, you can measure out your sugar, corn syrup, and honey mixture in advance and store it in an airtight container at room temperature for up to a month. Just measure and sift the baking soda fresh on the day you’re actually making the candy, as pre-measured baking soda can clump or lose potency.
Serving Suggestions
Honeycomb candy is incredibly versatile and can be enjoyed in so many delicious ways beyond eating it plain (though that’s pretty wonderful too!).
Classic Pairings: Serve honeycomb candy alongside hot coffee, espresso, or tea for an elegant afternoon treat. The candy pairs beautifully with the slight bitterness of coffee, creating a perfect balance of flavors.
Ice Cream Topping: Crush or crumble honeycomb candy over vanilla, chocolate, or caramel ice cream for an incredibly indulgent dessert. The contrast of cold, creamy ice cream with crispy, crunchy candy is absolutely divine.
Dessert Garnish: Use small pieces of honeycomb as an elegant garnish for cakes, cupcakes, panna cotta, cheesecake, or mousse. It adds both visual appeal and textural interest to plated desserts.
Hot Chocolate Stirrer: Place a piece of honeycomb candy on a spoon and use it to stir hot chocolate. As it slowly dissolves, it adds sweetness and a subtle honey flavor to your drink.
Cheese Board Addition: Believe it or not, honeycomb candy is stunning on a cheese board! Pair it with sharp cheddar, aged gouda, or blue cheese for a sophisticated sweet-and-savory combination that will impress guests.
With Fresh Fruit: Serve honeycomb alongside fresh berries, sliced pears, or apple wedges for a lighter dessert option that still feels special and indulgent.
Milkshake Mix-In: Blend crushed honeycomb into vanilla or chocolate milkshakes for incredible texture and flavor. It creates pockets of crunchy candy throughout the shake.
Gift Presentation: Package honeycomb candy in clear cellophane bags tied with ribbon, mason jars with fabric toppers, or decorative tins for beautiful homemade gifts that anyone would be thrilled to receive.
FAQs Section
Can I make honeycomb candy without corn syrup?
Yes, you can substitute golden syrup (like Lyle’s) or glucose syrup in equal amounts. However, do not use maple syrup, agave, or honey as a substitute – these won’t prevent crystallization properly. Some people successfully use liquid glucose, but corn syrup remains the easiest option for beginners and gives the most consistent results.
Why did my honeycomb turn out sticky instead of crispy?
Stickiness is almost always a moisture issue. The most common causes are: 1) Making candy on a humid day, 2) Not cooking the sugar to the proper temperature (300°F), 3) Storing improperly in a non-airtight container, or 4) Refrigerating the candy. Always make honeycomb on dry days and store in airtight containers with silica gel packets if possible.
Can I add food coloring to honeycomb candy?
While you technically can add gel food coloring to the sugar mixture before cooking, it’s not recommended. The high heat can cause many food colorings to change or darken unpredictably. If you want colored honeycomb, your best bet is to coat it with colored chocolate or dust the finished pieces with edible luster dust.
How do I know when the sugar is ready without a thermometer?
Use the cold water test: Drop a small amount of the sugar syrup into a bowl of very cold water. At the hard crack stage (300°F/150°C), the syrup should immediately harden and form brittle threads that snap cleanly when you bend them. If it’s still pliable or chewy, continue cooking.
Why didn’t my honeycomb bubble up and foam?
This usually happens for one of three reasons: 1) Your baking soda was old or inactive, 2) The sugar mixture wasn’t hot enough when you added the baking soda, or 3) You over-mixed the baking soda, deflating the bubbles. Make sure you’re using fresh, sifted baking soda, reaching exactly 300°F, and whisking for only 3-5 seconds.
Is honeycomb candy gluten-free?
Yes! When made with the ingredients listed in this recipe, honeycomb candy is naturally gluten-free. However, if you’re dipping it in chocolate, check the chocolate label to ensure it’s certified gluten-free, as some chocolate products can contain gluten-containing ingredients.
Can I use dark or brown sugar instead of white sugar?
It’s not recommended. Brown sugar contains molasses and extra moisture, which will prevent proper crystallization and can make your honeycomb sticky or cause it to collapse. Dark brown sugar will also give you a much darker color and stronger molasses flavor that overpowers the delicate honey notes. Stick with regular granulated white sugar for best results.
Conclusion
There’s something truly magical about making honeycomb candy at home – watching simple pantry ingredients transform into golden, crispy, cloud-like confection never gets old, no matter how many times you make it. This easy honeycomb candy recipe proves that impressive, gourmet-quality treats don’t have to be complicated or require professional equipment. With just four ingredients, fifteen minutes of active time, and a little kitchen chemistry magic, you can create something that looks like it came from an expensive candy boutique.
Whether you’re making a batch for holiday gifts, creating a show-stopping dessert topping, or simply treating yourself to something special, this homemade honeycomb candy recipe delivers every single time. The crispy, airy texture combined with deep caramelized sweetness and subtle honey notes makes it absolutely irresistible.
Now it’s your turn to experience the joy of making this incredible candy! Give this recipe a try and watch the magic happen in your own kitchen. Don’t forget to snap a photo of your beautiful golden honeycomb and share it on Pinterest so others can discover this amazing recipe too. Leave a comment below to let me know how your honeycomb turned out – I love hearing about your candy-making adventures!
Happy cooking, and may your honeycomb always be perfectly crispy and delicious!