Japanese Cotton Cheesecake: Fluffy Soufflé Cheesecake Recipe

Imagine slicing into a cheesecake so light and airy it practically melts on your tongue, with a delicate texture that’s somewhere between a cloud and the silkiest custard you’ve ever tasted. That’s the magic of Japanese cotton cheesecake—a dessert that’s taken the world by storm with its impossibly fluffy texture and subtly sweet flavor that’s far less heavy than traditional American cheesecake.
This Japanese soufflé cheesecake recipe creates a dessert that jiggles when you move the pan, has a golden-brown top that’s slightly caramelized, and offers a taste experience unlike any other cheesecake you’ve tried. Also known as “soufflé cheesecake” or “jiggly cheesecake,” this ethereal dessert combines the tangy richness of cream cheese with the airy lightness of a soufflé, creating something truly extraordinary.
Perfect for special occasions, afternoon tea parties, elegant dinner party desserts, or anytime you want to impress guests with something unique and delicious, this fluffy Japanese cheesecake serves 8-10 people. While it requires a bit more technique than regular cheesecake—specifically mastering the meringue and water bath method—the result is absolutely worth every careful step. Once you nail this recipe, you’ll have a showstopper dessert that looks as impressive as it tastes.
History / Background
Japanese cotton cheesecake, or “soufflé cheesecake” (スフレチーズケーキ), was created in Japan in the 1960s-1970s as Japanese pastry chefs sought to create a lighter version of the dense, rich American-style cheesecake. The exact origin is debated, but most food historians credit Tomotaro Kuzuno, the owner of Uncle Rikuro’s cheesecake shop in Osaka, with popularizing this style in the 1980s.
The Japanese have always had a preference for desserts that are less sweet and lighter in texture than their Western counterparts. When cheesecake was introduced to Japan after World War II, bakers began experimenting with ways to make it more suitable to Japanese tastes. They incorporated techniques from French pastry-making, particularly the use of whipped egg whites (meringue) to create lift and airiness, similar to a soufflé.
The result was revolutionary—a cheesecake that retained the tangy cream cheese flavor but featured an incredibly soft, fluffy texture that practically dissolved in your mouth. The Japanese added their own twist by baking it in a water bath (bain-marie), which ensures even, gentle heat distribution and prevents cracking, resulting in that signature smooth top and jiggly texture.
Uncle Rikuro’s in Osaka became famous for their version, which they served warm and fresh from the oven, creating massive lines of customers waiting for the freshly baked cheesecakes. The trend spread throughout Japan, with variations appearing in bakeries, cafes, and department stores across the country.
In the 2010s, videos of “jiggly” Japanese cheesecake went viral on social media, captivating viewers worldwide with footage of the cakes wiggling like jelly when gently shaken. This sparked international interest, and Japanese cotton cheesecake shops began opening in cities around the globe. Today, it’s a beloved dessert that represents the Japanese philosophy of refinement and lightness in confectionery.
The “cotton” in the name refers to the incredibly soft, cotton-like texture that seems to melt away the moment it touches your tongue—a texture achieved through careful technique, precise temperature control, and the magic of properly whipped meringue.
Why You’ll Love This Recipe
This Japanese cotton cheesecake recipe is the perfect introduction to this ethereal dessert. While it requires more attention than a standard cheesecake, the technique is straightforward once you understand the key steps, and the result is absolutely spectacular—guaranteed to wow anyone who tries it.
Here’s why this recipe will become your go-to for special occasions:
- Incredibly Light & Fluffy: Tastes like eating a sweet, creamy cloud
- Less Sweet Than Regular Cheesecake: Perfect for those who find traditional cheesecake too rich
- Impressive Presentation: That signature jiggle makes it Instagram-worthy and dinner-party ready
- Unique Texture Experience: Unlike any other cheesecake you’ve tasted
- Lower in Sugar: More subtle sweetness lets the cream cheese flavor shine
- Elegant and Sophisticated: Perfect for afternoon tea or upscale gatherings
- Naturally Gluten-Free: Contains no flour (though cornstarch is used)
- Memorable: Guests will ask for the recipe and remember this dessert
- Worth the Effort: The technique is manageable with clear instructions
- Versatile: Delicious plain or with various toppings
Whether you’re an experienced baker ready for a fun challenge or someone looking to expand their dessert repertoire, this fluffy soufflé cheesecake delivers results that’ll make you feel like a professional pastry chef.
Ingredient Notes
Understanding your ingredients is crucial for success with this delicate cheesecake:
Cream Cheese: The foundation of your cheesecake. Use full-fat brick cream cheese (like Philadelphia brand), not the spreadable kind, which has different moisture content and won’t work. The cream cheese should be at room temperature for smooth mixing—leave it out for 30-60 minutes before starting.
Eggs: You’ll need to separate eggs carefully—no yolk in the whites or your meringue won’t whip properly. Room temperature eggs separate more easily and whites whip to greater volume. This recipe uses both yolks (for richness and structure) and whites (whipped into meringue for lightness).
Granulated Sugar: Divided between the yolk mixture and the meringue. Sugar stabilizes the meringue and adds structure, so measure carefully. Superfine sugar dissolves more easily but regular granulated works fine.
Butter: Adds richness and helps create that tender crumb. Unsalted butter is best so you can control salt levels. Must be melted and slightly cooled before adding.
Milk: Whole milk is preferred for richness, but 2% works. The milk thins the batter to the right consistency for folding in the meringue.
Cornstarch: Acts as a stabilizer, helping the cheesecake maintain structure while staying incredibly tender. It’s also naturally gluten-free. Don’t substitute with flour—the texture will be wrong.
Lemon Juice: Adds brightness that cuts through the richness and enhances the cream cheese flavor. Fresh lemon juice is best, but bottled works in a pinch.
Vanilla Extract: Enhances all the flavors. Use pure vanilla extract, not imitation, for best results.
Cream of Tartar: Optional but highly recommended. It stabilizes the egg whites and helps them hold their structure, making your meringue more foolproof.
Equipment Needed
Having the right tools is essential for Japanese cotton cheesecake success:
- 8-inch Round Cake Pan: Springform pans work but aren’t necessary. A regular cake pan with tall sides (at least 3 inches) is perfect.
- Parchment Paper: For lining the pan—essential for easy removal.
- Large Roasting Pan: For the water bath—must be large enough to hold your cake pan.
- Electric Mixer (Stand or Hand): Critical for whipping meringue to stiff peaks. Doing this by hand is nearly impossible.
- Mixing Bowls: One large, one medium. Glass or metal bowls work best for meringue.
- Rubber Spatula: For gentle folding—the key to maintaining airiness.
- Whisk: For mixing the cream cheese base smoothly.
- Fine-Mesh Sieve: For sifting cornstarch to prevent lumps.
- Measuring Cups and Spoons: Accuracy matters in baking!
- Double Boiler or Microwave: For melting cream cheese and butter together.
- Kettle or Pot: For boiling water for the water bath.
- Instant-Read Thermometer: Optional but helpful for checking doneness.
- Cooling Rack: For cooling the cheesecake properly.
Japanese Cotton Cheesecake
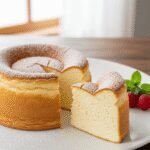
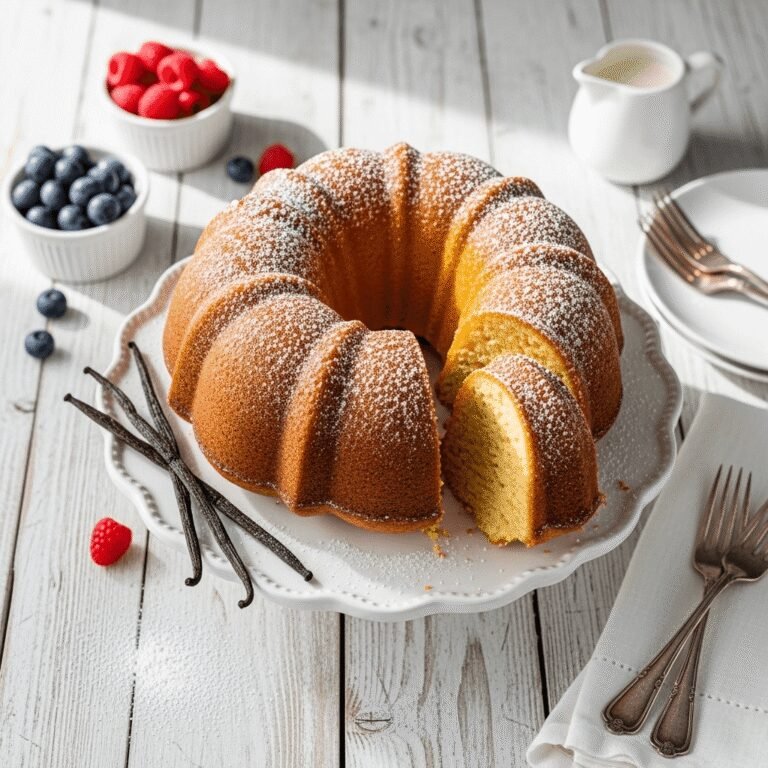
This Japanese cotton cheesecake (soufflé cheesecake) is incredibly light, fluffy, and jiggly with a delicate texture that melts in your mouth. Less sweet than traditional cheesecake, this elegant dessert features a golden top and cloud-like interior that’s achieved through carefully whipped meringue and gentle water bath baking.
- Prep Time: 30 minutes
- Cook Time: 70 minutes
- Total Time: 1 hour 40 minutes (plus cooling)
- Yield: 8-10 servings 1x
- Category: Dessert
- Method: Baking
- Cuisine: Japanese
- Diet: Gluten Free
Ingredients
For the Cheesecake:
- 8 ounces (226g) cream cheese, at room temperature
- 1/4 cup (60ml) whole milk
- 1/4 cup (56g) unsalted butter
- 6 large eggs, separated (at room temperature)
- 1/2 cup (100g) granulated sugar, divided
- 1/4 cup (30g) cornstarch
- 1 tablespoon fresh lemon juice
- 1 teaspoon vanilla extract
- 1/4 teaspoon cream of tartar (optional but recommended)
- Pinch of salt
For the Pan:
- Butter or cooking spray for greasing
- Parchment paper
For the Water Bath:
- Boiling water (about 6-8 cups)
Instructions
- Prep the Pan: Preheat oven to 320°F (160°C). Line the bottom of an 8-inch round cake pan with parchment paper. Cut a strip of parchment paper tall enough to come up the sides (about 3 inches high) and line the sides of the pan. Lightly grease the parchment. This double lining prevents sticking and helps the cake rise evenly.
- Melt Cream Cheese Base: In a double boiler or microwave-safe bowl, combine cream cheese, milk, and butter. Heat gently, stirring frequently, until completely melted and smooth. If using microwave, heat in 20-second intervals, stirring between each. Let cool for 5 minutes until just warm, not hot.
- Add Egg Yolks: Whisk the egg yolks into the cream cheese mixture one at a time until fully incorporated and smooth. Add vanilla extract and lemon juice, mixing well.
- Sift in Cornstarch: Sift the cornstarch over the cream cheese mixture. Whisk until completely smooth with no lumps. The mixture should be silky and pourable. Set aside.
- Make the Meringue: In a large, clean mixing bowl (no grease or water!), beat egg whites with an electric mixer on medium speed until foamy, about 1 minute. Add cream of tartar and salt. Gradually add the sugar one tablespoon at a time while continuing to beat. Increase speed to medium-high and beat until stiff, glossy peaks form, about 4-5 minutes. The meringue should stand straight up when you lift the beaters and not droop.
- Fold Meringue (First Addition): Add about 1/3 of the meringue to the cream cheese mixture. Using a rubber spatula, fold gently but thoroughly to lighten the batter. Use a cutting and folding motion, rotating the bowl as you go. This first addition can be mixed more thoroughly—it helps lighten the heavy base.
- Fold Remaining Meringue: Add half of the remaining meringue and fold very gently until mostly incorporated with some white streaks remaining. Add the final portion of meringue and fold very gently just until no white streaks remain. Work quickly but carefully—overmixing deflates the air bubbles, but undermixing leaves unmixed meringue pockets.
- Pour and Smooth: Pour the batter into the prepared pan. Tap the pan gently on the counter 2-3 times to release large air bubbles. Smooth the top with a spatula.
- Prepare Water Bath: Place the cake pan inside a larger roasting pan. Pull the oven rack out slightly and place the roasting pan on it. Carefully pour boiling water into the roasting pan until it reaches about halfway up the sides of the cake pan (about 1-1.5 inches deep).
- Bake: Bake at 320°F (160°C) for 25 minutes. Without opening the oven door, reduce temperature to 285°F (140°C) and bake for an additional 45 minutes. The top should be golden brown and the cake should jiggle slightly when gently shaken—it will firm up as it cools.
- Cool in Oven: Turn off the oven and crack the door open about 4 inches. Let the cheesecake cool in the oven for 15 minutes. This gradual temperature change prevents collapsing and cracking.
- Cool Completely: Remove from oven and water bath. Let cool to room temperature on a wire rack, about 1 hour. The cheesecake will deflate slightly—this is normal! It will shrink from its puffed height but should remain tall and fluffy.
- Chill: Once at room temperature, refrigerate for at least 4 hours or overnight before serving. The texture firms up and the flavors develop beautifully.
- Unmold and Serve: Run a thin knife around the edge, remove from pan, peel away parchment paper, and transfer to a serving plate. Dust with powdered sugar if desired. Slice with a hot, clean knife for neat cuts.
Notes
- Room Temperature Ingredients: This is crucial! Cold eggs won’t incorporate smoothly, and cold cream cheese won’t melt properly.
- No Peeking: Don’t open the oven door during baking except when reducing temperature. Opening the door causes temperature fluctuations that can make the cake crack or collapse.
- Water Bath is Essential: This provides gentle, even heat that prevents the cheesecake from drying out, cracking, or cooking unevenly.
- Meringue Matters Most: Properly whipped meringue is the key to that fluffy texture. Stiff peaks should stand straight up.
- Gentle Folding: The way you fold in the meringue determines the final texture. Be gentle to preserve air bubbles.
- Normal Deflation: The cake will deflate slightly as it cools—this is expected and normal for soufflé cheesecake.
Nutrition
- Serving Size: 1 slice (1/10 of cake)
- Calories: 195
- Sugar: 12g
- Sodium: 140mg
- Fat: 13g
- Saturated Fat: 7g
- Unsaturated Fat: 5g
- Trans Fat: 0g
- Carbohydrates: 14g
- Fiber: 0g
- Protein: 6g
- Cholesterol: 145mg
Tips & Variations
Matcha Cotton Cheesecake: Add 1-2 tablespoons matcha (green tea) powder to the cornstarch before sifting into the cream cheese mixture. The earthy matcha flavor pairs beautifully with the creamy cheese.
Chocolate Marble: Reserve 1/3 of the batter. Mix 2 tablespoons cocoa powder with 1 tablespoon hot water until smooth, then fold into reserved batter. Pour plain batter into pan, dollop chocolate batter on top, and swirl gently with a knife.
Lemon Cotton Cheesecake: Increase lemon juice to 3 tablespoons and add 1 tablespoon lemon zest to the cream cheese mixture for a bright, citrusy version.
Reduced Sugar Version: You can reduce sugar to 1/3 cup total, though the texture may be slightly less stable. The meringue needs some sugar for structure.
Individual Servings: Divide batter among 6-8 ramekins or small cake pans. Reduce baking time to 25-30 minutes total. Perfect for elegant dinner parties.
Earl Grey Infused: Steep 2 Earl Grey tea bags in the warm milk for 10 minutes, remove bags, then proceed with recipe. The bergamot flavor adds sophistication.
Coffee Flavor: Dissolve 1 tablespoon instant coffee or espresso powder in the warm milk before adding to cream cheese.
Pro Chef Tips
Room Temperature is Non-Negotiable: Cold ingredients don’t incorporate smoothly and can cause the cream cheese mixture to seize up. Plan ahead—remove cream cheese and eggs from the refrigerator at least 1 hour before starting.
Master the Meringue: The meringue is everything in this recipe. Beat until stiff peaks form—when you lift the beaters, the peaks should stand straight up without drooping. Under-whipped meringue creates a dense cake; over-whipped meringue becomes grainy and difficult to fold in.
The Folding Technique: This is where most mistakes happen. Use a large rubber spatula and a gentle “cut down the center, sweep across the bottom, bring up the side” motion while rotating the bowl. Work quickly but gently—you want to maintain as much air as possible while ensuring everything is mixed.
Test for Doneness: The cake should still jiggle slightly in the center when gently shaken—it will continue cooking with residual heat. Insert a toothpick near the edge (not center); it should come out with a few moist crumbs. An instant-read thermometer should read 158-160°F in the center.
Prevent Cracking: The gradual temperature reduction and slow cooling in the oven are critical. Sudden temperature changes cause the cake to contract rapidly, leading to cracks. Be patient!
Wrap the Pan for Safety: If worried about water seeping into your cake pan, wrap the outside bottom and sides with aluminum foil before placing in the water bath. This provides extra protection.
Serve at the Right Temperature: This cheesecake is delicious both chilled and at room temperature. For the best texture, remove from refrigerator 20-30 minutes before serving to take the chill off.
Common Mistakes to Avoid
Using Cold Ingredients: This is the most common mistake! Cold cream cheese won’t melt smoothly, and cold eggs won’t incorporate properly. The result is a lumpy batter that won’t rise correctly. Always bring ingredients to room temperature first.
Overmixing After Adding Meringue: Vigorous stirring deflates all those precious air bubbles you worked so hard to create. The result is a dense, heavy cake instead of a fluffy one. Fold gently and stop as soon as no white streaks remain.
Opening the Oven Door: Every time you peek, you lose heat and create temperature fluctuations. This causes the delicate structure to collapse or crack. Set your timer and trust the process—only open when it’s time to reduce temperature.
Skipping the Water Bath: Some think they can skip this step, but you really can’t. Without the water bath’s gentle, moist heat, the cheesecake will dry out, crack, and have an uneven texture. It’s essential for that signature silky texture.
Not Greasing the Parchment: Even parchment paper needs a light coating of butter or cooking spray, or the cake might stick when you try to remove it. A few seconds of prep saves a lot of frustration later.
Cutting While Warm: Warm cheesecake is too soft and will fall apart when you try to slice it. Patience is key—wait until it’s fully chilled for clean, beautiful slices.
Expecting it to Stay Tall: Some deflation is normal and expected. This is a soufflé-style cake, and like all soufflés, it will sink slightly from its puffed peak. That’s okay—it should still be notably taller and fluffier than regular cheesecake.
Storage & Meal Prep
Refrigerator Storage: Store Japanese cotton cheesecake covered with plastic wrap or in an airtight container in the refrigerator for up to 4-5 days. The texture remains soft and the flavor actually improves after a day as the flavors meld together.
Covering Tips: Don’t let plastic wrap touch the top surface directly—it will stick and damage the delicate top. Either use a cake dome, or tent plastic wrap over the top without touching.
Best Eating Window: This cheesecake is best eaten within 2-3 days of baking. After that, it’s still safe and delicious, but the texture becomes slightly denser as moisture is lost.
Serving Temperature: While it can be served cold straight from the fridge, the texture and flavor are best when slightly less chilled. Remove from refrigerator 15-20 minutes before serving for optimal taste and texture.
Slicing Tips: For clean slices, use a sharp knife dipped in hot water and wiped dry between each cut. This prevents the knife from dragging and creating messy edges.
Make-Ahead & Freezer Notes
Make-Ahead Timing: You can (and should!) make this cheesecake 1-2 days ahead. The texture actually improves after chilling overnight as it firms up perfectly. This also makes it ideal for entertaining since the dessert is completely ready ahead of time.
Freezing Instructions: Japanese cotton cheesecake can be frozen, though the texture becomes slightly denser after thawing. Cool completely, wrap tightly in plastic wrap, then aluminum foil. Freeze for up to 1 month for best quality.
Freezing Individual Slices: Pre-slice the cheesecake, then wrap individual slices in plastic wrap and place in a freezer bag. This way you can pull out just what you need. Perfect for portion control!
Thawing Method: Transfer frozen cheesecake to the refrigerator and let thaw slowly overnight. Never thaw at room temperature—this creates condensation that makes the cake soggy. Thawed cheesecake is best eaten within 2 days.
Does Freezing Affect Texture? Yes, somewhat. The texture becomes a bit denser and less airy after freezing and thawing, though it’s still delicious. If possible, enjoy fresh or refrigerated rather than frozen for the ultimate fluffy texture.
Can I Freeze Unbaked? Not recommended. The meringue will deflate during freezing, and the result won’t be fluffy. Always bake first, then freeze if needed.
Serving Suggestions
Classic Accompaniments:
- Light dusting of powdered sugar
- Fresh berries (strawberries, raspberries, blueberries)
- Whipped cream (lightly sweetened)
- Berry coulis or fruit sauce
- Caramel sauce drizzle
Beverage Pairings:
- Japanese green tea (sencha or hojicha)
- Earl Grey or English breakfast tea
- Coffee (hot or iced)
- Champagne or sparkling wine
- Sweet dessert wine like Moscato
Plating Ideas:
- Serve on white plates for elegant simplicity
- Add a small pile of fresh berries beside each slice
- Draw a decorative streak of fruit coulis on the plate
- Garnish with fresh mint leaves
- Add a quenelle of whipped cream
Occasion Ideas:
- Afternoon tea parties
- Birthday celebrations (less traditional than regular cake but memorable)
- Dinner party dessert (make ahead for stress-free entertaining)
- Mother’s Day or special brunches
- Wedding or baby showers
Japanese Tea Service: Serve with traditional Japanese tea in small cups, alongside small sweets or wagashi for an authentic experience.
Temperature Variations: Try serving slightly warm (just barely warm to the touch) for a completely different experience—it’s even more soufflé-like and delicate.
FAQs Section
Q: Why did my Japanese cheesecake crack or collapse?
A: Cracking usually happens from temperature shock—opening the oven door too soon, skipping the gradual cooling, or a too-hot oven. Some sinking is normal, but severe collapse means the meringue was under-whipped, over-folded, or the baking time was too short. Make sure your meringue reaches stiff peaks and fold very gently.
Q: Can I make this without cream of tartar?
A: Yes, but your meringue won’t be quite as stable. You can substitute with 1/2 teaspoon lemon juice or white vinegar, or simply omit it—just be extra careful not to over-whip the egg whites, and use them immediately after whipping. Fresh eggs at room temperature help compensate.
Q: My cheesecake is dense, not fluffy. What went wrong?
A: Most likely the meringue wasn’t whipped to stiff peaks, or it was deflated during folding. The egg whites must be beaten until they stand straight up without drooping, and folding must be very gentle. Also ensure your ingredients were at room temperature—cold ingredients create a thick base that’s hard to fold meringue into.
Q: Can I use a different size pan?
A: The 8-inch pan is ideal, but you can use a 9-inch pan—the cake will be slightly shorter and cook a bit faster (reduce time by 5-10 minutes). Smaller pans (6-inch) work beautifully but the cake will be taller and need an extra 10-15 minutes. Always check for that slight jiggle to determine doneness.
Q: Do I need a springform pan?
A: No! A regular 8-inch cake pan with tall sides works perfectly, often better than springform because there’s no risk of water seepage. Just line it well with parchment paper that extends up the sides for easy removal.
Q: Why is my cheesecake still jiggly after baking?
A: A slight jiggle in the center is actually perfect! It will firm up as it cools. Japanese cotton cheesecake should have a delicate, custardy texture—not firm like American cheesecake. If it jiggles a lot throughout the entire cake, it may need 5-10 more minutes.
Q: Can I add mix-ins like chocolate chips or fruit?
A: It’s not recommended for your first attempt because they can interfere with the delicate structure. Once you’ve mastered the basic recipe, you can carefully fold in 1/2 cup of mini chocolate chips or small fresh blueberries at the very end, but expect slightly denser results.
Conclusion
Making Japanese cotton cheesecake might seem intimidating at first—I’ll admit, it’s not as simple as stirring together a basic batter and tossing it in the oven. But here’s the beautiful truth: once you understand the key techniques (room temperature ingredients, properly whipped meringue, gentle folding, and patient cooling), this ethereal dessert is absolutely achievable, and the result is nothing short of magical.
There’s something deeply satisfying about pulling off a recipe that requires a bit of technique and care. When you cut into that first slice and see the fluffy, cloud-like interior, when you take that first bite and experience the way it dissolves on your tongue, when you see the delighted reactions from everyone who tastes it—that’s when you realize this fluffy soufflé cheesecake was worth every careful step.
This isn’t just a dessert; it’s an experience. It’s the kind of recipe that expands your baking skills, impresses guests like few other desserts can, and gives you serious bragging rights in the kitchen. Plus, it’s naturally gluten-free and less sweet than traditional cheesecake, making it a sophisticated option that appeals to a wide range of tastes.
Ready to create your own jiggly masterpiece? I’d absolutely love to hear how your Japanese cotton cheesecake turns out! Did you try any flavor variations? Master the meringue on your first try? Have questions or tips to share? Drop a comment below—I read every single one and love hearing about your baking adventures.
Pin this recipe to your Pinterest boards! Save it to your “Cheesecake Recipes,” “Japanese Desserts,” or “Impressive Desserts” collections so you can find it whenever you’re ready for a baking challenge. And if this recipe brings joy and delicious success to your kitchen, please share it with friends and family who appreciate the art of beautiful baking.
Here’s to fluffy clouds, impressive jiggles, and the pure magic of Japanese cotton cheesecake!