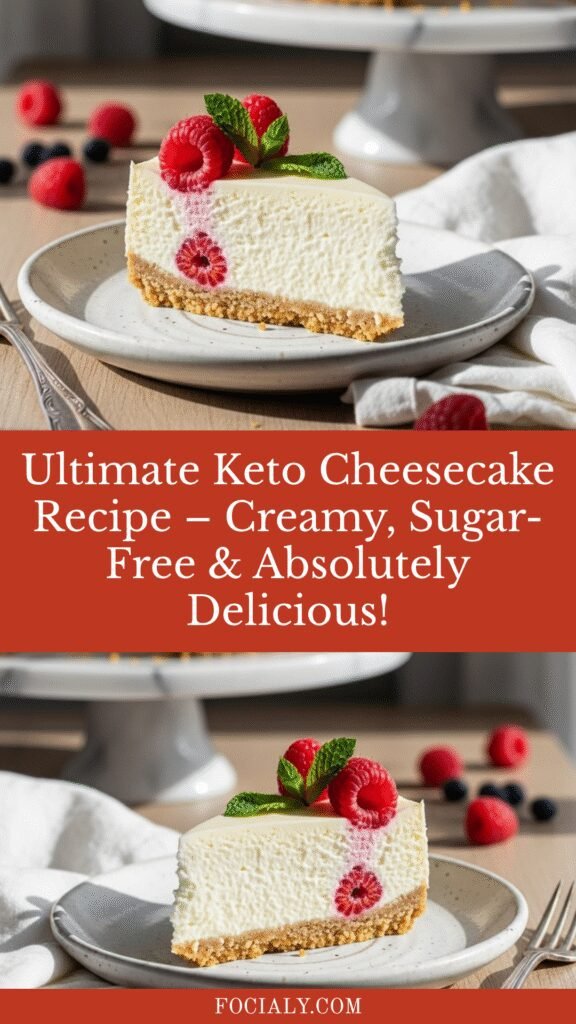
Ultimate Keto Cheesecake Recipe – Creamy, Sugar-Free & Absolutely Delicious!
If you’ve been searching for the perfect keto cheesecake recipe that doesn’t compromise on taste or texture, your search ends here! This low-carb, sugar-free cheesecake is everything you’d expect from a classic New York-style cheesecake – incredibly creamy, rich, and satisfying – without the guilt or the carb overload. Whether you’re following a ketogenic lifestyle, managing blood sugar levels, or simply looking for a healthier dessert option, this keto cheesecake delivers pure indulgence in every bite.
This recipe is perfect for special occasions like birthdays, holidays, dinner parties, or those moments when you just need something sweet to satisfy your cravings. The best part? It’s surprisingly simple to make, requiring just basic ingredients and straightforward techniques that even beginner bakers can master. Serve it plain for pure cheesecake perfection, or dress it up with fresh berries, sugar-free chocolate sauce, or whipped cream for an extra-special presentation.
History / Background
Cheesecake has a fascinating history that dates back thousands of years. The ancient Greeks are credited with creating the first cheesecakes around 2,000 BCE on the island of Samos, where they served small cakes made from cheese, honey, and wheat flour to athletes during the first Olympic Games. The Romans adopted and adapted the recipe, spreading it throughout Europe as their empire expanded.
The cheesecake we know and love today – the rich, creamy New York-style version – evolved in America during the late 19th and early 20th centuries. The game-changer came in 1872 when American dairyman William Lawrence accidentally invented cream cheese while trying to recreate French Neufchâtel cheese in Chester, New York. This Philadelphia Brand cream cheese became the foundation for the iconic American cheesecake.
The keto adaptation of this classic dessert emerged alongside the rising popularity of low-carb and ketogenic diets in the early 2000s. Creative home bakers and health-conscious foodies began experimenting with alternative sweeteners and almond flour crusts to create a version that fit within strict carbohydrate limits while maintaining the luxurious texture and flavor everyone craved. Today, keto cheesecake has become a staple in the low-carb community, proving that dietary restrictions don’t mean sacrificing delicious desserts.
Why You’ll Love This Recipe
This keto cheesecake is a game-changer for anyone following a low-carb lifestyle or simply looking to reduce their sugar intake without giving up dessert. It delivers all the creamy, dreamy satisfaction of traditional cheesecake while keeping you firmly in ketosis. The texture is impossibly smooth and velvety, the flavor is perfectly balanced between tangy and sweet, and the almond flour crust provides just the right amount of buttery crunch.
Here’s what makes this recipe absolutely irresistible:
- Incredibly Low Carb – With only 4-5 net carbs per slice, you can enjoy guilt-free indulgence
- No Sugar Crash – Sweetened with erythritol or monk fruit, so no blood sugar spikes
- Restaurant-Quality Results – Tastes just like premium New York cheesecake from your favorite bakery
- Make-Ahead Friendly – Actually tastes better the next day, perfect for party planning
- Easily Customizable – Add your favorite keto-friendly flavors and toppings
- Budget-Friendly – Uses simple, accessible ingredients you can find at any grocery store
- No Special Equipment Needed – Just a springform pan and basic kitchen tools
- Impressive Presentation – Looks stunning and no one will guess it’s sugar-free
- Stays Fresh for Days – Keeps beautifully in the fridge for up to a week
Ingredient Notes
Cream Cheese: The star of the show! Use full-fat cream cheese (not low-fat or fat-free) for the richest, creamiest texture. Make sure it’s completely softened to room temperature before mixing to avoid lumps. Philadelphia brand works perfectly, but any quality cream cheese will do.
Erythritol or Monk Fruit Sweetener: These keto-friendly sweeteners provide sweetness without the carbs or calories. Erythritol has zero glycemic impact and measures cup-for-cup like sugar. Powdered erythritol blends more smoothly than granulated. Monk fruit sweetener is another excellent option. Avoid stevia alone as it can have a bitter aftertaste.
Almond Flour: Creates a delicious, nutty crust that’s naturally low in carbs. Use blanched almond flour (not almond meal) for the finest texture. Bob’s Red Mill or Anthony’s brands are reliable choices.
Eggs: Provide structure and that signature creamy texture. Use large eggs at room temperature for best incorporation. Cold eggs can cause the cream cheese to seize up.
Heavy Cream: Adds richness and helps achieve that ultra-creamy consistency. Must be heavy whipping cream with at least 36% fat content.
Vanilla Extract: Pure vanilla extract is essential for authentic flavor. The imitation stuff just doesn’t compare.
Lemon Juice: Just a touch brightens the flavor and balances the richness. Fresh-squeezed is best, but bottled works too.
Butter: For the crust, use real unsalted butter. Salted butter can make the crust too salty.
Substitutions: Can’t find erythritol? Try allulose or Swerve. Need nut-free? Use coconut flour crust (adjust liquid ratios). Dairy-free? Use coconut cream and dairy-free cream cheese alternatives.
Equipment Needed
- 9-inch Springform Pan – Essential for easy removal and perfect presentation
- Electric Mixer (hand mixer or stand mixer) – For beating cream cheese until smooth
- Large Mixing Bowls (at least 2)
- Measuring Cups and Spoons – Accurate measurements are crucial for baking
- Spatula – For scraping down bowl sides and smoothing the top
- Food Processor (optional) – Makes quick work of the crust
- Aluminum Foil – For wrapping the pan if using a water bath
- Roasting Pan (optional) – For water bath method to prevent cracks
- Parchment Paper – Line the bottom of the pan for easy release
- Cooling Rack – Allows even cooling
- Whisk – For mixing eggs gently
Keto Cheesecake Recipe

This ultra-creamy keto cheesecake recipe delivers all the rich, indulgent flavor of classic New York cheesecake with only 4-5 net carbs per slice. The almond flour crust is perfectly buttery and crunchy, while the smooth, velvety filling is sweetened with erythritol for a sugar-free treat that tastes absolutely amazing.
- Prep Time: 20 minutes
- Cook Time: 55 minutes
- Total Time: 5 hours 15 minutes
- Yield: 12 servings 1x
- Category: Dessert
- Method: Baking
- Cuisine: American
- Diet: Gluten Free
Ingredients
For the Almond Flour Crust:
- 2 cups blanched almond flour
- 1/4 cup erythritol (powdered or granulated)
- 1/3 cup unsalted butter, melted
- 1 teaspoon vanilla extract
- Pinch of salt
For the Cheesecake Filling:
- 32 oz (4 packages) cream cheese, softened to room temperature
- 1 cup erythritol (powdered preferred)
- 4 large eggs, room temperature
- 1/2 cup heavy whipping cream
- 2 teaspoons vanilla extract
- 1 tablespoon fresh lemon juice
- 1/4 teaspoon salt
Instructions
Prepare the Pan and Preheat:
- Preheat your oven to 325°F (163°C). Line the bottom of a 9-inch springform pan with parchment paper, then grease the sides lightly with butter or cooking spray.
Make the Crust: 2. In a medium bowl, combine almond flour, 1/4 cup erythritol, melted butter, vanilla extract, and a pinch of salt. Mix until the texture resembles wet sand and holds together when pressed.
- Press the mixture firmly and evenly into the bottom of the prepared springform pan, extending slightly up the sides (about 1/2 inch). Use the bottom of a measuring cup or glass to pack it down firmly.
- Bake the crust for 10-12 minutes until lightly golden and fragrant. Remove from oven and let cool while you prepare the filling. Keep the oven on.
Prepare the Filling: 5. In a large mixing bowl, beat the softened cream cheese with an electric mixer on medium speed for 2-3 minutes until completely smooth and fluffy with no lumps. Scrape down the sides of the bowl frequently.
- Add the 1 cup of erythritol to the cream cheese and beat for another 2 minutes until fully incorporated and smooth.
- Reduce mixer speed to low. Add eggs one at a time, beating just until each egg is incorporated before adding the next. Don’t overmix at this stage – overmixing can incorporate too much air and cause cracks.
- Add the heavy cream, vanilla extract, lemon juice, and salt. Mix on low speed just until everything is combined and smooth, about 30 seconds. The batter should be thick, creamy, and pourable.
Bake the Cheesecake: 9. Pour the filling over the pre-baked crust, spreading it evenly with a spatula. Gently tap the pan on the counter a few times to release any air bubbles.
- (Optional water bath method for crack prevention): Wrap the outside of the springform pan tightly with heavy-duty aluminum foil. Place the wrapped pan inside a larger roasting pan and fill the roasting pan with hot water until it reaches halfway up the sides of the springform pan.
- Bake for 50-55 minutes. The cheesecake is done when the edges are set and slightly puffed, but the center still has a slight jiggle (about 3 inches in diameter). It should not be completely firm – it will continue to set as it cools.
Cool Properly: 12. Turn off the oven and crack the door open about 1 inch. Let the cheesecake cool in the oven for 1 hour. This gradual cooling helps prevent cracks.
- Remove from oven and run a thin knife around the edges to loosen the cheesecake from the pan. Let it cool completely at room temperature (about 1 hour).
- Cover with plastic wrap and refrigerate for at least 4 hours, but preferably overnight. The cheesecake needs this time to fully set and develop the best texture and flavor.
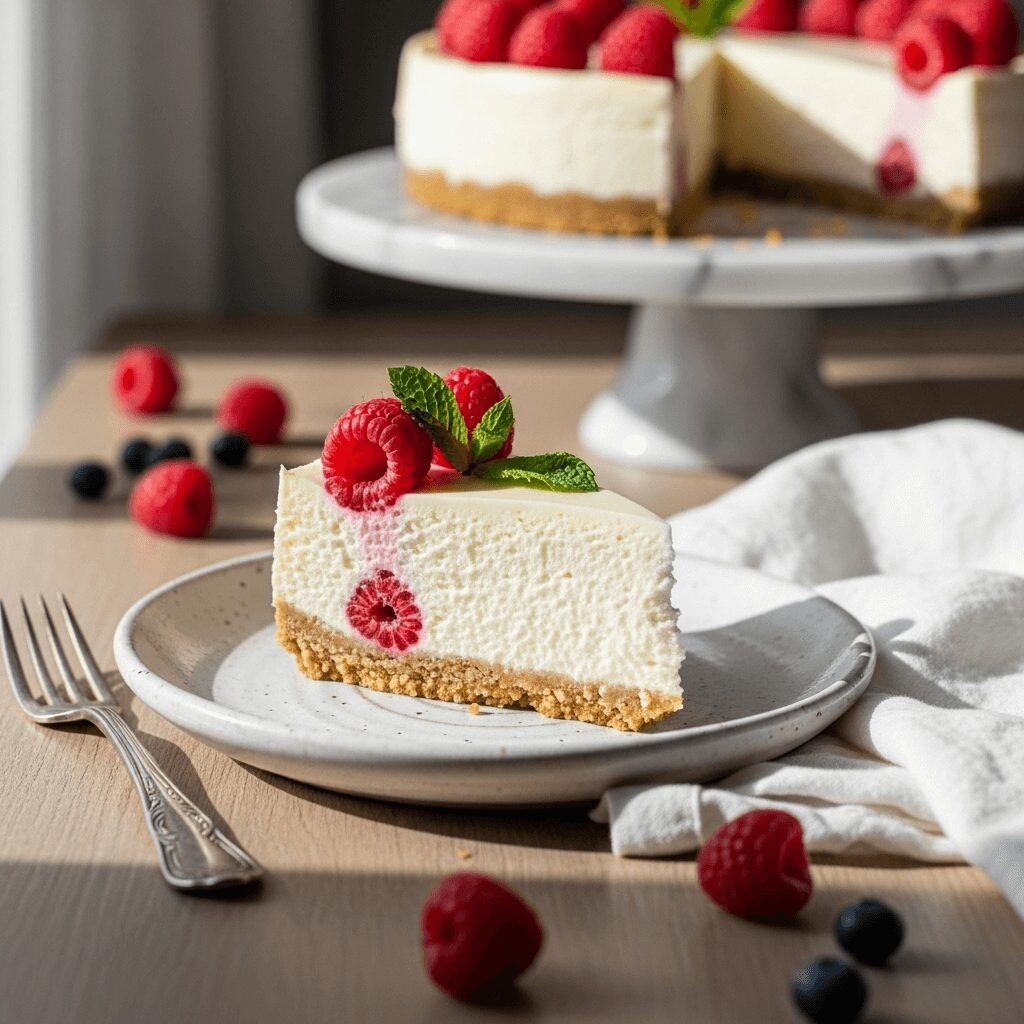
Serve: 15. When ready to serve, carefully remove the springform pan sides. Use a sharp knife dipped in hot water (wiping clean between cuts) to slice clean pieces. Serve plain or with your favorite keto-friendly toppings.
Notes
- Room Temperature Ingredients: This is crucial! Cold cream cheese and eggs will create lumps and affect texture. Set them out 2-3 hours before baking.
- Don’t Overmix: Once eggs are added, mix just until combined. Overmixing incorporates air that can cause cracks.
- Sweetener Options: Allulose, Swerve, or monk fruit sweetener work equally well. Avoid liquid sweeteners as they’ll affect texture.
- Prevent Cracks: Use the water bath method, avoid overmixing, don’t overbake, and cool gradually in the oven.
- Testing Doneness: The center should jiggle slightly like Jello. An instant-read thermometer should read 150°F in the center.
- Serving Temperature: Cheesecake tastes best when served chilled but not ice cold – remove from fridge 15-20 minutes before serving.
Nutrition
- Serving Size: 1 slice (1/12 of cheesecake
- Calories: 315
- Sugar: 2g
- Sodium: 285mg
- Fat: 29g
- Saturated Fat: 14g
- Unsaturated Fat: 13g
- Trans Fat: 0g
- Carbohydrates: 7g
- Fiber: 2g
- Protein: 9g
- Cholesterol: 125mg
Note: Nutrition information is calculated using erythritol, which is not absorbed by the body and doesn’t impact blood sugar. Different sweeteners may slightly alter nutritional values.
Tips & Variations
Flavor Variations:
- Chocolate Keto Cheesecake: Add 1/3 cup unsweetened cocoa powder and 1 oz melted sugar-free dark chocolate to the filling.
- Lemon Cheesecake: Increase lemon juice to 3 tablespoons and add 1 tablespoon lemon zest for bright citrus flavor.
- Pumpkin Spice: Add 3/4 cup pumpkin puree and 2 teaspoons pumpkin pie spice for a fall-inspired version.
- Berry Swirl: Drop spoonfuls of sugar-free berry sauce on top and swirl with a knife before baking.
- Peanut Butter: Replace 1/2 cup cream cheese with natural peanut butter for nutty richness.
Topping Ideas:
- Fresh berries (strawberries, raspberries, blackberries, blueberries)
- Sugar-free chocolate ganache
- Whipped cream sweetened with powdered erythritol
- Sugar-free caramel sauce
- Toasted sliced almonds or pecans
- Sugar-free fruit compote
Crust Alternatives:
- Use crushed pecans instead of almond flour for a different nutty flavor
- Make it crustless by simply greasing the pan well (reduces carbs even further)
- Try a coconut flour crust for those with nut allergies (use 3/4 cup coconut flour)
Pro Chef Tips
Temperature Control is Everything: Professional bakers know that cheesecake is all about temperature management. Every ingredient should be at room temperature, the oven should be precisely calibrated, and cooling must be gradual. This prevents density issues, cracks, and ensures that silky-smooth texture.
The Tap Test: Before adding the filling, tap your mixing bowl firmly on the counter several times. This releases trapped air bubbles that could create holes or an uneven texture in your finished cheesecake.
Water Bath Magic: Professional bakeries almost always use a water bath (bain-marie) when baking cheesecake. The humid environment prevents the top from drying out and cracking while ensuring even, gentle heat distribution. If you skip this step, place a pan of water on the lower oven rack.
The Jiggle Rule: A perfectly baked cheesecake should jiggle like gelatin in the center when you gently shake the pan. It will look underdone, but trust the process – it continues cooking as it cools. Overbaking is the number one mistake home bakers make.
Knife Cleaning Technique: For those picture-perfect slices, keep a tall glass of very hot water next to your cutting board. Dip your knife in the hot water before each cut, then wipe it completely clean with a towel. This gives you those clean, professional-looking slices with no filling dragging.
Patience Pays Off: The hardest part of making cheesecake is waiting! Cheesecake actually tastes better after 24 hours in the refrigerator. The flavors meld, the texture becomes even creamier, and it slices more cleanly. Plan to make it a day ahead for best results.
Common Mistakes to Avoid
Using Cold Ingredients: This is the most common error. Cold cream cheese creates lumps that are nearly impossible to smooth out, and cold eggs can cause the mixture to seize or curdle. Always let ingredients sit at room temperature for 2-3 hours before starting.
Overmixing the Batter: Once you add the eggs, mix on low speed and only until just combined. Overmixing incorporates excess air that expands during baking and then collapses, causing cracks and a dense, heavy texture instead of creamy smoothness.
Opening the Oven Door: Every time you open that oven door, the temperature drops dramatically. This temperature shock is a major cause of cracking. Resist the urge to peek! Use your oven light instead.
Skipping the Gradual Cool-Down: Pulling a hot cheesecake straight from the oven into room temperature air causes rapid contraction and – you guessed it – cracks. Always let it cool gradually in the turned-off oven with the door cracked for at least an hour.
Not Refrigerating Long Enough: Cutting into a cheesecake that hasn’t fully chilled results in a runny, messy slice. The cheesecake needs at least 4 hours (preferably overnight) to set properly. The wait is worth it!
Storage & Meal Prep
Refrigerator Storage: Cover your cheesecake tightly with plastic wrap or store in an airtight container in the refrigerator for up to 7 days. The cheesecake actually improves over the first 2-3 days as the flavors develop and meld together. Keep it away from strong-smelling foods as cheesecake can absorb odors.
Individual Slice Storage: For easy grab-and-go portions, slice the entire cheesecake and wrap individual pieces in plastic wrap, then place in an airtight container. This way you can pull out single servings without exposing the whole cheesecake to air repeatedly.
Maintaining Freshness: The crust can sometimes soften after a few days due to moisture from the filling. To maintain crispness, you can place a paper towel underneath the cheesecake in the container to absorb excess moisture, replacing it daily.
Reheating: Cheesecake should always be served cold or at cool room temperature – never reheated. If you prefer it less cold, simply remove from the refrigerator 15-20 minutes before serving to take the chill off.
Make-Ahead & Freezer Notes
Perfect Make-Ahead Dessert: Keto cheesecake is an ideal make-ahead dessert for parties and special occasions. You can make it up to 3 days in advance, and it will taste even better than the day you baked it. Keep it covered in the refrigerator until ready to serve.
Freezing Whole Cheesecake: This cheesecake freezes beautifully for up to 3 months. Once completely chilled, wrap the entire cheesecake (still in the springform pan or removed) tightly in two layers of plastic wrap, then wrap in aluminum foil. Place in a freezer-safe bag for extra protection.
Freezing Individual Slices: Slice the cheesecake and wrap each piece individually in plastic wrap, then foil. Place wrapped slices in a freezer-safe container or bag. This method allows you to thaw only what you need.
Thawing Instructions: Transfer the wrapped cheesecake from freezer to refrigerator and let it thaw slowly overnight (8-12 hours). Never thaw at room temperature as this can cause condensation and a watery texture. For individual slices, they’ll thaw in 4-6 hours in the fridge.
Post-Freezer Serving Tip: After thawing, let the cheesecake sit at room temperature for 15-20 minutes before serving. Some people actually prefer the texture of cheesecake after it’s been frozen – it becomes even more dense and creamy!
Serving Suggestions
This keto cheesecake is stunning enough to serve plain, but here are some delicious accompaniments that keep it low-carb:
Berry Compote: Simmer fresh or frozen mixed berries with a little erythritol and lemon juice until thickened. The tartness of berries perfectly complements the rich, creamy cheesecake.
Whipped Cream: Make fresh whipped cream sweetened with powdered erythritol and vanilla. Pipe it decoratively or dollop generously on each slice.
Coffee or Tea: A hot cup of black coffee or unsweetened tea provides a perfect contrast to the cool, creamy dessert and enhances the flavors.
Sugar-Free Hot Chocolate: For a decadent dessert experience, serve alongside keto hot chocolate made with unsweetened cocoa, heavy cream, and your favorite sweetener.
Nuts and Seeds: Sprinkle toasted sliced almonds, chopped pecans, or pumpkin seeds on top for added crunch and healthy fats.
Dark Chocolate Shavings: Use a vegetable peeler to create curls from a bar of sugar-free dark chocolate (85% cacao or higher) for an elegant garnish.
Fresh Mint: A sprig of fresh mint adds a pop of color and a refreshing aromatic note that cuts through the richness.
Berry Wine Pairing: If you enjoy wine, a dry red wine like Pinot Noir (in moderation) or unsweetened berry-infused sparkling water makes an excellent pairing.
FAQs Section
Q: Can I use a different sweetener instead of erythritol?
A: Absolutely! Monk fruit sweetener, allulose, or Swerve all work wonderfully in this recipe. Use the same measurements as you would for erythritol. Avoid stevia-only sweeteners as they can leave a bitter aftertaste. Liquid sweeteners like liquid stevia will alter the texture, so stick with granulated or powdered alternatives.
Q: Why did my cheesecake crack on top?
A: Cracks happen due to several reasons: overmixing air into the batter, overbaking, or cooling too quickly. The water bath method prevents most cracks. Also ensure you’re not overbaking – the center should still jiggle slightly when done. Let it cool gradually in the turned-off oven with the door cracked. Don’t worry too much – cracks don’t affect taste, and you can cover them with toppings!
Q: My cheesecake seems runny after refrigerating. What went wrong?
A: This usually means it was underbaked or didn’t chill long enough. The cheesecake needs at least 4 hours (ideally overnight) to fully set. If it’s still too soft after 24 hours in the fridge, it was definitely underbaked. The center should reach about 150°F internal temperature when baking. Next time, bake a few minutes longer until only a 3-inch circle in the center jiggles.
Q: Can I make this without a springform pan?
A: While a springform pan is ideal for easy removal and presentation, you can use a regular 9-inch cake pan lined with parchment paper with long overhanging edges (to lift it out) or even a pie dish. You won’t get the tall, classic cheesecake look, but it will taste just as delicious. Just be very careful when removing it.
Q: Is this recipe truly keto-friendly?
A: Yes! With only 5 net carbs per slice, this cheesecake fits perfectly into a ketogenic diet. The almond flour crust and erythritol sweetener keep carbs minimal while providing all the flavor and texture of traditional cheesecake. Just be mindful of portion sizes and what toppings you add.
Q: How do I know when my cheesecake is done baking?
A: The edges should be set and slightly puffed, while the center (about 3 inches in diameter) should still jiggle like gelatin when you gently shake the pan. An instant-read thermometer inserted in the center should read 150°F. Don’t wait for it to look completely firm – it will continue to cook and set as it cools.
Q: Can I make this dairy-free?
A: Yes, but with modifications. Use dairy-free cream cheese (Kite Hill or Violife work well) and replace heavy cream with full-fat coconut cream. The texture won’t be quite as traditional, but it will still be delicious. Make sure your dairy-free cream cheese is at room temperature before mixing.
Conclusion
There you have it – the ultimate keto cheesecake recipe that proves you don’t have to sacrifice flavor or texture when you’re eating low-carb! This creamy, dreamy dessert delivers all the indulgence of classic New York cheesecake with just a fraction of the carbs. Whether you’re making it for a special celebration, meal prepping desserts for the week, or simply treating yourself because you deserve something delicious, this recipe won’t disappoint.
The best part? Once you master this basic recipe, you can customize it endlessly with different flavors, toppings, and mix-ins. From chocolate to pumpkin spice to berry swirl, the possibilities are truly endless. And because it keeps so well in the refrigerator and freezer, you can always have a keto-friendly dessert ready when those sweet cravings hit.
I’d absolutely love to hear how your keto cheesecake turns out! Drop a comment below with your results, any variations you tried, or questions you might have. Did you add any special toppings? Try a flavor variation? Your feedback helps other home bakers, and I read every single comment. And if you loved this recipe as much as I do, please save it to your Pinterest boards and share it with your low-carb friends – they’ll thank you for it!
Happy baking, and here’s to guilt-free dessert indulgence! 🍰