The Ultimate Lava Brownies Recipe: Decadent Chocolate Heaven in Every Bite
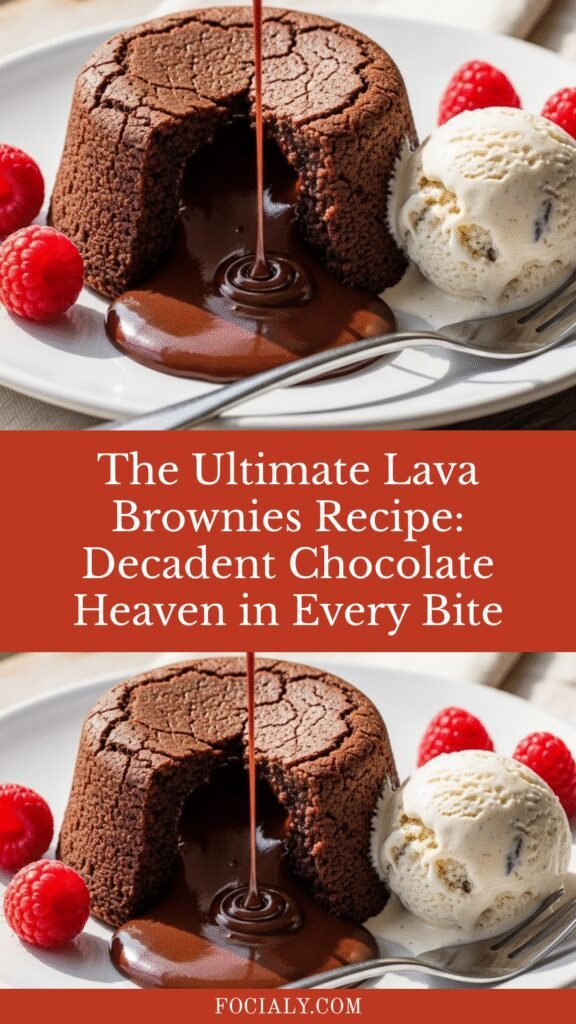
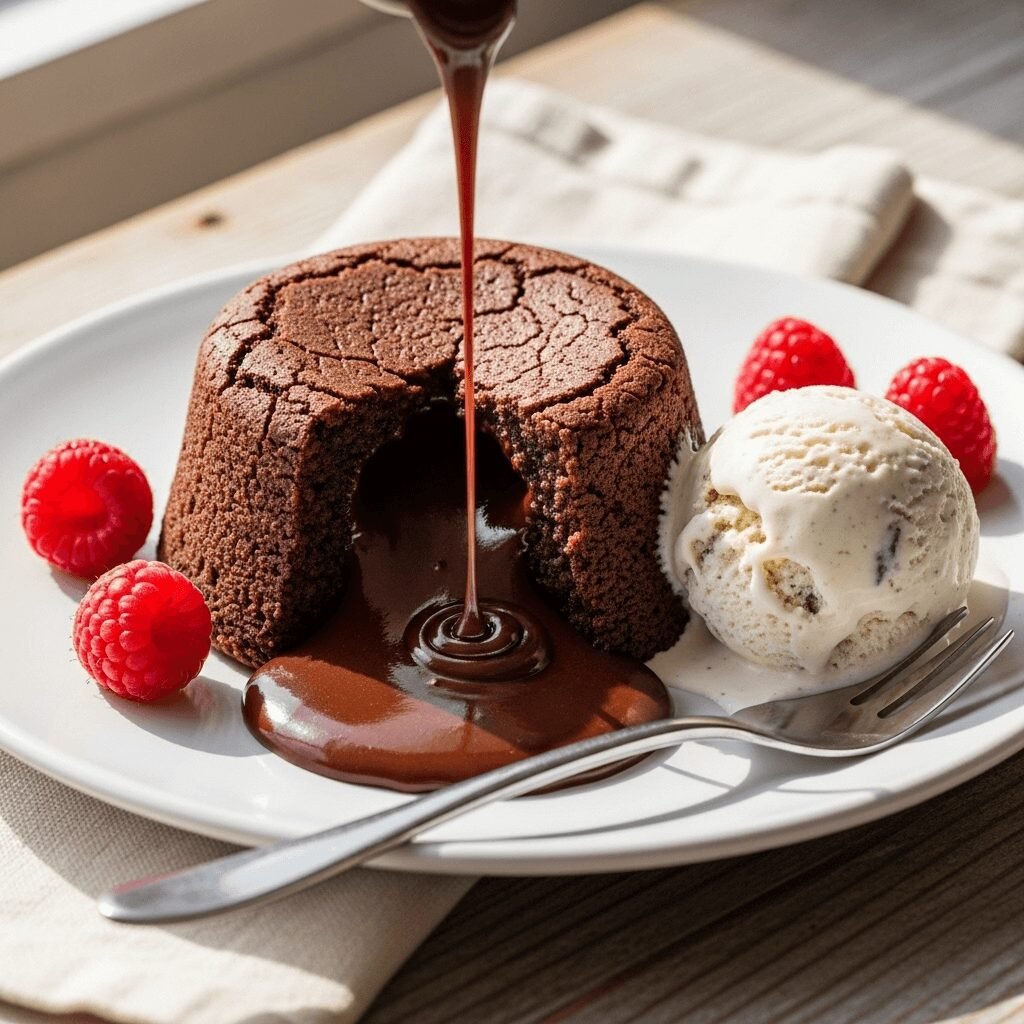
Imagine cutting into a warm, fudgy brownie and watching as a stream of rich, molten chocolate ganache flows onto your plate like liquid gold. That’s the magic of lava brownies—a show-stopping dessert that combines the best of both worlds: the dense, chewy texture of classic brownies with the luxurious surprise of a gooey chocolate center.
Lava brownies are perfect for any occasion where you want to impress without spending hours in the kitchen. Whether you’re hosting a dinner party, celebrating a birthday, need a romantic dessert for two, or simply craving something indulgent on a Tuesday night, these chocolate lava brownies deliver restaurant-quality results right from your home oven. They’re ideal for Valentine’s Day, anniversaries, holiday gatherings, or whenever you need a dessert that’ll make everyone at the table go “wow!”
What makes this recipe special is that it looks incredibly fancy but is surprisingly simple to make. The individual portions mean everyone gets their own personal chocolate explosion, and you can even prepare them ahead of time—a total game-changer for entertaining.
History / Background
The molten chocolate lava cake was invented somewhat accidentally in 1987 by French chef Jean-Georges Vongerichten in New York City. Legend has it that he pulled a chocolate sponge cake from the oven too early, and instead of a disaster, he discovered a dessert sensation. The undercooked center created a warm, flowing chocolate center that guests absolutely loved. He refined the concept and added it to his restaurant menu, where it became an instant classic.
Since then, the molten lava concept has inspired countless variations, and the lava brownie is one of the most beloved adaptations. While traditional lava cakes have a more cake-like exterior, lava brownies bring that signature dense, fudgy brownie texture that American home bakers know and love. The brownie base provides a richer, more substantial bite compared to the lighter sponge cake texture of the original French dessert.
This fusion dessert gained massive popularity in the 2000s as food blogs and Pinterest made home baking more accessible. Home cooks discovered that achieving the signature molten center wasn’t as complicated as it seemed—you just needed the right technique and timing. Today, chocolate lava brownies are a staple on restaurant dessert menus and have become a go-to recipe for home bakers who want to create something truly special.
The beauty of lava brownies is that they represent the evolution of American chocolate desserts—taking a French fine-dining concept and making it more indulgent, more chocolate-forward, and more suited to the comfort-food-loving American palate.
Why You’ll Love This Recipe
This lava brownie recipe is about to become your secret weapon for impressing guests and satisfying serious chocolate cravings. The exterior bakes to that perfect crackly-topped, fudgy brownie consistency we all love, while the hidden chocolate ganache center stays gloriously molten. When you break into it with a spoon, that warm chocolate lava flows out, creating an Instagram-worthy moment every single time.
Here’s why this recipe is a total winner:
- Restaurant-quality results at home – You’ll save $12+ per serving by making these yourself, and they taste just as good (if not better!) than what you’d get at a fancy steakhouse
- Surprisingly simple – Despite looking incredibly impressive, these come together in about 30 minutes with basic baking skills
- Make-ahead friendly – Prep the batter and ganache centers in advance, then bake right before serving for fresh, warm brownies
- Perfectly portioned – Individual servings mean no cutting and serving drama—everyone gets their own personal lava explosion
- Customizable – Add espresso powder for depth, swap in dark chocolate for intensity, or add a pinch of sea salt for gourmet flair
- Minimal cleanup – Uses just a few bowls and ramekins, making post-dessert cleanup a breeze
- Guaranteed wow factor – The molten center never fails to impress dinner guests and family members alike
- Versatile serving options – Delicious on its own or dressed up with vanilla ice cream, whipped cream, or fresh berries
Whether you’re a beginner baker or a seasoned pro, this recipe delivers consistent, foolproof results. The timing and temperature are dialed in perfectly to ensure that gooey center every time.
Ingredient Notes
Let’s talk about what goes into these incredible lava brownies and why each ingredient matters:
Semi-Sweet or Dark Chocolate – This is the star of the show, so quality matters. Use good chocolate bars (not chips) with 60-70% cacao for the best flavor. Ghirardelli, Lindt, or Guittard work beautifully. The chocolate gets melted into both the brownie batter and the ganache center. You can substitute milk chocolate if you prefer sweeter brownies, but semi-sweet provides the perfect balance.
Unsalted Butter – Adds richness and helps create that fudgy texture. Unsalted lets you control the salt level. If using salted butter, reduce added salt by half.
Granulated Sugar – Sweetens the brownies and helps create that signature crackly top. Some recipes use a mix of white and brown sugar, but granulated sugar alone gives you the best crust.
Eggs – Provide structure and richness. Make sure they’re at room temperature so they incorporate smoothly into the chocolate mixture. The eggs help the brownies set around the edges while keeping the center molten.
All-Purpose Flour – Just a small amount gives the brownies structure without making them cakey. You can substitute with a 1:1 gluten-free baking flour if needed.
Cocoa Powder – Intensifies the chocolate flavor and adds depth. Dutch-process cocoa creates a darker, richer brownie, while natural cocoa powder provides a more intense chocolate punch.
Heavy Cream – Used to make the ganache centers. Whole milk can work in a pinch, but heavy cream creates a more luxurious, flowing texture.
Vanilla Extract – Enhances all the chocolate flavors. Pure vanilla extract is worth the investment over imitation.
Salt – A pinch brings out the chocolate flavor and balances the sweetness. Don’t skip it!
Optional: Espresso Powder – Just 1/2 teaspoon deepens the chocolate flavor without making the brownies taste like coffee. This is a pro baker secret!
Equipment Needed
Having the right tools makes this recipe even easier. Here’s what you’ll need:
- 6 ramekins (6-ounce capacity) – Individual oven-safe dishes are essential for creating perfectly portioned lava brownies. Ceramic or glass ramekins work best. Make sure they’re at least 3 inches wide.
- Medium saucepan – For making the ganache filling and melting the chocolate-butter mixture.
- Large mixing bowl – For combining the brownie batter ingredients.
- Whisk – Helps incorporate eggs smoothly and creates that shiny brownie batter.
- Rubber spatula – For folding and scraping down bowl sides.
- Measuring cups and spoons – Accuracy matters in baking!
- Baking sheet – To hold the ramekins in the oven for easy transport and even baking.
- Butter and cocoa powder for greasing – Ensures the brownies release easily from the ramekins.
- Small ice cream scoop or spoon – Makes it easy to portion the ganache centers.
- Oven mitts – These babies come out hot!
- Cooling rack – Lets the ramekins cool slightly before serving.
Lava Brownies Recipe
Decadent chocolate lava brownies with a molten ganache center that flows like liquid chocolate when you dig in. These individual brownies feature a fudgy exterior with a crackly top and a surprise gooey center that’s pure chocolate heaven. Perfect for impressive dinner party desserts or special occasions!
- Prep Time: 20 minutes
- Cook Time: 12 minutes
- Total Time: 32 minutes
- Yield: 6 lava brownies 1x
- Category: Dessert
- Method: Baking
- Cuisine: American
- Diet: Vegetarian
Ingredients
For the Ganache Centers:
- 4 ounces semi-sweet chocolate, finely chopped
- 1/3 cup heavy cream
- 1 tablespoon unsalted butter
For the Brownie Batter:
- 6 ounces semi-sweet or dark chocolate (60-70% cacao), chopped
- 1/2 cup (1 stick) unsalted butter
- 2/3 cup granulated sugar
- 3 large eggs, room temperature
- 1 teaspoon pure vanilla extract
- 1/3 cup all-purpose flour
- 3 tablespoons unsweetened cocoa powder
- 1/4 teaspoon salt
- 1/2 teaspoon espresso powder (optional, but recommended)
For Preparing Ramekins:
- 1 tablespoon softened butter
- 2 tablespoons cocoa powder
Instructions
Make the Ganache Centers (Can be done up to 3 days ahead):
- Create the ganache: Place the chopped chocolate in a heat-safe bowl. In a small saucepan, heat the heavy cream over medium heat until it just begins to simmer around the edges (don’t let it boil). Pour the hot cream over the chocolate and let it sit undisturbed for 2 minutes to soften the chocolate.
- Combine and chill: Add the butter and whisk until the mixture is completely smooth and glossy. Cover the bowl with plastic wrap and refrigerate for at least 2 hours or until firm enough to scoop. You want it to be the consistency of thick frosting.
- Form ganache portions: Once chilled, use a small ice cream scoop or spoon to portion the ganache into 6 equal balls (about 1 tablespoon each). Place them on a parchment-lined plate and freeze while you prepare the brownie batter. They should be frozen solid before baking.
Prepare the Brownies:
- Prep your workspace: Preheat your oven to 425°F (220°C). Generously butter the inside of six 6-ounce ramekins, making sure to coat the sides well. Dust each ramekin with cocoa powder, tapping out any excess. Place the prepared ramekins on a baking sheet and set aside.
- Melt chocolate and butter: In a medium saucepan over low heat, combine the chopped chocolate and butter. Stir constantly until completely melted and smooth, about 3-4 minutes. Remove from heat and let cool for 5 minutes. The mixture should be warm but not hot.
- Mix in sugar: Add the granulated sugar to the chocolate mixture and whisk vigorously for about 30 seconds until well combined and slightly glossy.
- Add eggs: Add the eggs one at a time, whisking well after each addition. The batter should become smooth and shiny. Whisk in the vanilla extract.
- Incorporate dry ingredients: In a small bowl, whisk together the flour, cocoa powder, salt, and espresso powder (if using). Sift or sprinkle the dry ingredients over the chocolate mixture. Gently fold with a rubber spatula until just combined. Don’t overmix—a few small lumps are fine.
- Assemble the lava brownies: Divide half of the brownie batter evenly among the prepared ramekins (about 2 tablespoons each). Take the frozen ganache balls and press one into the center of each ramekin, pushing it down slightly into the batter. Cover each ganache ball with the remaining brownie batter, making sure the ganache is completely enclosed. The ramekins should be about 3/4 full.
- Bake to perfection: Bake for 11-13 minutes. The edges should look set and slightly pulling away from the ramekins, while the centers should still look slightly soft and underbaked. This is key—don’t overbake! The brownies will continue cooking from residual heat.
- Rest and serve: Remove from the oven and let the brownies rest in the ramekins for 1 minute. This helps them set slightly. Run a thin knife around the edges of each ramekin. Place a dessert plate upside down on top of each ramekin and carefully flip to invert the brownie onto the plate. Gently lift off the ramekin. Serve immediately while the center is still molten.
- Optional garnish: Dust with powdered sugar, add a scoop of vanilla ice cream, garnish with fresh raspberries, or drizzle with chocolate sauce. Serve with a spoon so guests can break into the center and enjoy the lava flow!
Notes
- Temperature is crucial: The oven needs to be fully preheated to 425°F for proper baking. If your oven runs cool, you may need to add 1-2 minutes to the baking time.
- Ganache must be frozen solid: If the ganache isn’t completely frozen before baking, it will melt too quickly and won’t create the signature lava effect.
- Don’t overbake: The difference between molten centers and fully cooked brownies is just 1-2 minutes. Set a timer and watch carefully. The tops should look set but the centers should still jiggle slightly when gently shaken.
- Grease ramekins thoroughly: This ensures the brownies release cleanly. Missing spots will cause sticking.
- Make-ahead tip: You can fill the ramekins with batter and ganache, cover with plastic wrap, and refrigerate for up to 24 hours. Add 2-3 minutes to baking time if baking from cold.
- Ramekin alternatives: If you don’t have 6-ounce ramekins, you can use a muffin tin, though baking time will be shorter (8-10 minutes). Watch carefully.
Nutrition
- Serving Size: 1 lava brownie
- Calories: 425
- Sugar: 35g
- Sodium: 145mg
- Fat: 28g
- Saturated Fat: 17g
- Unsaturated Fat: 9g
- Trans Fat: 0g
- Carbohydrates: 42g
- Fiber: 3g
- Protein: 6g
- Cholesterol: 135mg
Nutrition information is approximate and based on standard ingredient measurements. Values may vary based on specific brands and ingredient substitutions used.
Tips & Variations
Flavor Variations:
- Salted Caramel Lava Brownies: Use caramel sauce instead of ganache for the center and sprinkle flaky sea salt on top before serving
- Peanut Butter Lava Brownies: Mix 2 tablespoons of creamy peanut butter into the ganache for a peanut butter cup experience
- Mint Chocolate Lava Brownies: Add 1/2 teaspoon peppermint extract to the brownie batter and use dark chocolate ganache centers
- Orange Chocolate Lava Brownies: Add 1 teaspoon orange zest to the batter and 1/4 teaspoon orange extract to the ganache
- Spicy Mexican Hot Chocolate: Add 1/2 teaspoon cinnamon and 1/4 teaspoon cayenne pepper to the brownie batter
Dietary Modifications:
- Gluten-Free: Substitute the all-purpose flour with a 1:1 gluten-free baking blend or almond flour (though texture will be slightly denser with almond flour)
- Dairy-Free: Use dairy-free chocolate, coconut oil instead of butter, and coconut cream instead of heavy cream
- Lower Sugar: Reduce sugar to 1/2 cup and use dark chocolate with 85% cacao for a more intense, less sweet version
Texture Adjustments:
- For fudgier brownies, reduce flour by 1 tablespoon
- For cakier brownies (still with molten center), increase flour by 1 tablespoon
- For extra gooey centers, make the ganache balls slightly larger
Serving Upgrades:
- Serve with vanilla bean ice cream that melts into the warm chocolate
- Add a dollop of fresh whipped cream and fresh raspberries
- Drizzle with warm chocolate ganache or caramel sauce
- Dust with espresso powder and cocoa for a sophisticated presentation
- Top with toasted chopped hazelnuts or pecans for crunch
Pro Chef Tips
- Use a kitchen scale for precision – Weighing chocolate ensures consistent results every time. 6 ounces is about 170 grams, and 4 ounces is about 113 grams.
- Quality chocolate makes all the difference – Since chocolate is the primary flavor, splurge on good bars from the baking aisle rather than generic chocolate chips. Chips contain stabilizers that prevent them from melting smoothly.
- Freeze ganache completely – The frozen ganache center is what creates that dramatic lava flow. If it’s just chilled, it will melt too quickly and you’ll lose the effect.
- Room temperature eggs mix better – Cold eggs can seize the chocolate. Let them sit out for 30 minutes before baking, or place in warm water for 5 minutes.
- Don’t skip the espresso powder – Even coffee haters won’t taste coffee—it simply amplifies the chocolate flavor and makes it taste richer and more complex.
- Test one ramekin first – If you’re nervous about timing, bake one brownie first as a test to see how your oven performs. Adjust timing for the remaining five.
- Gentle folding technique – When adding the dry ingredients, fold gently just until no white streaks remain. Overmixing develops gluten and creates tough, cakey brownies instead of fudgy ones.
- Proper oven position – Bake on the middle rack for even heat circulation. Too close to the top or bottom can cause uneven baking.
- Create a small well in the batter – Before adding the ganache ball, create a small indentation in the batter with a spoon. This helps center the ganache perfectly.
- The jiggle test – When you gently shake the baking sheet at 11 minutes, the edges should be firm but the centers should jiggle like jello. That’s your sign they’re perfect.
Common Mistakes to Avoid
Overbaking the brownies – This is the number one mistake! Set a timer for 11 minutes and check them. The centers should look slightly underdone. Remember, they continue cooking after removal from the oven. Overbaked lava brownies become regular brownies—still delicious, but no lava!
Using cold ganache instead of frozen – If your ganache centers aren’t completely frozen solid, they’ll melt too quickly during baking and mix into the batter instead of staying contained. Always freeze for at least 1 hour or until rock-solid.
Not greasing ramekins properly – Brownies will stick stubbornly to ungreased spots. Butter every surface thoroughly, especially the edges where the sides meet the bottom. The cocoa powder dust creates a non-stick barrier and adds extra chocolate flavor.
Skipping the cooling time for chocolate – If you add eggs to chocolate that’s too hot (above 120°F), you’ll scramble the eggs and create a grainy texture. Let the chocolate cool for 5 minutes after melting so it’s warm, not hot.
Overmixing the batter – Once you add the flour, mix just until combined. Overworking the batter develops gluten, which creates tough, dense brownies instead of tender, fudgy ones. Some small lumps are perfectly fine.
Using chocolate chips instead of bar chocolate – Chocolate chips contain stabilizers that prevent them from melting smoothly. Always use chopped chocolate bars for the best texture and flavor.
Inconsistent ramekin sizing – Using different sized ramekins means uneven baking. Some will be overdone while others are underbaked. Stick to 6-ounce ramekins for consistent results.
Storage & Meal Prep
Refrigerator Storage:
Surprisingly, leftover lava brownies (if you have any!) can be stored in their ramekins, covered tightly with plastic wrap, in the refrigerator for up to 3 days. To reheat, microwave on 50% power for 30-45 seconds until the center is warmed through but not hot. You can also reheat in a 350°F oven for 5-7 minutes. The center won’t be as dramatically molten as when freshly baked, but they’ll still be incredibly fudgy and delicious.
Reheating Individual Portions:
For the best results, let refrigerated brownies sit at room temperature for 10 minutes, then microwave for 30 seconds. If the center isn’t warm enough, continue in 10-second intervals. The goal is to warm the ganache without overcooking the brownie.
Best Served Fresh:
Honestly, these lava brownies are best enjoyed within 30 minutes of baking when the centers are still flowing. The dramatic molten effect diminishes as they cool, though they remain deliciously fudgy.
Serving Temperature:
Serve these brownies warm, not hot. After inverting onto plates, let them rest for about 1 minute. This allows the structure to set slightly while keeping the center perfectly molten.
Make-Ahead & Freezer Notes
Ganache Centers (Up to 3 Days Ahead):
The ganache filling can be made up to 3 days in advance. Prepare the ganache, let it chill until firm, portion into balls, and keep frozen in an airtight container until ready to use. This is a huge time-saver when entertaining!
Assembled Unbaked Brownies (Up to 24 Hours Ahead):
This is a game-changer for dinner parties! Fill the prepared ramekins with batter and frozen ganache centers, cover each ramekin tightly with plastic wrap, and refrigerate for up to 24 hours. When ready to serve, remove from the refrigerator, let sit at room temperature for 10 minutes, then bake. You’ll need to add 2-3 extra minutes to the baking time since they’re cold. This means you can prep everything the night before and just pop them in the oven when you’re ready for dessert!
Freezing Unbaked Brownies:
You can also freeze assembled unbaked lava brownies for up to 1 month. Wrap each filled ramekin tightly in plastic wrap, then aluminum foil. When ready to bake, unwrap and bake directly from frozen, adding 4-5 minutes to the baking time. Keep an eye on them and use the jiggle test to check for doneness.
Freezing Baked Brownies (Not Recommended):
While you technically can freeze baked brownies, the texture changes upon thawing and reheating, and you lose that signature lava center. If you want to plan ahead, freeze them unbaked instead.
Best Make-Ahead Strategy:
For the ultimate make-ahead plan: prepare the ganache centers 2-3 days before and keep frozen, then assemble the brownies in their ramekins the morning of or night before your event. This way, you’ll spend just 15 minutes on baking and serving when it’s dessert time!
Serving Suggestions
These lava brownies are absolutely stunning on their own, but pairing them with the right accompaniments takes them to the next level. Here are the best ways to serve these decadent chocolate treats:
Classic Pairings:
- Vanilla ice cream – The cold, creamy vanilla is the ultimate contrast to warm, molten chocolate. Place a scoop right on top and watch it melt into the lava center
- Fresh whipped cream – Lightly sweetened whipped cream adds a cloud-like texture without competing with the rich chocolate
- Crème fraîche or mascarpone – For a more sophisticated, slightly tangy contrast that cuts through the sweetness
Fresh Fruit Additions:
- Fresh raspberries or strawberries – The tartness of berries balances the intense chocolate richness perfectly
- Sliced bananas – Creates a chocolate-banana split vibe that’s nostalgic and delicious
- Orange segments – The citrus brightens the deep chocolate flavors beautifully
Sauces & Drizzles:
- Salted caramel sauce – Drizzle over the top for a sweet-salty combination
- Raspberry coulis – Adds a tart, fruity element and beautiful color contrast
- Extra chocolate ganache – Because more chocolate is always a good idea
- Espresso or coffee – Serve alongside a shot of espresso for an Italian-inspired dessert experience
Garnishes:
- Powdered sugar dusting – Classic and elegant, creates a beautiful contrast against the dark chocolate
- Flaky sea salt – A pinch on top adds gourmet flair and enhances the chocolate flavor
- Chocolate shavings – Adds visual appeal and extra chocolate texture
- Fresh mint leaves – Provides a pop of color and refreshing aroma
- Chopped toasted nuts – Hazelnuts, pecans, or almonds add welcome crunch
Beverage Pairings:
- Coffee or espresso – The bitterness complements the sweet chocolate
- Red wine – A rich Cabernet Sauvignon or Port wine is divine with chocolate
- Hot chocolate or drinking chocolate – For the ultimate chocolate lover experience
- Cold milk – Sometimes simple is best, especially for kids
Presentation Ideas: Serve on white plates to make the chocolate color pop, add a small scoop of ice cream beside (not on top) so guests can choose how to combine them, dust the plate with cocoa powder through a fine mesh strainer for a restaurant-style presentation, or place three fresh raspberries around the plate for color and elegance.
FAQs Section
Can I make these without ramekins?
Yes! You can use a standard muffin tin instead. Grease and dust 6 muffin cups with butter and cocoa powder, then fill as directed. Reduce baking time to 8-10 minutes since muffin cups are smaller. You can also use 8-ounce ramekins for larger portions—just increase baking time by 2-3 minutes. The downside to muffin tins is that the brownies are harder to remove cleanly, so ramekins are preferred for presentation.
Why didn’t my brownies have a molten center?
This usually happens for three reasons: overbaking (even 1-2 minutes too long will set the center), the ganache wasn’t frozen solid before baking (it needs to be rock-hard), or the oven temperature was too low (make sure your oven is fully preheated to 425°F). The jiggle test is your friend—when you gently shake the pan at 11 minutes, the centers should still jiggle while the edges are set.
Can I use milk chocolate instead of dark or semi-sweet?
Absolutely! Milk chocolate will create sweeter, milder lava brownies. Keep in mind that milk chocolate has more sugar and less cocoa intensity, so the flavor will be less complex. If you prefer dark chocolate, go for 70% cacao, but reduce the sugar in the batter to 1/2 cup to balance the bitterness.
How do I know when they’re done baking?
The edges should look set and be pulling slightly away from the sides of the ramekins. The tops should have a thin, slightly crackled crust. Most importantly, the centers should still look slightly soft and jiggle when you gently shake the baking sheet. They’ll look slightly underbaked, and that’s exactly what you want! They continue cooking from residual heat after removing from the oven.
Can I make these dairy-free or vegan?
Yes! For dairy-free, use dairy-free chocolate, substitute coconut oil for butter, and use full-fat coconut cream instead of heavy cream. For vegan brownies, you’ll also need to replace the eggs—use flax eggs (3 tablespoons ground flaxseed mixed with 9 tablespoons water, let sit 5 minutes) or a commercial egg replacer. The texture will be slightly different but still delicious.
What if I don’t have espresso powder?
You can skip it entirely—it’s optional. The brownies will still taste amazing! Espresso powder doesn’t make them taste like coffee; it just enhances the chocolate flavor. If you want a substitute, you can use 1 teaspoon of instant coffee granules dissolved in the vanilla extract.
Can I double this recipe?
Definitely! This recipe doubles perfectly for larger gatherings. Just make sure you have enough ramekins and baking sheet space. You may need to bake them in two batches unless you have two large baking sheets that fit side by side in your oven. The baking time remains the same.
My brownies stuck to the ramekins. How do I prevent this?
Thorough greasing is essential! Use soft butter (not melted) and apply it generously with a pastry brush or paper towel, making sure to coat every surface including where the sides meet the bottom. Then dust heavily with cocoa powder, tapping out the excess. If you’re still having issues, try adding a small circle of parchment paper to the bottom of each ramekin.
Conclusion
There’s something truly magical about breaking into a warm lava brownie and watching that river of molten chocolate flow onto your plate. These chocolate lava brownies bring restaurant-quality dessert to your home kitchen, and once you master the simple technique, you’ll be making them for every special occasion (and maybe some random Tuesday nights, too).
The combination of that fudgy, crackly-topped exterior with the surprise gooey center never gets old. Whether you’re serving them to impressed dinner guests or treating yourself after a long week, these brownies deliver pure chocolate bliss in every spoonful. The best part? You can prep them ahead and have a show-stopping dessert ready with minimal effort when you need it.
I’d love to hear how your lava brownies turn out! Did you try any of the variations? Did you nail the molten center on your first try? Leave a comment below sharing your experience and any creative twists you added. And if you loved this recipe as much as I do, please share it on Pinterest so other chocolate lovers can discover it too!
Happy baking, and may your brownies always have the perfect lava flow! 🍫✨