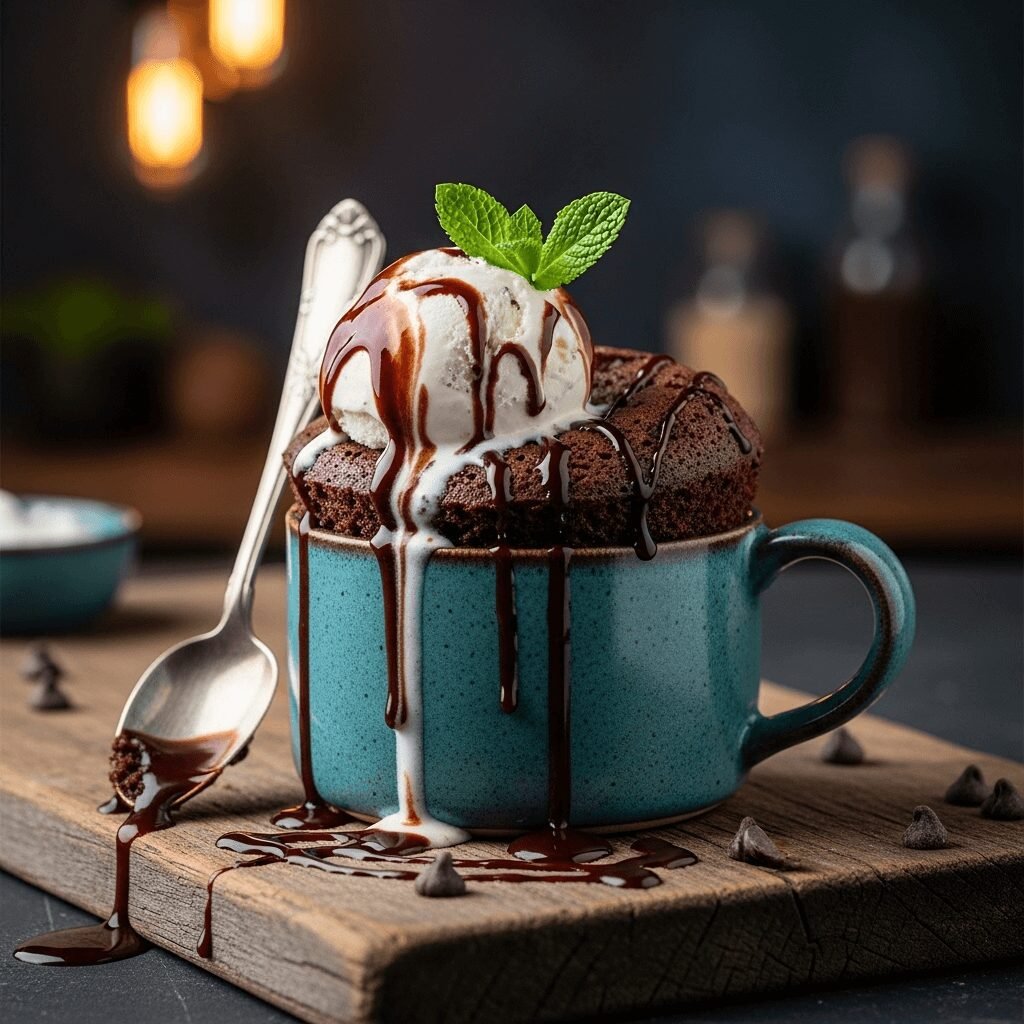
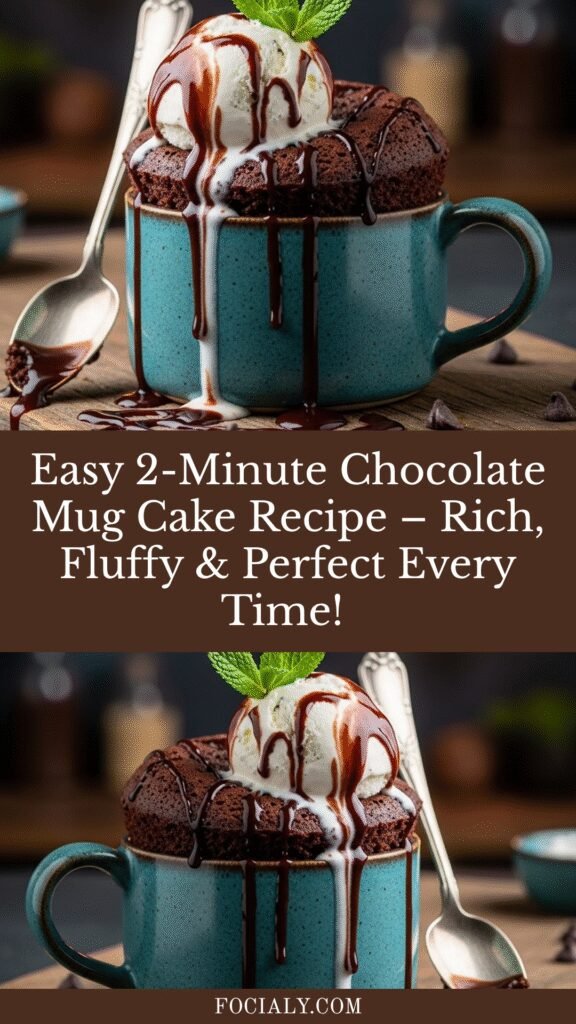
Easy 2-Minute Chocolate Mug Cake Recipe – Rich, Fluffy & Perfect Every Time!
There’s something magical about craving dessert and having it ready in less time than it takes to preheat your oven. That’s exactly what this chocolate mug cake delivers—a warm, gooey, bakery-quality chocolate cake made in a single mug, cooked in your microwave, and ready in just two minutes from start to finish.
This single-serve dessert has become a lifesaver for late-night sweet tooth emergencies, last-minute celebrations, and those moments when you want something indulgent without the commitment of baking an entire cake. Whether you’re a college student in a dorm room, a busy parent who needs a quick win, or someone who simply lives alone and doesn’t want leftover cake tempting you all week, this mug cake is your new best friend.
The beauty of this recipe lies in its simplicity. You mix everything directly in the mug—no bowls, no mixers, no mess. Within minutes, you’re digging into a warm, tender chocolate cake that rivals anything you’d get from a fancy bakery. It’s the perfect portion size, endlessly customizable, and honestly one of those recipes you’ll make over and over again once you master it.
History / Background
The mug cake phenomenon took the internet by storm in the early 2000s, though the concept of single-serve microwave desserts dates back to the 1980s when microwave ovens became household staples. The original “mug cake” recipes were often heavy, rubbery, and more of a novelty than a genuinely delicious dessert. But as home cooks experimented and shared their results online, the recipes evolved dramatically.
The chocolate mug cake specifically gained massive popularity around 2010 when food bloggers and college students began sharing perfected versions on social media platforms. The recipe became a symbol of convenience culture—a way to satisfy cravings instantly without the time investment of traditional baking. Pinterest played a huge role in spreading mug cake recipes, with the visual appeal of that perfectly domed cake sitting in a cute mug resonating with millions of users.
What makes mug cakes special is how they democratized dessert-making. You don’t need fancy equipment, extensive baking knowledge, or even a working oven. The mug cake proved that anyone, anywhere, could create something delicious with just a few pantry staples and a microwave. It’s become particularly beloved among college students, shift workers, and anyone cooking in small spaces or unconventional kitchens.
Today, mug cakes have evolved into a legitimate dessert category with countless variations—from vanilla and red velvet to lemon, peanut butter, and even savory versions. But the chocolate mug cake remains the most popular, the most searched, and the gateway recipe that introduces people to the magic of microwave baking.
Why You’ll Love This Recipe
This isn’t just another quick dessert—it’s a game-changing recipe that solves so many everyday cooking challenges. The chocolate mug cake combines convenience with genuine deliciousness, giving you a restaurant-quality dessert without any of the usual hassle.
Here’s why this recipe will become your go-to dessert:
- Lightning-fast preparation – From craving to eating in under 5 minutes total, including cook time
- Single-serve perfection – No temptation of leftover cake, perfect portion control
- Zero special equipment needed – Just a mug and a microwave, that’s it
- Pantry-friendly ingredients – Everything you need is probably already in your kitchen
- Beginner-proof – Literally anyone can make this successfully on the first try
- Customizable base – Add chocolate chips, peanut butter, caramel, or keep it simple
- Budget-friendly – Costs less than a dollar to make, way cheaper than bakery desserts
- No oven required – Perfect for dorms, offices, RVs, or hot summer days
- Minimal cleanup – You eat straight from the mug you cooked in
- Impressive enough for guests – Top with ice cream and it looks intentional and fancy
Ingredient Notes
Every ingredient in this mug cake serves a specific purpose, and understanding why each one matters will help you get perfect results every time.
All-Purpose Flour – Provides the structure for your cake. You need just enough to give body without making it dense. Cake flour works too for an even lighter texture, or use a 1:1 gluten-free flour blend if needed.
Granulated Sugar – Sweetens the cake and helps create that tender crumb. You can reduce it slightly if you prefer less sweet desserts, or substitute with coconut sugar for a deeper molasses flavor.
Unsweetened Cocoa Powder – This is what makes it chocolate cake, so quality matters here. Dutch-process cocoa gives a smoother, less acidic flavor, while natural cocoa powder provides a more intense chocolate punch. Either works beautifully.
Baking Powder – The leavening agent that makes your cake rise and become fluffy rather than dense. Make sure yours is fresh—if it’s been in your pantry for over six months, it might not work as well.
Salt – A tiny pinch enhances all the other flavors and balances the sweetness. Never skip the salt in baking, even in desserts.
Milk – Adds moisture and richness. Any milk works—dairy, almond, oat, soy—whatever you have on hand. Whole milk creates the richest texture, but low-fat works fine too.
Vegetable Oil – Keeps the cake moist and tender. You can substitute melted butter for a richer flavor, or use melted coconut oil for a subtle tropical note.
Vanilla Extract – Rounds out the chocolate flavor and adds warmth. Pure vanilla extract tastes better than imitation, but both work in a pinch.
Optional Add-ins – Chocolate chips, peanut butter chips, a small square of chocolate pressed into the center, caramel sauce, or even a spoonful of Nutella stirred through the batter all work wonderfully.
Equipment Needed
The beauty of this recipe is the minimal equipment required. Here’s everything you need:
- Microwave-safe mug (12-16 oz capacity) – Ceramic or thick glass works best; avoid metal or mugs with metallic paint
- Small whisk or fork – For mixing the batter smooth
- Measuring spoons – For accurate ingredient portions
- Small measuring cup – Optional but helpful for the milk
- Microwave – Obviously! Different wattages affect cooking time, so you may need to adjust
That’s genuinely it. No mixers, no baking pans, no oven mitts needed. This is as minimal as baking gets.
PrintMug Cake Recipe

A rich, fluffy chocolate cake that cooks in your microwave in under 2 minutes! This single-serve dessert is perfect for satisfying chocolate cravings without baking a full cake. Mix everything right in the mug for minimal cleanup.
- Prep Time: 2 minutes
- Cook Time: 1 minute 30 seconds
- Total Time: 3 minutes 30 seconds
- Yield: 1 serving 1x
- Category: Dessert
- Method: Microwave
- Cuisine: American
- Diet: Vegetarian
Ingredients
- 4 tablespoons all-purpose flour
- 4 tablespoons granulated sugar
- 2 tablespoons unsweetened cocoa powder
- 1/8 teaspoon baking powder
- Pinch of salt
- 3 tablespoons milk (any kind)
- 2 tablespoons vegetable oil (or melted butter)
- 1/4 teaspoon vanilla extract
- 2 tablespoons chocolate chips (optional)
Instructions
- Prepare your mug – Choose a microwave-safe mug that holds at least 12 ounces. Make sure it’s completely dry before starting.
- Mix dry ingredients – Add the flour, sugar, cocoa powder, baking powder, and salt directly to your mug. Use a fork or small whisk to stir these together thoroughly, making sure there are no lumps of cocoa powder. This step is crucial for even chocolate flavor throughout.
- Add wet ingredients – Pour in the milk, oil, and vanilla extract. Stir everything together with your fork until the batter is completely smooth with no flour pockets remaining. Scrape the bottom and sides of the mug to ensure everything is incorporated. The batter should be thick but pourable.
- Add chocolate chips – If using, fold in the chocolate chips or press a few into the top of the batter. You can also push a small square of chocolate into the center for a molten lava cake effect.
- Microwave – Place the mug in the center of your microwave. Cook on high power for 1 minute 30 seconds. The cake will rise significantly during cooking—this is normal. It should look set on top when done, though the very center might still look slightly moist (that’s perfect!).
- Cool briefly – Let the mug cake cool for 1-2 minutes before eating. The mug will be hot, so use a towel or oven mitt to handle it. The cake will settle slightly as it cools.
- Serve and enjoy – Eat directly from the mug or carefully turn it out onto a plate. Top with ice cream, whipped cream, or powdered sugar if desired.
Notes
- Microwave wattage matters – If you have a particularly powerful microwave (1200+ watts), start checking at 1 minute 15 seconds. Lower wattage microwaves may need up to 2 minutes.
- Don’t overfill – Make sure you use a mug with enough capacity. The batter will rise a lot during cooking.
- Don’t overcook – The cake should look just set on top. If you cook it too long, it becomes rubbery. A slightly underdone center is better than overdone.
- Customize the flavor – Add a tablespoon of peanut butter, swap vanilla for almond extract, or stir in instant coffee powder for mocha cake.
- Double the recipe – You can make two mug cakes at once in separate mugs, but don’t double the recipe in a single mug—it will overflow.
Nutrition
- Serving Size: 1 mug cake
- Calories: 485
- Sugar: 52g
- Sodium: 145mg
- Fat: 22g
- Saturated Fat: 4g
- Unsaturated Fat: 17g
- Trans Fat: 0g
- Carbohydrates: 68g
- Fiber: 4g
- Protein: 6g
- Cholesterol: 3mg
Note: Nutrition information is approximate and will vary based on specific ingredients used and optional add-ins.
Tips & Variations
The basic chocolate mug cake is delicious on its own, but here are some ways to customize it to your preferences:
Flavor Variations:
- Peanut Butter Chocolate – Swirl in a tablespoon of peanut butter before microwaving
- Mocha Mug Cake – Add 1/2 teaspoon instant coffee or espresso powder to the dry ingredients
- Mint Chocolate – Use 1/8 teaspoon peppermint extract instead of vanilla
- Orange Chocolate – Add 1/4 teaspoon orange zest to the batter
- Mexican Chocolate – Add a pinch of cinnamon and cayenne pepper
- Cookies and Cream – Crush 2 Oreo cookies and fold into the batter
Texture Modifications:
- Fudgier cake – Reduce cooking time by 15 seconds for a more molten center
- Fluffier cake – Add an extra 1/8 teaspoon of baking powder
- Denser cake – Reduce baking powder to just a pinch
Dietary Adaptations:
- Gluten-free – Use a 1:1 gluten-free flour blend
- Dairy-free – Use almond milk or oat milk and keep the oil (don’t substitute butter)
- Lower sugar – Reduce sugar to 3 tablespoons or use a sugar substitute designed for baking
- Vegan – Use plant-based milk and add 1/2 teaspoon apple cider vinegar to the wet ingredients
Topping Ideas:
- Vanilla ice cream melting over the warm cake
- Fresh whipped cream and berries
- Caramel or hot fudge sauce drizzle
- Powdered sugar dusted on top
- Marshmallow fluff melted on top
- Chopped nuts for crunch
Pro Chef Tips
These professional insights will take your mug cake from good to absolutely phenomenal:
Use room temperature ingredients – Cold milk can create an uneven texture. Let your milk sit out for 10 minutes before using, or microwave it for just 10 seconds to take the chill off.
Sift your cocoa powder – Cocoa powder tends to clump. Sifting it before adding ensures you don’t get bitter cocoa pockets in your finished cake. If you don’t have a sifter, just break up the lumps with the back of a spoon.
The fork matters – Use a fork with thin tines rather than a whisk for mixing. It works better in the confined space of a mug and helps you scrape the bottom effectively.
Create a molten center – For an impressive molten lava effect, place a square of good-quality dark chocolate in the center of your batter before microwaving. Press it down slightly but don’t stir it in.
Bloom your cocoa – For deeper chocolate flavor, mix your cocoa powder with the oil first and let it sit for 30 seconds before adding the other ingredients. This “blooms” the cocoa and intensifies its flavor.
Rotate halfway through – If your microwave doesn’t have a turntable, pause cooking at 45 seconds and rotate the mug 180 degrees for more even cooking.
The toothpick test doesn’t work – Unlike traditional cakes, you want a few moist crumbs on a toothpick. A completely clean toothpick means you’ve overcooked it.
Add salt to your toppings too – A tiny pinch of flaky sea salt on top of your finished cake with ice cream elevates it to dessert-bar quality.
Use quality cocoa powder – Since cocoa is the star ingredient, using a good brand like Ghirardelli, Valrhona, or Guittard makes a noticeable difference in flavor depth.
Don’t skip cooling time – Those 1-2 minutes allow the structure to set properly. Digging in immediately can make it seem too gummy.
Common Mistakes to Avoid
Even though this recipe is beginner-friendly, a few common errors can affect your results:
Overcooking the cake – This is the number one mistake. Mug cakes cook incredibly fast, and even 20 extra seconds can turn your fluffy cake into a rubbery puck. Start with less time and add more if needed. Remember, it continues cooking slightly from residual heat after you remove it from the microwave.
Using a mug that’s too small – The batter rises dramatically during cooking. If your mug is too small or too full, you’ll have a volcanic overflow situation in your microwave. Always use at least a 12-ounce mug and never fill it more than halfway with batter.
Not mixing thoroughly enough – Flour pockets and cocoa lumps will create an uneven texture and bitter spots. Take an extra 20 seconds to really incorporate everything smoothly, scraping the bottom and sides of your mug.
Substituting ingredients without adjusting – Not all substitutions work 1:1. If you use alternative flours or sweeteners, you may need to adjust liquid ratios. Almond flour, for example, needs less liquid than all-purpose flour.
Forgetting to grease with non-stick mugs – Most ceramic mugs don’t need greasing, but if you want to turn your cake out onto a plate, a light spray of cooking oil or butter around the inside helps it release cleanly.
Using expired baking powder – Baking powder loses potency over time. If yours is old, your cake won’t rise properly and will be dense. Test it by adding a pinch to hot water—it should bubble vigorously if it’s still good.
Eating it too hot – Yes, it’s tempting, but giving it 1-2 minutes to cool improves the texture significantly. The cake sets properly and becomes more cake-like rather than pudding-like.
Storage & Meal Prep
While mug cakes are definitely best enjoyed fresh and warm right after cooking, here’s what you need to know about storage:
Immediate consumption is ideal – Mug cakes are designed to be made and eaten immediately. The texture is perfect when freshly made and deteriorates over time.
Short-term storage – If you absolutely must save it, let the cake cool completely, then cover the mug with plastic wrap and refrigerate for up to 24 hours. The texture will become denser and more compact, but it’s still edible.
Reheating refrigerated cake – Microwave for 15-20 seconds to warm it back up. It won’t be quite as fluffy as fresh, but it’s acceptable.
Not freezer-friendly – Due to the high moisture content and single-serve size, mug cakes don’t freeze well. They become icy and the texture suffers significantly when thawed.
Dry ingredient prep – You CAN prepare multiple servings of the dry ingredients ahead of time. Mix flour, sugar, cocoa powder, baking powder, and salt in small containers or jars. When you want a mug cake, dump one portion into your mug, add the wet ingredients, and cook. This makes it even faster.
Office-ready preparation – Keep the dry ingredients in a small container at your desk along with a bottle of oil. You only need to add milk, which most office kitchens have. Instant dessert during your lunch break!
Make-Ahead & Freezer Notes
The nature of mug cakes makes them inherently a “make when you want it” recipe rather than a make-ahead situation, but here are some strategies for planning:
Dry mix jars – Measure out the dry ingredients (flour, sugar, cocoa powder, baking powder, salt) into small Mason jars or containers. Label each one and store in your pantry. When the craving hits, just add wet ingredients and cook. These pre-portioned mixes keep for months and make great gifts too.
DIY mug cake mix packets – Create individual portions in small zip-top bags. Write the wet ingredients needed on the bag with a permanent marker. Keep a stash in your pantry drawer for ultimate convenience.
Batter doesn’t store well – Once you’ve mixed the wet and dry ingredients together, you should cook it immediately. The baking powder activates when it meets liquid, so waiting will result in a flat, dense cake.
Not recommended for freezing – Cooked mug cakes don’t freeze well due to their moisture content and spongy texture. They become watery and unpleasant when thawed.
Best reheating method – If you have a leftover cooled mug cake (unusual, but it happens), the microwave is still your best bet. Heat in 10-15 second intervals until just warm. Don’t overheat or it becomes rubbery.
Travel-friendly prep – Going camping or staying in a hotel? Pack pre-measured dry ingredients in a small container and bring along those individual coffee creamer cups (they work as milk!). As long as you have microwave access, you can make this anywhere.
Serving Suggestions
While a warm chocolate mug cake is delicious on its own, here are some ways to turn it into a more complete dessert experience:
Classic ice cream pairing – A scoop of vanilla ice cream melting over the warm cake creates that perfect hot-and-cold, cake-and-cream combination. Chocolate, coffee, or salted caramel ice cream also work beautifully.
Whipped cream options – Fresh whipped cream, Cool Whip, or even marshmallow fluff add a light, airy contrast to the dense cake. Dollop it on top or stir it through for a marble effect.
Berry companions – Fresh raspberries, strawberries, or a berry compote add brightness and cut through the richness. The fruit acidity balances the chocolate sweetness perfectly.
Sauce drizzles – Caramel sauce, hot fudge, peanut butter sauce, or even Nutella warmed up adds extra decadence. Get creative with your drizzle patterns for Instagram-worthy presentation.
Coffee or tea pairing – Serve alongside a strong cup of coffee, espresso, or even chai tea. The cake is rich enough that you’ll want something to sip between bites.
Breakfast twist – Add a tablespoon of peanut butter to the batter and top with sliced banana for a breakfast-acceptable chocolate cake. Pair with your morning coffee for a treat to start your day.
Dessert charcuterie addition – Making a dessert board? Mug cakes make a fun, interactive element. Set out several mugs with dry ingredients and let guests mix and cook their own.
Milkshake mixer – Crumble a cooled mug cake into a blender with ice cream and milk for the ultimate chocolate milkshake with actual cake pieces throughout.
FAQs Section
Can I make this without a microwave?
Yes, but the texture will be slightly different. Pour the batter into a small greased ramekin and bake at 350°F (175°C) for about 12-15 minutes. The result will be more like a traditional cake with a firmer texture rather than the soft, steamed texture of microwaved cake.
Why did my mug cake turn out rubbery?
This almost always means you’ve overcooked it. Microwave wattages vary significantly—if yours is particularly powerful, reduce the cooking time by 15-30 seconds. The cake should look just barely set on top. Remember, it’s better to undercook slightly than overcook.
Can I use self-rising flour instead of all-purpose flour?
If you use self-rising flour, omit the baking powder and salt since they’re already included in self-rising flour. The ratio isn’t perfect, so your cake might be slightly denser or less fluffy, but it will still work in a pinch.
How do I prevent the cake from overflowing?
Use a larger mug (14-16 ounces minimum) and don’t fill it more than halfway with batter. The cake rises significantly during cooking. If you’re doubling the recipe, use two separate mugs rather than one large one. Also, place a microwave-safe plate under the mug to catch any potential spills.
Can I make this vegan?
Absolutely! Use plant-based milk (almond, oat, or soy work great), keep the vegetable oil (don’t substitute butter), and add 1/2 teaspoon of apple cider vinegar to the wet ingredients to help with leavening. The texture is nearly identical to the original version.
My mug cake sank in the middle—what happened?
This usually indicates you didn’t cook it quite long enough, or you removed it too quickly from the microwave without letting it cool. The cake needs those 1-2 minutes of cooling time for the structure to set properly. A slight dip in the center is actually normal and often preferred for that molten, underbaked center.
Can I double the recipe in one mug?
Not recommended! Doubling the batter in one mug increases the likelihood of overflow and uneven cooking. The center may stay raw while the edges overcook. If you want two servings, make them in separate mugs and cook them one at a time or side-by-side if your microwave is large enough and you can ensure even heating.
Conclusion
This 2-minute chocolate mug cake is more than just a quick dessert—it’s a solution to those moments when you need something sweet, comforting, and indulgent without any of the usual baking hassle. Whether you’re cooking for one, satisfying a midnight craving, or introducing a young baker to the joy of cooking, this recipe delivers every single time.
The beauty of mastering this simple recipe is that it opens up a whole world of single-serve dessert possibilities. Once you understand the basic ratios and technique, you can experiment with different flavors, mix-ins, and toppings to create your perfect personalized dessert. It’s the ultimate customizable sweet treat.
I’d love to hear how your mug cake turns out! Did you add any special mix-ins? Did you discover a topping combination that’s absolutely incredible? Drop a comment below and let me know. And if you loved this recipe, please share it on Pinterest so other chocolate lovers can discover how easy it is to satisfy their sweet tooth in just two minutes.
Now grab a mug and get baking—or should I say microwaving? Your perfect chocolate cake is just minutes away!