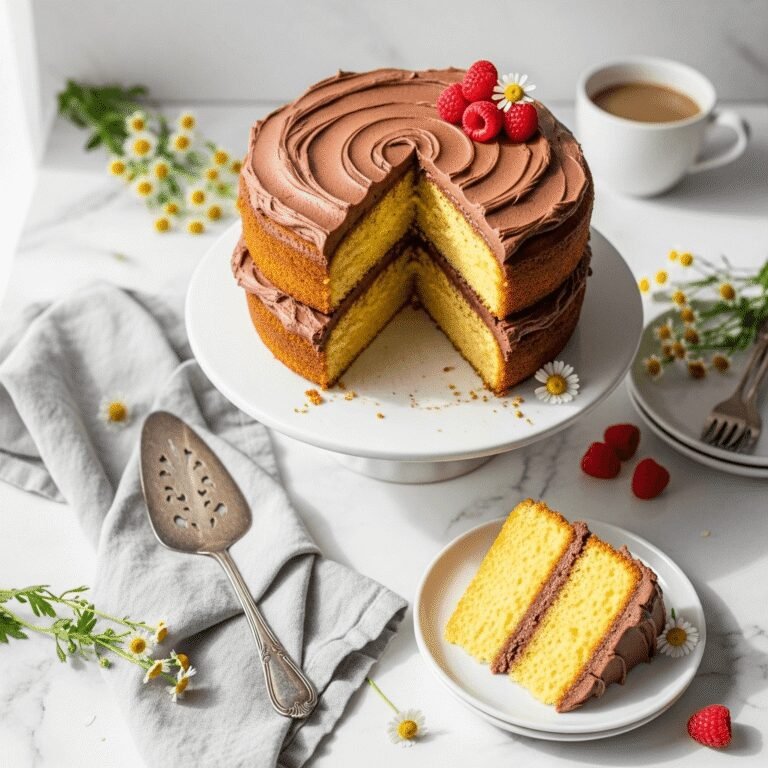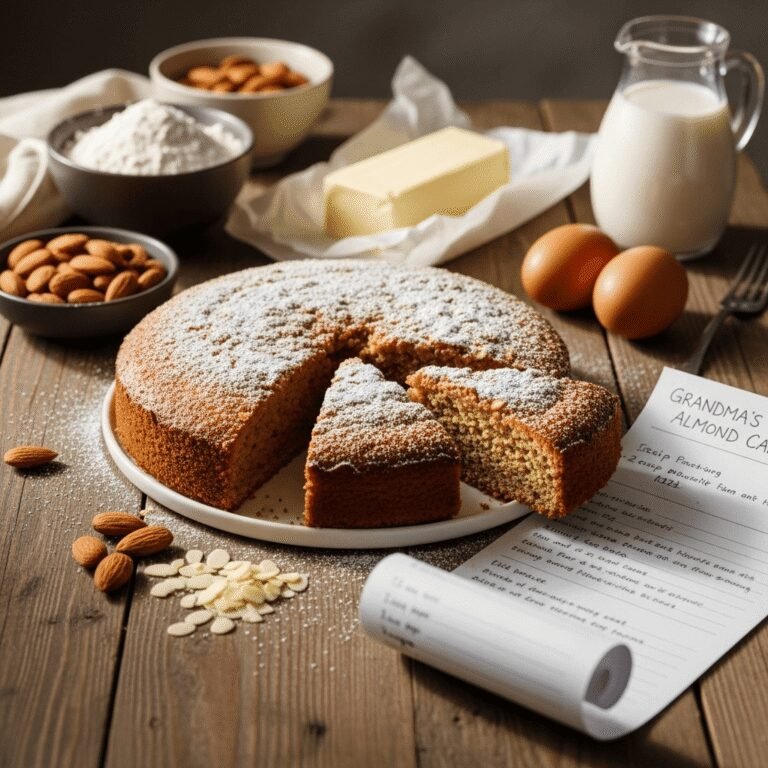
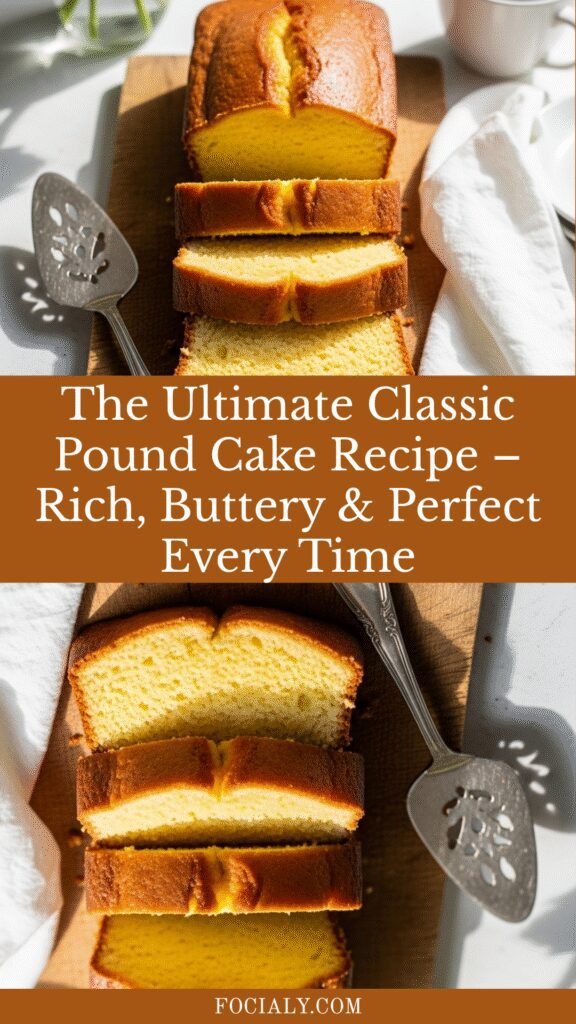
The Ultimate Classic Pound Cake Recipe – Rich, Buttery & Perfect Every Time
There’s something truly magical about a classic pound cake. This timeless dessert is the definition of simplicity meeting perfection – a tender, buttery crumb with a golden crust that’s been gracing American tables for generations. Unlike fussy layer cakes or complicated desserts, pound cake is wonderfully straightforward, yet impressively elegant.
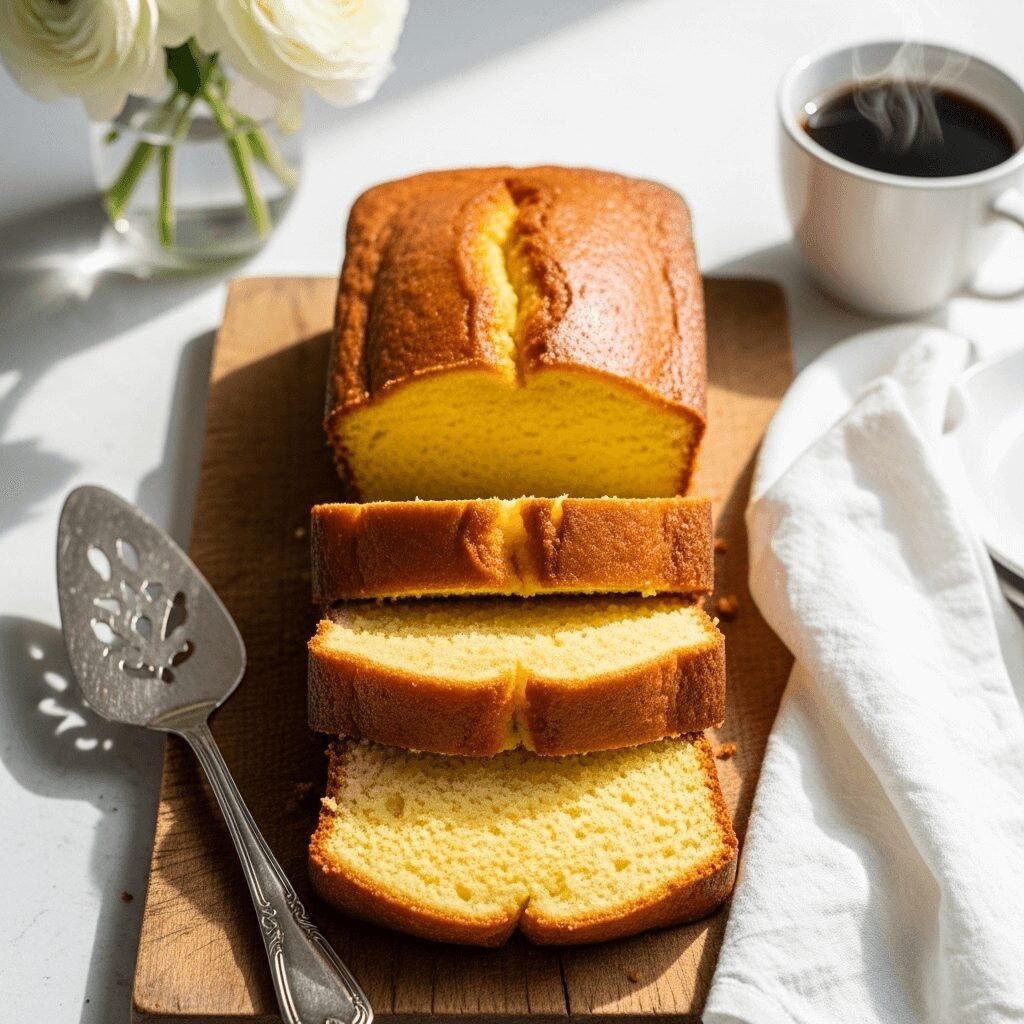
This recipe creates a rich, dense cake with a fine, velvety texture that melts in your mouth. It’s perfect for Sunday brunch, holiday gatherings, afternoon tea, or anytime you want a comforting homemade dessert. Serve it plain to appreciate its pure, buttery flavor, or dress it up with fresh berries, whipped cream, or a simple glaze. The beauty of pound cake lies in its versatility – it’s equally at home at a fancy dinner party or wrapped in foil for a weekday lunchbox treat.
What makes this pound cake recipe special is its reliability. Once you master this technique, you’ll have a go-to recipe that never disappoints. The ingredients are pantry staples, the method is straightforward, and the results are consistently delicious. Whether you’re a beginner baker or a seasoned pro, this classic pound cake will become your new favorite dessert to bake and share.
History / Background
The pound cake has a fascinating history that dates back to early 18th century Europe, with the first known recipe appearing in British cookbooks around the 1700s. The name “pound cake” comes from the traditional recipe formula: one pound each of butter, sugar, eggs, and flour. This simple 1:1:1:1 ratio made the recipe incredibly easy to remember in an era when written recipes were less common and measurements were less standardized.
The original pound cakes were quite different from what we enjoy today. They contained no leavening agents like baking powder or baking soda – the only rise came from air beaten into the butter and eggs. Bakers would beat the batter by hand for extended periods, sometimes up to an hour, to incorporate enough air for a proper rise. This labor-intensive process was considered a show of skill and dedication.
When European colonists brought pound cake recipes to America, the dessert quickly became a beloved staple, particularly in the South. Southern bakers embraced pound cake culture, developing regional variations and passing down treasured family recipes through generations. The introduction of chemical leaveners in the 19th century revolutionized pound cake baking, making it easier to achieve a tender crumb without hours of beating.
Today, pound cake remains a cornerstone of American baking traditions. It’s the cake grandmothers bake for homecomings, the dessert neighbors bring to potlucks, and the treat that evokes memories of simpler times. Modern versions have evolved to include various flavorings – vanilla, lemon, almond, cream cheese – but the classic butter pound cake remains the most beloved. In the South, pound cake is so revered that many families guard their recipes like precious heirlooms, with each baker claiming their version is “the best.”
The pound cake’s enduring popularity speaks to its timeless appeal. In an age of elaborate desserts and trendy flavors, there’s something deeply satisfying about a slice of perfectly baked pound cake – it’s comfort, tradition, and pure deliciousness in every bite.
Why You’ll Love This Recipe
This classic pound cake recipe is about to become your new baking obsession, and here’s why: it delivers that perfect old-fashioned pound cake texture and flavor that’s increasingly hard to find. The exterior develops a beautiful golden-brown crust that’s slightly crisp, while the interior stays incredibly moist and tender with that signature fine, tight crumb that makes pound cake so distinctive.
Here’s what makes this recipe a winner:
- Simple ingredients you already have – No specialty items required, just butter, sugar, eggs, flour, and a few basics from your pantry
- Foolproof technique – Clear, detailed instructions ensure success even for novice bakers
- Rich, buttery flavor – The high butter content creates an indulgent taste that’s never dry or bland
- Perfect texture – Dense yet tender, with that classic pound cake crumb that slices beautifully
- Versatile serving options – Delicious plain, or customize with glazes, fruits, or toppings
- Makes ahead beautifully – Actually tastes better the next day as flavors develop and marry
- Freezer-friendly – Wrap and freeze for up to 3 months without quality loss
- Impressive presentation – Looks bakery-quality with minimal effort
- Feeds a crowd – One loaf serves 10-12 people generously
- Budget-friendly – Costs a fraction of store-bought pound cake
- No mixer required option – Can be made by hand with a wooden spoon and some elbow grease
This recipe strikes the perfect balance between traditional technique and modern convenience. You’ll achieve that coveted fine, tight crumb and rich flavor without spending hours beating batter by hand.
Ingredient Notes
Understanding your ingredients is key to pound cake success. Here’s what you need and why each component matters:
Unsalted Butter – The star of the show. Use high-quality unsalted butter at room temperature (about 65-70°F). It should be soft enough to leave an indent when pressed, but not greasy or melted. European-style butter with higher fat content creates an even richer cake. Avoid salted butter as it can make the cake taste overly salty. Substitution: Not recommended, but margarine can work in a pinch, though flavor will suffer.
Granulated Sugar – Provides sweetness and helps create structure. The sugar crystals cut into the butter during creaming, creating air pockets that help the cake rise. Don’t use superfine sugar as it dissolves too quickly. Substitution: Can replace up to half with light brown sugar for a deeper, caramel-like flavor.
Eggs – Large eggs at room temperature are essential. They provide structure, moisture, and richness. Room temperature eggs incorporate more easily and create better emulsification. Take them out of the fridge 30-60 minutes before baking. Substitution: No good substitutes for traditional pound cake.
All-Purpose Flour – Provides structure. Measure carefully using the spoon-and-level method (spoon flour into measuring cup, level with knife). Don’t scoop directly from the bag as this packs the flour and results in a dry, tough cake. Substitution: Cake flour creates a more delicate crumb, but reduce quantity by 2 tablespoons per cup.
Baking Powder – A small amount helps with rise and creates a slightly lighter texture than historical recipes. Don’t omit or the cake will be extremely dense. Make sure yours is fresh (test by dropping 1/2 teaspoon in hot water – it should fizz vigorously).
Salt – Enhances all the flavors and balances sweetness. Don’t skip it!
Vanilla Extract – Pure vanilla extract is worth the investment. It adds depth and complexity. Substitution: Almond extract, lemon extract, or a combination.
Whole Milk or Buttermilk – Adds moisture and tenderness. Whole milk is traditional, but buttermilk creates a slightly tangier flavor and more tender crumb. Use at room temperature. Substitution: Heavy cream makes it richer; 2% milk works but results in slightly less tender texture.
Equipment Needed
Having the right tools makes pound cake baking easier and more successful:
- Stand mixer or hand mixer – Makes creaming butter and sugar effortless, though you can do it by hand
- 9×5-inch loaf pan – Standard size; avoid glass pans as they conduct heat differently
- Parchment paper – For easy removal and cleanup
- Large mixing bowls – At least 2, preferably glass or stainless steel
- Measuring cups and spoons – Accurate measurements are crucial for pound cake success
- Wire cooling rack – Essential for proper cooling and preventing soggy bottoms
- Rubber spatula – For scraping down bowl sides and folding batter
- Flour sifter or fine-mesh sieve – Optional but helpful for lump-free flour
- Toothpick or cake tester – For checking doneness
- Kitchen thermometer – Optional but helpful for checking butter and egg temperatures
- Offset spatula – Useful for smoothing batter in the pan
The Ultimate Classic Pound Cake Recipe – Rich, Buttery & Perfect Every Time
A classic, buttery pound cake with a tender crumb and golden crust. This timeless recipe delivers old-fashioned flavor and texture that’s perfect for any occasion. Rich, moist, and absolutely delicious served plain or with your favorite toppings.
- Prep Time: 20 minutes
- Cook Time: 1 hour 10 minutes
- Total Time: 1 hour 30 minutes
- Yield: 12 servings 1x
- Category: Dessert
- Method: Baking
- Cuisine: American
- Diet: Vegetarian
Ingredients
- 1 cup (2 sticks/226g) unsalted butter, room temperature
- 3 cups (600g) granulated sugar
- 6 large eggs, room temperature
- 3 cups (360g) all-purpose flour, spooned and leveled
- 1/2 teaspoon baking powder
- 1/2 teaspoon salt
- 1 cup (240ml) whole milk, room temperature
- 2 teaspoons pure vanilla extract
Instructions
- Prepare the pan and preheat oven: Position rack in the center of your oven and preheat to 325°F (163°C). Grease a 9×5-inch loaf pan thoroughly with butter or non-stick spray, then line with parchment paper, leaving overhang on the long sides for easy removal. Grease the parchment as well.
- Cream butter and sugar: In a large bowl using a stand mixer fitted with paddle attachment (or hand mixer), beat the room temperature butter on medium speed for 2-3 minutes until smooth and creamy. Gradually add sugar, about 1/2 cup at a time, beating well after each addition. Continue beating on medium-high speed for 5-7 minutes until mixture is very light, fluffy, and pale in color. This step is crucial – don’t rush it! Properly creamed butter and sugar creates the foundation for a tender crumb.
- Add eggs: Reduce mixer speed to medium-low. Add eggs one at a time, beating well after each addition and scraping down the bowl sides as needed. The mixture may look slightly curdled after adding eggs – this is normal and will come together when you add the flour.
- Combine dry ingredients: In a separate medium bowl, whisk together flour, baking powder, and salt until evenly combined. This ensures the leavening is distributed throughout.
- Mix wet ingredients: In a small bowl or measuring cup, stir together milk and vanilla extract.
- Alternate adding dry and wet ingredients: With mixer on low speed, add flour mixture in three additions, alternating with milk mixture in two additions, beginning and ending with flour. Mix each addition just until combined – about 5-10 seconds after the last streak of flour disappears. The sequence should be: 1/3 flour, 1/2 milk, 1/3 flour, remaining milk, remaining flour. Do not overmix or the cake will be tough.
- Finish batter by hand: Remove bowl from mixer and use a rubber spatula to give the batter several folds, scraping the bottom and sides to ensure everything is evenly incorporated. The batter should be thick, smooth, and creamy.
- Transfer to pan: Pour batter into prepared pan and smooth the top with a spatula. Gently tap the pan on the counter 2-3 times to release any large air bubbles.
- Bake: Bake for 70-80 minutes, or until a toothpick inserted into the center comes out clean or with just a few moist crumbs. The top should be deeply golden brown and may crack slightly (this is characteristic of pound cake). If the top is browning too quickly after 45-50 minutes, tent loosely with aluminum foil.
- Cool: Let the cake cool in the pan on a wire rack for 15-20 minutes. Then use the parchment paper overhang to carefully lift the cake out of the pan and transfer to the wire rack. Let cool completely before slicing, at least 1 hour. The cake will continue to set as it cools.
- Slice and serve: Use a sharp serrated knife to cut clean slices. Wipe the knife between cuts for the neatest presentation. Serve plain, dusted with powdered sugar, or with your favorite toppings.
Notes
- Room temperature ingredients are crucial – Cold eggs and butter won’t emulsify properly, resulting in a dense, heavy cake. Plan ahead and remove them from the refrigerator 1-2 hours before baking.
- Don’t overmix once flour is added – This develops gluten and creates a tough, dry cake. Mix just until combined.
- Oven temperature matters – Use an oven thermometer to verify accuracy. Too hot and the outside will burn before the inside cooks; too cool and the cake won’t develop proper structure.
- The crack on top is normal and desirable – It’s a signature characteristic of authentic pound cake.
- Cake tastes better the next day – The flavors meld and the texture becomes even more tender after 24 hours wrapped at room temperature.
Nutrition
- Serving Size: 1 slice (1/12 of cake)
- Calories: 445
- Sugar: 50g
- Sodium: 180mg
- Fat: 19g
- Saturated Fat: 11g
- Unsaturated Fat: 6g
- Trans Fat: 0.5g
- Carbohydrates: 64g
- Fiber: 1g
- Protein: 7g
- Cholesterol: 140mg
Tips & Variations
Make this recipe your own with these creative twists:
Lemon Pound Cake: Add 2 tablespoons fresh lemon zest to the butter-sugar mixture and replace vanilla with 1 teaspoon lemon extract. Glaze with a mixture of 1 cup powdered sugar and 2-3 tablespoons fresh lemon juice.
Almond Pound Cake: Replace 1 teaspoon vanilla extract with 1 teaspoon almond extract. Fold in 1/2 cup toasted sliced almonds before baking.
Cream Cheese Pound Cake: Replace 1/2 cup butter with 4 oz softened cream cheese. Beat the cream cheese with butter before adding sugar.
Chocolate Marble: Reserve 1 cup batter and mix with 2 tablespoons cocoa powder and 1 tablespoon milk. Alternate spoonfuls of vanilla and chocolate batter in the pan, then swirl with a knife.
Brown Butter Pound Cake: Brown the butter until nutty and fragrant, let cool to room temperature, then use as directed. Adds incredible depth of flavor.
Sour Cream Pound Cake: Replace milk with full-fat sour cream for an incredibly tender, tangy cake.
Citrus Burst: Add a mix of lemon, lime, and orange zest for a bright, citrusy flavor.
Coconut Pound Cake: Add 1 teaspoon coconut extract and fold in 1 cup sweetened shredded coconut.
Pro Chef Tips
Take your pound cake from good to extraordinary with these professional techniques:
Temperature is everything: Invest in an oven thermometer and check your oven’s actual temperature. Even a 25°F difference can dramatically affect results. Similarly, ingredient temperature matters – room temperature ingredients emulsify better and create superior texture.
The creaming method is crucial: When beating butter and sugar, you’re not just mixing – you’re incorporating air that helps the cake rise. Beat for the full 5-7 minutes until the mixture is pale, fluffy, and has increased in volume by about one-third. This creates the foundation for a tender crumb.
Add eggs slowly: Adding eggs one at a time and beating well between additions helps create a stable emulsion. If your mixture looks curdled after adding eggs, add a tablespoon of flour – this helps stabilize the batter.
Don’t overmix flour: The moment flour hits the batter, gluten development begins. Mix just until the last streak of flour disappears, then stop. Overmixed batter develops too much gluten, resulting in a tough, dry cake with tunnels and an uneven crumb.
The fold-and-turn technique: After mixer work is done, give the batter several gentle folds with a spatula, turning the bowl as you work. This ensures even distribution without overmixing.
Low and slow wins the race: Pound cake needs moderate heat for an extended time to bake through without burning the exterior. The 325°F temperature ensures even baking and that characteristic golden crust.
The toothpick test isn’t foolproof: A few moist crumbs on the toothpick are fine – they’ll finish setting as the cake cools. If you wait for the toothpick to come out completely clean, you risk overbaking.
Cool completely before slicing: I know it’s tempting, but warm pound cake crumbles and tears. The structure needs to fully set during cooling. Patience pays off with clean, beautiful slices.
Use quality ingredients: Since pound cake has so few ingredients, each one’s quality shines through. Use real butter (not margarine), pure vanilla extract (not imitation), and fresh eggs.
The overnight rest: Professional bakers know that pound cake wrapped and rested overnight develops richer flavor as the butter infuses every crumb. It also becomes more tender. Make it a day ahead for best results.
Common Mistakes to Avoid
Sidestep these pitfalls for pound cake perfection:
Using cold ingredients: Cold butter won’t cream properly, and cold eggs can cause the batter to curdle or break, resulting in a dense, heavy cake with poor texture. Always bring ingredients to room temperature (65-70°F) before beginning. Set eggs in warm water for 10 minutes if you forgot to take them out earlier.
Undermixing butter and sugar: Not creaming long enough is one of the top pound cake mistakes. This step incorporates air that helps the cake rise and creates tender texture. Mixture should be light, fluffy, pale in color, and increased in volume – this takes a full 5-7 minutes. Rushing this step yields a dense, heavy cake.
Overmixing after adding flour: The instant flour meets liquid, gluten develops. Overmixing creates too much gluten, resulting in a tough, dry cake with tunnels running through it. Mix on low speed just until flour streaks disappear – usually 10-15 seconds after the last addition.
Opening the oven door too early: Every time you open the oven door, the temperature drops dramatically. This can cause the cake to fall or bake unevenly. Don’t open the door until at least 60 minutes into baking, and then only to test for doneness or tent with foil if browning too quickly.
Wrong pan size or material: Using a pan that’s too large makes the cake flat and dry; too small causes overflow and uneven baking. Glass pans conduct heat differently than metal and can cause over-browning. Stick with a standard 9×5-inch metal loaf pan for best results. Dark-colored pans may require reducing oven temperature by 25°F to prevent over-browning.
Slicing while still warm: Warm pound cake is structurally fragile and will crumble, tear, and create a mess. The texture and structure continue to develop during cooling. Wait until completely cool (at least 1 hour) before slicing for clean, beautiful cuts.
Incorrect measuring: Pound cake is all about ratios. Too much flour makes it dry; too little causes collapse. Always use the spoon-and-level method: spoon flour into measuring cup, then level with a knife. Never scoop directly from the bag.
Storage & Meal Prep
Proper storage keeps your pound cake fresh and delicious:
Room Temperature Storage: Wrap cooled pound cake tightly in plastic wrap or aluminum foil, or store in an airtight container. Keeps at room temperature for 4-5 days. The cake actually improves after a day as flavors develop and meld. Room temperature storage is ideal for maintaining the best texture.
Refrigerator Storage: If your kitchen is very warm or humid, refrigerate wrapped pound cake for up to 1 week. Bring to room temperature before serving (30-45 minutes) for best flavor and texture. Refrigeration can dry out the cake slightly, so ensure it’s tightly wrapped.
Individual Slicing: For longer storage or grab-and-go convenience, slice the cooled cake and wrap individual slices in plastic wrap, then store in a zip-top freezer bag. This makes it easy to defrost just what you need.
Refreshing Leftover Cake: If cake has dried out slightly, warm individual slices in the microwave for 10-15 seconds, or wrap the whole loaf in foil and warm in a 300°F oven for 10 minutes. This revives moisture and makes it taste freshly baked.
Reheating Tips: While pound cake is traditionally served at room temperature, you can warm it slightly for a comforting treat. Microwave individual slices for 10-15 seconds, or warm in a 300°F oven wrapped in foil for 10-12 minutes. Don’t overheat or it can become dry.
Make-Ahead & Freezer Notes
Pound cake is an excellent make-ahead dessert that freezes beautifully:
Make-Ahead Instructions: Pound cake is actually better when made 1-2 days in advance. The flavors meld and deepen, and the texture becomes more tender as the crumb fully sets. Bake, cool completely, wrap tightly in plastic wrap, and store at room temperature until ready to serve. Add glazes or toppings just before serving.
Freezing the Whole Loaf: Cool cake completely. Wrap tightly in plastic wrap, then again in heavy-duty aluminum foil. Label with date and freeze for up to 3 months. Thaw overnight in the refrigerator (still wrapped), then bring to room temperature before serving. Freezing preserves the texture beautifully.
Freezing Individual Slices: Slice cooled cake into individual portions. Wrap each slice in plastic wrap, then place all slices in a freezer-safe zip-top bag. Freeze up to 3 months. Thaw individual slices at room temperature for 30-45 minutes, or microwave from frozen for 20-30 seconds. Perfect for when you want a single serving!
Freezing Batter: Not recommended. Pound cake batter relies on air incorporation during mixing, which begins to dissipate immediately. The leavening also starts working once wet and dry ingredients combine. For best results, always bake immediately after mixing.
Best Reheating from Frozen: For whole loaves, thaw completely in the refrigerator overnight (still wrapped), then bring to room temperature. For slices, microwave from frozen for 20-30 seconds, or thaw at room temperature for 30-45 minutes. You can also toast frozen slices directly in a toaster oven for a delicious variation.
Freezing with Glaze: Best to freeze unglazed and add glaze after thawing. Glazes can become soggy or crack during freezing and thawing. If you must freeze glazed cake, ensure the glaze is fully set before wrapping.
Serving Suggestions
Pound cake’s versatility shines with these serving ideas:
Classic Presentations:
- Dust with powdered sugar and serve with fresh berries (strawberries, raspberries, blueberries) and whipped cream
- Drizzle with a simple glaze made from powdered sugar and milk or lemon juice
- Serve warm with a scoop of vanilla ice cream or gelato
- Toast slices and butter them for breakfast or brunch
- Layer with whipped cream and fresh fruit for a simple trifle
Elegant Toppings:
- Lemon curd and fresh whipped cream
- Macerated strawberries (berries tossed with sugar and left to release juices)
- Caramel sauce and toasted pecans
- Chocolate ganache drizzle and fresh raspberries
- Cream cheese frosting for special occasions
Beverage Pairings:
- Hot coffee or espresso (the classic accompaniment)
- English breakfast or Earl Grey tea
- Cold milk (especially for kids)
- Dessert wine like Moscato or late-harvest Riesling
- Port or sherry for an elegant after-dinner treat
Seasonal Variations:
- Spring: Serve with strawberries and rhubarb compote
- Summer: Top with grilled peaches and vanilla ice cream
- Fall: Pair with apple butter and cinnamon whipped cream
- Winter: Serve with cranberry sauce and orange zest
Creative Uses:
- Make French toast by dipping slices in egg mixture and griddle-frying
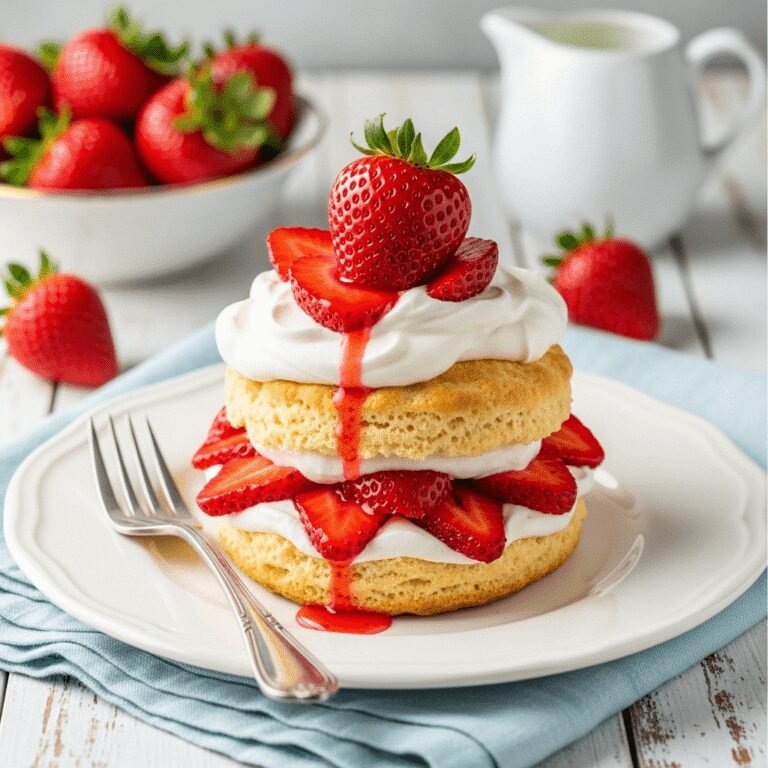
- Use as a base for strawberry shortcake
- Cube and use in bread pudding
- Toast and serve with jam for breakfast
- Create cake pops or cake truffles with crumbled pound cake
Side Dishes:
- Fresh fruit salad
- Vanilla custard or crème anglaise
- Fruit compote or coulis
- Whipped mascarpone cheese
- Chocolate or caramel sauce
FAQs Section
Q: Why is my pound cake dense and heavy? A: Dense pound cake usually results from insufficient creaming of butter and sugar, cold ingredients preventing proper emulsification, or overmixing the batter after adding flour. Make sure to cream butter and sugar for the full 5-7 minutes until light and fluffy, use room temperature ingredients, and mix the batter just until combined once you add the flour.
Q: Can I make this pound cake without a mixer? A: Yes, though it requires more effort. Cream the butter and sugar using a wooden spoon and vigorous stirring for about 10-15 minutes until light and fluffy. Your arm will get a workout, but it’s the traditional method and works beautifully. Add eggs one at a time, beating well with the spoon, then gently fold in flour mixture alternating with milk using a spatula.
Q: Why did my pound cake crack on top? A: The crack is actually a desired characteristic of authentic pound cake! It happens because the exterior sets in the oven before the interior is fully cooked, and as the inside continues to rise, it creates a crack. This is perfectly normal and traditional. If you want to minimize cracking, you can reduce oven temperature by 25°F and bake longer.
Q: How do I know when my pound cake is done? A: Insert a toothpick or cake tester into the center of the cake. It should come out clean or with just a few moist crumbs (not wet batter). The cake should also pull away slightly from the sides of the pan, feel firm when lightly pressed, and have a deeply golden-brown top. Internal temperature should reach 200-210°F on an instant-read thermometer.
Q: Can I use salted butter instead of unsalted? A: It’s not recommended. Salted butter can make the cake taste overly salty, and the amount of salt varies by brand, making it impossible to control seasoning accurately. If you must use salted butter, omit the salt called for in the recipe, but results may still be saltier than ideal.
Q: Why did my pound cake sink in the middle? A: Common causes include opening the oven door too early (causing temperature drop), underbaking (the structure hasn’t fully set), too much leavening (causing collapse after initial rise), or oven temperature too high (causing rapid rise and then collapse). Ensure your oven is properly calibrated and resist opening the door until at least 60 minutes into baking.
Q: Can I double this recipe? A: Yes, but bake in two separate 9×5-inch pans rather than one large pan. A single large pan would require extremely long baking time and the exterior would overbake before the center cooked through. Keep the oven temperature the same but check for doneness starting at 65 minutes as the slightly thinner batter may bake faster.
Q: How do I prevent my pound cake from sticking to the pan? A: Thoroughly grease your pan with butter or non-stick spray, paying special attention to corners and edges. Line the bottom and long sides with parchment paper, leaving overhang, and grease the parchment too. This double-insurance method ensures easy removal every time. Let the cake cool in the pan for 15-20 minutes before attempting to remove.
Conclusion
There you have it – your complete guide to baking the perfect classic pound cake! This timeless recipe delivers that beloved old-fashioned flavor and texture that brings comfort and joy with every slice. Whether you’re baking for a special occasion, bringing a homemade treat to a gathering, or simply satisfying a sweet craving, this pound cake never disappoints.
The beauty of pound cake lies in its simplicity and versatility. Master this basic recipe, and you’ll have endless possibilities for variations, flavorings, and presentations. From elegant dinner party dessert to casual afternoon snack with coffee, pound cake fits every occasion.
I’d love to hear how your pound cake turns out! Did you try any of the variations? How did your family enjoy it? Leave a comment below sharing your experience, and don’t forget to rate this recipe. Your feedback helps other home bakers and means the world to me.
Ready to bake? Save this recipe to your Pinterest boards so you can find it easily next time! Pin it, bake it, and share your beautiful pound cake photos with me on social media. Happy baking, friends – may your kitchen be filled with the irresistible aroma of buttery pound cake!