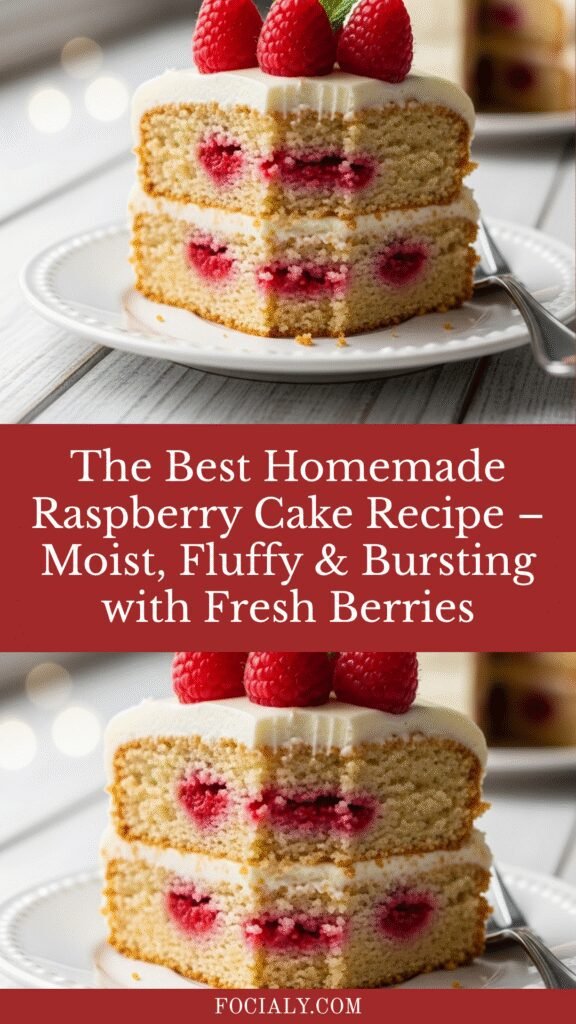
The Best Homemade Raspberry Cake Recipe – Moist, Fluffy & Bursting with Fresh Berries
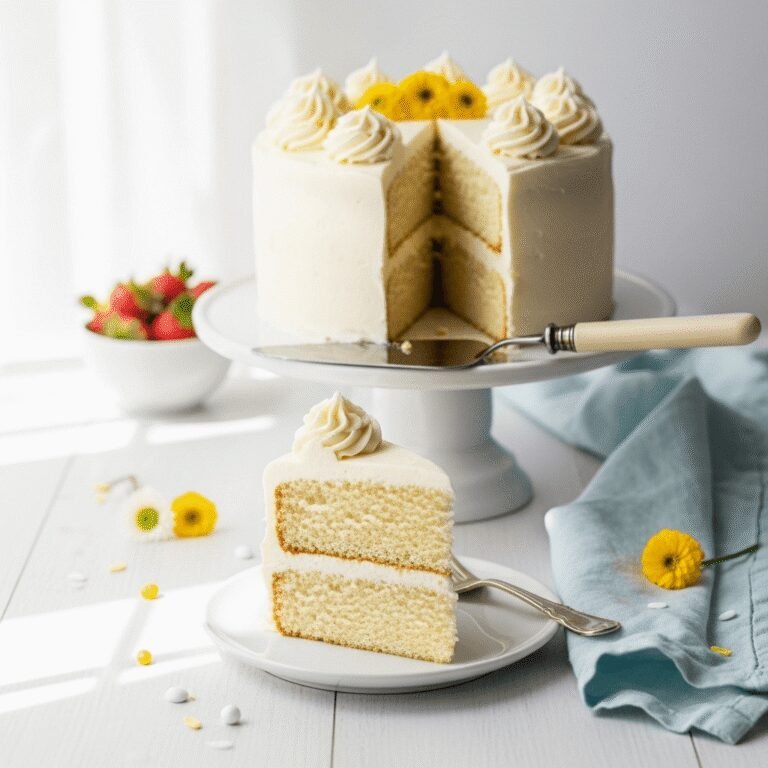
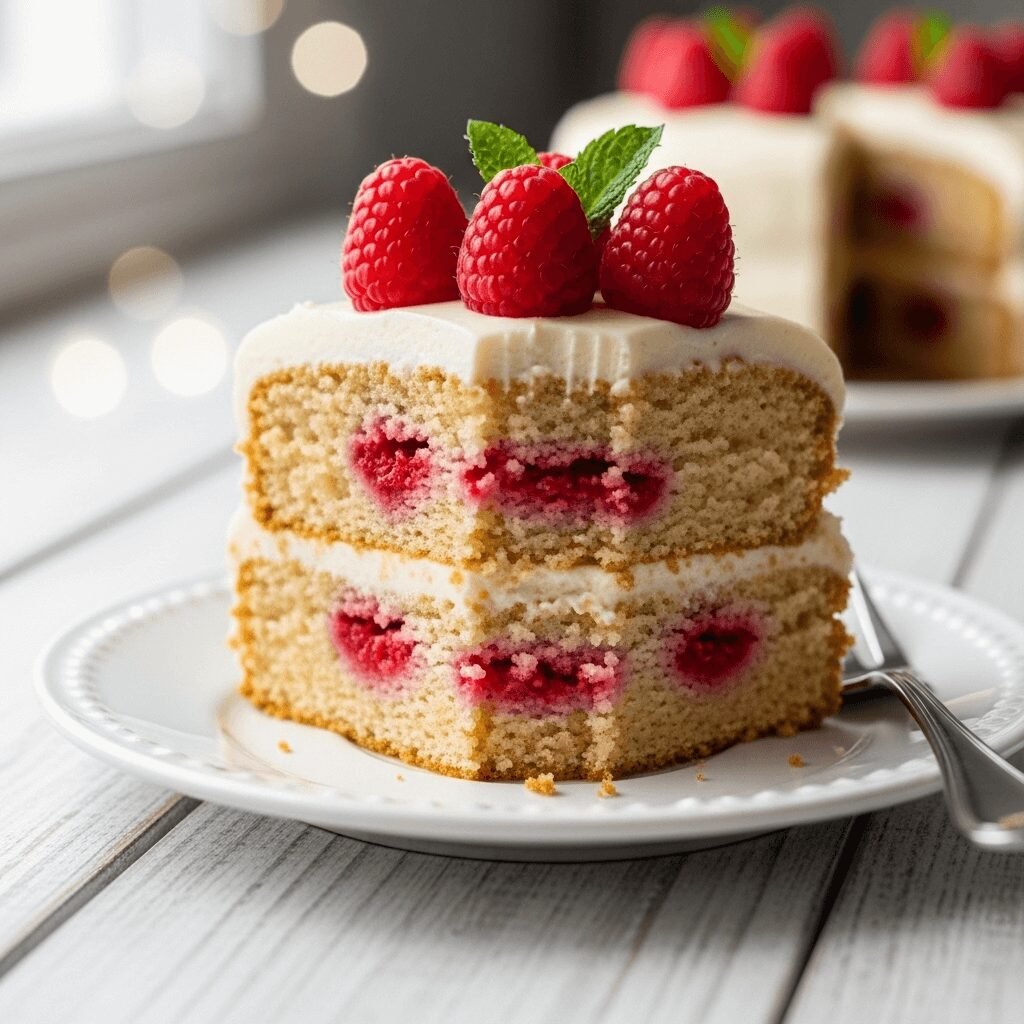
There’s something utterly magical about a slice of raspberry cake—the way those vibrant ruby-red berries peek through tender, buttery crumb, creating little pockets of tart sweetness in every bite. This homemade raspberry cake recipe is the perfect balance of light, fluffy vanilla cake studded with fresh raspberries and topped with a silky cream cheese frosting that’ll make your taste buds sing.
Whether you’re celebrating a birthday, hosting a summer garden party, or simply treating yourself to something special on a Sunday afternoon, this raspberry cake delivers that bakery-quality taste right from your home kitchen. It’s elegant enough for special occasions yet simple enough to whip up whenever you’re craving something sweet and fruity. The best part? You don’t need any fancy techniques or professional baking skills to achieve absolutely stunning results.
This recipe works beautifully year-round, though it truly shines during raspberry season from late spring through early fall when those berries are at their peak sweetness. But don’t worry—frozen raspberries work wonderfully too, meaning you can enjoy this delightful cake any time the craving strikes.
History / Background
Raspberry cakes have graced European tables for centuries, with variations appearing in French patisseries, English afternoon teas, and Scandinavian coffee gatherings. The combination of delicate cake and tart berries became particularly popular in Victorian England, where raspberries were considered a luxury fruit grown in carefully tended gardens and served at elegant gatherings.
In America, raspberry cake gained prominence in the early 20th century when home baking became more accessible with the introduction of reliable ovens and standardized baking ingredients. The cake became a staple at church socials, summer picnics, and family celebrations throughout the Midwest and Northeast, where raspberry bushes thrived in backyard gardens.
The specific style of raspberry cake we’re making today—a butter-based cake with fresh berries folded throughout—is heavily influenced by classic American layer cakes and European sponge traditions. It combines the best of both worlds: the rich, tender crumb of an American butter cake with the fruit-forward elegance of continental baking.
What makes raspberry cake particularly special is how the berries behave during baking. As they heat, they release their natural juices, creating gorgeous pink streaks throughout the cake while maintaining their shape and providing delightful bursts of flavor. This natural marbling effect is what bakers call “the raspberry magic”—and it happens all on its own with no extra effort required.
Why You’ll Love This Recipe
This isn’t just another cake recipe—it’s the raspberry cake recipe you’ll turn to again and again, the one you’ll bookmark, scribble notes on, and eventually memorize because you’ve made it so many times. Let me tell you why this particular version stands out from all the rest.
The texture is absolutely divine—moist without being dense, fluffy without being dry, with just the right amount of structure to hold those beautiful berries in place. The flavor profile is perfectly balanced, with the sweetness of the vanilla cake complementing (rather than overpowering) the natural tartness of fresh raspberries.
Here’s what makes this raspberry cake truly special:
- Beginner-friendly process – No complicated techniques, special equipment, or professional skills required. If you can mix ingredients and turn on an oven, you can make this cake.
- One-bowl simplicity – Less cleanup means more time enjoying your gorgeous creation instead of scrubbing dishes.
- Consistently reliable results – This recipe has been tested dozens of times to ensure it works perfectly every single time, even for nervous first-time bakers.
- Budget-conscious indulgence – You’re getting bakery-quality results without the bakery price tag. Most ingredients are pantry staples.
- Naturally impressive presentation – Those ruby berries peeking through create a stunning visual that looks like you spent hours on it.
- Flexible for all seasons – Works beautifully with fresh berries in summer or frozen raspberries during winter months.
- Make-ahead friendly – Can be baked a day in advance, making it perfect for stress-free entertaining.
- Crowd-pleaser guarantee – I’ve yet to meet someone who doesn’t love this cake. It appeals to fruit lovers, vanilla cake enthusiasts, and everyone in between.
Ingredient Notes
The beauty of a truly great raspberry cake lies in the quality and balance of simple ingredients. Let’s talk about what goes into this recipe and why each component matters.
All-Purpose Flour – The foundation of your cake’s structure. I recommend measuring by weight if possible, or using the spoon-and-level method to avoid packing too much flour, which can make your cake dense.
Granulated Sugar – Provides sweetness and helps create that tender, moist crumb through its interaction with the butter. Don’t reduce the sugar significantly, as it affects both texture and the cake’s structural integrity.
Unsalted Butter – This is what gives your cake its rich flavor and tender texture. Make sure it’s at room temperature (should leave a slight indent when pressed). Cold butter won’t cream properly, and melted butter will give you a different texture entirely. Can substitute with vegetable oil for a dairy-free version, though you’ll lose some of that buttery richness.
Eggs – They bind everything together and provide structure. Room temperature eggs incorporate more easily and create better volume. If you forgot to take them out, place them in warm water for 5 minutes.
Buttermilk – This is the secret ingredient that makes the cake incredibly tender with a subtle tang that balances the sweetness. The acidity also reacts with baking soda to help the cake rise. No buttermilk? Make your own by adding 1 tablespoon of lemon juice or vinegar to regular milk and letting it sit for 5 minutes.
Fresh Raspberries – The star of the show! Fresh berries provide the best flavor and texture, but frozen raspberries work in a pinch (don’t thaw them first). You’ll need about 2 cups, and be sure to toss them lightly in flour before folding into the batter—this prevents them from sinking to the bottom.
Vanilla Extract – Use pure vanilla extract, not imitation. It makes a noticeable difference in flavor.
Baking Powder & Baking Soda – The dynamic duo that helps your cake rise beautifully. Make sure they’re fresh (less than 6 months old) for best results.
Salt – Never skip the salt! It enhances all the other flavors and balances the sweetness.
Cream Cheese – For the frosting, this adds tangy richness that pairs perfectly with the sweet cake and tart berries. Must be at room temperature for smooth frosting.
Powdered Sugar – Creates a silky-smooth frosting texture. Sifting it prevents lumps.
Equipment Needed
Having the right tools makes baking so much easier and more enjoyable. Here’s what you’ll need for this raspberry cake:
- Two 9-inch round cake pans – For a classic two-layer cake. Make sure they’re at least 2 inches deep.
- Parchment paper – Line the bottoms of your pans for foolproof cake release.
- Large mixing bowl – For combining your cake ingredients.
- Electric hand mixer or stand mixer – While you can make this by hand, a mixer makes creaming the butter and sugar much easier and gives better results.
- Medium mixing bowl – For your dry ingredients.
- Measuring cups and spoons – Accurate measurements are crucial in baking.
- Kitchen scale (optional but recommended) – For the most precise measurements.
- Rubber spatula – For scraping down the bowl and folding in berries gently.
- Wire cooling racks – Essential for cooling cakes evenly without creating soggy bottoms.
- Offset spatula – Makes frosting your cake layers smooth and professional-looking.
- Toothpick or cake tester – For checking doneness.
- Sifter or fine-mesh strainer – For sifting powdered sugar into your frosting.
Raspberry Cake Recipe

This homemade raspberry cake features tender, moist vanilla layers studded with fresh raspberries and topped with silky cream cheese frosting. Perfect for birthdays, celebrations, or any time you want an impressive yet easy dessert that tastes like it came from a fancy bakery.
- Prep Time: 20 minutes
- Cook Time: 28 minutes
- Total Time: 48 minutes (plus cooling time)
- Yield: 12 servings 1x
- Category: Dessert
- Method: Baking
- Cuisine: American
- Diet: Vegetarian
Ingredients
For the Cake:
- 2 ¾ cups all-purpose flour
- 2 ½ teaspoons baking powder
- ½ teaspoon baking soda
- ¾ teaspoon salt
- 1 cup (2 sticks) unsalted butter, room temperature
- 1 ¾ cups granulated sugar
- 4 large eggs, room temperature
- 2 teaspoons pure vanilla extract
- 1 ¼ cups buttermilk, room temperature
- 2 cups fresh raspberries (plus 2 tablespoons flour for tossing)
For the Cream Cheese Frosting:
- 8 ounces cream cheese, softened
- ½ cup (1 stick) unsalted butter, softened
- 4 cups powdered sugar, sifted
- 2 teaspoons vanilla extract
- 2-3 tablespoons heavy cream or milk
- Pinch of salt
For Garnish:
- Fresh raspberries
- Optional: fresh mint leaves
Instructions
- Prepare your pans and preheat: Preheat your oven to 350°F (175°C). Grease two 9-inch round cake pans with butter or baking spray, line the bottoms with parchment paper circles, and give them another light spray. This double-protection ensures your cakes will release perfectly.
- Mix your dry ingredients: In a medium bowl, whisk together the flour, baking powder, baking soda, and salt. Set this aside—you’ll add it to your wet ingredients later.
- Cream the butter and sugar: In your large mixing bowl, beat the softened butter and sugar together on medium-high speed for 3-4 minutes until the mixture is light, fluffy, and pale in color. This step incorporates air into your batter, which helps create that tender, fluffy texture we’re after. Don’t rush this step—proper creaming makes all the difference!
- Add eggs one at a time: With your mixer on medium speed, add the eggs one at a time, beating well after each addition. This helps them incorporate smoothly without deflating your batter. Add the vanilla extract with the last egg.
- Alternate wet and dry ingredients: With your mixer on low speed, add your flour mixture in three additions, alternating with the buttermilk in two additions. Start and end with the flour mixture. The pattern looks like this: flour, buttermilk, flour, buttermilk, flour. Mix just until each addition is incorporated—overmixing develops gluten and can make your cake tough.
- Prepare the raspberries: In a small bowl, gently toss your fresh raspberries with 2 tablespoons of flour. This light coating helps prevent them from sinking to the bottom of the cake during baking.
- Fold in the berries: Using a rubber spatula, gently fold the flour-coated raspberries into your batter with broad, sweeping motions. Be gentle here—you want to keep those berries whole, not crush them into mush. It’s okay if a few break; those pink streaks will look beautiful!
- Divide and bake: Divide the batter evenly between your prepared pans (a kitchen scale makes this super easy—each pan should have about 650 grams of batter). Smooth the tops with your spatula. Bake for 26-28 minutes, until the cakes are golden on top and a toothpick inserted into the center comes out clean or with just a few moist crumbs.
- Cool properly: Let the cakes cool in their pans for 10 minutes—this allows them to firm up enough to handle. Then carefully invert them onto wire racks, peel off the parchment paper, and let them cool completely. This usually takes about an hour. Don’t try to frost warm cakes—they’ll just make your frosting melt!
- Make the frosting: While your cakes cool, make your frosting. Beat the softened cream cheese and butter together until smooth and fluffy, about 2 minutes. Add the vanilla and salt. Gradually add the powdered sugar, one cup at a time, beating on low speed until incorporated, then increasing to medium-high until fluffy. Add heavy cream one tablespoon at a time until you reach your desired spreading consistency.
- Assemble your cake: Place one cake layer on your serving plate. Spread about 1 cup of frosting evenly over the top. Place the second layer on top and press down gently. Frost the top and sides of the cake with the remaining frosting, using an offset spatula for smooth, professional-looking results.
- Garnish and serve: Decorate the top of your cake with fresh raspberries arranged however you like—a simple ring around the edge is classic, or cover the entire top for dramatic effect. Add a few mint leaves if desired for a pop of color. Refrigerate for at least 30 minutes before slicing for the cleanest cuts.
Notes
- Room temperature ingredients are crucial – They mix together more easily and create better texture. Plan ahead!
- Don’t overmix – Once you add the flour, mix just until combined. Overmixing develops gluten and makes cakes tough.
- Frozen raspberries work too – Use them straight from the freezer; don’t thaw first or they’ll be too mushy and release too much juice.
- Cake is done when… – A toothpick inserted in the center comes out clean or with a few moist crumbs, and the cake springs back when lightly pressed.
- Frosting consistency – Add more cream to thin it out, more powdered sugar to thicken it up.
- Make ahead – Cake layers can be baked a day ahead, wrapped tightly, and stored at room temperature.
Nutrition
- Serving Size: 1 slice (1/12 of cake)
- Calories: 485
- Sugar: 48g
- Sodium: 285mg
- Fat: 23g
- Saturated Fat: 14g
- Unsaturated Fat: 7g
- Trans Fat: 0g
- Carbohydrates: 66g
- Fiber: 2g
- Protein: 6g
- Cholesterol: 115mg
Note: Nutrition information is calculated using an ingredient database and should be considered an estimate. Actual nutritional content will vary based on brands used and exact measurements.
Tips & Variations
Lemon Raspberry Cake: Add 2 tablespoons of fresh lemon zest to your cake batter and 1 tablespoon to your frosting for a bright, citrusy twist that makes the raspberry flavor pop even more.
Mixed Berry Version: Replace half the raspberries with blueberries or blackberries for a gorgeous mixed berry cake that’s perfect for patriotic holidays.
Chocolate Raspberry Cake: Swap ½ cup of the flour for unsweetened cocoa powder for a chocolate-raspberry combination that rivals any fancy bakery creation.
Lighter Frosting Option: Use a whipped cream cheese frosting instead by folding 1 cup of whipped cream into your basic cream cheese frosting for an airier texture.
Make it Boozy: Brush each cake layer with a tablespoon or two of Chambord (raspberry liqueur) before frosting for an adult version that’s absolutely divine.
Reduced Sugar: You can reduce the sugar in the cake by up to ¼ cup if you prefer less sweetness, though this will affect texture slightly.
Individual Servings: Bake the batter in a muffin tin lined with paper liners for adorable raspberry cupcakes. Bake for 18-20 minutes instead.
Naked Cake Style: Skip the frosting on the sides and just frost between the layers and on top for that trendy, rustic naked cake look.
Pro Chef Tips
The Flour-Coating Trick: Tossing your raspberries in flour before adding them isn’t just an old wives’ tale—the flour creates a light barrier that helps the berries stay suspended in the batter instead of sinking. This works because the flour absorbs some of the berry juice and creates friction with the batter.
Reverse Creaming Method: For an even more tender crumb, try reverse creaming: combine your dry ingredients and butter first until crumbly, then add your wet ingredients. This coats the flour particles in fat, which limits gluten development.
The Toothpick Test Isn’t Everything: Your cake is actually done when it reaches 210°F in the center (use an instant-read thermometer). This takes the guesswork out completely. The toothpick test works, but temperature is more accurate.
Level Your Layers Like a Pro: If your cakes dome during baking, use a serrated knife to level them before frosting. A flat surface makes stacking and frosting infinitely easier. Save those scraps for snacking—baker’s treat!
Crumb Coat Technique: Apply a thin “crumb coat” layer of frosting first, refrigerate for 15 minutes, then apply your final frosting coat. This locks in all the crumbs so your final layer looks perfectly smooth and professional.
Flavor Amplification: A tiny pinch of almond extract (just ¼ teaspoon) enhances the raspberry flavor without making the cake taste like almonds. It’s a secret trick pastry chefs use all the time.
Perfect Slicing: For Instagram-worthy slices, dip your knife in hot water and wipe it clean between each cut. The warm, clean blade glides through the frosting without dragging.
Common Mistakes to Avoid
Mistake #1: Using cold ingredients. When your butter, eggs, and buttermilk aren’t at room temperature, they don’t emulsify properly. The result? A denser, less tender cake with an uneven crumb. Fix: Plan ahead and set everything out 1-2 hours before baking.
Mistake #2: Overmixing the batter. Once you add flour to liquid, gluten starts developing. Too much mixing = too much gluten = tough, rubbery cake. Fix: Mix just until you can’t see dry flour anymore, then stop. A few small lumps are perfectly fine.
Mistake #3: Opening the oven door too early. Every time you open that oven door, the temperature drops by 25-50°F, which can cause your cake to sink in the middle. Fix: Don’t open the door until at least 20 minutes have passed, and only then to check for doneness.
Mistake #4: Frosting warm cakes. I know it’s tempting to speed things along, but warm cake + frosting = melted, sliding, frustrating mess. Fix: Practice patience. Let those cakes cool completely—use that time to make your frosting and clean up.
Mistake #5: Using old leavening agents. Baking powder and baking soda lose their potency over time. If yours are more than 6 months old, they might not give your cake proper rise. Fix: Test your baking powder by mixing a teaspoon with hot water—it should bubble vigorously. Replace if it doesn’t.
Mistake #6: Not preparing pans properly. Nothing breaks a baker’s heart quite like a beautiful cake that sticks to the pan and tears when you try to remove it. Fix: Butter, parchment, and butter again. This double-protection method is foolproof.
Storage & Meal Prep
Room Temperature Storage: If you’re planning to eat the cake within 1-2 days and your home isn’t too warm, you can keep it at room temperature under a cake dome or covered with plastic wrap. The buttermilk and frosting’s acidity provides some preservation.
Refrigerator Storage: For longer storage (up to 5 days), keep your cake refrigerated. The cream cheese frosting requires refrigeration. Cover it loosely with plastic wrap or store in an airtight container. Let it sit at room temperature for 20-30 minutes before serving—the flavors and texture are better when the cake isn’t cold.
Leftover Slices: Wrap individual slices in plastic wrap and store in an airtight container in the fridge for up to 5 days. This way, you can grab a slice whenever the craving strikes without exposing the entire cake to air repeatedly.
Reheating Tips: While this cake is delicious cold, if you prefer it at room temperature, simply let refrigerated slices sit out for 20-30 minutes. You can also microwave a slice for 10-15 seconds to take the chill off—just be careful not to melt the frosting.
Unfrosted Cake Storage: If you’ve only baked the cake layers but haven’t frosted them yet, wrap them tightly in plastic wrap and store at room temperature for up to 2 days or refrigerate for up to 5 days.
Make-Ahead & Freezer Notes
Baking Ahead: You can bake your cake layers up to 2 days in advance. Let them cool completely, wrap each layer tightly in plastic wrap, then again in aluminum foil. Store at room temperature and frost when ready to serve.
Freezing Unfrosted Layers: This is my favorite make-ahead method! Wrap cooled cake layers individually in plastic wrap, then aluminum foil, and freeze for up to 3 months. They’ll actually stay more moist this way. Thaw overnight in the refrigerator or at room temperature for a few hours before frosting.
Freezing Frosted Cake: Yes, you can freeze the fully assembled cake! Place it in the freezer uncovered for 30 minutes to firm up the frosting (this is called “flash freezing”), then wrap carefully in plastic wrap and foil. Freeze for up to 2 months. Thaw overnight in the refrigerator, still wrapped, then let it come to room temperature before serving.
Frosting Separately: Make your cream cheese frosting up to 3 days ahead and store it in an airtight container in the refrigerator. Let it come to room temperature and give it a quick whip with your mixer before using to restore its fluffy texture.
Best Reheating Method for Frozen Cake: Never microwave frozen cake—it creates weird texture issues. Always thaw slowly in the refrigerator overnight while still wrapped. This prevents condensation from making your cake soggy. Then let it sit at room temperature for 30 minutes before serving.
Freezing Individual Slices: Pre-slice your cake, wrap each piece individually in plastic wrap, place in a freezer bag, and freeze for grab-and-go desserts for up to 3 months. Thaw at room temperature for 30-45 minutes.
Serving Suggestions
Classic Pairings: Serve your raspberry cake with a scoop of vanilla ice cream or a dollop of freshly whipped cream alongside. The cold, creamy element balances the sweetness beautifully. A cup of hot coffee or Earl Grey tea is the perfect beverage accompaniment—the tannins in tea particularly complement raspberry’s tartness.
Brunch Spread: This cake is gorgeous on a brunch table alongside fresh fruit salad, yogurt parfaits, and mimosas. It’s sweet but not overwhelming for morning entertaining.
Birthday Party Perfection: This cake is ideal for birthday celebrations. Add candles, surround the base with fresh flowers (make sure they’re food-safe if they’ll touch the cake), and you’ve got an Instagram-worthy centerpiece.
Summer Garden Party: Serve thin slices on pretty dessert plates with fresh mint sprigs and a few extra raspberries. Pair with sparkling rosé or raspberry lemonade for a refreshing warm-weather dessert.
Dinner Party Finale: For elegant dinner parties, serve smaller slices (this cake is rich!) with a raspberry coulis drizzled on the plate, a few fresh berries, and a small mint garnish. It looks restaurant-quality with minimal effort.
Afternoon Tea Service: Cut into petite squares or fingers and serve as part of an afternoon tea spread alongside scones, finger sandwiches, and petit fours.
Holiday Alternative: This makes a beautiful alternative to traditional holiday pies and can be decorated festively for Easter, Mother’s Day, or Valentine’s Day with themed decorations and colored frosting.
FAQs Section
Q: Can I use frozen raspberries instead of fresh?
A: Absolutely! Use frozen raspberries straight from the freezer without thawing—this prevents them from becoming too mushy and releasing excess juice. You might see slightly more pink streaking in your cake, but the flavor will be just as delicious. Toss them in flour just like fresh berries.
Q: Why did my raspberries sink to the bottom of the cake?
A: This usually happens when the batter is too thin or the berries weren’t coated in flour. The flour coating helps create friction and suspends the berries in the batter. Also, make sure you’re gently folding them in rather than stirring vigorously, which can break them up. If your batter seems too thin, you may have accidentally added too much buttermilk.
Q: Can I make this as a sheet cake instead of layer cake?
A: Yes! Pour all the batter into a greased and parchment-lined 9×13-inch pan and bake for 35-40 minutes. This makes serving a crowd much easier. You can frost the top only or leave it unfrosted and dust with powdered sugar for a simpler presentation.
Q: My frosting is too soft/runny. How do I fix it?
A: Refrigerate the frosting for 15-20 minutes, then re-whip it. If it’s still too soft, beat in more powdered sugar, ¼ cup at a time, until you reach the desired consistency. Make sure your cream cheese and butter were truly at room temperature when you started—if they were too warm, the frosting will be loose.
Q: Can I make this cake dairy-free?
A: For the cake, yes—substitute non-dairy butter and use either store-bought dairy-free buttermilk or make your own by adding 1 tablespoon vinegar to plant milk. The cream cheese frosting is trickier; you’ll need to use dairy-free cream cheese and butter alternatives, which vary widely in quality. Brands like Kite Hill or Miyoko’s work best.
Q: How do I prevent my cake layers from doming?
A: Doming happens when the edges set quickly while the center continues to rise. Try these tricks: use baking strips (wet fabric strips wrapped around pans), slightly lower your oven temperature by 25°F and bake longer, or don’t fill the pans more than 2/3 full. Some doming is normal and can be easily leveled with a serrated knife.
Q: Why does my cake have a dense, gummy layer at the bottom?
A: This is usually caused by overmixing the batter, which develops too much gluten, or your oven temperature being too low. Make sure your oven is properly calibrated (use an oven thermometer) and mix only until ingredients are just combined.
Conclusion
There you have it—your complete guide to making the most incredible homemade raspberry cake that’ll have everyone asking for seconds (and the recipe!). This isn’t just another cake; it’s the kind of dessert that creates memories, whether you’re celebrating a special occasion or just treating yourself to something beautiful on an ordinary Tuesday.
The best part about this recipe is how it manages to feel both impressively elegant and comfortingly familiar at the same time. Those gorgeous raspberry swirls make it look like you spent hours in the kitchen, but the straightforward process means you’ll actually have time to enjoy the celebration instead of stressing in the kitchen.
I’d love to hear how your raspberry cake turns out! Did you try any of the variations? Did you serve it for a special occasion? Drop a comment below and let me know—I read every single one and love hearing about your baking adventures. And if you loved this recipe, please share it on Pinterest so other home bakers can discover it too!
Happy baking, and remember: the best cakes are made with love (and maybe a few taste-tests along the way). Now get in that kitchen and create something delicious! 🍰💕