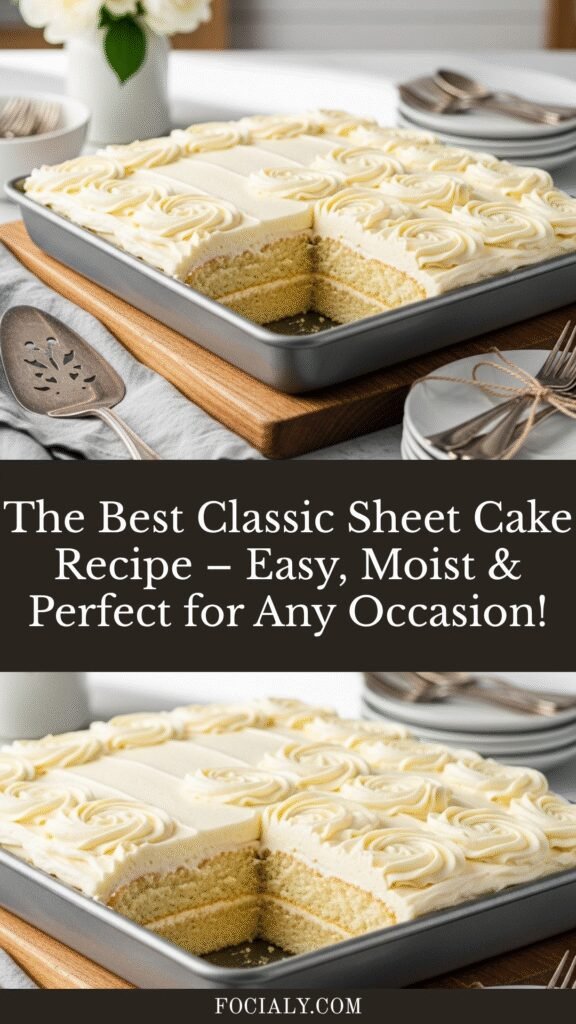
The Best Classic Sheet Cake Recipe – Easy, Moist & Perfect for Any Occasion!
There’s something wonderfully nostalgic about a classic sheet cake – that perfectly moist, tender crumb topped with silky buttercream frosting that brings everyone together. Whether you’re celebrating a birthday, hosting a potluck, or simply craving something sweet, this sheet cake recipe is your go-to solution for feeding a crowd without spending hours in the kitchen.
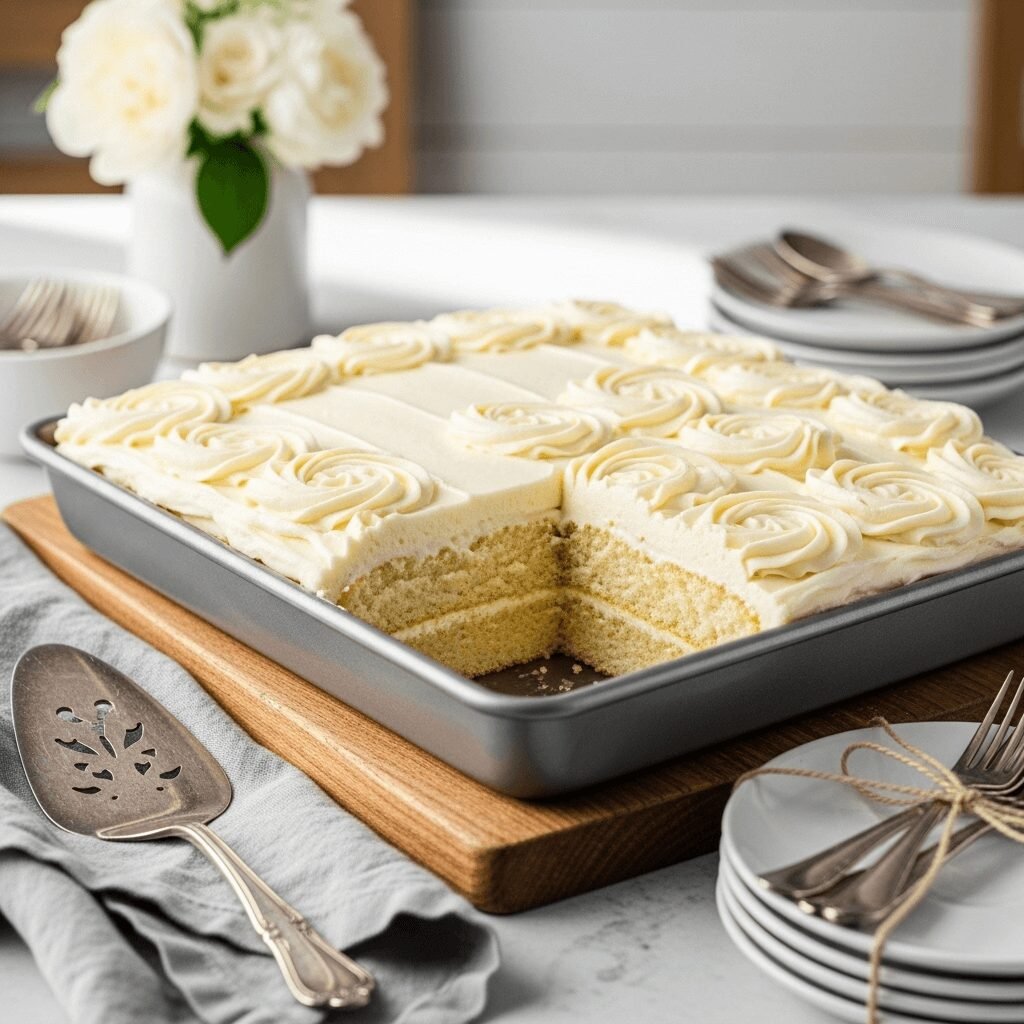
Unlike towering layer cakes that require precise leveling and fancy decorating skills, sheet cakes are delightfully straightforward. They’re baked in a single rectangular pan, frosted right in the pan, and served in generous squares that disappear faster than you can say “seconds, please!” This recipe delivers that old-fashioned cake shop flavor – supremely moist with a fine, velvety texture and a buttercream frosting so good you’ll want to eat it with a spoon.
What makes this sheet cake truly special is its versatility. It’s equally at home at a casual backyard barbecue or an elegant anniversary celebration. You can dress it up with fresh berries and edible flowers or keep it simple with classic buttercream swirls. Either way, you’re guaranteed to have happy faces and empty plates.
History / Background
The sheet cake has deep roots in American home baking, becoming particularly popular in the mid-20th century when convenience and efficiency became key values in the modern kitchen. Unlike European layer cakes that required specialized pans and advanced techniques, sheet cakes represented the democratization of cake baking – making it accessible to every home cook regardless of skill level.
The Texas sheet cake, one of the most famous variations, emerged in the 1950s and became a Southern staple at church potlucks, family reunions, and school fundraisers. The beauty of sheet cakes lies in their practical design: they’re easy to transport, simple to serve, and feed a crowd economically. During the Great Depression and war years, sheet cakes were valued for using basic pantry ingredients efficiently while still delivering maximum flavor and satisfaction.
Sheet cakes also hold a special place in American birthday traditions. While elaborate fondant-covered creations have their moment on social media, many of us have cherished childhood memories of grocery store sheet cakes with those impossibly sweet buttercream roses. This homemade version captures that same nostalgic flavor while using real butter, quality vanilla, and fresh ingredients that make all the difference.
The cake’s enduring popularity speaks to its fundamental appeal – it’s unpretentious, delicious, and brings people together. In an era of complicated desserts and Instagram-perfect pastries, the humble sheet cake reminds us that sometimes the simplest pleasures are the most satisfying.
Why You’ll Love This Recipe
This classic sheet cake recipe has been tested and perfected to deliver consistent, foolproof results every single time. It’s the cake recipe you’ll turn to again and again, whether you’re an experienced baker or just starting your kitchen adventures.
Here’s why this recipe will become your favorite:
- Incredibly moist and tender – The secret combination of buttermilk and oil creates a cake that stays soft for days
- Feeds a crowd easily – One pan serves 15-20 people, making it perfect for parties and gatherings
- Simple one-bowl mixing – No special equipment or complicated techniques required
- Budget-friendly – Uses basic pantry staples that won’t break the bank
- Endlessly customizable – Easily adapt with different flavors, frostings, and decorations
- Great for beginners – Forgiving recipe with clear instructions that guarantee success
- Make-ahead friendly – Actually tastes better the next day as flavors meld together
- Transport-friendly – Frost right in the pan and cover for easy potluck travel
- Kid-approved – Classic vanilla flavor that pleases picky eaters and adults alike
- Consistent results – No sunken centers, dry edges, or frustrating failures
Ingredient Notes
Understanding your ingredients helps you make smart substitutions and achieve the best possible results. Here’s what you need to know about each component:
All-Purpose Flour – Forms the cake’s structure. For best results, spoon flour into your measuring cup and level it off rather than scooping directly from the bag, which can compact the flour and make your cake dense. You can substitute with a 1:1 gluten-free baking blend if needed.
Granulated Sugar – Provides sweetness and helps create that tender, moist crumb. Don’t reduce the sugar significantly, as it also affects texture and moisture retention.
Baking Powder & Baking Soda – These leavening agents work together to help the cake rise beautifully. Make sure they’re fresh (less than 6 months old) for maximum lift.
Salt – Enhances all the other flavors and balances the sweetness. Don’t skip it!
Buttermilk – The acidity tenderizes the gluten and reacts with the baking soda for extra rise. No buttermilk? Make your own by adding 1 tablespoon of lemon juice or white vinegar to regular milk and letting it sit for 5 minutes.
Vegetable Oil – Keeps the cake incredibly moist and tender, even after several days. Unlike butter, oil doesn’t solidify when cold, so your cake stays soft straight from the refrigerator.
Eggs – Provide structure, richness, and help bind everything together. Use large eggs at room temperature for best incorporation.
Pure Vanilla Extract – Use real vanilla extract, not imitation, for the best flavor. This is where quality really shines through.
Unsalted Butter (for frosting) – Softened to room temperature, it should be soft enough to leave an indent when pressed but not melted or greasy.
Powdered Sugar – Creates smooth, sweet frosting. Sift it if it’s lumpy to avoid lumps in your buttercream.
Heavy Cream or Milk – Thins the frosting to spreadable consistency. Add gradually until you reach your desired texture.
Equipment Needed
Having the right tools makes baking easier and more enjoyable. Here’s what you’ll need for this recipe:
- 9×13-inch metal baking pan – Metal conducts heat better than glass for even baking
- Large mixing bowl – For combining your cake batter
- Medium mixing bowl – For preparing the buttercream frosting
- Whisk or electric mixer – Hand mixer or stand mixer makes quick work of frosting
- Rubber spatula – For scraping down bowl sides and folding ingredients
- Measuring cups and spoons – For accurate ingredient measurements
- Offset spatula or butter knife – Makes frosting spreading smooth and easy
- Cooling rack – Allows air circulation for even cooling
- Toothpick or cake tester – To check for doneness
- Parchment paper (optional) – Makes removing cake slices easier
- Sifter or fine-mesh strainer – For lump-free powdered sugar in frosting
Sheet Cake Recipe
This classic sheet cake recipe delivers a moist, tender vanilla cake with silky buttercream frosting that’s perfect for any celebration. Easy to make, transport, and serve, it’s the ultimate crowd-pleasing dessert that tastes like home.
- Prep Time: 15 minutes
- Cook Time: 30-35 minutes
- Total Time: 45-50 minutes (plus cooling time)
- Yield: 15-20 servings 1x
- Category: Dessert
- Method: Baking
- Cuisine: American
- Diet: Vegetarian
Ingredients
For the Cake:
- 2 cups all-purpose flour
- 2 cups granulated sugar
- 1 teaspoon baking powder
- 1 teaspoon baking soda
- ¾ teaspoon salt
- 1 cup buttermilk, room temperature
- ½ cup vegetable oil
- 2 large eggs, room temperature
- 2 teaspoons pure vanilla extract
- 1 cup hot water
For the Buttercream Frosting:
- 1 cup (2 sticks) unsalted butter, softened
- 4-5 cups powdered sugar, sifted
- ¼ cup heavy cream or whole milk
- 2 teaspoons pure vanilla extract
- ¼ teaspoon salt
Instructions
For the Cake:
- Preheat and prepare: Preheat your oven to 350°F (175°C). Grease and flour a 9×13-inch baking pan, or line with parchment paper for easier removal. Set aside.
- Mix dry ingredients: In a large mixing bowl, whisk together the flour, sugar, baking powder, baking soda, and salt until well combined. This ensures even distribution of leavening agents throughout the cake.
- Combine wet ingredients: In a separate medium bowl, whisk together the buttermilk, vegetable oil, eggs, and vanilla extract until smooth and emulsified.
- Create the batter: Pour the wet ingredients into the dry ingredients and stir with a wooden spoon or rubber spatula until just combined. Don’t overmix – a few small lumps are perfectly fine.
- Add hot water: Carefully pour in the hot water and stir gently until fully incorporated. The batter will be quite thin – this is exactly what you want for a moist cake! Don’t be alarmed by the consistency.
- Bake: Pour the batter into your prepared pan and tap gently on the counter to release any air bubbles. Bake for 30-35 minutes, or until a toothpick inserted in the center comes out clean or with just a few moist crumbs. The cake should spring back lightly when touched.
- Cool completely: Remove from the oven and let the cake cool in the pan on a wire rack for at least 1 hour before frosting. This is crucial – frosting a warm cake will result in melted, sliding frosting.
For the Buttercream Frosting:
- Beat the butter: In a large bowl using an electric mixer, beat the softened butter on medium speed for 2-3 minutes until light and fluffy.
- Add sugar gradually: With the mixer on low speed, gradually add the powdered sugar, one cup at a time, beating well after each addition.
- Incorporate liquids: Add the vanilla extract, salt, and 2 tablespoons of heavy cream. Beat on medium-high speed for 3-4 minutes until light and fluffy.
- Adjust consistency: If the frosting is too thick, add more cream one tablespoon at a time. If too thin, add more powdered sugar ¼ cup at a time until you reach your desired spreading consistency.
- Frost the cake: Once the cake is completely cool, spread the frosting evenly over the top using an offset spatula or butter knife. Create swirls or keep it smooth – whatever suits your style!
- Set and serve: Let the frosted cake sit for 15-20 minutes before slicing to allow the frosting to set slightly. Cut into squares and serve.
Notes
- Room temperature ingredients are crucial for proper mixing and texture. Take eggs and buttermilk out of the refrigerator 30-60 minutes before baking.
- Don’t skip the hot water – it might seem unusual, but it activates the cocoa (if you’re making chocolate variation) and creates incredible moisture.
- Cooling is essential – rushing this step will ruin your frosting. Be patient!
- Frosting texture should be spreadable but hold its shape. Add liquid or sugar as needed.
- Storage: Keep covered at room temperature for 2 days or refrigerate for up to 5 days.
- Flavor variations: Add almond extract, lemon zest, or cocoa powder for different flavors.
Nutrition
- Serving Size: : 1 slice (based on 15 servings)
- Calories: 385
- Sugar: 48g
- Sodium: 285mg
- Fat: 178g
- Saturated Fat: 8g
- Unsaturated Fat: 8g
- Trans Fat: 0g
- Carbohydrates: 56g
- Fiber: 0.5g
- Protein: 3g
- Cholesterol: 55mg
Note: Nutrition information is approximate and will vary based on exact ingredients and portion sizes.
Tips & Variations
Chocolate Sheet Cake: Replace ½ cup flour with ½ cup unsweetened cocoa powder and use hot coffee instead of hot water for deeper chocolate flavor.
Lemon Sheet Cake: Add 2 tablespoons lemon zest to the batter and replace 2 tablespoons buttermilk with fresh lemon juice. Use lemon zest in the frosting too.
Strawberry Sheet Cake: Fold 1 cup finely chopped fresh strawberries into the batter and top frosted cake with sliced strawberries.
Spice Cake Variation: Add 1½ teaspoons cinnamon, ½ teaspoon nutmeg, and ¼ teaspoon cloves to the dry ingredients.
Reduced Sugar Version: You can reduce the sugar in the cake by ¼ cup without significantly affecting texture, but the frosting amount should stay the same for best results.
Cream Cheese Frosting: Substitute 8 oz softened cream cheese for half the butter for a tangy alternative.
Add Mix-ins: Fold in ½ cup mini chocolate chips, chopped nuts, or sprinkles for fun texture and visual appeal.
Make it Funfetti: Add ½ cup rainbow sprinkles to the batter and top the frosting with more sprinkles.
Pro Chef Tips
Temperature matters tremendously. Professional bakers know that ingredient temperature affects both mixing and final texture. Cold eggs won’t emulsify properly with room temperature ingredients, creating a separated batter that yields a less tender cake.
Use the toothpick test correctly. Insert the toothpick about 2 inches from the center rather than dead center. The very center can sometimes test clean even when the cake needs more time, while edges can be overdone.
Invest in an oven thermometer. Home ovens are notoriously inaccurate, often running 25°F hotter or cooler than the dial suggests. A $10 thermometer ensures you’re baking at the correct temperature every time.
Create a moisture barrier. Before frosting, brush the cooled cake with a simple syrup (equal parts sugar and water, heated until dissolved and cooled). This keeps the cake incredibly moist for days and adds a subtle sweetness.
Level your oven racks. An uneven rack creates an uneven cake. Use a small level on your oven rack before baking to ensure even heat distribution.
The creaming method for frosting matters. Beating the butter alone first incorporates air, creating a lighter, fluffier frosting. Rushing this step results in dense, heavy buttercream.
Frost with a warm spatula. Run your offset spatula under hot water, dry it quickly, and use it while still warm. The slight heat helps the frosting glide smoothly across the surface.
Common Mistakes to Avoid
Overmixing the batter. Once you add the wet ingredients to dry, mix only until combined. Overmixing develops gluten, resulting in a tough, chewy cake instead of a tender one. A few lumps are perfectly acceptable and will bake out.
Using cold ingredients. This is the number one mistake home bakers make. Cold eggs and buttermilk won’t properly emulsify with the other ingredients, creating a curdled-looking batter that bakes into a dense, uneven cake. Let ingredients sit at room temperature for at least 30 minutes.
Frosting too soon. If the cake is even slightly warm, the frosting will melt and slide off. Be patient and let it cool completely – ideally for a full hour. If you’re in a rush, pop it in the refrigerator for 20-30 minutes to speed cooling.
Measuring flour incorrectly. Scooping directly from the bag compacts flour, adding up to 25% more than intended. Always spoon flour into your measuring cup and level with a knife for accuracy.
Not preheating the oven fully. Starting your cake in a cold or not-fully-heated oven affects rising and can create an uneven crumb. Always wait for your oven to reach temperature before baking.
Skipping the grease and flour step. Even with non-stick pans, properly greasing ensures easy release. Don’t skip this step or you’ll have a cake that sticks stubbornly to the pan.
Storage & Meal Prep
Room Temperature Storage: This sheet cake stays beautifully moist at room temperature for up to 2 days when covered with plastic wrap or aluminum foil. Keep it in a cool, dry place away from direct sunlight. The buttercream frosting is stable at room temperature thanks to the butter and sugar content.
Refrigerator Storage: For longer storage, refrigerate the covered cake for up to 5 days. The cake will firm up slightly when cold but returns to its tender texture when brought to room temperature. Let slices sit out for 15-20 minutes before serving for the best taste and texture.
Reheating: While delicious cold, you can warm individual slices in the microwave for 10-15 seconds to recreate that fresh-baked experience. Don’t overdo it – you want it slightly warm, not hot, which would melt the frosting.
Slicing for Storage: If you’re storing portions, cut the cake into individual slices and wrap each separately in plastic wrap before refrigerating. This makes it easy to grab a single serving and prevents the entire cake from drying out from repeated exposure to air.
Protecting Frosting: When covering a frosted cake, tent the plastic wrap or foil slightly so it doesn’t touch the frosting surface, or use toothpicks at the corners to create space. This prevents your beautiful frosting from sticking to the covering.
Make-Ahead & Freezer Notes
Bake Ahead: You can bake the cake up to 2 days in advance. Let it cool completely, wrap tightly in plastic wrap (still in the pan), and store at room temperature. Frost the day of serving for the freshest presentation.
Freeze Unfrosted Cake: For longer storage, wrap the completely cooled unfrosted cake tightly in two layers of plastic wrap followed by aluminum foil. Freeze for up to 3 months. Thaw overnight in the refrigerator, then bring to room temperature before frosting.
Freeze Frosted Cake: Yes, you can freeze frosted sheet cake! Flash-freeze uncovered for 1-2 hours until the frosting is solid, then wrap tightly in plastic wrap and foil. Freeze for up to 2 months. To thaw, unwrap and let it defrost in the refrigerator overnight, then bring to room temperature.
Freeze Individual Slices: Cut the frosted cake into individual portions, wrap each slice in plastic wrap, and place in a freezer-safe container. These grab-and-go portions are perfect for quick desserts and thaw in about 30 minutes at room temperature.
Make Frosting Ahead: Prepare buttercream up to 3 days ahead and refrigerate in an airtight container. Bring to room temperature and re-whip with an electric mixer before using to restore the fluffy texture.
Best Reheating from Frozen: For frozen slices, thaw in the refrigerator overnight or at room temperature for 1-2 hours. You can also microwave frozen slices for 20-30 seconds on 50% power for a quick treat.
Serving Suggestions
Classic Pairings: Serve this sheet cake with a tall glass of cold milk, hot coffee, or fresh-brewed iced tea. The combination of sweet cake and beverage is timeless and crowd-pleasing.
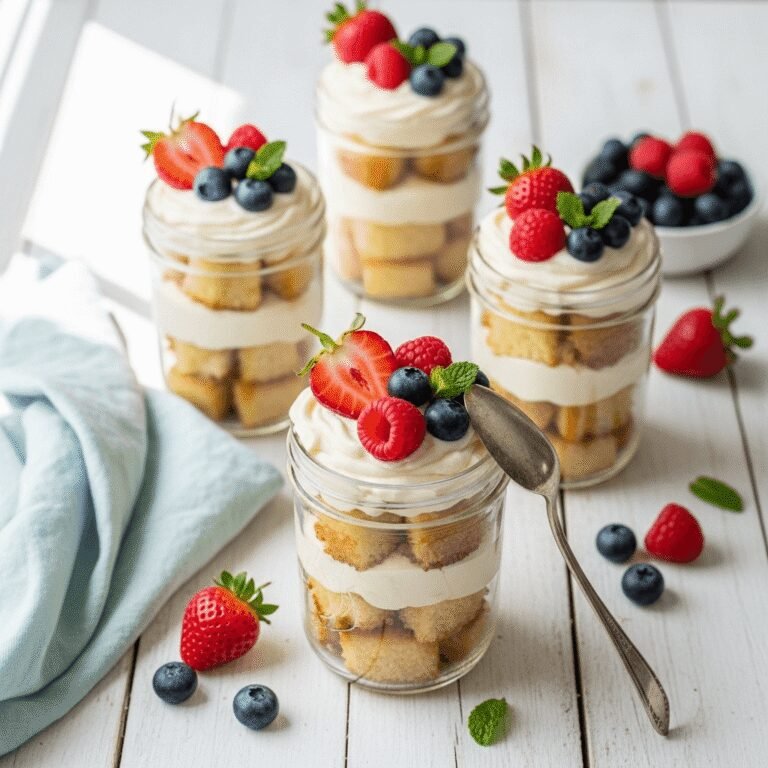
Fresh Fruit: Top slices with fresh berries – strawberries, raspberries, or blueberries add beautiful color and a tart contrast to the sweet buttercream. A dollop of whipped cream alongside makes it extra special.
Ice Cream Bar: Turn your sheet cake into a dessert bar by serving warm slices with vanilla, chocolate, or strawberry ice cream. Add hot fudge, caramel sauce, and chopped nuts for a build-your-own sundae experience.
Beverage Station: For parties, set up a beverage pairing station with options like flavored coffee, hot chocolate, fruit punch, or lemonade. This creates an interactive element that guests love.
Breakfast Treat: This cake is perfectly acceptable for birthday breakfasts or special morning celebrations. Serve with fresh fruit salad and coffee for a balanced start to a celebration day.
Elegant Plating: For more formal occasions, plate individual slices on dessert plates with a dusting of powdered sugar, fresh mint sprig, and a few fresh berries for restaurant-quality presentation.
Picnic Perfect: Cut into squares and serve on napkins for casual outdoor gatherings. The sturdy texture holds up well for handheld eating without plates.
FAQs Section
Can I make this cake without buttermilk?
Absolutely! Make a buttermilk substitute by adding 1 tablespoon of white vinegar or lemon juice to 1 cup of regular milk. Stir and let sit for 5 minutes until slightly thickened before using. You can also use plain yogurt thinned with a little milk to equal 1 cup.
Why is my cake dense instead of light and fluffy?
Dense cake usually results from overmixing the batter (developing too much gluten), using cold ingredients that don’t emulsify properly, or measuring too much flour. Make sure to measure flour correctly by spooning it into the cup and leveling, and mix only until ingredients are just combined.
Can I use a different pan size?
The 9×13-inch pan is ideal for this recipe, but you can use two 8-inch or 9-inch round pans if you prefer a layer cake. Reduce baking time to 25-28 minutes and check for doneness early. For a 9×9-inch square pan, you’ll need to halve the recipe.
How do I know when the cake is done?
The cake is done when a toothpick inserted 2 inches from the center comes out clean or with a few moist crumbs (not wet batter). The cake should also spring back when lightly pressed, and the edges will start to pull away slightly from the pan sides.
Can I halve this recipe?
Yes! Halve all ingredients and bake in a 9×9-inch square pan or 8×8-inch pan. Reduce baking time to 25-30 minutes. This yields 8-10 servings, perfect for smaller gatherings.
What if my frosting is too thick or too thin?
If frosting is too thick, add heavy cream or milk one tablespoon at a time, beating well after each addition. If too thin, add powdered sugar ¼ cup at a time until you reach the desired consistency. Remember, frosting thickens as it sits and thins as you beat it.
Can I frost the cake the night before serving?
Yes! Frosting the night before actually allows the flavors to meld beautifully. Keep the frosted cake loosely covered at room temperature (if serving within 24 hours) or refrigerated for longer storage. If refrigerated, bring to room temperature 30 minutes before serving.
Conclusion
This classic sheet cake recipe is more than just a dessert – it’s a celebration on a plate, a comfort food hug, and a guaranteed crowd-pleaser all rolled into one simple, delicious package. Whether you’re a novice baker looking for a foolproof first cake or an experienced home cook seeking a reliable go-to recipe, this sheet cake delivers every single time.
The beauty of this recipe lies in its simplicity and versatility. You can keep it classic with vanilla buttercream, dress it up with fresh fruit and flowers, or customize it with endless flavor variations. It’s perfect for birthdays, potlucks, bake sales, family dinners, or those random Tuesday nights when you just need something sweet.
I’d love to hear how your sheet cake turns out! Did you stick with the classic recipe or try one of the variations? What occasion are you baking it for? Drop a comment below and share your experience – your feedback helps fellow bakers and creates a wonderful community of home cooks supporting each other.
Don’t forget to save this recipe to your Pinterest boards so you can find it easily whenever cake cravings strike! Share it with friends who love home baking, and tag me in your photos so I can see your beautiful creations. Happy baking, friends! 🎂