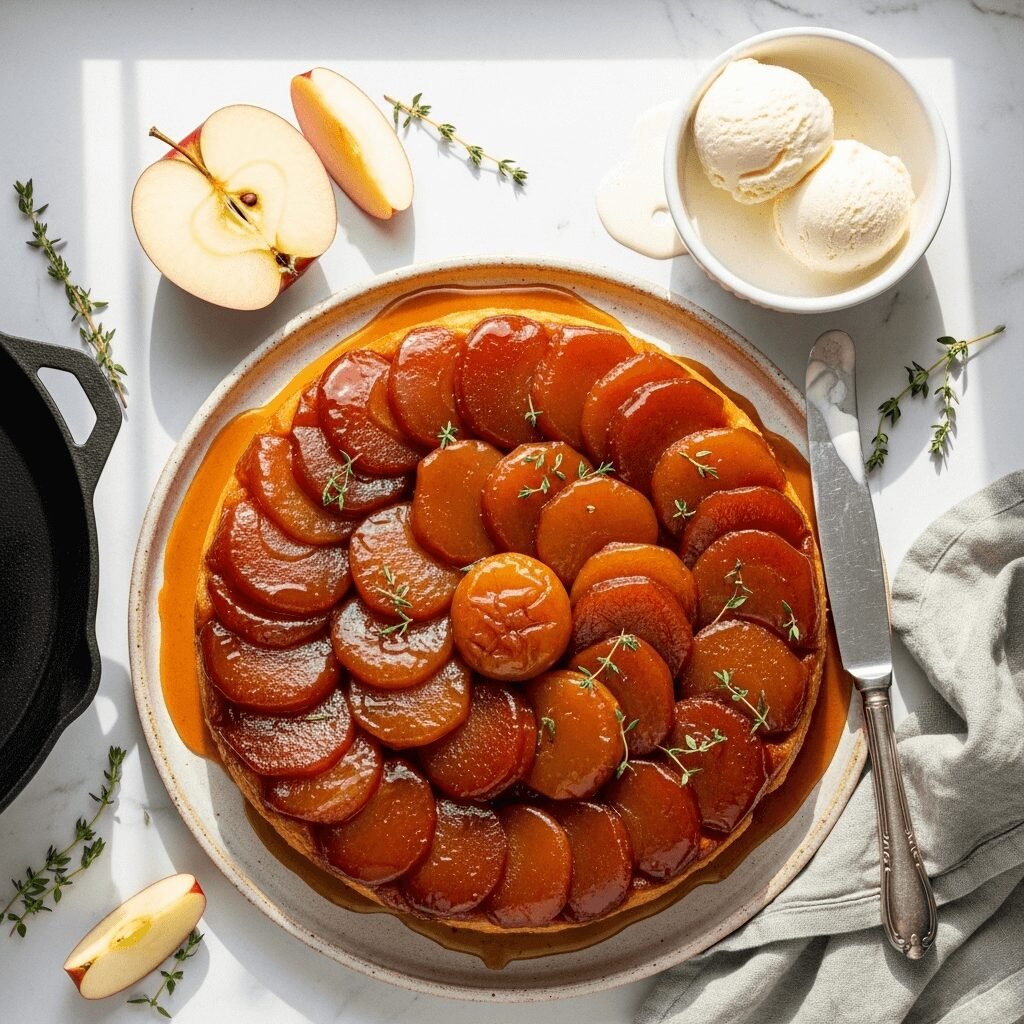
The Ultimate Tarte Tatin Recipe: Classic French Caramelized Apple Upside-Down Tart

There’s something utterly magical about Tarte Tatin – that gorgeous French upside-down apple tart with its glistening caramelized apples and buttery, flaky pastry. When you flip it out of the pan and reveal those perfectly golden apples swimming in rich caramel, it’s like unveiling a work of art. This show-stopping dessert tastes like it came straight from a Parisian patisserie, but I’m here to tell you it’s totally doable in your home kitchen!
Tarte Tatin is the perfect dessert for fall gatherings, holiday dinners, Sunday suppers, or any time you want to seriously impress your guests without spending hours in the kitchen. It’s elegant enough for special occasions yet comforting enough for a cozy weeknight treat. The combination of tender, caramelized apples with that crispy, buttery pastry creates a flavor and texture contrast that’s absolutely irresistible. Serve it warm with a scoop of vanilla ice cream or a dollop of crème fraîche, and you’ll have everyone asking for seconds!
History / Background
The story behind Tarte Tatin is one of those delightful kitchen accidents that became culinary legend. This iconic French dessert was created in the 1880s at the Hôtel Tatin in Lamotte-Beuvron, a small town in the Loire Valley region of France. The hotel was run by two sisters, Stéphanie and Caroline Tatin, and according to the most popular version of the story, Stéphanie was making a traditional apple tart one busy day when she made a mistake.
Some say she left the apples cooking in butter and sugar for too long and, in a panic, tried to rescue the dessert by placing the pastry on top and quickly shoving it in the oven. Others claim she simply forgot to put the pastry in the pan first and improvised by adding it on top of the already-cooking apples. Regardless of exactly how it happened, when she turned it upside down to serve, the result was spectacular – beautifully caramelized apples on top of perfectly crisp pastry.
The dessert became the signature dish of Hôtel Tatin and soon gained fame throughout France. The legendary Parisian restaurant Maxim’s helped popularize it further when they added it to their menu in the early 1900s. Today, Tarte Tatin is considered a classic of French cuisine and has inspired countless variations using pears, peaches, tomatoes, and other fruits and vegetables. But the original apple version remains the gold standard – a testament to how sometimes the best recipes come from happy accidents in the kitchen!
Why You’ll Love This Recipe
This Tarte Tatin recipe is my go-to whenever I want to create something that looks incredibly fancy but doesn’t require professional pastry chef skills. The beauty of this dessert lies in its rustic elegance – even if it’s not perfect, it still looks and tastes amazing!
Here’s why you’ll absolutely love making this:
- Surprisingly Simple: Despite its impressive appearance, this recipe uses straightforward techniques and common ingredients
- Minimal Ingredients: You only need apples, sugar, butter, and pastry – that’s it for a restaurant-quality dessert
- Make-Ahead Friendly: You can prep components in advance, making it perfect for entertaining
- Versatile for Any Season: While perfect for fall, this tart works beautifully year-round with different apple varieties
- Impressive Presentation: The dramatic flip creates a “wow” moment that makes you look like a baking superstar
- Customizable: Easily adapt it with different spices, apple varieties, or flavor additions like vanilla or bourbon
- Perfect Texture Balance: The contrast between caramelized apples and crispy pastry is absolutely divine
- Crowd-Pleaser: Even people who claim they don’t like apple desserts fall in love with this one
Ingredient Notes
Let me walk you through what makes each component of this Tarte Tatin so special and share some helpful tips for selecting and substituting ingredients.
Apples: The star of the show! You want firm, tart apples that hold their shape during cooking. Granny Smith apples are the classic choice because their tartness balances the sweet caramel perfectly, and they don’t turn to mush. Other excellent options include Honeycrisp, Braeburn, or a mix of Granny Smith and Golden Delicious for more complex flavor. Avoid softer apples like Red Delicious or McIntosh – they’ll break down too much. You’ll need about 6-8 medium apples depending on your pan size.
Granulated Sugar: Creates that beautiful amber caramel. White granulated sugar works best for achieving the right color and flavor. You can use superfine sugar for faster melting, but regular granulated is perfectly fine. Don’t substitute with brown sugar or coconut sugar as they’ll give you different caramel colors and flavors.
Unsalted Butter: Provides richness and helps create the caramel sauce. Using unsalted butter lets you control the salt level. European-style butter with higher fat content creates an even more luxurious caramel, but regular unsalted butter works beautifully too.
Puff Pastry: Store-bought puff pastry is your friend here! It saves hours of work and produces excellent results. Look for all-butter puff pastry if available (brands like Dufour are fantastic). You can also use homemade pie dough or rough puff pastry if you prefer. Just make sure whatever you use is well-chilled before topping the apples.
Salt: Just a pinch enhances all the flavors and balances the sweetness of the caramel.
Optional Additions: Many bakers like to add vanilla extract, cinnamon, nutmeg, or even a splash of calvados (apple brandy) or bourbon to the caramel for extra depth. A squeeze of lemon juice can also help prevent the apples from browning and adds brightness.
Equipment Needed
Having the right tools makes this recipe much easier. Here’s what you’ll need:
- 10-inch oven-safe skillet (cast iron or heavy stainless steel): This is essential! The skillet goes from stovetop to oven, and you need it to be oven-safe for flipping. Cast iron is ideal because it distributes heat evenly and retains it well.
- Sharp peeler and paring knife: For prepping your apples efficiently
- Cutting board: A large, stable surface for apple prep
- Wooden spoon or heat-resistant spatula: For stirring the caramel and arranging apples
- Rolling pin: If your puff pastry needs to be rolled out to fit your pan
- Parchment paper: Helpful for rolling out pastry
- Kitchen timer: Timing is important when making caramel
- Oven mitts: You’ll be handling a very hot, heavy skillet
- Large serving plate: For the dramatic flip! Make sure it’s larger than your skillet and can handle heat
- Cooling rack: To let the tart rest before serving
- Pastry brush (optional): For brushing away any excess caramel if needed
Tarte Tatin Recipe

This classic French Tarte Tatin features tender apples caramelized in buttery sugar until golden and gorgeous, then topped with flaky puff pastry and baked to perfection. When flipped upside down, you’ll reveal a stunning dessert with glistening caramelized apples that tastes like it came from a French patisserie. Serve warm with vanilla ice cream for the ultimate treat!
- Prep Time: 20 minutes
- Cook Time: 45 minutes
- Total Time: 1 hour 5 minutes
- Yield: 8 servings 1x
- Category: Dessert
- Method: Stovetop and Baking
- Cuisine: French
- Diet: Vegetarian
Ingredients
- 6-8 medium Granny Smith apples (about 3 pounds)
- 1 cup (200g) granulated sugar
- 6 tablespoons (85g) unsalted butter, cut into pieces
- ¼ teaspoon salt
- 1 sheet puff pastry (about 8-9 ounces), thawed according to package directions
- 1 teaspoon vanilla extract (optional)
- ½ teaspoon ground cinnamon (optional)
Instructions
- Preheat your oven to 375°F (190°C). Position a rack in the lower third of the oven.
- Prepare the apples: Peel, core, and quarter the apples. If your apples are very large, you may want to cut them into sixths. Try to keep the pieces relatively uniform in size so they cook evenly.
- Make the caramel: In your 10-inch oven-safe skillet, spread the sugar evenly across the bottom. Place over medium heat and let it melt, without stirring, for about 3-4 minutes. Once it begins to melt around the edges, you can gently tilt the pan to distribute the melting sugar, but avoid stirring which can cause crystallization.
- Add the butter: When the sugar has turned a deep amber color (this takes about 8-10 minutes total), remove from heat and immediately add the butter pieces. Stir carefully until the butter is completely melted and incorporated. The mixture will bubble up vigorously, so be careful! Stir in the salt and vanilla if using.
- Arrange the apples: Working quickly while the caramel is still hot and fluid, arrange the apple quarters in the skillet in a circular pattern. Start from the outside edge and work your way toward the center, fitting them as tightly as possible. Place them rounded-side down as this will be the top when you flip it. You can create a second layer on top if needed.
- Cook the apples: Place the skillet back over medium heat and cook for about 15-20 minutes, occasionally pressing down gently on the apples with a spatula. The caramel will bubble up around the apples. You want the apples to be partially cooked and the caramel to be thick and bubbling. If using cinnamon, sprinkle it over the apples during this step.
- Prepare the pastry: While the apples are cooking, roll out your puff pastry on a lightly floured surface just large enough to cover your skillet with about a 1-inch overhang. Keep it refrigerated until you’re ready to use it.
- Top with pastry: Remove the skillet from heat. Carefully place the puff pastry over the apples, tucking the edges down between the apples and the side of the skillet all the way around. Use a knife to poke 4-5 small vents in the pastry to allow steam to escape.
- Bake: Transfer the skillet to your preheated oven and bake for 40-45 minutes, until the pastry is puffed, golden brown, and crispy. If the pastry is browning too quickly, you can tent it loosely with foil.
- Cool slightly: Remove from the oven and let the tart cool in the skillet for 10-15 minutes. This allows the caramel to thicken slightly and makes flipping easier. Don’t let it cool completely or the caramel will harden and make flipping difficult.
- The big flip: Place a large serving plate over the top of the skillet. Using oven mitts and holding both the plate and skillet together firmly, quickly and confidently flip them over. Give the bottom of the skillet a few taps if needed to release the tart. Carefully lift off the skillet to reveal your beautiful Tarte Tatin!
- Finishing touches: If any apples stuck to the pan, simply place them back on the tart. You can use a pastry brush to redistribute any caramel that pooled on the plate back over the apples for a glossy finish.
- Serve: Serve warm with vanilla ice cream, whipped cream, or crème fraîche. Heaven!
Notes
- Apple positioning matters: Place apples rounded-side down in the pan, as this will be the top when flipped. Pack them tightly as they’ll shrink during cooking.
- Don’t skip the cooling step: Letting it rest for 10-15 minutes is crucial. Too hot and the caramel will be too liquid; too cool and it won’t release from the pan.
- Caramel color guide: Your caramel should be a deep amber color, similar to an old penny. Too light and it won’t have enough flavor; too dark and it will taste bitter.
- Puff pastry tips: Keep puff pastry cold until you’re ready to use it. If it gets too warm, it won’t puff properly in the oven.
- Pan temperature check: If you’re nervous about flipping, you can run a knife around the edge before flipping to ensure nothing is stuck.
Nutrition
- Serving Size: 1 slice (⅛ of tart)
- Calories: 385
- Sugar: 32g
- Sodium: 145mg
- Fat: 18g
- Saturated Fat: 9g
- Unsaturated Fat: 8g
- Trans Fat: 0g
- Carbohydrates: 56g
- Fiber: 3g
- Protein: 3g
- Cholesterol: 23mg
Tips & Variations
The beauty of Tarte Tatin is that once you master the basic technique, you can customize it in so many delicious ways!
Flavor Variations:
- Spiced Apple: Add 1 teaspoon cinnamon, ¼ teaspoon nutmeg, and a pinch of cardamom to the caramel
- Boozy Version: Stir 2 tablespoons of calvados, brandy, or bourbon into the caramel for grown-up flavor
- Salted Caramel: Sprinkle flaky sea salt over the finished tart for a sweet-salty combination
- Vanilla Bean: Scrape half a vanilla bean into the caramel instead of extract for more intense vanilla flavor
- Citrus Twist: Add the zest of one lemon or orange to the caramel for brightness
Fruit Variations:
- Pear Tatin: Substitute firm pears like Bosc or Anjou for a more delicate flavor
- Mixed Fruit: Use a combination of apples and pears
- Peach or Apricot: Summer stone fruit versions are divine (reduce cooking time slightly)
- Quince: Traditional in some regions of France, though quince needs longer cooking time
Pastry Alternatives:
- Use homemade pie dough for a more rustic, less puffy result
- Try whole wheat puff pastry for a nuttier flavor
- Use phyllo dough brushed with butter for a lighter, crispier top
Dietary Modifications:
- Vegan: Use vegan butter and vegan puff pastry (many store-bought versions are accidentally vegan)
- Gluten-Free: Use gluten-free puff pastry or a gluten-free pie crust
Pro Chef Tips
Want your Tarte Tatin to taste like it came from a French bakery? Here are my professional secrets:
Temperature control is everything: The biggest mistake home cooks make is using heat that’s too high or too low. Medium heat is your sweet spot for caramelizing the sugar evenly without burning. Be patient – good caramel can’t be rushed!
Apple preparation matters: Cut your apples into uniform sizes and try to keep them in quarters rather than smaller pieces. Larger pieces hold their shape better and create that stunning visual effect when you flip the tart. Also, don’t pre-slice your apples too far in advance or they’ll brown – prep them right before you start cooking.
Pack those apples tightly: This is crucial! Apples shrink considerably as they cook, so what seems impossibly crowded in the pan will be perfect when finished. Stand them upright in tight concentric circles, and don’t be afraid to really wedge them in there. You can even create a second layer if needed.
Watch your caramel color: Use a light-colored skillet if possible so you can see the caramel color develop. You want a deep amber that looks like an old copper penny. This gives you the perfect balance of sweetness and that slightly bitter caramel note that makes Tarte Tatin so sophisticated.
The confidence flip: When it’s time to flip your tart, commit to it! Place your serving plate on top, hold both firmly together, and flip in one quick, confident motion. Hesitation can lead to accidents. Think of it like ripping off a bandage – fast and decisive is best!
Serve at the right temperature: Tarte Tatin is best served warm, not hot or cold. The warmth makes the caramel gloriously fluid and the pastry stays crispy. If it cools completely, you can gently rewarm individual slices in the oven.
Quality ingredients make a difference: Since this recipe has so few ingredients, each one really shines through. Splurge on good butter, choose flavorful apples, and if you can find all-butter puff pastry, it truly makes a difference in the final flavor.
Common Mistakes to Avoid
Let me help you sidestep the pitfalls I’ve encountered (and seen others encounter) when making Tarte Tatin:
Mistake #1: Using the wrong apples. Soft, mealy apples will turn to mush under the heat and long cooking time. Stick with firm, tart varieties like Granny Smith, Honeycrisp, or Braeburn. These hold their shape beautifully and provide the right flavor balance.
Mistake #2: Not packing the apples tightly enough. I can’t stress this enough – what looks overcrowded will be perfect after cooking. Apples release moisture and shrink significantly. If you don’t pack them tightly, you’ll end up with gaps and a less visually impressive final result.
Mistake #3: Burning the caramel. This happens when you walk away or use heat that’s too high. Watch your caramel like a hawk during those final minutes. Once sugar starts to darken, it goes from perfect to burnt very quickly. If you do burn it, don’t try to salvage it – start over with fresh sugar.
Mistake #4: Flipping too soon or too late. Too soon and the caramel will be dangerously hot and liquid, potentially causing burns. Too late and the caramel hardens, gluing your tart to the pan. That 10-15 minute cooling window is the sweet spot when the caramel is thick but still pliable.
Mistake #5: Using a pan that’s not oven-safe. I’ve heard horror stories of people forgetting to check if their skillet can go in the oven. Handles with plastic or rubber, or pans not rated for high heat, can melt or release harmful chemicals. Always verify your pan is completely oven-safe before starting.
Mistake #6: Skipping the steam vents in the pastry. Those little cuts aren’t just decorative – they allow steam to escape so your pastry gets crispy instead of soggy. Just 4-5 small slits will do the trick.
Mistake #7: Opening the oven door repeatedly. Every time you open the oven, you let out heat and interfere with the puff pastry’s ability to rise properly. Trust your timer and only check toward the end of the baking time.
Storage & Meal Prep
Let’s talk about how to handle leftovers and plan ahead with your Tarte Tatin.
Room Temperature Storage: If you plan to eat your Tarte Tatin within a few hours of baking, you can leave it at room temperature, loosely covered with foil. This is actually ideal because the pastry stays crispiest at room temperature. It will keep this way for up to 4 hours.
Refrigerator Storage: For longer storage, cover the tart tightly with plastic wrap or transfer individual slices to an airtight container. It will keep in the refrigerator for up to 3 days. Be aware that the pastry will soften in the fridge due to the moisture from the apples and caramel.
Reheating Instructions: The best way to reheat Tarte Tatin is in a 350°F oven for 10-15 minutes (for the whole tart) or 5-8 minutes for individual slices. This helps re-crisp the pastry. You can also reheat slices in a toaster oven. Avoid the microwave if possible, as it makes the pastry soggy, though in a pinch, 20-30 seconds will warm it through.
Serving Suggestions After Storage: Even if the pastry has softened a bit, serving your reheated Tarte Tatin with ice cream or whipped cream makes it delicious. The contrast of cold cream against warm tart is irresistible!
Make-Ahead & Freezer Notes
Tarte Tatin is a fantastic dessert to partially prepare in advance, which makes entertaining much easier!
Make-Ahead Option 1 (Best Method): You can caramelize the apples in the skillet, let them cool completely, then cover tightly and refrigerate for up to 24 hours. When ready to bake, top with the puff pastry and proceed with baking. You may need to add 5-10 minutes to the baking time since you’re starting with cold apples.
Make-Ahead Option 2: You can prepare everything up until baking, including topping with the pastry, and refrigerate for up to 4 hours. Let it sit at room temperature for 15 minutes before baking, then proceed as directed.
Freezing Unbaked Tarte Tatin: While not ideal, you can freeze the skillet with caramelized apples and pastry topping (make sure your skillet is freezer-safe!) for up to 2 months. Wrap extremely well in plastic wrap and foil. Bake from frozen, adding 15-20 minutes to the baking time.
Freezing Baked Tarte Tatin: You can freeze baked and cooled Tarte Tatin for up to 3 months. Wrap the whole tart or individual slices tightly in plastic wrap, then foil. Thaw in the refrigerator overnight and reheat in a 350°F oven until warmed through and the pastry crisps up again, about 15-20 minutes.
Best Reheating from Frozen: If you’re in a hurry, you can reheat frozen slices directly in a 325°F oven for about 20-25 minutes, covered with foil for the first 15 minutes to prevent over-browning.
Pro Tip: While Tarte Tatin can be made ahead, it truly is best within a few hours of baking when the pastry is at its crispiest and the caramel is still slightly fluid. If I’m entertaining, I usually prep the apples ahead but do the final baking right before serving.
Serving Suggestions
Tarte Tatin is versatile enough to serve in various settings, and there are so many wonderful accompaniments that can take it from delicious to absolutely extraordinary!
Classic Accompaniments:
- Vanilla Ice Cream: The traditional pairing and my personal favorite – that contrast of hot caramel against cold, creamy vanilla is perfection
- Crème Fraîche: Tangy and rich, this is very French and cuts through the sweetness beautifully
- Whipped Cream: Lightly sweetened whipped cream is lighter than ice cream but equally delicious
- Vanilla Custard (Crème Anglaise): Ultra-traditional French accompaniment that makes this dessert feel truly special
Beverage Pairings:
- Coffee: A strong espresso or café au lait balances the sweetness
- Dessert Wine: Sauternes, late-harvest Riesling, or ice wine are spectacular pairings
- Calvados: A small glass of this apple brandy continues the apple theme
- Hot Tea: Earl Grey or chamomile tea with honey complements the caramel notes
- Sparkling Wine: A demi-sec Champagne or Prosecco adds celebratory elegance
Additional Garnishes:
- Toasted pecans or walnuts sprinkled on top add wonderful crunch
- Fresh thyme leaves add an unexpected herbal note
- A drizzle of heavy cream around the plate looks restaurant-fancy
- Caramel sauce (yes, more caramel!) for extra indulgence
Occasion-Specific Serving:
- Dinner Party: Serve warm on individual plates with a scoop of ice cream and a sprig of fresh mint
- Holiday Meal: Present the whole tart on a beautiful platter and let guests serve themselves
- Afternoon Tea: Serve at room temperature in smaller wedges alongside coffee or tea
- Casual Family Dinner: Bring the skillet right to the table and serve directly from it for rustic charm
FAQs Section
Q: Can I use a different pan if I don’t have a cast-iron skillet?
A: Yes! Any oven-safe skillet will work – stainless steel, copper, or enameled cast iron are all fine. Just make sure the handle is oven-safe (no plastic or rubber) and that it’s heavy enough to distribute heat evenly. In a pinch, you can make the caramel in a regular pan, then transfer the apples to a cake pan or pie dish before topping with pastry, though you’ll lose some of that rustic, straight-from-the-skillet charm.
Q: Why did my Tarte Tatin stick to the pan?
A: This usually happens for one of two reasons: either the tart cooled too long and the caramel hardened (flip while still quite warm!), or there wasn’t enough caramel to create a non-stick layer. Make sure you’re using enough butter and sugar, and cook the apples long enough to create plenty of that glorious caramel sauce. If your tart does stick, you can gently warm the bottom of the pan over low heat for 30 seconds to loosen it.
Q: Can I make Tarte Tatin with other fruits?
A: Absolutely! Pears are probably the most popular alternative – use firm Bosc or Anjou pears and follow the same method. Peaches, apricots, plums, and even figs work beautifully, though you’ll want to reduce the cooking time since they’re softer than apples. Some adventurous cooks even make savory versions with tomatoes or shallots!
Q: My puff pastry didn’t puff up. What went wrong?
A: The most common cause is working with pastry that got too warm before baking. Puff pastry needs to be cold going into a hot oven for proper puffing. Other causes include not cutting steam vents (the pressure has nowhere to escape), opening the oven door too often during baking, or oven temperature being too low. Make sure your oven is fully preheated to 375°F.
Q: How do I know when my caramel is the right color?
A: Look for a deep amber color that resembles an old penny or copper. It should be noticeably darker than honey but not approaching black. The caramel will also smell deeply toasty and nutty (but not burnt). If you’re using a stainless steel or copper pan where you can see the color clearly, this is easier. With cast iron, you’ll need to rely more on timing and smell – usually 8-10 minutes of cooking after the sugar first starts melting.
Q: Can I use store-bought caramel sauce instead of making my own?
A: I wouldn’t recommend it. The dry caramel method (starting with just sugar) creates a much more stable base that won’t make your pastry soggy, and it develops complex flavors that jarred caramel can’t match. Plus, making caramel from scratch is easier than you think! The butter and sugar method in this recipe is very forgiving.
Q: What’s the best way to cut Tarte Tatin for serving?
A: Use a sharp serrated knife and a gentle sawing motion to cut through the pastry without crushing it. Wipe the knife clean between slices for the cleanest cuts. If the caramel has become very thick and sticky, you can dip your knife in hot water and wipe it dry between cuts. Serve each slice with a pie server or large spatula to keep it intact.
Conclusion
There you have it – everything you need to master the art of making Tarte Tatin! This stunning French dessert might seem intimidating at first glance, but I hope I’ve shown you that with the right techniques and a little confidence, you can absolutely create this showstopper in your own kitchen.
The beauty of Tarte Tatin goes beyond its gorgeous appearance. It’s a dessert with soul – born from a happy accident in a French country hotel and perfected over more than a century. Every time you flip that pan and reveal those glistening caramelized apples, you’re participating in a delicious piece of culinary history.
Whether you’re making this for a special holiday dinner, a cozy fall evening, or just because you’re craving something sweet and spectacular, I know it’s going to be amazing. Don’t be discouraged if your first attempt isn’t perfect – even a slightly messy Tarte Tatin tastes absolutely incredible!
I’d love to hear how your Tarte Tatin turns out! Leave a comment below with your results, any creative variations you tried, or questions you have. And please, don’t forget to save this recipe to your Pinterest boards so you can find it easily when apple season rolls around. If you make this recipe, tag me on social media – I genuinely love seeing your beautiful creations!
Now grab those apples, dust off your skillet, and let’s get baking. Your kitchen is about to smell absolutely heavenly! 🍎✨