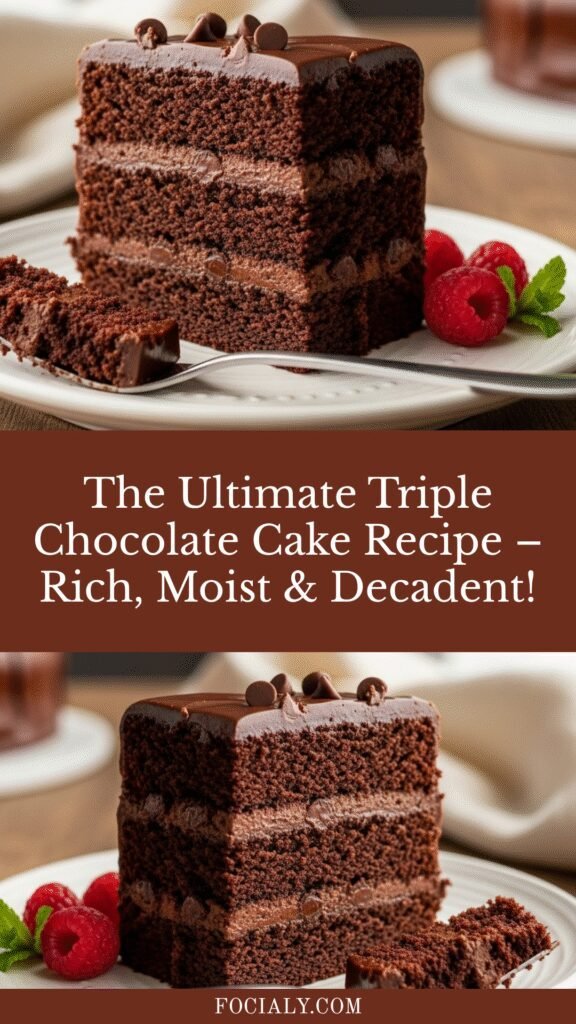
The Ultimate Triple Chocolate Cake Recipe – Rich, Moist & Decadent!
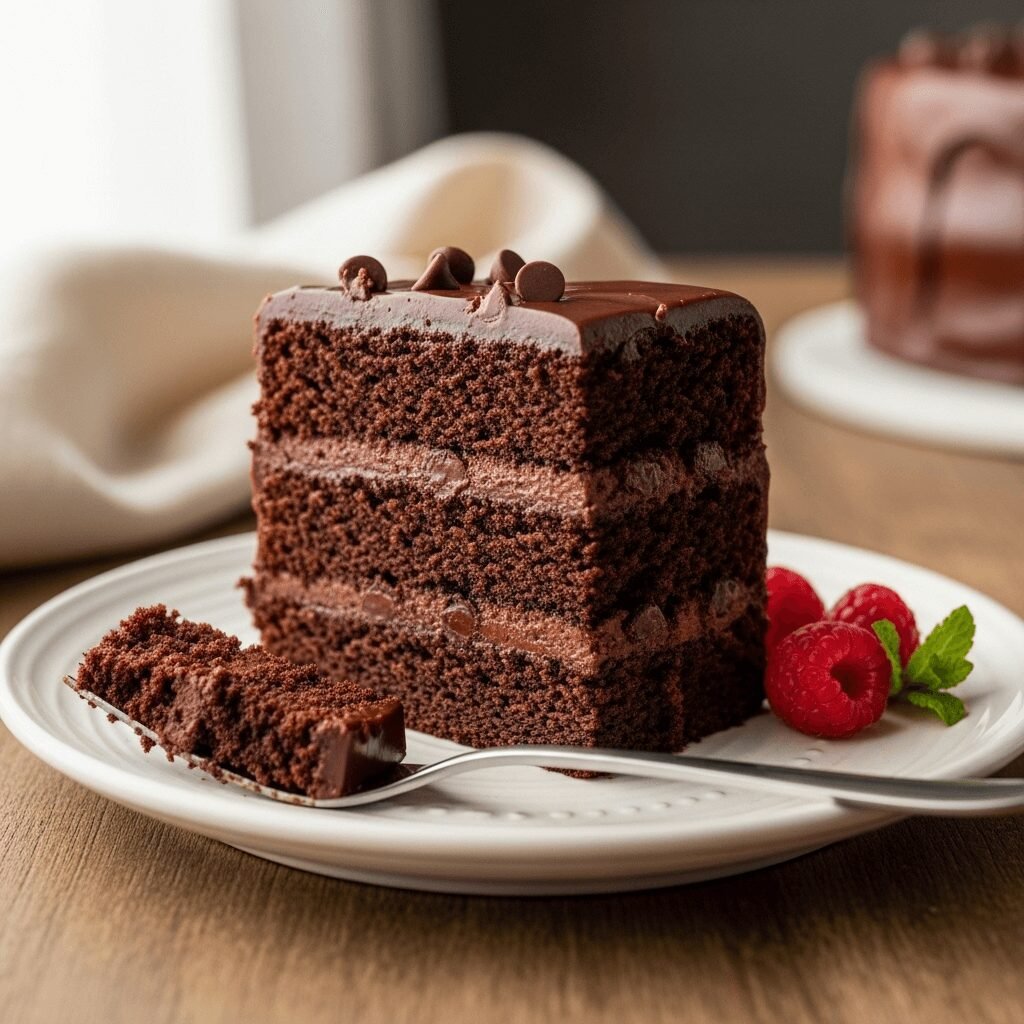
If you’re a chocolate lover, this Triple Chocolate Cake is about to become your new favorite dessert obsession. This show-stopping cake features three layers of pure chocolate bliss: a deeply flavored chocolate cake base, rich chocolate chips folded throughout, and a luxurious chocolate ganache frosting that creates the most decadent finish imaginable. Every bite delivers an intense chocolate experience that’s surprisingly not overwhelming – just perfectly balanced and incredibly satisfying.
This triple chocolate cake is the kind of dessert that makes celebrations feel extra special. Whether you’re planning a birthday party, anniversary dinner, holiday gathering, or simply treating yourself because it’s Tuesday, this cake delivers bakery-quality results right from your home kitchen. It’s moist, tender, and has that perfect crumb that makes everyone ask for seconds. The best part? While it looks and tastes like something from an upscale bakery, it’s actually straightforward enough for home bakers of all skill levels to master.
History / Background
The concept of chocolate cake has been delighting dessert lovers since the late 18th century, but the “triple chocolate” variation is a more modern American innovation that emerged during the chocolate renaissance of the 1980s and 1990s. During this era, American home bakers and professional pastry chefs alike began experimenting with layering different chocolate elements to create more complex, intensely flavored desserts.
The triple chocolate cake specifically became popular as a way to satisfy the growing demand for “more chocolate” without simply making desserts sweeter or heavier. The genius lies in incorporating chocolate in three distinct forms – cocoa powder in the batter for depth, chocolate chips for texture and pockets of melted chocolate, and chocolate ganache or frosting for richness. This trinity of chocolate creates layers of flavor and texture that keep each bite interesting.
This particular style of cake gained massive popularity through American bakeries, cooking shows, and eventually Pinterest and food blogs, where home bakers discovered they could recreate restaurant-quality chocolate cakes at home. Today, it’s become a staple celebration cake across the United States, beloved for special occasions and chocolate emergencies alike. The recipe has evolved to become more accessible to home cooks while maintaining that impressive, indulgent quality that makes it perfect for sharing (or not – we don’t judge!).
Why You’ll Love This Recipe
This triple chocolate cake isn’t just another chocolate cake recipe – it’s the chocolate cake that will ruin all other chocolate cakes for you (in the best possible way). The combination of techniques and ingredients creates a dessert that’s genuinely restaurant-quality, yet achievable in your home kitchen without any fancy equipment or professional training.
Here’s why this recipe will become your go-to chocolate cake:
- Incredibly moist texture – The secret ingredient combination keeps this cake tender for days without being dense or heavy
- Triple chocolate intensity – Three forms of chocolate create complex flavor without being overly sweet or one-dimensional
- Foolproof method – Clear step-by-step instructions ensure success even for nervous bakers
- Make-ahead friendly – Perfect for stress-free party planning since components can be prepared in advance
- Customizable sweetness – Easy to adjust the chocolate intensity to suit your preference
- Impressive presentation – Looks bakery-professional with minimal decorating skills required
- Feeds a crowd – Generously sized to serve 12-16 people, making it economical for gatherings
- Stable frosting – The ganache holds up beautifully at room temperature, perfect for parties
- Uses pantry staples – Most ingredients are probably already in your kitchen
Ingredient Notes
Understanding your ingredients helps you make smart substitutions and troubleshoot successfully. Here’s what goes into this amazing cake and why each component matters:
All-Purpose Flour – Provides structure without making the cake tough. Cake flour can be substituted for an even more tender crumb, but all-purpose works perfectly and is more accessible.
Cocoa Powder – Use high-quality unsweetened cocoa powder (Dutch-process or natural both work). This is your primary chocolate flavor, so quality matters here. Dutch-process creates a darker, more mellow flavor while natural cocoa is slightly more acidic and intense.
Granulated Sugar – Provides sweetness and helps create that tender, moist texture. It also helps the cake brown properly. Don’t reduce the sugar significantly or the texture will suffer.
Eggs – Add structure, moisture, and richness. They should be room temperature for best incorporation. Each egg adds protein that helps the cake rise and maintain structure.
Butter – Contributes flavor, moisture, and tender texture. Use unsalted butter so you can control the salt level. Room temperature butter creams properly with sugar.
Buttermilk or Sour Cream – The acidity tenderizes the gluten and reacts with baking soda to create lift. It also adds incredible moisture. Regular milk with a tablespoon of vinegar works as a substitute.
Semi-Sweet Chocolate Chips – Fold throughout the batter for pockets of melted chocolate. Can use dark chocolate chips for more intensity or milk chocolate for sweeter results.
Heavy Cream – Essential for the ganache frosting. Creates that silky, pourable consistency. No good substitutes here – the fat content is crucial.
Baking Powder & Baking Soda – Work together to create proper rise and tender crumb. Don’t skip either or substitute one for the other.
Vanilla Extract – Enhances and rounds out the chocolate flavor. Pure vanilla makes a noticeable difference.
Salt – Balances sweetness and makes the chocolate flavor more pronounced. Essential, not optional.
Hot Coffee or Hot Water – Blooms the cocoa powder and intensifies chocolate flavor without making it taste like coffee. Can use hot water if you prefer.
Equipment Needed
You don’t need a professional kitchen to make this stunning cake, but having the right tools makes the process smoother:
- Three 9-inch round cake pans – For the classic layer cake presentation (or two pans if making a two-layer version)
- Parchment paper – Prevents sticking and ensures easy release
- Large mixing bowls – At least two for separating wet and dry ingredients
- Electric mixer (stand or hand) – Makes creaming and mixing effortless, though you can mix by hand with commitment
- Wire whisk – For combining dry ingredients and ensuring no lumps
- Rubber spatula – Essential for scraping down bowls and folding in chips
- Measuring cups and spoons – Accurate measurements matter in baking
- Sifter or fine-mesh strainer – Removes cocoa lumps for smooth batter
- Cooling racks – Allows air circulation so cakes cool evenly
- Offset spatula – Makes frosting smooth and professional-looking
- Small saucepan – For making the ganache
- Cake stand or serving plate – For assembling and displaying your masterpiece
- Toothpicks – For testing doneness
Triple Chocolate Cake Recipe

This Triple Chocolate Cake is the ultimate chocolate lover’s dream! Featuring moist chocolate cake layers studded with chocolate chips and covered in silky chocolate ganache, this show-stopping dessert delivers intense chocolate flavor with a tender, bakery-quality crumb. Perfect for celebrations or whenever you need a serious chocolate fix!
- Prep Time: 25 minutes
- Cook Time: 30 minutes
- Total Time: 55 minutes (plus cooling time)
- Yield: 12-16 servings 1x
- Category: Dessert
- Method: Baking
- Cuisine: American
- Diet: Vegetarian
Ingredients
For the Chocolate Cake:
- 2 cups all-purpose flour
- 2 cups granulated sugar
- ¾ cup unsweetened cocoa powder
- 2 teaspoons baking powder
- 1½ teaspoons baking soda
- 1 teaspoon salt
- 2 large eggs, room temperature
- 1 cup buttermilk, room temperature
- 1 cup hot coffee (or hot water)
- ½ cup vegetable oil
- 2 teaspoons vanilla extract
- 1½ cups semi-sweet chocolate chips
For the Chocolate Ganache Frosting:
- 2 cups heavy cream
- 24 ounces semi-sweet chocolate chips (about 4 cups)
- 2 tablespoons butter
- 2 teaspoons vanilla extract
- Pinch of salt
Instructions
Making the Cake:
- Prep your pans: Preheat oven to 350°F (175°C). Grease three 9-inch round cake pans with butter or cooking spray, then line the bottoms with parchment paper circles. Grease the parchment too. This double insurance prevents any sticking disasters.
- Mix dry ingredients: In a large bowl, sift together the flour, sugar, cocoa powder, baking powder, baking soda, and salt. Whisk thoroughly to ensure the cocoa powder is evenly distributed with no lumps. This step is crucial for even chocolate flavor throughout.
- Combine wet ingredients: In another bowl, whisk together the eggs, buttermilk, oil, and vanilla extract until well combined and slightly frothy. Room temperature ingredients mix more smoothly and create better texture.
- Create the batter: Pour the wet ingredients into the dry ingredients and mix on medium speed for about 2 minutes until well combined. The batter will be thick at this point – that’s normal.
- Add hot coffee: Carefully stir in the hot coffee. The batter will become very thin and liquidy – don’t panic! This loose batter is the secret to incredibly moist cake. The hot liquid also blooms the cocoa powder for deeper flavor.
- Fold in chocolate chips: Gently fold in 1½ cups of chocolate chips using a spatula. Make sure they’re evenly distributed throughout the batter.
- Divide and bake: Divide the batter evenly among the three prepared pans (about 2⅓ cups per pan). Tap pans gently on the counter to release air bubbles. Bake for 28-32 minutes, or until a toothpick inserted in the center comes out with just a few moist crumbs. Don’t overbake or the cake will be dry.
- Cool properly: Let cakes cool in pans for 15 minutes, then carefully turn out onto wire racks. Remove parchment paper and cool completely before frosting – this takes about 1-2 hours. Rushing this step leads to melted frosting.
Making the Ganache:
- Heat the cream: In a medium saucepan over medium heat, bring the heavy cream just to a simmer. You’ll see small bubbles around the edges. Don’t let it boil.
- Melt the chocolate: Remove from heat and add the chocolate chips. Let sit for 2-3 minutes to soften, then stir until completely smooth and glossy. Add butter, vanilla, and salt, stirring until incorporated.
- Cool to spreading consistency: Let ganache cool at room temperature for 45-60 minutes, stirring occasionally. It should thicken to a spreadable consistency similar to frosting. If it gets too thick, briefly warm it; too thin, refrigerate for 10-15 minutes.
Assembling the Cake:
- Level if needed: If your cake layers have domed tops, use a serrated knife to level them for easier stacking.
- First layer: Place one cake layer on your serving plate. Spread about ¾ cup of ganache evenly on top, going almost to the edges.
- Second layer: Add the second cake layer and repeat with another ¾ cup of ganache.
- Final layer: Place the third layer on top, then use remaining ganache to frost the top and sides of the cake. Use an offset spatula for smooth, professional-looking results.
- Final touches: For an extra elegant finish, you can decorate with additional chocolate chips, chocolate shavings, fresh berries, or a light dusting of cocoa powder.
Notes
- Buttermilk substitute: Mix 1 cup regular milk with 1 tablespoon white vinegar or lemon juice. Let sit 5 minutes.
- Coffee substitute: Hot water works fine, but coffee deepens the chocolate flavor without tasting like coffee.
- Two-layer option: Use two 9-inch pans and bake for 33-37 minutes for thicker layers.
- Storage: Keep covered at room temperature for 3 days, refrigerated for up to 1 week.
- Make-ahead: Cake layers can be baked, cooled, wrapped tightly, and frozen for up to 3 months.
- Ganache consistency: If ganache is too thin, chill briefly; if too thick, add a tablespoon of warm cream.
Nutrition
- Serving Size: 1 slice (1/14 of cake)
- Calories: 485
- Sugar: 48g
- Sodium: 285mg
- Fat: 26g
- Saturated Fat: 13g
- Unsaturated Fat: 11g
- Trans Fat: 0g
- Carbohydrates: 62g
- Fiber: 4g
- Protein: 6g
- Cholesterol: 55mg
Note: Nutrition information is approximate and will vary based on specific ingredients used and portion sizes.
Tips & Variations
Flavor Variations:
- Mocha chocolate cake: Replace half the coffee with strong espresso for more pronounced coffee flavor
- Mint chocolate: Add 1 teaspoon mint extract to the batter and use chocolate-mint chips
- Orange chocolate: Add 2 teaspoons orange zest to the batter and 1 teaspoon orange extract
- Mexican chocolate: Add 1 teaspoon cinnamon and ¼ teaspoon cayenne pepper to the dry ingredients
- White chocolate version: Use white chocolate chips in the batter and make white chocolate ganache
Dietary Modifications:
- Gluten-free: Use a 1:1 gluten-free flour blend with xanthan gum
- Dairy-free: Substitute coconut milk for buttermilk, coconut oil for vegetable oil, and make ganache with coconut cream and dairy-free chocolate
- Reduced sugar: You can reduce sugar by ¼ cup, but the texture will be slightly less moist
Presentation Ideas:
- Drizzle with white chocolate for contrast
- Top with fresh raspberries or strawberries
- Add crushed Oreos between layers
- Pipe decorative swirls of ganache on top
- Create an ombre effect with different chocolate shades
Pro Chef Tips
Temperature matters: Always use room temperature eggs, buttermilk, and butter. Cold ingredients don’t emulsify properly and can create dense, uneven texture. Take items out of the fridge 30-60 minutes before baking.
Don’t overmix after adding coffee: Once the hot coffee goes in, mix just until combined. Overmixing at this stage can create tough cake since you’re activating gluten development.
Test doneness carefully: Chocolate cake is harder to judge than vanilla. A few moist crumbs on the toothpick are perfect – completely clean means overbaked. The cake will also pull away slightly from the pan edges when done.
Cool completely before frosting: This is non-negotiable. Even slightly warm cake will melt your ganache and create a sliding, melting mess. If you’re in a hurry, you can refrigerate cooled layers for 20 minutes before assembling.
Crumb coat technique: For the most professional finish, apply a thin layer of ganache to seal in crumbs, then refrigerate for 15 minutes before applying the final frosting layer. This creates that smooth bakery look.
Bloom your cocoa: The hot coffee isn’t just for thinning the batter – it chemically “blooms” the cocoa powder, which releases more complex chocolate flavors and aromas that you can’t achieve with cold liquid.
Quality chocolate matters: Use good-quality chocolate chips or chopped chocolate for the ganache. Cheap chocolate can taste waxy and won’t create that silky-smooth texture you want.
Common Mistakes to Avoid
Overmixing the batter: Once you add the flour mixture, mix just until combined. Overmixing develops gluten, creating tough, dense cake instead of tender crumb. A few small flour streaks are fine – they’ll disappear during baking.
Skipping the parchment paper: Even if your pans are “non-stick,” use parchment paper rounds on the bottom. Chocolate cake can be sticky, and parchment ensures your layers release cleanly without breaking.
Frosting too soon: This is the number one mistake that ruins otherwise perfect cakes. Warm cake + cold frosting = melted, sliding mess. Wait until layers are completely cool to room temperature before attempting to frost.
Opening the oven door too early: Don’t open the oven for at least 20 minutes. Temperature fluctuations can cause cakes to sink in the middle. If you must check, do it quickly in the last 5-8 minutes of baking.
Not measuring cocoa powder correctly: Cocoa powder should be spooned into the measuring cup and leveled off, not scooped directly. Scooping packs the cocoa and you’ll end up with too much, creating dry, bitter cake.
Storage & Meal Prep
Room Temperature Storage: This cake stores beautifully at room temperature for up to 3 days when covered with a cake dome or wrapped loosely with plastic wrap. The ganache actually gets better after 24 hours as the flavors meld. Make sure the cake is in a cool room away from direct sunlight or heat sources.
Refrigerator Storage: You can refrigerate the frosted cake for up to 1 week in an airtight container. The texture will become slightly firmer when cold. Before serving, let it sit at room temperature for 30-45 minutes to soften and bring out the best flavor and texture.
Reheating Tips: Individual slices can be microwaved for 10-15 seconds to serve warm, which makes the chocolate chips gooey and delicious. You can also warm slices in a 300°F oven for 5-7 minutes. This is absolutely amazing served warm with vanilla ice cream.
Portioning for Storage: If you’re storing leftovers, slice the cake first and wrap individual pieces in plastic wrap, then place in an airtight container. This makes it easy to grab single servings and prevents the entire cake from drying out from repeated exposure to air.
Make-Ahead & Freezer Notes
Baking Ahead: This is an excellent make-ahead cake! Bake the layers up to 2 days in advance, let them cool completely, then wrap each layer tightly in plastic wrap and store at room temperature. This actually makes the cake easier to work with since the layers are firmer and less likely to break.
Freezing Unfrosted Layers: For longer storage, wrap cooled cake layers in plastic wrap, then aluminum foil, and freeze for up to 3 months. Thaw overnight in the refrigerator, then bring to room temperature before frosting. The texture will be virtually identical to fresh-baked.
Freezing Frosted Cake: You can freeze the entire frosted cake. Place it uncovered in the freezer for 30 minutes to firm up the ganache, then wrap carefully in plastic wrap and foil. Freeze for up to 2 months. Thaw overnight in the refrigerator, then bring to room temperature before serving.
Ganache Make-Ahead: Make ganache up to 1 week ahead and store in the refrigerator in an airtight container. When ready to use, let it come to room temperature and stir well. If needed, microwave in 10-second intervals to soften to spreading consistency.
Best Reheating Method: For frozen cake, always thaw in the refrigerator first (6-8 hours or overnight), then let it sit at room temperature for 45-60 minutes before serving. Never microwave a whole frozen cake as it will thaw unevenly.
Serving Suggestions
This decadent triple chocolate cake is rich enough to stand alone, but pairing it with the right accompaniments can elevate the entire dessert experience and balance the chocolate intensity.
Classic Pairings:
- Vanilla bean ice cream or whipped cream to cut the richness
- Fresh raspberries or strawberries for tartness and color contrast
- Hot coffee or espresso to complement the chocolate flavors
- Cold glass of whole milk for a nostalgic, comforting combination
Elegant Additions:
- Raspberry or strawberry coulis drizzled on the plate
- Sweetened whipped cream with a touch of Grand Marnier or Amaretto
- Fresh mint leaves for garnish and a hint of brightness
- Candied orange peel for sophisticated citrus notes
- Sea salt flakes sprinkled on top for sweet-salty contrast
For Special Occasions:
- Serve with champagne or sparkling wine for celebrations
- Add edible gold leaf for ultra-elegant presentation
- Pair with dessert wine like Port or late-harvest Riesling
- Create a dessert plate with multiple chocolate elements (ganache drizzle, chocolate sauce, chocolate shavings)
Party Presentation:
- Serve smaller slices since this is quite rich
- Offer both warm and room temperature options
- Set up a topping bar with whipped cream, berries, and chocolate sauce
- Include decaf coffee for evening events
FAQs Section
Q: Can I make this as a sheet cake instead of layers?
A: Absolutely! Pour the batter into a greased 9×13-inch pan and bake at 350°F for 35-40 minutes. The cake will be slightly thicker and you’ll use the ganache as a poured topping instead of frosting. This is perfect for casual gatherings and makes serving easier.
Q: Why is my cake dense instead of light and fluffy?
A: Several factors can cause density: overmixing the batter after adding flour, using expired leavening agents (baking powder/soda), skipping the hot liquid which helps create steam and lift, or overbaking. Make sure your baking powder and soda are fresh (test by adding a bit to hot water – it should fizz vigorously).
Q: Can I use Dutch-process cocoa instead of natural cocoa powder?
A: Yes! Both work beautifully in this recipe. Dutch-process cocoa creates a darker, more mellow chocolate flavor with less acidity, while natural cocoa is slightly more intense and acidic. Since this recipe includes both baking powder and baking soda, it can handle either type.
Q: My ganache is too runny – how do I fix it?
A: Simply refrigerate it for 10-15 minutes, stirring every 5 minutes until it thickens to spreadable consistency. If you need it to firm up faster, place the bowl over an ice bath and stir continuously. The opposite problem (too thick) can be fixed by adding a tablespoon of warm cream and stirring until smooth.
Q: Can I make this cake without coffee?
A: Yes, substitute hot water for the hot coffee. The coffee enhances the chocolate flavor without making it taste like coffee, but hot water will still work to create the proper texture and moisture. You won’t taste any coffee flavor in the finished cake either way.
Q: How do I prevent my cake layers from sticking to the pans?
A: Use the three-step method: grease the pans with butter or shortening, line bottoms with parchment paper circles, then grease the parchment. This ensures easy release every time. Letting cakes cool in the pans for 15 minutes before turning out also helps.
Q: Can I make cupcakes with this recipe?
A: Yes! This batter makes approximately 24-28 cupcakes. Fill liners about 2/3 full and bake at 350°F for 18-22 minutes. The ganache works perfectly as cupcake frosting – just make sure it’s cooled to a thicker consistency so it holds its shape on top.
Conclusion
This Triple Chocolate Cake is pure magic in dessert form – rich, indulgent, and surprisingly achievable for home bakers of any skill level. The combination of moist chocolate cake, melted chocolate chips throughout, and that silky ganache frosting creates layers of chocolate heaven that’ll have everyone asking for your secret recipe. Whether you’re celebrating a special occasion or just treating yourself to something extraordinary, this cake delivers the kind of wow-factor that makes memories.
The best part? Once you master this recipe, you’ll have a reliable showstopper in your baking repertoire that works for everything from birthday parties to holiday gatherings to “just because” Tuesdays. The make-ahead friendly nature means you can bake stress-free, and the room temperature storage means no last-minute rushing around before guests arrive.
Ready to dive into chocolate paradise? Grab your mixing bowls and let’s get baking! This cake is calling your name, and trust me – your taste buds will thank you. Don’t forget to snap a photo of your beautiful creation and share it on Pinterest to inspire other chocolate lovers. And if you make this recipe, I’d absolutely love to hear about it in the comments below – tell me how it turned out and any creative twists you added!
Happy baking, and prepare yourself for some serious chocolate bliss! 🍫