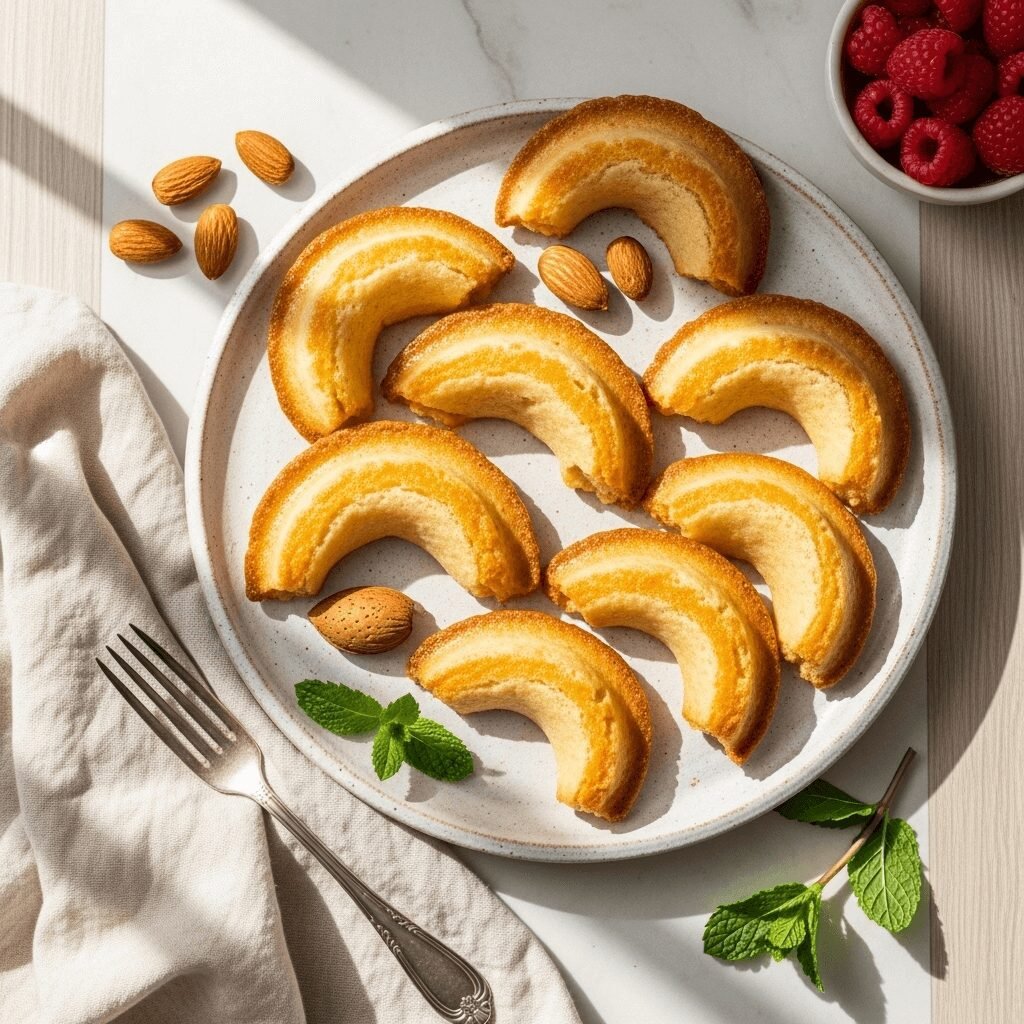
Classic French Tuiles Recipe – Delicate, Crispy, & Incredibly Elegant

Tuiles (pronounced “tweels”) are delicate, wafer-thin French cookies that literally translate to “tiles” in English—named after the curved terra-cotta roof tiles found throughout France. These elegant, lacy cookies are the ultimate finishing touch for any dessert platter, ice cream sundae, or sophisticated dinner party spread.
What makes tuiles so special is their incredible versatility and that gorgeous, professional bakery look they bring to your table. With just a handful of simple ingredients you probably already have in your pantry, you can create these stunning, crispy cookies that practically melt on your tongue. They’re traditionally shaped while still warm and pliable, draped over a rolling pin or wine bottle to create that signature curved shape that’s both beautiful and functional—perfect for serving alongside sorbets, mousses, or your favorite cup of coffee.
Whether you’re hosting an elegant dinner party, looking to impress guests with a restaurant-quality dessert component, or simply want to elevate your everyday coffee break, these tuiles deliver sophistication without the stress. They’re surprisingly easy to make once you understand the technique, and the wow-factor is absolutely worth the minimal effort required.
History / Background
Tuiles have deep roots in French pâtisserie tradition, dating back several centuries to the charming regions of southern France. The name comes from the distinctive curved tiles that have adorned French rooftops since Roman times—the cookies’ characteristic shape mirrors these architectural elements perfectly.
Originally, tuiles were created by resourceful French bakers who wanted to use up leftover egg whites (often left over from making rich custards and cream-based desserts that required only yolks). This practical approach to reducing waste became an art form, with each region of France developing its own signature variation. In Provence, almond tuiles became particularly famous, while other regions experimented with different nuts, citrus zests, and flavorings.
The cookies became a staple in French tea salons and cafés throughout the 19th century, where they were served alongside afternoon tea or coffee. Their delicate nature and refined appearance made them a favorite among the French bourgeoisie. By the early 20th century, tuiles had become a standard component of haute cuisine, often appearing as an elegant garnish on plated desserts in Michelin-starred restaurants.
Today, tuiles remain a beloved classic in French pastry-making and have earned their place in professional kitchens and home bakeries worldwide. They represent the French philosophy of creating something extraordinary from the simplest ingredients—a hallmark of exceptional cooking that focuses on technique and quality over complexity.
Why You’ll Love This Recipe
Tuiles embody everything wonderful about French baking: they look incredibly impressive yet require just five basic ingredients and about 30 minutes from start to finish. These cookies prove that elegant doesn’t have to mean complicated, and that sometimes the most memorable desserts are the simplest ones done well.
Here’s why this recipe deserves a permanent spot in your baking repertoire:
- Minimal ingredients, maximum impact – Just egg whites, sugar, flour, butter, and vanilla create bakery-quality results
- Lightning-fast preparation – The batter comes together in under 10 minutes with just a bowl and whisk
- Endlessly customizable – Add almonds, chocolate drizzle, citrus zest, or spices to make them your own
- Perfect for make-ahead entertaining – Bake these a day or two in advance and store in an airtight container
- Budget-friendly elegance – Create restaurant-quality garnishes for pennies per serving
- Impressive presentation – Guests will think you spent hours crafting these delicate beauties
- Gluten-free adaptable – Easily swap all-purpose flour for almond flour for a naturally gluten-free version
- Versatile serving options – Serve alongside desserts, stuff with mousse, or enjoy plain with coffee
- Great for using up egg whites – Perfect solution when you’ve made custards, curds, or carbonara
- Kid-friendly baking project – Simple enough for young bakers to help with spreading and shaping
Ingredient Notes
The beauty of tuiles lies in their simplicity. Each ingredient plays a crucial role in creating that perfect crispy-yet-delicate texture that makes these cookies so special.
Egg Whites – The foundation of tuiles. They provide structure and that characteristic crispy texture. Make sure they’re at room temperature for easier mixing. Two large egg whites are typically needed, and they should be free of any yolk traces for the best results.
Granulated Sugar – Sweetens the cookies and helps create that beautiful golden color when baked. The sugar also contributes to the crispy texture. You can reduce the sugar slightly if you prefer less sweet cookies, but don’t eliminate it entirely as it affects the texture.
All-Purpose Flour – Provides just enough structure to hold the cookies together while keeping them delicate. You can substitute with almond flour for a nuttier flavor and gluten-free option, though the texture will be slightly different—more tender and fragile.
Unsalted Butter – Melted butter adds richness and helps the cookies spread beautifully thin on the baking sheet. It also contributes to that melt-in-your-mouth quality. Always use unsalted so you can control the sweetness level.
Pure Vanilla Extract – A small amount enhances all the other flavors and adds that classic French patisserie aroma. You can substitute with almond extract, orange extract, or even a touch of liqueur like Grand Marnier for variation.
Optional Add-ins – Sliced almonds, orange zest, lemon zest, cocoa powder, or a pinch of cinnamon can transform these basic tuiles into something uniquely yours.
Equipment Needed
You don’t need specialty equipment for perfect tuiles—just a few basic kitchen tools you likely already own:
- Medium mixing bowl – For combining your ingredients
- Whisk or electric hand mixer – To blend the batter smoothly
- Baking sheet – A flat, rimmed baking sheet works best
- Silicone baking mat or parchment paper – Essential for preventing sticking and ensuring easy removal
- Offset spatula or small spoon – For spreading the batter into thin circles
- Rolling pin, wine bottle, or cylindrical object – For shaping the warm cookies into curves
- Wire cooling rack – To cool the shaped cookies completely
- Timer – These bake quickly and can go from perfect to burnt in seconds
- Measuring cups and spoons – For accuracy (baking is science!)
- Thin metal spatula – To quickly remove cookies from the baking sheet while warm
Tuiles Recipe

Elegant French tuiles are crispy, delicate cookies that curve beautifully over ice cream or stand alone as a sophisticated treat. With just five ingredients and a simple technique, you’ll create bakery-quality cookies that impress every time.
- Prep Time: 10 minutes
- Cook Time: 8 minutes per batch
- Total Time: 30 minutes (including multiple batches)
- Yield: 15-18 cookies 1x
- Category: Dessert
- Method: Baking
- Cuisine: French
- Diet: Gluten Free
Ingredients
- 2 large egg whites, room temperature
- ½ cup (100g) granulated sugar
- 6 tablespoons (45g) all-purpose flour
- 4 tablespoons (56g) unsalted butter, melted and slightly cooled
- 1 teaspoon pure vanilla extract
- Pinch of salt (optional, but recommended)
- Optional: ⅓ cup sliced almonds, orange zest, or other flavorings
Instructions
Step 1: Prepare Your Workspace
Preheat your oven to 350°F (175°C). Line a baking sheet with a silicone baking mat or parchment paper. Have your rolling pin or wine bottle ready nearby for shaping. This is crucial because you’ll need to work quickly once the cookies come out of the oven.
Step 2: Make the Batter
In a medium bowl, lightly whisk the egg whites until slightly frothy but not stiff—you’re not making meringue here. Add the sugar and whisk until well combined and the mixture is smooth, about 1 minute.
Step 3: Add Dry Ingredients
Sift the flour over the egg white mixture and gently fold it in with a spatula or whisk until no streaks remain. The batter should be smooth and lump-free.
Step 4: Incorporate Butter and Vanilla
Pour in the melted butter and vanilla extract. Whisk gently until completely incorporated and the batter is silky smooth. Let the batter rest for 5 minutes—this helps it spread more easily.
Step 5: Shape and Spread
Drop 1 tablespoon of batter onto your prepared baking sheet. Using the back of a spoon or an offset spatula, spread the batter into a thin 3-4 inch circle. Make it as thin as possible—the thinner it is, the crispier your tuile will be. Only do 3-4 cookies per baking sheet as they spread during baking and you’ll need room to work when shaping them.
Step 6: Add Optional Toppings
If using sliced almonds or other toppings, sprinkle them lightly over the unbaked circles now.
Step 7: Bake
Bake for 6-8 minutes, watching carefully. The edges should turn golden brown while the centers remain slightly lighter. They’ll crisp up as they cool, so don’t overbake. Every oven is different, so watch your first batch carefully to learn the perfect timing for your oven.
Step 8: Shape While Hot
This is the crucial step! As soon as the cookies come out of the oven, work quickly. Using a thin metal spatula, carefully lift each cookie and immediately drape it over a rolling pin or wine bottle. Hold it in place for just 10-15 seconds until it starts to firm up and holds its curved shape. If a cookie hardens before you can shape it, return it to the oven for 15-20 seconds to soften.
Step 9: Cool Completely
Transfer the shaped tuiles to a wire rack to cool completely. They’ll continue to crisp as they cool. Once completely cool, they should be crispy and delicate.
Step 10: Repeat and Store
Continue with remaining batter, working in small batches. Once cooled, store tuiles in an airtight container at room temperature with parchment paper between layers to prevent breaking.
Notes
- Temperature matters: Work with room temperature egg whites for smoother batter
- Don’t rush the spreading: Take time to spread batter very thin for the crispiest results
- Work fast when shaping: You have only 30-60 seconds to shape each cookie after baking
- Humidity is the enemy: Store in an airtight container with a small packet of silica gel if you live in a humid climate
- Batter can be refrigerated: Make batter up to 2 days ahead; bring to room temperature before using
- Consistent size matters: Use a tablespoon measure for even-sized cookies that bake uniformly
Nutrition
- Serving Size: 1 tuile Calories
- Calories: 45
- Sugar: 6g
- Sodium: 10mg
- Fat: 2g
- Saturated Fat: 1g
- Unsaturated Fat: 1g
- Trans Fat: 0g
- Carbohydrates: 7g
- Fiber: 0g
- Protein: 1g
- Cholesterol: 5mg
Note: Nutrition information is approximate and will vary based on specific ingredients used and any optional add-ins.
Tips & Variations
The basic tuile recipe is wonderfully adaptable. Here are some ways to customize these elegant cookies to suit your taste or occasion:
Flavor Variations:
- Almond Tuiles – Add ½ teaspoon almond extract and top with sliced almonds before baking
- Citrus Tuiles – Fold in 1 tablespoon orange or lemon zest for bright, fresh flavor
- Chocolate Tuiles – Replace 1 tablespoon flour with cocoa powder for chocolate versions
- Spiced Tuiles – Add ¼ teaspoon cinnamon, cardamom, or ginger for warming spice notes
- Coconut Tuiles – Fold in 2 tablespoons unsweetened shredded coconut
Shape Variations:
- Cigarette Cookies – Roll warm tuiles around a wooden spoon handle for cylinder shapes
- Cups – Drape over an inverted muffin tin or small bowl to create edible dessert cups
- Flat Tuiles – Skip the shaping step for simple, flat crispy cookies
- Fortune Cookies – Fold into fortune cookie shapes while warm (trickier but fun!)
Dietary Adaptations:
- Gluten-Free – Substitute almond flour for all-purpose flour (use slightly less, about 5 tablespoons)
- Lower Sugar – Reduce sugar to ⅓ cup, though texture will be slightly less crispy
- Vegan – Use aquafaba (chickpea liquid) instead of egg whites in equal amounts
Pro Chef Tips
Professional pastry chefs have perfected tuile-making over centuries. Here are insider secrets that will take your cookies from good to exceptional:
Temperature Control is Everything – Your oven temperature must be accurate. Invest in an oven thermometer if you bake regularly. Just 25 degrees too hot will burn your tuiles before they’re fully baked through.
Silicone Mats Are Your Best Friend – While parchment works, silicone baking mats provide the most even heat distribution and make removal easier. They’re worth the small investment if you plan to make tuiles regularly.
The Batter Rest Makes a Difference – Letting your batter rest for 5-10 minutes allows the flour to fully hydrate, resulting in smoother spreading and more even baking. Don’t skip this step when you have time.
Practice Your Spreading Technique – The thinner and more even your spread, the better your tuiles will be. Use a small offset spatula and work in circular motions from the center outward. Aim for translucent thinness—you should almost be able to see through the batter.
Embrace the Learning Curve – Your first batch might not be perfect, and that’s okay. Each oven behaves differently. Use batch one as a test run to learn timing and spreading thickness for your specific setup.
Create a Shaping Station – Before you start baking, set up a station with your rolling pin, spatula, and wire rack all within arm’s reach. You’ll need to move quickly, and organization is key to success.
Watch for the Color Change – The perfect tuile has golden-brown edges that fade to light gold in the center. This visual cue is more reliable than timing alone. As soon as you see that color, they’re done.
Use the Right Tools for Removal – A thin, flexible metal spatula slides under tuiles better than thick silicone or plastic ones. This makes the difference between broken cookies and perfect ones.
Common Mistakes to Avoid
Even experienced bakers can struggle with tuiles until they understand these common pitfalls:
Spreading Too Thick – This is the number one mistake. Thick tuiles won’t crisp properly and will have a chewy texture instead of that signature snap. Always spread thinner than you think you should—aim for translucent.
Working Too Slowly When Shaping – Tuiles harden in seconds. If you’re tentative or slow, you’ll end up with flat cookies and a few burnt fingers. Commit to quick, confident movements. If cookies harden before shaping, pop the whole sheet back in the oven for 20 seconds.
Baking Too Many at Once – Trying to shape 6 cookies simultaneously is a recipe for frustration and broken cookies. Stick to 3-4 per sheet maximum until you’ve mastered the technique and speed.
Skipping the Silicone Mat – Parchment paper works but can wrinkle or shift. Tuiles need a perfectly flat, non-stick surface. A silicone mat provides better results and is reusable for years.
Storing Improperly – Tuiles are hygroscopic, meaning they absorb moisture from the air. Storing them in a container that’s not completely airtight will result in soft, chewy cookies within hours. Use a good-quality airtight container and add parchment between layers.
Opening the Oven Door Too Often – Each time you open the oven, the temperature drops. This causes uneven baking. Trust your timer and visual cues through the oven window instead of constantly checking.
Not Accounting for Carryover Baking – Tuiles continue cooking for about 30 seconds after leaving the oven due to residual heat in the baking sheet. Pull them when they’re slightly underdone to prevent over-browning.
Storage & Meal Prep
Proper storage is essential for maintaining that perfect crispy texture that makes tuiles so special.
Room Temperature Storage:
Store completely cooled tuiles in an airtight container at room temperature for up to 5 days. Place parchment or wax paper between layers to prevent them from sticking together or breaking. Keep the container in a cool, dry place away from heat sources and humidity.
Humid Climate Storage:
If you live in a humid environment, add a food-safe silica gel packet to your storage container to absorb excess moisture. Without this precaution, tuiles can become soft and lose their crispness within 24 hours in humid conditions.
Refreshing Softened Tuiles:
If your tuiles lose their crispness, you can revive them! Place them on a baking sheet in a 300°F oven for 2-3 minutes. Let them cool completely on a wire rack, and they’ll crisp right back up.
Not Recommended for Refrigeration:
Never store tuiles in the refrigerator. The moisture and cold temperature will make them soggy and soft. Room temperature storage is always best.
Leftover Batter Storage:
Unbaked tuile batter can be refrigerated in an airtight container for up to 2 days. Bring it to room temperature and give it a gentle stir before using. This makes it easy to bake fresh tuiles for multiple occasions from one batch of batter.
Make-Ahead & Freezer Notes
Tuiles are excellent for advance preparation, making them perfect for stress-free entertaining.
Advance Baking:
You can bake tuiles up to 3 days in advance. Store them in an airtight container at room temperature with parchment paper between layers. This is the best make-ahead method as the cookies maintain their quality perfectly.
Batter Preparation:
Make the batter up to 48 hours in advance and refrigerate. This actually makes spreading slightly easier as the slightly chilled batter holds its shape better initially. Just remember to bring it to room temperature (about 30 minutes on the counter) before spreading.
Freezing Baked Tuiles:
While possible, freezing baked tuiles is not ideal as they can become fragile and may absorb moisture. If you must freeze them, place them in a rigid airtight container with parchment between layers. Freeze for up to 1 month. Thaw at room temperature for 30 minutes, then crisp in a 300°F oven for 2-3 minutes before serving.
Freezing Unbaked Batter:
Tuile batter does not freeze well. The egg whites separate and the texture changes upon thawing. It’s better to make fresh batter when needed—it only takes 10 minutes anyway!
Best Make-Ahead Strategy:
For optimal results, bake tuiles 1-2 days before you need them and store properly at room temperature. This timing gives you the convenience of advance preparation without compromising texture or flavor.
Serving Suggestions
Tuiles are incredibly versatile and can elevate virtually any dessert presentation or coffee service.
Classic Pairings:
- Ice Cream and Sorbet – Serve 2-3 tuiles alongside a scoop of vanilla, chocolate, or fruit sorbet
- Mousse – Use curved tuiles as edible spoons for chocolate or fruit mousses
- Panna Cotta – Place a tuile on the plate next to Italian panna cotta for textural contrast
- Coffee or Tea Service – Offer tuiles with afternoon coffee or tea for an elegant touch
- Fresh Berries and Cream – Serve alongside macerated berries and whipped cream
Creative Presentations:
- Dessert Cups – Shape larger tuiles over inverted cups, then fill with mousse or whipped cream
- Tiramisu Garnish – Place a tuile vertically in tiramisu for restaurant-style plating
- Cheese Course – Surprisingly wonderful with soft cheeses like brie and a drizzle of honey
- Fruit Tart Accompaniment – Serve alongside a slice of fruit tart for added crunch
- Chocolate Fondue – Use as dippers for chocolate fondue instead of regular cookies
Beverage Pairings:
- Espresso or Cappuccino – The perfect crispy companion to Italian coffee
- Sweet Dessert Wines – Particularly lovely with Sauternes or ice wine
- Hot Chocolate – A sophisticated alternative to traditional dunking cookies
- Champagne – Elegant tuiles match the celebration of sparkling wine
FAQs Section
Q: Why did my tuiles spread too much or not enough during baking?
A: Batter that’s too thin (too much butter) spreads excessively, while batter that’s too thick (too much flour) won’t spread enough. Make sure you’re measuring accurately—use weight measurements if possible for best results. Also, the batter should be at room temperature; cold batter spreads less than warm batter.
Q: Can I make tuiles without a silicone mat?
A: Yes! Parchment paper works fine, though tuiles may stick slightly more. Avoid wax paper (it will smoke) and never bake directly on an unlined sheet (they’ll stick permanently). Lightly greasing parchment with butter can help if you’re having sticking issues.
Q: My tuiles are chewy instead of crispy. What went wrong?
A: This usually means they weren’t baked long enough or were stored in humid conditions. Tuiles must be golden brown at the edges to be fully crispy. If they’re already baked and cooled, you can re-crisp them in a 300°F oven for 2-3 minutes. For future batches, bake a bit longer and ensure proper airtight storage.
Q: How do I prevent tuiles from breaking when shaping them?
A: Work quickly while they’re still warm—this is when they’re most pliable. If you’re too slow and they harden, put the entire baking sheet back in the oven for 15-20 seconds to soften them again. Also, make sure they’re thin enough; thick tuiles are more prone to cracking when bent.
Q: Can I make tuiles ahead for a party?
A: Absolutely! Tuiles are actually ideal for advance preparation. Bake them 1-3 days ahead and store in an airtight container at room temperature. They maintain their quality perfectly and actually save you stress on the day of your event.
Q: What’s the best way to add chocolate to tuiles?
A: You have two options: fold 1 tablespoon of cocoa powder into the batter for chocolate tuiles, or drizzle melted chocolate over completely cooled baked tuiles. For the drizzle method, use tempered chocolate or chocolate melts for best results that won’t bloom or melt at room temperature.
Q: Why are my tuiles sticking to the baking sheet?
A: This usually indicates underbaking or a poorly prepared surface. Make sure you’re using parchment paper or a silicone mat, and that your tuiles are fully golden at the edges before removing. If using parchment, a very light coating of butter can help. Also, let them cool for about 15 seconds before attempting to lift—they’re too fragile immediately out of the oven.
Conclusion
There’s something wonderfully satisfying about mastering classic French tuiles—these delicate, curved cookies that look like they came from a professional pâtisserie but actually take less than 30 minutes to make at home. With just five pantry staples and a simple technique, you can create these elegant, crispy treats that transform any dessert into something extraordinary.
Whether you’re serving them alongside homemade ice cream for a summer dinner party, tucking them next to your afternoon espresso, or using them as a stunning garnish on plated desserts, tuiles bring that special touch of sophistication that makes meals memorable. The beauty is in their versatility—customize them with almonds, citrus, or chocolate to suit your taste, and don’t be intimidated by the shaping process. Like any skill, it gets easier with practice, and even “imperfect” tuiles taste absolutely delicious.
I encourage you to give this recipe a try this weekend. Start with a small batch to get comfortable with the technique, and soon you’ll be whipping these up confidently for any occasion. The first time you serve these to guests and see their impressed reactions, you’ll understand why tuiles have remained a beloved classic in French baking for centuries.
Have you made tuiles before? I’d love to hear about your experience! Drop a comment below with your favorite way to serve them, any creative flavor variations you’ve tried, or questions about the technique. And if you love this recipe, please save it to your Pinterest boards and share it with your fellow baking enthusiasts—every home cook deserves to know how easy it is to create bakery-quality cookies at home!
Happy baking, and here’s to bringing a little French elegance into your kitchen! 🥖✨