Homemade Ube Ice Cream Recipe (Filipino Purple Yam Ice Cream)
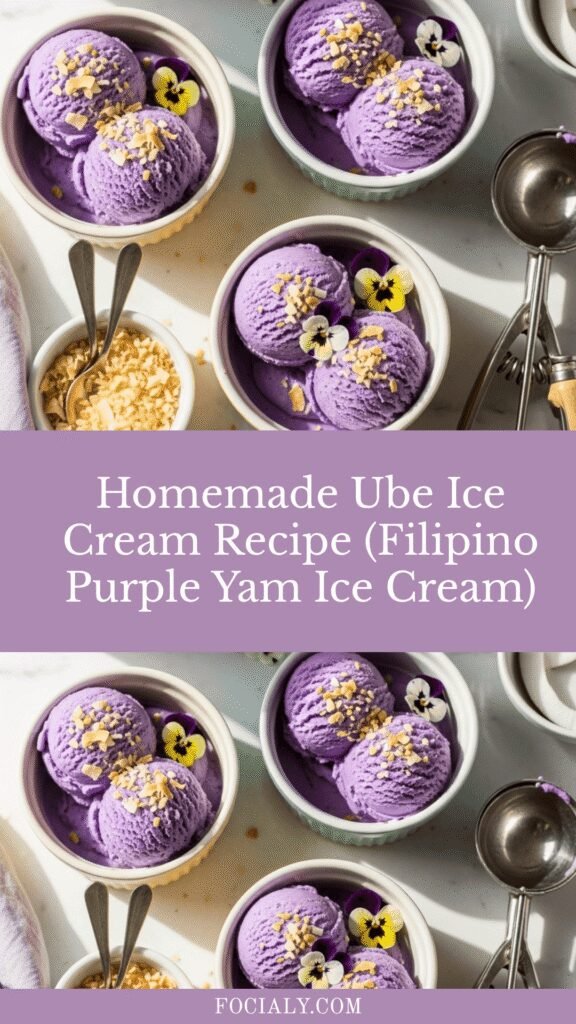
If you’ve ever scrolled through Pinterest and stopped dead in your tracks at the sight of stunningly vibrant purple ice cream, you’ve discovered ube! This Homemade Ube Ice Cream is a creamy, dreamy frozen dessert made from Filipino purple yam that’s taking the dessert world by storm. With its naturally gorgeous violet hue and subtly sweet, nutty flavor, ube ice cream is unlike anything you’ve tasted before.
This recipe creates a luxuriously smooth, scoopable ice cream that’s perfect for summer barbecues, birthday parties, or simply when you want to treat yourself to something special. Whether you’re familiar with Filipino cuisine or trying ube for the first time, this ice cream will become your new favorite frozen treat. It’s rich without being overly sweet, uniquely flavored without being strange, and so beautiful it practically begs to be photographed for your Instagram feed.
The best part? You can make this stunning dessert right in your own kitchen with an ice cream maker and a handful of simple ingredients. Let’s dive into the wonderful world of ube!
History / Background
Ube (pronounced “OO-beh”) is a purple yam native to the Philippines, where it’s been a beloved ingredient for centuries. Unlike the orange sweet potatoes we’re familiar with in America, ube has a distinct purple color and a flavor profile that’s often described as a combination of vanilla, pistachio, and white chocolate with earthy, nutty undertones.
In Filipino culture, ube isn’t just an ingredient—it’s a cultural icon. Filipinos have been using ube in traditional desserts like halo-halo (a famous shaved ice dessert), ube halaya (a jam-like spread), and various kakanin (rice cakes) for generations. The vibrant purple color represents celebration and joy in Filipino cuisine, making ube dishes a staple at fiestas, holidays, and special gatherings.
Ube ice cream specifically gained popularity in the Philippines during the American colonial period when ice cream became more accessible. Filipino ice cream makers began incorporating local flavors into this Western dessert, and ube quickly became one of the most beloved varieties. Today, you’ll find ube ice cream sold by street vendors and high-end restaurants alike throughout the Philippines.
In recent years, ube has experienced a massive surge in popularity across the United States, thanks to social media platforms like Pinterest and Instagram. The eye-catching purple color photographs beautifully, making it a viral sensation. Food bloggers, bakers, and home cooks have embraced ube, incorporating it into everything from doughnuts and cakes to lattes and now, homemade ice cream. What was once a niche Filipino ingredient is now appearing in mainstream grocery stores and trendy dessert shops across America.
Why You’ll Love This Recipe
This Homemade Ube Ice Cream combines authentic Filipino flavors with easy-to-follow techniques that any home cook can master. The result is a dessert that’s both exotic and accessible, impressive yet surprisingly simple to make.
Here’s why this recipe deserves a permanent spot in your dessert rotation:
- Stunning Visual Appeal – That natural purple color is absolutely Instagram and Pinterest-worthy, no food coloring needed (though you can enhance it if desired)
- Unique Flavor Profile – Tired of plain vanilla and chocolate? Ube offers a sophisticated, nutty-sweet taste that’s refreshingly different
- Creamy, Scoopable Texture – This isn’t icy or crystallized; it’s luxuriously smooth and creamy, just like premium ice cream shop quality
- Impressive But Easy – Looks like you spent hours, but the active prep time is under 30 minutes
- Conversation Starter – Serve this at your next gathering and watch everyone ask “What IS this?” before going back for seconds
- Versatile Serving Options – Perfect on its own, in ice cream sandwiches, with Filipino desserts, or as a topping for warm brownies
- Make-Ahead Friendly – Prepare it days or even weeks in advance and store in your freezer until you’re ready to serve
- Kid-Approved – The mild, sweet flavor and fun purple color make this a hit with children (who’ll happily eat more vegetables if they’re purple!)
Ingredient Notes
Understanding your ingredients is the key to ice cream success. Here’s what you’ll need and why each component matters:
Ube Halaya (Purple Yam Jam) – This is the star ingredient! Ube halaya is a sweetened purple yam jam available at Filipino grocery stores or online. It provides both the flavor and that gorgeous purple color. You can find brands like “Good Shepherd” or “Remy” easily on Amazon. If you can’t find it, you can make your own by cooking and mashing purple yams with coconut milk and sugar, though the store-bought version is much more convenient and consistently flavored.
Heavy Cream – The foundation of any great ice cream. Heavy cream (also called heavy whipping cream) has a high fat content that creates that luxurious, creamy texture we all love. Don’t substitute with half-and-half or milk, or your ice cream will be icy rather than creamy.
Whole Milk – This lightens the heavy cream slightly, making the ice cream scoopable rather than rock-hard when frozen. Whole milk (not skim or 2%) is essential for maintaining creaminess.
Granulated Sugar – Sweetens the ice cream and helps prevent it from freezing into a solid block. Sugar lowers the freezing point, which keeps the texture smooth and scoopable.
Egg Yolks – These create a custard base that makes the ice cream extra rich and prevents ice crystals from forming. The egg yolks contain lecithin, a natural emulsifier that helps blend the fat and water components together.
Vanilla Extract – Enhances the natural ube flavor without overpowering it. Use pure vanilla extract, not imitation, for the best taste.
Salt – Just a pinch balances the sweetness and makes all the other flavors pop.
Optional: Purple Food Coloring – Ube halaya can vary in color intensity depending on the brand. If you want that vibrant purple color for Pinterest-perfect photos, add a few drops of gel food coloring. It won’t affect the flavor but will make your ice cream more visually stunning.
Substitution Tips: If you’re feeling adventurous and can’t find ube halaya, you can use frozen or fresh purple yams (about 2 cups cooked and mashed) blended with 1/2 cup coconut milk and 1/2 cup sugar. For a lighter version, you can replace half the heavy cream with coconut cream, which adds a subtle tropical flavor that pairs beautifully with ube.
Equipment Needed
Having the right tools makes ice cream making so much easier. Here’s what you’ll need:
- Ice Cream Maker – Either electric or manual, 1.5 to 2-quart capacity. Make sure the freezer bowl is frozen solid for at least 24 hours before use.
- Medium Saucepan – For cooking the custard base
- Mixing Bowls – One large and one medium
- Whisk – For stirring and tempering eggs
- Fine-Mesh Strainer – To strain out any cooked egg bits for an ultra-smooth custard
- Rubber Spatula or Wooden Spoon – For stirring the custard
- Measuring Cups and Spoons – Precision matters in ice cream making
- Instant-Read Thermometer – Optional but helpful for ensuring the custard reaches the right temperature
- Freezer-Safe Container – A loaf pan or shallow container with a lid for storing the finished ice cream
- Ice Cream Scoop – For serving your beautiful creation
Ube Ice Cream Recipe

Creamy, dreamy homemade ube ice cream made with authentic Filipino purple yam. This stunning violet-colored frozen treat features a unique nutty-sweet flavor that’s absolutely irresistible. Perfect for summer parties or any time you want an impressive dessert!
- Prep Time: 20 minutes
- Cook Time: 15 minutes
- Total Time: 9 hours 0 minutes
- Yield: 8 servings (1 quart) 1x
- Category: Dessert
- Method: Churn
- Cuisine: Filipino
- Diet: Vegetarian
Ingredients
- 1 cup ube halaya (purple yam jam)
- 2 cups heavy cream, divided
- 1 cup whole milk
- ¾ cup granulated sugar
- 5 large egg yolks
- 1 teaspoon pure vanilla extract
- ¼ teaspoon salt
- 2-3 drops purple gel food coloring (optional, for more vibrant color)
Instructions
- Prepare the Ube Mixture: In a medium bowl, combine the ube halaya with ½ cup of heavy cream. Whisk until smooth and well blended. Set aside. This step ensures the ube incorporates evenly into your ice cream base.
- Heat the Dairy: In a medium saucepan, combine the remaining 1½ cups heavy cream, whole milk, and half of the sugar (about 6 tablespoons). Heat over medium heat, stirring occasionally, until the mixture is steaming hot but not boiling (about 170°F). Small bubbles will form around the edges.
- Prepare the Egg Mixture: While the cream mixture heats, whisk together the egg yolks, remaining sugar, and salt in a medium bowl until the mixture becomes pale yellow and slightly thickened, about 2 minutes.
- Temper the Eggs: This is the crucial step! Slowly pour about 1 cup of the hot cream mixture into the egg yolk mixture while whisking constantly. This gradually raises the temperature of the eggs without scrambling them. Pour the tempered egg mixture back into the saucepan with the remaining cream mixture, whisking continuously.
- Cook the Custard: Return the saucepan to medium-low heat. Cook, stirring constantly with a rubber spatula and scraping the bottom of the pan, until the mixture thickens enough to coat the back of a spoon (about 170-175°F on an instant-read thermometer). This should take 5-8 minutes. When you draw your finger across the spatula, it should leave a clean line. Do not let it boil or the eggs will scramble.
- Strain and Combine: Remove from heat and immediately strain the custard through a fine-mesh strainer into a clean bowl. This removes any bits of cooked egg for a silky-smooth texture. Whisk in the ube mixture, vanilla extract, and food coloring if using, until completely smooth and uniformly colored.
- Chill the Base: Cover the bowl with plastic wrap, pressing it directly onto the surface of the custard to prevent a skin from forming. Refrigerate for at least 4 hours or overnight until completely cold (40°F or below). This step is essential—a cold base churns better and creates smoother ice cream.
- Churn the Ice Cream: Pour the chilled custard into your ice cream maker and churn according to the manufacturer’s instructions, typically 20-25 minutes. The ice cream is ready when it reaches a soft-serve consistency and has increased in volume.
- Freeze Until Firm: Transfer the churned ice cream to a freezer-safe container. Press plastic wrap or parchment paper directly onto the surface, then cover with a lid. Freeze for at least 4 hours or until firm enough to scoop.
- Serve and Enjoy: Let the ice cream sit at room temperature for 5-10 minutes before scooping if it’s very hard. Scoop into bowls or cones and enjoy your homemade Filipino masterpiece!
Notes
- Ube Halaya Quality: Different brands vary in sweetness and color intensity. Taste your ube halaya first—if it’s very sweet, you might want to reduce the added sugar slightly.
- No Ice Cream Maker? You can still make this! Pour the custard into a shallow freezer-safe container and freeze, stirring vigorously every 30 minutes for the first 3 hours to break up ice crystals.
- Storage: Homemade ice cream is best within 2 weeks. After that, ice crystals may form.
- Temperature Matters: Always ensure your custard is thoroughly chilled before churning for the best texture.
- Smooth Scoops: Run your ice cream scoop under hot water between scoops for easier serving.
Nutrition
- Serving Size: ½ cup
- Calories: 385
- Sugar: 28g
- Sodium: 95mg
- Fat: 28g
- Saturated Fat: 17g
- Unsaturated Fat: 9g
- Trans Fat: 0g
- Carbohydrates: 32g
- Fiber: 1g
- Protein: 4g
- Cholesterol: 190mg
Tips & Variations
Make It Extra Creamy: Add 2 tablespoons of vodka or rum to the custard before chilling. Alcohol doesn’t freeze, so it keeps the ice cream extra scoopable and smooth. You won’t taste the alcohol in the finished product.
Coconut Ube Ice Cream: Replace 1 cup of heavy cream with full-fat coconut cream for a tropical twist. This enhances the ube flavor and adds a subtle coconut note that’s absolutely divine.
Ube Swirl Ice Cream: Reserve ¼ cup of ube halaya and swirl it through the ice cream during the last minute of churning for dramatic purple ribbons throughout.
Add Texture: Fold in ½ cup of toasted coconut flakes, chopped macadamia nuts, or white chocolate chips after churning for added crunch.
Vegan Version: Use full-fat coconut milk and coconut cream instead of dairy, and substitute a vegan custard base using cornstarch instead of eggs. You’ll need to adjust the recipe to 2 cups coconut cream, 1 cup coconut milk, ¾ cup sugar, and 2 tablespoons cornstarch.
Ube Chocolate Chip: Add ½ cup mini dark chocolate chips during the last minute of churning for an ube-chocolate combination.
Sugar-Free Option: Replace granulated sugar with a 1:1 sugar substitute like allulose or erythritol, though the texture may be slightly less creamy.
Pro Chef Tips
Temperature Control is Everything: Use an instant-read thermometer when making the custard. Keeping it between 170-175°F ensures it thickens properly without scrambling the eggs. This precision separates good ice cream from exceptional ice cream.
The Overnight Chill: While you can churn after 4 hours of chilling, professional ice cream makers let their custard rest overnight. This aging process allows the flavors to meld and the dairy proteins to hydrate fully, resulting in a noticeably smoother, more flavorful ice cream.
Press Out Air: When storing ice cream, press plastic wrap or parchment paper directly onto the surface before sealing the container. Air exposure causes ice crystals and freezer burn, ruining your perfect texture.
Layer for Better Freezing: Transfer churned ice cream to your container in layers, pressing down firmly with a spatula between each layer to eliminate air pockets. This creates a denser, creamier final product.
Warm Your Scoop: Professional ice cream shops keep their scoops in warm water between servings. Do the same at home—dip your scoop in hot water, shake off excess, and you’ll get perfect, smooth scoops every time.
Toast Your Ube: For deeper flavor, spread your ube halaya on a baking sheet and bake at 350°F for 10 minutes, stirring once. This caramelizes the natural sugars and intensifies the ube flavor dramatically.
Common Mistakes to Avoid
Mistake #1: Not Chilling the Base Thoroughly – Churning warm custard leads to icy, grainy ice cream. Your base must be completely cold (40°F or below) before churning. Plan ahead and chill overnight for best results.
Mistake #2: Over-Churning – Stop churning when the ice cream reaches soft-serve consistency. If you churn too long, you’ll incorporate too much air and create a fluffy, less creamy texture. It should look thick and move sluggishly in the machine.
Mistake #3: Scrambling the Eggs – When tempering eggs, always add hot liquid to eggs slowly while whisking vigorously, never the reverse. And never let your custard boil, or you’ll end up with sweet scrambled eggs instead of smooth custard.
Mistake #4: Skipping the Straining Step – Even if you think your custard looks smooth, always strain it. This catches any small bits of cooked egg that can ruin the silky texture of your finished ice cream.
Mistake #5: Using a Warm Ice Cream Maker Bowl – Your freezer bowl must be frozen solid (usually 24 hours minimum). A partially frozen bowl won’t get cold enough to properly churn the ice cream, leaving you with liquid soup instead of frozen dessert.
Storage & Meal Prep
Refrigerator Storage: The prepared custard base can be refrigerated for up to 3 days before churning. In fact, letting it age for 24-48 hours improves flavor development, much like marinating meat.
Freezer Storage: Homemade ice cream is best enjoyed within 2 weeks. Store it in an airtight, freezer-safe container with plastic wrap pressed directly onto the surface. Keep it in the back of the freezer where temperature is most consistent (not in the door).
Preventing Ice Crystals: Place a piece of parchment paper directly on the ice cream surface, then cover with a tight-fitting lid. For extra protection against freezer burn, place the container inside a large zip-top freezer bag.
Leftover Management: If your ice cream becomes too hard after extended storage, let it sit at room temperature for 10-15 minutes before scooping. You can also microwave it in 5-second intervals to soften slightly, though be careful not to melt it.
Texture Revival: If ice crystals form during storage, let the ice cream soften slightly, transfer to a food processor, pulse until smooth, then refreeze. This breaks up crystals and restores creaminess.
Make-Ahead & Freezer Notes
Advance Prep Timeline: This ice cream is perfect for party planning! Make the custard base 2-3 days ahead and keep refrigerated. Churn it the day before your event and freeze overnight. This actually improves the texture compared to freshly churned ice cream.
Freezer Life: Properly stored ube ice cream stays delicious for 1-2 weeks. After 2 weeks, it’s still safe to eat but may develop ice crystals and lose some of that premium creamy texture. Mark your container with the date made.
Freezing Portions: Consider freezing in individual portions using small mason jars or silicone muffin cups. These single servings are perfect for portion control and thaw more quickly than a large container.
Best Reheating Method: Actually, you don’t reheat ice cream (obviously!), but to achieve the perfect scooping consistency from frozen, let it sit at room temperature for 5-10 minutes. During summer, 5 minutes is usually enough; in winter, you might need 10-15 minutes.
Flash Freeze Method: For the smoothest texture, spread freshly churned ice cream in a thin layer on a parchment-lined baking sheet and freeze for 1 hour, then transfer to your storage container. This “flash freeze” technique creates smaller ice crystals for extra creaminess.
Serving Suggestions
Ube ice cream is incredibly versatile! Here are some delicious ways to serve it:
Classic Scoop Style: Serve in waffle cones or bowls, topped with whipped cream, toasted coconut flakes, and a sprinkle of ube cookie crumbs for Instagram-worthy presentation.
Halo-Halo: Create the famous Filipino dessert by layering ube ice cream with sweetened beans, jellies, fresh fruit, crushed ice, evaporated milk, and leche flan. This is the ultimate summer treat!
Ice Cream Sandwiches: Sandwich scoops between ube or chocolate chip cookies for a handheld treat that’s perfect for summer parties.
Affogato Style: Pour a shot of hot espresso over a scoop of ube ice cream for a stunning purple affogato that combines Filipino and Italian flavors beautifully.
With Warm Desserts: Serve alongside warm brownies, chocolate lava cake, or Filipino bibingka (rice cake) for a delightful temperature contrast.
Milkshakes and Floats: Blend with milk for an ube milkshake, or add a scoop to root beer or cream soda for a purple float.
Topping Ideas: Garnish with toasted coconut chips, crushed graham crackers, chocolate sauce, dulce de leche, condensed milk drizzle, or fresh tropical fruit like mango and pineapple.
Pair with Beverages: Serve with Filipino hot chocolate (tsokolate), iced coffee, or coconut water for a complete dessert experience.
FAQs Section
Q: Where can I buy ube halaya?
A: Ube halaya is available at Filipino grocery stores, Asian markets, or online through Amazon. Popular brands include Good Shepherd, Remy, and White King. You can also find it at specialty stores like Seafood City or through online retailers like Weee! and Maple. If unavailable, you can make your own using fresh or frozen purple yams.
Q: Can I use fresh ube instead of ube halaya?
A: Yes, but it requires extra work. You’ll need about 1 pound of purple yams, which you’ll need to peel, steam or boil until tender, then mash smoothly. Cook the mashed yams with ½ cup coconut milk and ½ cup sugar until thick and jam-like (about 20 minutes), stirring constantly. Cool completely before using in the ice cream recipe.
Q: Why is my ube ice cream icy and not creamy?
A: Several factors cause icy ice cream: the custard base wasn’t chilled enough before churning, the ice cream maker bowl wasn’t frozen solid, you churned for too long, or there’s not enough fat in the recipe. Always use full-fat dairy and follow the recipe precisely for creamy results.
Q: Can I make this without an ice cream maker?
A: Absolutely! Use the no-churn method: pour the prepared custard into a shallow, freezer-safe container and freeze. Every 30-45 minutes for the first 3-4 hours, remove from freezer and stir vigorously with a fork or whisk to break up ice crystals. It won’t be quite as smooth as churned ice cream, but it’s still delicious.
Q: Is ube ice cream the same as taro ice cream?
A: No, they’re different! While both are purple, ube is a purple yam from the Philippines with a nutty, vanilla-like flavor, while taro is a root vegetable used throughout Asia with a more earthy, slightly savory taste. They’re often confused because of their similar color, but the flavors are quite distinct.
Q: How do I make the purple color more vibrant?
A: Different brands of ube halaya vary in color intensity. For that vivid purple seen in professional ube desserts, add 2-3 drops of purple gel food coloring (or equal parts blue and red) to your custard. Wilton or Americolor brands work well. Remember, a little goes a long way!
Q: My custard split or looks curdled—can I fix it?
A: If your custard splits slightly, immediately remove from heat and blend with an immersion blender or regular blender for 30 seconds. This re-emulsifies the mixture. Strain afterward to ensure smoothness. Prevention is key: always temper eggs slowly and don’t let the custard boil.
Conclusion
There you have it—your complete guide to making stunning, creamy, authentically delicious Homemade Ube Ice Cream! This Filipino-inspired frozen treat brings together the perfect balance of exotic flavor and familiar comfort, all in one gorgeous purple scoop. Whether you’re discovering ube for the first time or you’re a longtime fan looking to recreate your favorite flavor at home, this recipe delivers restaurant-quality results every single time.
The beauty of this recipe is that it looks incredibly impressive but uses straightforward techniques that any home cook can master. Yes, making custard-based ice cream takes a bit of time and patience, but the reward is absolutely worth it. That first spoonful of velvety, nutty-sweet ube ice cream is pure magic—and knowing you made it yourself makes it taste even better.
I’d love to hear how your ube ice cream adventure goes! Did you add any fun mix-ins? Serve it at a party? Take drool-worthy photos? Drop a comment below sharing your experience, and don’t forget to save this recipe to your Pinterest boards so you can find it again when ice cream cravings strike! If you try this recipe, tag me on Instagram or Pinterest—I can’t wait to see your beautiful purple creations!
Now grab that ice cream maker, hunt down some ube halaya, and get ready to impress everyone with your new favorite frozen dessert. Happy churning! 🍨💜