Easy Upside Down Pineapple Cake Recipe – Classic Retro Dessert Made Simple

There’s something truly magical about an upside-down pineapple cake. When you flip that warm cake pan over and reveal the glistening, caramelized pineapple rings with their jewel-like maraschino cherries, it feels like unveiling a masterpiece. This stunning retro dessert has been gracing American dinner tables since the 1920s, and honestly? It never gets old.
This upside-down pineapple cake recipe delivers everything you want in a classic dessert: buttery caramelized fruit, moist tender cake, and that gorgeous presentation that makes everyone think you spent hours in the kitchen (even though you didn’t!). It’s perfect for Sunday family dinners, potluck gatherings, birthday celebrations, or anytime you want to serve something nostalgic and delicious. The combination of sweet pineapple, rich brown sugar topping, and fluffy vanilla cake creates flavor magic that appeals to all ages.
What I love most about this dessert is how it transforms simple pantry ingredients into something spectacular. You don’t need fancy techniques or professional skills – just a cast iron skillet or cake pan, some basic ingredients, and about an hour from start to finish. Whether you’re an experienced baker or just starting your home cooking journey, this pineapple upside down cake will become one of your go-to recipes.
History / Background
The upside-down pineapple cake we know and love today has fascinating roots in American culinary history. While upside-down cakes existed in various forms throughout Europe for centuries, the pineapple version became an American icon thanks to a specific moment in food history.
In 1925, the Hawaiian Pineapple Company (now Dole) sponsored a recipe contest seeking creative ways to use canned pineapple. Over 2,500 submissions flooded in, and more than 60% of them were variations of pineapple upside-down cake! This wasn’t entirely coincidental – canned pineapple had become widely available and affordable in the United States during the 1920s, making exotic tropical fruit accessible to home cooks across the country.
The timing was perfect. Cast iron skillets were standard kitchen equipment in every American home, and the introduction of reliable canned pineapple meant you could create this impressive dessert year-round, regardless of season or location. The recipe quickly spread through community cookbooks, women’s magazines, and by word of mouth, becoming a symbol of mid-century American home cooking.
During the 1950s and 60s, pineapple upside-down cake reached peak popularity. It represented the optimism and abundance of post-war America, with its bright colors, sweet flavors, and impressive presentation. Homemakers served it at dinner parties, church socials, and family gatherings. It became so iconic that it appeared in virtually every community cookbook and on the back of countless pineapple can labels.
Today, this retro dessert is experiencing a well-deserved renaissance. Home bakers are rediscovering the simple pleasure of classic recipes that deliver consistent, crowd-pleasing results. The upside-down pineapple cake represents comfort, nostalgia, and the joy of sharing homemade desserts with people you love.
Why You’ll Love This Recipe
This isn’t just another pineapple cake recipe – it’s THE recipe you’ll make again and again because it works perfectly every single time. Let me tell you why this will quickly become your favorite dessert to bake.
The beauty of this upside-down pineapple cake lies in its perfect balance of simplicity and sophistication. You get bakery-worthy results using ingredients you probably already have in your pantry. The caramelized pineapple topping creates a glossy, gorgeous finish that looks like you spent hours on decoration, but it practically makes itself as the cake bakes.
Here’s why you’ll absolutely love this recipe:
- Impressive presentation with minimal effort – The “upside-down” reveal always gets oohs and ahhs, making you look like a baking superstar
- One-bowl cake batter – Less cleanup means more time enjoying your dessert
- Uses canned pineapple – No need to wrestle with fresh pineapple; canned works perfectly and is available year-round
- Perfect texture every time – The cake stays moist for days thanks to the fruit topping
- Nostalgic comfort food – Tastes like grandma’s kitchen and simpler times
- Budget-friendly ingredients – No expensive or hard-to-find items required
- Naturally portion-controlled – Each pineapple ring creates a perfect serving
- Kid-friendly flavor – Even picky eaters love the sweet, fruity taste
- Doubles as breakfast cake – With fruit and cake, it’s totally acceptable for brunch
- Great for potlucks and gatherings – Travels well and feeds a crowd
Ingredient Notes
Understanding your ingredients is the secret to baking success. Let’s break down what goes into this classic upside-down pineapple cake and why each component matters.
Canned Pineapple Rings: The star of the show! Use pineapple packed in juice (not syrup) for better flavor control. You’ll need about 7-8 rings for a standard 10-inch skillet. Drain them well, but save that juice – it’s liquid gold for the cake batter. Fresh pineapple can work, but canned actually caramelizes better and provides more consistent results.
Maraschino Cherries: These bright red cherries provide that classic retro look and sweet pop of flavor. Drain them thoroughly before using. If you prefer, substitute with fresh cherries when in season, or use dried cranberries for a more sophisticated twist.
Unsalted Butter: You’ll need butter for both the topping and the cake. Using unsalted lets you control the salt level. The butter creates that luscious caramel sauce and adds richness to the cake. Don’t substitute with margarine – real butter makes a significant difference in flavor.
Brown Sugar: Dark or light brown sugar both work beautifully for the caramelized topping. Brown sugar’s molasses content creates deeper, more complex caramel flavors than white sugar would. This is what gives you that sticky, sweet coating.
All-Purpose Flour: The foundation of your cake structure. Measure it correctly by spooning it into the measuring cup and leveling off – don’t pack it down. For a more tender crumb, you can substitute up to 1/4 cup with cake flour.
Granulated Sugar: Sweetens the cake itself. You can reduce this slightly if you prefer less sweet desserts, but don’t eliminate it entirely as it also affects texture.
Eggs: Use large eggs at room temperature. They incorporate better into the batter and create a more even crumb. If you forget to take them out of the fridge, place them in warm water for 5 minutes.
Vanilla Extract: Pure vanilla extract tastes significantly better than imitation. It enhances all the other flavors and adds warmth to the cake.
Baking Powder and Baking Soda: These leaveners create a light, fluffy cake. Make sure they’re fresh (less than 6 months old) for best results.
Buttermilk or Milk: Buttermilk creates extra tender cake with a slight tang that balances the sweetness. No buttermilk? Make your own by adding 1 tablespoon lemon juice or vinegar to regular milk and letting it sit for 5 minutes.
Equipment Needed
Having the right tools makes baking this upside-down pineapple cake so much easier. Here’s everything you’ll need:
- 10-inch cast iron skillet OR 9×13 inch cake pan – Cast iron is traditional and creates the best caramelization, but a regular cake pan works perfectly too
- Large mixing bowl – For preparing the cake batter
- Medium mixing bowl – For combining dry ingredients
- Electric mixer (hand or stand) – Makes creaming butter and sugar effortless; you can also use a whisk and some elbow grease
- Measuring cups and spoons – Accurate measurements are crucial in baking
- Whisk – For combining dry ingredients
- Rubber spatula – For scraping down bowl sides and spreading batter
- Can opener – For your pineapple can
- Cooling rack – Essential for the dramatic flip
- Serving plate or platter – Choose one at least 12 inches in diameter for the flip
- Toothpick or cake tester – For checking doneness
- Oven mitts – Safety first when handling hot skillets
Upside Down Pineapple Cake Recipe

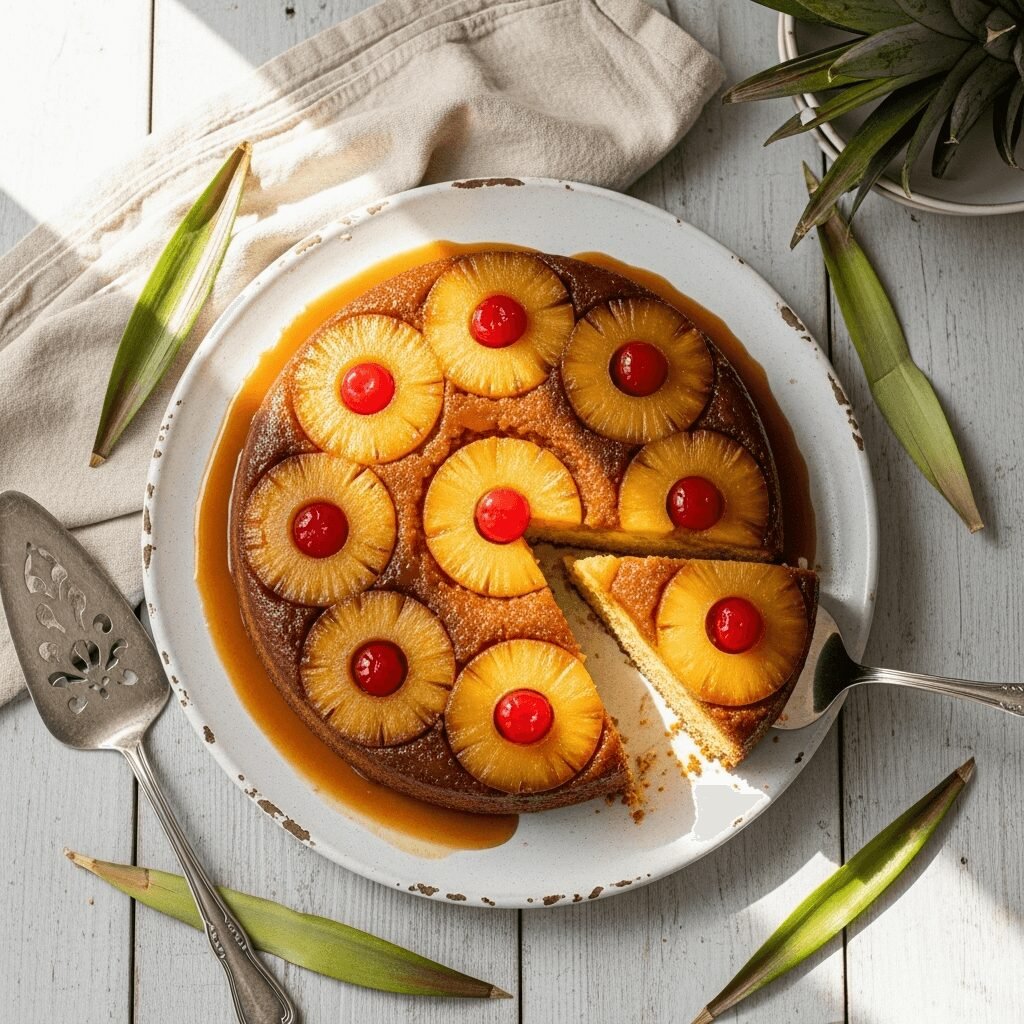
This classic upside-down pineapple cake features caramelized pineapple rings and maraschino cherries atop a moist, buttery vanilla cake. It’s a stunning retro dessert that’s surprisingly easy to make and always impresses guests.
- Prep Time: 15 minutes
- Cook Time: 45 minutes
- Total Time: 1 hour
- Yield: 8-10 servings 1x
- Category: Dessert
- Method: Baking
- Cuisine: American
- Diet: Vegetarian
Ingredients
For the Topping:
- 1/4 cup unsalted butter, melted
- 2/3 cup packed brown sugar (light or dark)
- 1 can (20 oz) pineapple rings in juice, drained (reserve 1/4 cup juice)
- 8-10 maraschino cherries, drained
For the Cake:
- 1 1/2 cups all-purpose flour
- 1 1/2 teaspoons baking powder
- 1/4 teaspoon baking soda
- 1/4 teaspoon salt
- 1/2 cup unsalted butter, softened
- 3/4 cup granulated sugar
- 2 large eggs, room temperature
- 2 teaspoons pure vanilla extract
- 1/2 cup buttermilk, room temperature
- 1/4 cup reserved pineapple juice
Instructions
- Preheat and Prepare: Preheat your oven to 350°F (175°C). If using a cast iron skillet, there’s no need to grease it. If using a cake pan, lightly grease and line the bottom with parchment paper.
- Create the Topping: Pour melted butter into the bottom of your 10-inch cast iron skillet or cake pan. Sprinkle brown sugar evenly over the butter. Arrange pineapple rings in a single layer over the brown sugar (you should fit about 7-8 rings). Place a maraschino cherry in the center of each pineapple ring. Set aside.
- Mix Dry Ingredients: In a medium bowl, whisk together flour, baking powder, baking soda, and salt. Set aside.
- Cream Butter and Sugar: In a large bowl using an electric mixer, beat softened butter and granulated sugar on medium-high speed for 3-4 minutes until light and fluffy. This step incorporates air and creates a tender cake.
- Add Eggs and Vanilla: Beat in eggs one at a time, mixing well after each addition. Add vanilla extract and mix until combined. Scrape down the bowl sides as needed.
- Alternate Wet and Dry: With mixer on low speed, add the flour mixture in three additions, alternating with the buttermilk and pineapple juice (combined) in two additions. Begin and end with flour mixture. Mix just until combined – don’t overmix or you’ll develop too much gluten and create a tough cake.
- Assemble: Carefully spread the cake batter over the pineapple rings in the skillet, smoothing the top with a spatula. The batter will be thick – this is normal.
- Bake: Place skillet on a baking sheet (to catch any drips) and bake for 45-50 minutes, or until a toothpick inserted in the center comes out clean and the cake springs back when lightly pressed. The top should be golden brown.
- Cool Briefly: Remove from oven and let cool in the pan for exactly 10 minutes. This is crucial – cooling too long makes the topping stick, but flipping too soon means the topping will slide off.
- The Grand Flip: Run a knife around the edges of the cake to loosen it. Place your serving plate upside down over the skillet. Using oven mitts, hold both the plate and skillet firmly and quickly flip them over in one confident motion. Let the skillet rest on top for 1-2 minutes, then carefully lift it off. If any pineapple or cherries stick, simply replace them on the cake.
- Serve: Let the cake cool slightly before slicing, or serve warm with vanilla ice cream or whipped cream.
Notes
- Don’t skip the parchment paper if using a regular cake pan – it helps with the flip.
- Make sure your butter is truly softened (not melted) for the cake batter.
- The 10-minute cooling time before flipping is critical for success.
- If your brown sugar is clumpy, press it through a sieve before using.
- Cake tastes even better the next day as flavors meld together.
Nutrition
- Serving Size: 1 slice (1/10 of cake)
- Calories: 385
- Sugar: 42g
- Sodium: 195mg
- Fat: 15g
- Saturated Fat: 9g
- Unsaturated Fat: 5g
- Trans Fat: 0g
- Carbohydrates: 60g
- Fiber: 1g
- Protein: 4g
- Cholesterol: 75mg
Nutrition information is approximate and calculated based on standard ingredient measurements. Values may vary based on specific brands and ingredient substitutions used.
Tips & Variations
One of the best things about upside-down pineapple cake is how adaptable it is to different tastes and dietary needs. Here are my favorite ways to customize this classic:
Flavor Variations:
- Add 1/2 teaspoon coconut extract to the batter and sprinkle toasted coconut over the pineapple for a tropical twist
- Mix 1 teaspoon rum extract or 2 tablespoons dark rum into the batter for an adult version
- Stir 1/2 cup toasted pecans or walnuts into the brown sugar topping for extra crunch
- Replace maraschino cherries with fresh raspberries or blackberries for a more sophisticated flavor
- Add 1/2 teaspoon cinnamon and 1/4 teaspoon nutmeg to the cake batter for warm spice notes
Healthier Modifications:
- Substitute half the all-purpose flour with whole wheat pastry flour
- Replace half the butter with unsweetened applesauce (affects texture slightly but reduces calories)
- Use coconut sugar instead of brown sugar for the topping
- Try Greek yogurt instead of buttermilk for added protein
- Reduce granulated sugar in cake batter to 1/2 cup
Different Fruits:
- Use canned peach halves instead of pineapple for a Southern twist
- Try plums, apricots, or pears for seasonal variations
- Make a mixed berry version with strawberries and blueberries
- Create an apple version using thinly sliced apples arranged in a spiral
Pan Size Adjustments:
- For a 9-inch round pan, reduce all ingredients by 20% and check for doneness at 35 minutes
- For a 9×13 inch pan, increase all ingredients by 50% and bake for 55-60 minutes
- Individual servings: Use a muffin tin and mini pineapple tidbits, bake for 18-22 minutes
Pro Chef Tips
These professional tricks will take your upside-down pineapple cake from good to absolutely incredible:
Temperature Matters: Always use room temperature ingredients for the cake batter. Cold eggs and buttermilk don’t emulsify properly with butter, creating a denser cake. Take ingredients out 30 minutes before baking.
Don’t Overmix: Once you add flour to wet ingredients, mix just until you can’t see dry streaks. Overmixing develops gluten, resulting in a tough, chewy cake instead of a tender one. It’s okay if the batter isn’t perfectly smooth.
Test the Pan Temperature: Before adding batter, touch the center of your pineapple arrangement. It should feel slightly warm but not hot. If it’s too hot, the bottom of your cake will cook too quickly and potentially burn.
Create Steam: Place a small pan of water on the oven’s bottom rack while baking. The steam helps keep the cake moist and creates a more tender crumb.
The Flip Technique: Practice the flipping motion without the hot pan first. You want one smooth, confident flip – hesitation can cause the topping to slide. Have your serving plate within arm’s reach before removing the cake from the oven.
Enhance Caramelization: For deeper caramel flavor, briefly broil the pineapple topping for 2-3 minutes before adding the batter. Watch it carefully to avoid burning. This creates incredible depth of flavor.
Butter Quality: Use European-style butter with higher fat content for richer flavor. The difference is noticeable, especially in the caramelized topping.
Check Doneness Multiple Ways: Don’t rely solely on a toothpick. The cake should also pull away slightly from the pan sides, spring back when touched, and smell fragrant and caramelized.
Cooling Rack Positioning: Place your cooling rack over a large plate or baking sheet before flipping. This catches any caramel drips and makes cleanup easier.
Rescue Stuck Pineapple: If pieces stick to the pan after flipping, warm the pan bottom with a hot, damp towel for 30 seconds. The heat will soften the caramel, making it easier to transfer stuck pieces back to the cake.
Common Mistakes to Avoid
Even experienced bakers can stumble with upside-down cakes. Here are the most frequent issues and how to prevent them:
Mistake #1: Flipping Too Early or Too Late
Timing the flip is crucial. Too early and the topping slides off in a hot, liquidy mess. Too late and the caramel hardens, cementing the pineapple to the pan. Stick to that 10-minute cooling window religiously. Set a timer!
Mistake #2: Overpacking the Pineapple
It’s tempting to cram in extra fruit, but overcrowding prevents proper caramelization and makes the cake soggy. Leave small gaps between pineapple rings – the cake will rise into these spaces and create a better texture.
Mistake #3: Using Pineapple That’s Too Wet
If you don’t drain your pineapple thoroughly, excess liquid creates a soggy cake bottom and prevents caramelization. Pat pineapple rings dry with paper towels before arranging them.
Mistake #4: Opening the Oven Door Too Often
Each time you peek, you release heat and cause temperature fluctuations. This leads to uneven baking and potentially a sunken center. Resist checking until at least 40 minutes have passed.
Mistake #5: Skipping the Parchment Paper (in Regular Pans)
Cast iron is naturally non-stick enough, but regular cake pans need parchment paper for a clean flip. Without it, you risk half your topping remaining in the pan. Grease the pan, add parchment, then grease the parchment for guaranteed success.
Mistake #6: Not Leveling the Pan
An unlevel pan causes batter to pool on one side, creating uneven thickness and doneness. Check that your oven rack is level before baking.
Mistake #7: Cutting Too Soon
I know it’s hard to wait, but cutting into a piping-hot cake makes it fall apart and ruins those beautiful slices. Let it cool for at least 20 minutes total (10 in pan, 10 after flipping) before slicing.
Storage & Meal Prep
Good news – this upside-down pineapple cake actually improves with time as the flavors meld together. Here’s how to store it properly:
Room Temperature Storage:
Cover the cooled cake loosely with plastic wrap or store in a cake keeper for up to 2 days. The moisture from the fruit keeps the cake surprisingly moist. Avoid airtight containers at room temperature, which can make the topping weepy.
Refrigerator Storage:
For longer storage, refrigerate the covered cake for up to 5 days. The cake will firm up when cold, so let slices come to room temperature for 15-20 minutes before serving, or warm briefly in the microwave (15-20 seconds per slice).
Reheating Tips:
This cake is delicious cold, at room temperature, or warmed. For the best texture, warm individual slices in the microwave for 15-20 seconds, or place the whole cake in a 300°F oven for 10-12 minutes. Warming brings back that fresh-baked aroma and softens the caramelized topping beautifully.
Preventing Sogginess:
If you notice moisture collecting under your storage cover, the cake is releasing steam. Let it cool completely before covering, and use a paper towel layer between the cake and plastic wrap to absorb excess moisture.
Make-Ahead & Freezer Notes
This upside-down pineapple cake is perfect for planning ahead, whether you’re meal prepping or preparing for an event.
Make-Ahead Options:
You can prepare the cake completely, let it cool, and store it covered at room temperature up to 1 day before serving. The texture actually improves overnight. Alternatively, prepare and arrange the pineapple topping in your pan up to 4 hours ahead, then make and bake the batter when ready.
Freezing Instructions:
This cake freezes beautifully for up to 3 months. Let the cake cool completely, then wrap tightly in two layers of plastic wrap followed by aluminum foil. Freeze the whole cake or cut into individual slices first for easier portioning.
Thawing Method:
For best texture, thaw frozen cake in the refrigerator overnight, still wrapped. This prevents condensation from making the cake soggy. Once thawed, unwrap and let come to room temperature, or warm as desired.
Freezing Tip:
Place the wrapped cake in a rigid container to prevent crushing in the freezer. Label with the date so you remember when you froze it.
Not Recommended:
Don’t freeze the cake before baking. The pineapple releases too much liquid when thawed, preventing proper caramelization.
Serving Suggestions
An upside-down pineapple cake is stunning on its own, but these accompaniments take it to the next level:
Classic Pairings:
Serve warm slices with a generous scoop of vanilla ice cream melting over the top – the temperature contrast is heavenly. Whipped cream or freshly whipped coconut cream adds lightness and balances the sweetness beautifully.
Beverage Pairings:
This cake pairs wonderfully with hot coffee or tea (try Earl Grey or chai). For evening dessert, serve with dessert wine like Moscato or a tropical cocktail. Kids love it with cold milk.
Brunch Service:
This makes an impressive brunch dessert alongside fresh fruit salad, yogurt parfaits, and mimosas. The pineapple makes it feel perfectly appropriate for morning gatherings.
Special Occasion Presentation:
For birthdays or celebrations, add sparkler candles in the cherry centers. Drizzle with caramel sauce and sprinkle toasted coconut around the plate edges for extra flair.
Complementary Desserts:
If serving multiple desserts, pair this with something lighter like lemon bars or fresh fruit. The pineapple cake is rich and sweet, so contrasting flavors work best.
Side Dishes:
Fresh berries, sliced mango, or a simple green salad with citrus vinaigrette provide refreshing contrast when serving this as part of a larger meal.
FAQs Section
Q: Can I use fresh pineapple instead of canned?
A: Yes, but canned actually works better for this recipe. Fresh pineapple contains more enzymes that can affect cake texture, and it doesn’t caramelize as evenly. If you insist on fresh, slice it 1/4-inch thick, pat very dry, and cook the slices in the brown sugar mixture on the stovetop for 5 minutes before adding cake batter.
Q: Why did my cake stick to the pan?
A: The most common reason is waiting too long to flip (more than 12 minutes). The caramel hardens as it cools, cementing the pineapple to the pan. Other causes include not running a knife around the edges before flipping or insufficient butter in the topping layer.
Q: Can I make this in a bundt pan?
A: While technically possible, it’s tricky because flipping a bundt pan doesn’t showcase the pineapple arrangement well. If you try it, use pineapple chunks instead of rings, increase the topping by 50%, and be extra careful when flipping. A flat-bottomed pan is really the way to go.
Q: My cake sank in the middle – what happened?
A: Usually this means the cake wasn’t fully baked, even if a toothpick came out clean. Canned pineapple adds moisture that requires slightly longer baking time. It could also indicate opening the oven door too frequently, or using expired leavening agents. Bake for the full 45-50 minutes and test in multiple spots.
Q: Can I make this dairy-free?
A: Absolutely! Substitute the butter with equal amounts of coconut oil or vegan butter. Replace buttermilk with non-dairy milk (like almond or oat milk) mixed with 1 tablespoon lemon juice. The texture will be slightly different but still delicious.
Q: How do I know when it’s done baking?
A: Look for multiple signs: a toothpick inserted in the center comes out clean or with just a few moist crumbs, the cake springs back when lightly pressed, it pulls away slightly from pan sides, and the top is golden brown. The house will smell amazing too!
Q: Can I reduce the sugar?
A: You can slightly reduce the granulated sugar in the cake (down to 1/2 cup), but don’t reduce the brown sugar in the topping. That brown sugar creates the essential caramel sauce. Without enough of it, the pineapple won’t caramelize properly and you’ll lose that signature glossy coating.
Conclusion
There’s something wonderfully satisfying about pulling a beautiful upside-down pineapple cake from the oven. This classic American dessert brings together everything we love about home baking – it’s approachable enough for beginners but impressive enough for special occasions. The caramelized pineapple, tender cake, and that dramatic flip moment make it an experience, not just a dessert.
Whether you’re baking this for a family Sunday dinner, bringing it to a potluck, or simply treating yourself to a slice of nostalgia, I guarantee this recipe will become a favorite in your rotation. The best part? It genuinely tastes even better the next day, so you can bake ahead without stress.
I’d love to hear how your upside-down pineapple cake turns out! Did you try any of the variations? Did your family love it as much as mine does? Leave a comment below sharing your experience, and don’t forget to rate this recipe if you tried it.
Ready to make this gorgeous cake? Save this recipe to your Pinterest boards so you can find it easily next time you need an impressive dessert! Hit that Pin button and share it with your friends who love classic home baking. Happy baking! 🍍✨