The Best Homemade Vanilla Cake Recipe – Moist, Fluffy & Perfect Every Time
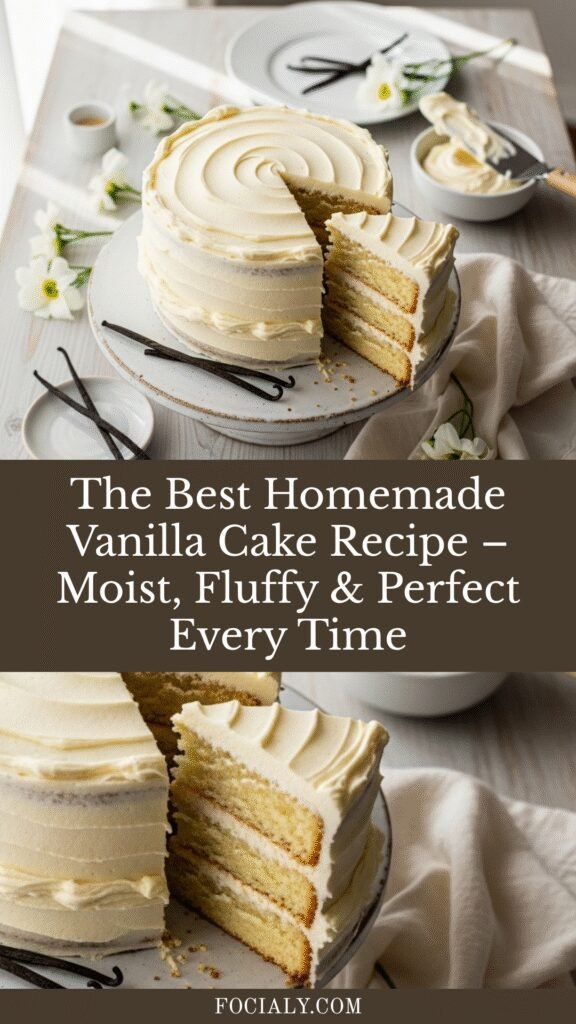
There’s something truly magical about a homemade vanilla cake. This isn’t just any cake—it’s the tender, buttery, impossibly moist vanilla cake that becomes the star of birthday parties, weekend celebrations, and those “just because” moments when you need something sweet and comforting. While chocolate often steals the spotlight, vanilla cake holds a special place in the hearts of home bakers everywhere because it’s both elegantly simple and endlessly versatile.
This recipe delivers a classic American-style vanilla cake with a fine, tender crumb and rich vanilla flavor that pairs beautifully with any frosting you can dream up. Whether you’re making a layer cake for a special occasion, cupcakes for a school celebration, or a simple sheet cake for Sunday dinner, this foolproof recipe will quickly become your go-to. It’s the kind of cake that tastes like it came from a fancy bakery but uses ingredients you already have in your pantry and techniques that even beginner bakers can master with confidence.
History / Background
Vanilla cake has been a cornerstone of American baking since the late 1800s, though its origins trace back even further to European butter cakes. The introduction of vanilla extract to the Western world, derived from vanilla beans native to Mexico, revolutionized baking and transformed what was once a luxury spice into a household staple.
In early American cookbooks, vanilla cake was often called “silver cake” or “white cake” and was reserved for special occasions due to the expense of pure vanilla extract and refined white sugar. During the Victorian era, a pristine white cake symbolized purity and sophistication, making it the traditional choice for weddings and formal celebrations.
The development of reliable leavening agents like baking powder in the mid-1800s made light, fluffy cakes accessible to home bakers, no longer requiring the labor-intensive process of beating air into eggs for hours. By the early 20th century, vanilla cake had become America’s sweetheart dessert—the blank canvas upon which creative bakers could showcase their decorating skills and the reliable crowd-pleaser at every church potluck, birthday party, and family gathering.
Today, vanilla cake remains beloved precisely because it doesn’t try to be anything other than what it is: pure, simple, and absolutely delicious. Its subtle sweetness and delicate flavor allow the quality of your ingredients to shine through, making it a true test of a baker’s skill.
Why You’ll Love This Recipe
This vanilla cake recipe has earned its place as a tried-and-true favorite in countless home kitchens, and once you make it, you’ll understand why. The texture is absolutely perfect—moist without being dense, fluffy without being dry, with a tender crumb that practically melts on your tongue. Unlike boxed cake mixes that can taste artificial, this homemade version delivers authentic vanilla flavor that tastes like real butter, eggs, and pure vanilla extract should.
Here’s what makes this recipe truly special:
- Incredibly moist texture that stays fresh for days without drying out
- Easy one-bowl method that doesn’t require fancy techniques or equipment
- Consistent results every time – no more sunken centers or dry edges
- Budget-friendly ingredients you probably already have in your pantry
- Versatile base that works beautifully as a layer cake, sheet cake, or cupcakes
- Kid-approved flavor that appeals to all ages without being overly sweet
- Quick preparation – ready for the oven in just 15 minutes
- Perfect for decorating – sturdy enough to stack and frost without crumbling
- Make-ahead friendly for stress-free party planning
- Customizable – easily adapt with different extracts, fillings, or frostings
Ingredient Notes
Understanding your ingredients is the key to baking success, so let’s break down what makes this vanilla cake so spectacular:
All-Purpose Flour: The foundation of our cake’s structure. I recommend measuring by weight or using the spoon-and-level method to avoid dense cake. Cake flour can be substituted for an even more tender crumb—just use 2 1/4 cups cake flour in place of 2 cups all-purpose flour.
Granulated Sugar: Provides sweetness and helps create that light, fluffy texture by aerating the batter when creamed with butter. Don’t substitute with powdered sugar, but you can use superfine sugar for an even finer crumb.
Unsalted Butter: The star of the show! Use real butter at room temperature (not melted) for the best flavor and texture. If you only have salted butter, reduce the added salt to 1/4 teaspoon. European-style butter with higher fat content creates an even richer cake.
Eggs: Add structure, moisture, and richness. Room temperature eggs incorporate more easily and create better volume. If you forgot to take them out ahead, place them in warm water for 5-10 minutes.
Whole Milk: Creates moisture and tenderness. Buttermilk can be substituted for a slightly tangy flavor and even more tender crumb. In a pinch, you can use 2% milk, but avoid skim milk as it lacks the fat needed for richness.
Pure Vanilla Extract: This is where quality matters! Pure vanilla extract delivers incomparable flavor compared to imitation. Use at least 2 teaspoons, or splurge on vanilla bean paste for visible vanilla specks and intensified flavor.
Baking Powder & Baking Soda: The dynamic duo that creates lift and a tender crumb. Make sure yours are fresh (less than 6 months old) for proper rise.
Salt: Enhances all the other flavors and balances sweetness. Don’t skip it!
Sour Cream: The secret ingredient for extra moisture and a tender, cake-shop quality texture. Greek yogurt works as a substitute, but full-fat sour cream is ideal.
Equipment Needed
Having the right tools makes baking easier and ensures better results. Here’s what you’ll need:
- Electric mixer (stand mixer or hand mixer) for creaming butter and sugar
- Two 9-inch round cake pans (or one 9×13-inch pan for sheet cake)
- Parchment paper for lining pans to prevent sticking
- Mixing bowls (medium and large)
- Measuring cups and spoons (or a kitchen scale for precision)
- Whisk for combining dry ingredients
- Rubber spatula for scraping down bowl and folding batter
- Cooling racks to prevent soggy bottoms
- Toothpick or cake tester for checking doneness
- Sifter or fine-mesh strainer (optional, for extra-smooth batter)
- Offset spatula (if frosting a layer cake)
Vanilla Cake Recipe
This classic homemade vanilla cake is incredibly moist, perfectly fluffy, and bursting with real vanilla flavor. It’s the ultimate versatile cake recipe that works beautifully for birthdays, celebrations, or any time you’re craving something sweet and comforting.
- Prep Time: 15 minutes
- Cook Time: 28 minutes
- Total Time: 43 minutes (plus cooling)
- Yield: 12 servings (two 9-inch layers) 1x
- Category: Dessert
- Method: Baking
- Cuisine: American
- Diet: Vegetarian
Ingredients
- 2 cups (250g) all-purpose flour
- 1 1/2 cups (300g) granulated sugar
- 3/4 cup (170g) unsalted butter, softened to room temperature
- 3 large eggs, room temperature
- 1 cup (240ml) whole milk, room temperature
- 1/2 cup (120g) full-fat sour cream, room temperature
- 2 1/2 teaspoons pure vanilla extract
- 2 1/2 teaspoons baking powder
- 1/2 teaspoon baking soda
- 1/2 teaspoon salt
Instructions
- Preheat and Prepare: Preheat your oven to 350°F (175°C). Grease two 9-inch round cake pans with butter or non-stick spray, line the bottoms with parchment paper circles, then grease the parchment. Lightly dust with flour and tap out excess.
- Mix Dry Ingredients: In a medium bowl, whisk together the flour, baking powder, baking soda, and salt. Set aside.
- Cream Butter and Sugar: In a large bowl using an electric mixer, beat the softened butter on medium speed for about 1 minute until smooth. Add the sugar and beat on medium-high speed for 3-4 minutes until light, fluffy, and pale in color. This step is crucial for a light, airy cake texture.
- Add Eggs: Add the eggs one at a time, beating well after each addition (about 30 seconds per egg). Scrape down the sides and bottom of the bowl with a rubber spatula as needed. Mix in the vanilla extract.
- Combine Wet Ingredients: In a measuring cup or small bowl, whisk together the milk and sour cream until smooth and well combined.
- Alternate Adding Ingredients: With the mixer on low speed, add the flour mixture in three additions, alternating with the milk mixture in two additions. Begin and end with the flour mixture: flour, milk, flour, milk, flour. Mix each addition just until combined—do not overmix. Scrape the sides and bottom of the bowl and give the batter a few final stirs with a rubber spatula to ensure everything is incorporated.
- Divide and Bake: Divide the batter evenly between the prepared pans (use a kitchen scale for precision if desired—each pan should have about 570g of batter). Smooth the tops with a spatula. Tap the pans gently on the counter 2-3 times to release any air bubbles.
- Bake: Bake for 26-28 minutes, or until a toothpick inserted into the center comes out clean or with just a few moist crumbs (not wet batter). The tops should spring back when gently pressed, and the edges should just start pulling away from the pan sides.
- Cool: Let the cakes cool in the pans on wire racks for 15 minutes. Run a knife around the edges, then carefully invert the cakes onto the racks. Peel off the parchment paper and flip the cakes right-side up to cool completely before frosting (at least 1 hour).
- Frost and Serve: Once completely cooled, frost with your favorite frosting. Slice, serve, and enjoy!
Notes
- Room temperature ingredients are essential for proper mixing and texture. Cold ingredients can cause the batter to curdle or mix unevenly.
- Don’t overmix the batter once you add the flour, or your cake may become tough and dense. Mix just until you no longer see streaks of flour.
- Test for doneness starting at 25 minutes to avoid overbaking. Every oven is different, so use the toothpick test as your guide.
- Level your cakes before frosting if they have domed tops for professional-looking layers.
- This recipe can easily be turned into 24 cupcakes—bake at 350°F for 18-20 minutes.
Nutrition
- Serving Size: 1 slice (1/12 of recipe, unfrosted)
- Calories: 295
- Sugar: 26g
- Sodium: 215mg
- Fat: 13g
- Saturated Fat: 8g
- Unsaturated Fat: 4g
- Trans Fat: 0g
- Carbohydrates: 41g
- Fiber: 1g
- Protein: 5g
- Cholesterol: 82mg
Tips & Variations
The beauty of vanilla cake is its versatility—once you’ve mastered the base recipe, you can customize it in countless ways:
Flavor Variations:
- Almond Vanilla Cake: Replace 1 teaspoon of vanilla with almond extract for a subtle almond flavor
- Lemon Vanilla Cake: Add 2 tablespoons fresh lemon zest and 1 tablespoon lemon juice for a citrusy twist
- Funfetti Cake: Gently fold in 1/2 cup rainbow sprinkles just before baking
- Coconut Cake: Replace 1/2 cup milk with coconut milk and add 1/2 teaspoon coconut extract
Texture Modifications:
- For an even more tender crumb, substitute cake flour for all-purpose flour
- Add an extra egg yolk for a richer, more velvety texture
- Replace sour cream with Greek yogurt for a tangier flavor profile
Dietary Adaptations:
- Dairy-free: Use plant-based butter, dairy-free milk, and coconut cream in place of sour cream
- Reduced sugar: You can reduce sugar by up to 1/4 cup, though the cake will be less sweet and slightly less tender
Creative Add-ins:
- Fold in 1/2 cup mini chocolate chips for a cookies-and-cream style cake
- Add 1/4 cup rainbow sprinkles for a birthday cake vibe
- Swirl in 1/3 cup of your favorite jam between layers for a filled cake
Pro Chef Tips
These professional baking secrets will take your vanilla cake from good to absolutely spectacular:
Weigh your ingredients: Professional bakers always weigh flour for consistency. Too much flour is the #1 cause of dry, dense cake. If you don’t have a scale, spoon flour into your measuring cup and level it off—never scoop directly from the bag.
Bring ingredients to room temperature: This seems fussy, but it’s crucial. Room temperature ingredients emulsify properly, creating a smooth, cohesive batter that bakes into a tender, fine-crumbed cake. Cold ingredients can cause the butter to seize and create a lumpy, separated batter.
Cream butter and sugar properly: Don’t rush this step! Beat for the full 3-4 minutes until the mixture is noticeably lighter in color and fluffy. This incorporates air that helps your cake rise and creates that perfect tender texture.
Use parchment paper circles: This simple step ensures your cakes release perfectly every time. Trace your cake pan on parchment, cut it out, and place it in the greased pan before adding batter.
Don’t overbake: Check your cake a few minutes before the recommended time. Overbaking is the enemy of moist cake. The toothpick should come out with a few moist crumbs clinging to it—completely clean means overbaked.
Cool completely before frosting: Patience is virtue! Warm cake will melt your frosting and slide apart. Wait at least 1 hour for full cooling, or refrigerate the layers for 30 minutes to speed things up.
Freeze for easier frosting: For show-stopping layer cakes, freeze your cooled layers for 30 minutes before frosting. This firms them up and prevents crumbs from mixing into your frosting.
Common Mistakes to Avoid
Learn from these common pitfalls to ensure perfect vanilla cake every time:
Using cold ingredients: This is the most common mistake! Cold eggs, milk, and butter don’t incorporate smoothly, leading to a dense, uneven cake. Always plan ahead and bring everything to room temperature.
Overmixing the batter: Once you add flour, mix only until you can’t see streaks of flour anymore. Overmixing develops gluten, making your cake tough and chewy instead of tender and fluffy.
Opening the oven door too early: Resist the temptation to peek! Opening the oven during the first 20 minutes of baking can cause your cake to sink in the middle. Wait until at least the 25-minute mark before checking.
Using expired leavening agents: Baking powder and baking soda lose their potency over time. If yours are more than 6 months old, they might not provide enough lift, resulting in a flat, dense cake.
Incorrectly measuring flour: Scooping flour directly from the bag compacts it, giving you up to 25% more flour than the recipe calls for. This creates dry, dense cake. Always spoon flour into your measuring cup and level it off, or better yet, use a kitchen scale.
Frosting too soon: I know it’s tempting, but frosting a warm cake is a recipe for disaster. The frosting will melt and slide off, and your layers may slide apart. Patience pays off with a beautiful finished cake.
Storage & Meal Prep
Proper storage keeps your vanilla cake fresh and delicious for days:
Room Temperature Storage: Unfrosted cake layers can be wrapped tightly in plastic wrap and stored at room temperature for up to 2 days. Once frosted, store the cake in an airtight container or under a cake dome at room temperature for up to 3 days.
Refrigerator Storage: If your frosting contains cream cheese, whipped cream, or fresh fruit, refrigerate the cake. Cover loosely with plastic wrap or foil and store for up to 5 days. Bring to room temperature 30 minutes before serving for the best flavor and texture.
Shelf Life: The sour cream in this recipe keeps the cake incredibly moist for days. Unfrosted layers stay fresh for 2 days at room temperature or up to 1 week refrigerated. Frosted cake is best within 3-4 days.
Reheating Tips: Cake is delicious at room temperature, but if you prefer it warm, microwave individual slices for 10-15 seconds. For frosted cake, let it come to room temperature naturally rather than microwaving, which can melt the frosting.
Make-Ahead & Freezer Notes
This vanilla cake is perfect for make-ahead baking, making party prep stress-free:
Make-Ahead Baking: Bake the cake layers up to 2 days in advance. Once completely cooled, wrap each layer tightly in two layers of plastic wrap and store at room temperature until you’re ready to frost.
Freezing Unfrosted Layers: For longer storage, freeze unfrosted cake layers for up to 3 months. Wrap each cooled layer tightly in plastic wrap, then again in aluminum foil or place in a freezer-safe bag. Label with the date and contents.
Freezing Frosted Cake: You can freeze a fully frosted cake! Place it in the freezer unwrapped for 30 minutes to firm up the frosting, then wrap carefully in plastic wrap and foil. Freeze for up to 2 months.
Thawing Instructions: For unfrosted layers, thaw at room temperature for 2-3 hours or overnight in the refrigerator, still wrapped. For frosted cake, unwrap and thaw in the refrigerator overnight, then bring to room temperature 1 hour before serving.
Best Reheating Method: For the freshest taste, always bring frozen cake to room temperature naturally. Avoid microwaving frozen cake, as it can become rubbery. If desired, warm individual slices in the microwave for 10-15 seconds after thawing.
Batter Preparation: While I recommend baking fresh for best results, you can prepare the batter and refrigerate it for up to 1 hour before baking. Give it a gentle stir before pouring into pans.
Serving Suggestions
Vanilla cake is wonderfully versatile and pairs beautifully with so many accompaniments:
Classic Frosting Options:
- Buttercream frosting (vanilla, chocolate, or cream cheese)
- Whipped cream frosting for a lighter option
- Chocolate ganache for an elegant finish
- Cream cheese frosting for a tangy complement
Delicious Side Pairings:
- Fresh berries (strawberries, raspberries, blueberries)
- Vanilla ice cream or gelato
- Fruit compote or berry sauce
- Caramel or chocolate sauce drizzle
Beverage Pairings:
- Hot coffee or espresso
- Cold milk (especially for kids!)
- Hot tea (Earl Grey or chamomile)
- Sweet dessert wine
Occasion-Specific Serving Ideas:
- Birthday Parties: Frost with colorful buttercream, add sprinkles, and top with candles
- Weddings/Showers: Stack as a naked cake with fresh flowers and berries
- Casual Gatherings: Serve as a simple sheet cake with whipped cream
- Holiday Desserts: Dress up with seasonal flavors like peppermint frosting or spiced buttercream
Creative Serving Presentations:
- Trifle: Cube the cake and layer with pudding, whipped cream, and berries
- Cake Pops: Crumble the cake, mix with frosting, and dip in chocolate
- Ice Cream Cake: Layer with softened ice cream and refreeze
- French Toast: Use day-old cake slices for decadent French toast
FAQs Section
Q: Can I make this vanilla cake into cupcakes?
A: Absolutely! This recipe makes approximately 24 standard cupcakes. Fill cupcake liners about 2/3 full and bake at 350°F for 18-20 minutes, or until a toothpick comes out clean. Check at 18 minutes as cupcakes can overbake quickly.
Q: Why is my cake dense instead of fluffy?
A: The most common causes are overmixing the batter after adding flour, using too much flour (remember to spoon and level!), or using cold ingredients that don’t incorporate properly. Make sure you’re creaming the butter and sugar for the full 3-4 minutes to incorporate enough air.
Q: Can I use oil instead of butter?
A: While you can substitute oil for butter, I don’t recommend it for this recipe. Butter provides essential flavor and structure that oil can’t replicate. If you must use oil, use 1/2 cup of neutral-flavored oil, but expect a different texture and less rich flavor.
Q: How do I prevent my cake from sticking to the pan?
A: The key is proper pan preparation! Grease the pans with butter or non-stick spray, line the bottoms with parchment paper circles, then grease the parchment. Lightly dust with flour and tap out excess. This triple-protection method ensures easy release every time.
Q: Can I halve this recipe to make one layer?
A: Yes! Halve all ingredients and bake in a single 9-inch pan for 30-35 minutes. You can also bake it in an 8-inch square pan for the same time, which makes perfect servings for smaller gatherings.
Q: My cake domed in the middle. How can I prevent this?
A: Some doming is normal, but excessive doming can be reduced by using cake strips (wet fabric strips wrapped around the pans) or lowering your oven temperature to 325°F and baking slightly longer. You can also level the domed top with a serrated knife once cooled.
Q: Can I make this recipe dairy-free?
A: Yes! Use vegan butter, your favorite plant-based milk (almond, oat, or soy work well), and coconut cream in place of sour cream. The texture will be slightly different but still delicious.
Conclusion
There’s nothing quite like the satisfaction of serving a homemade vanilla cake that’s been made with love, care, and quality ingredients. This recipe delivers bakery-quality results every single time—moist, fluffy, perfectly tender, and bursting with genuine vanilla flavor that reminds you why vanilla is called the queen of flavors.
Whether you’re celebrating a milestone birthday, creating a stunning wedding cake, or simply treating your family to Sunday dessert, this versatile vanilla cake is your blank canvas for creativity. Master this recipe, and you’ll have the confidence to tackle any cake project that comes your way.
I can’t wait for you to try this recipe! Once you bake it, I’d love to hear how it turned out. Leave a comment below with your results, any creative variations you tried, or questions you have. And please, if you love this recipe as much as my family does, share it on Pinterest so other home bakers can discover it too. Happy baking!