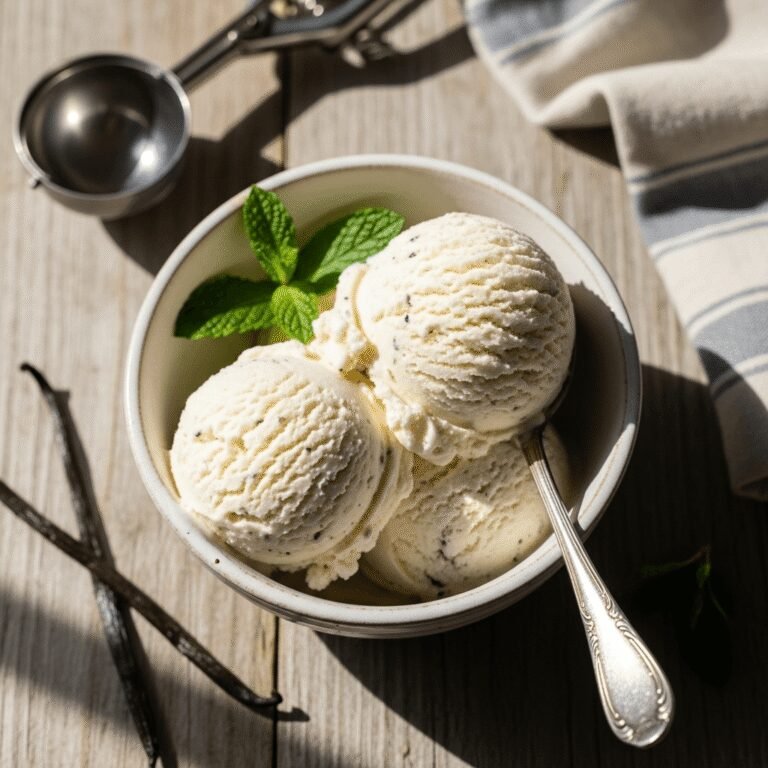
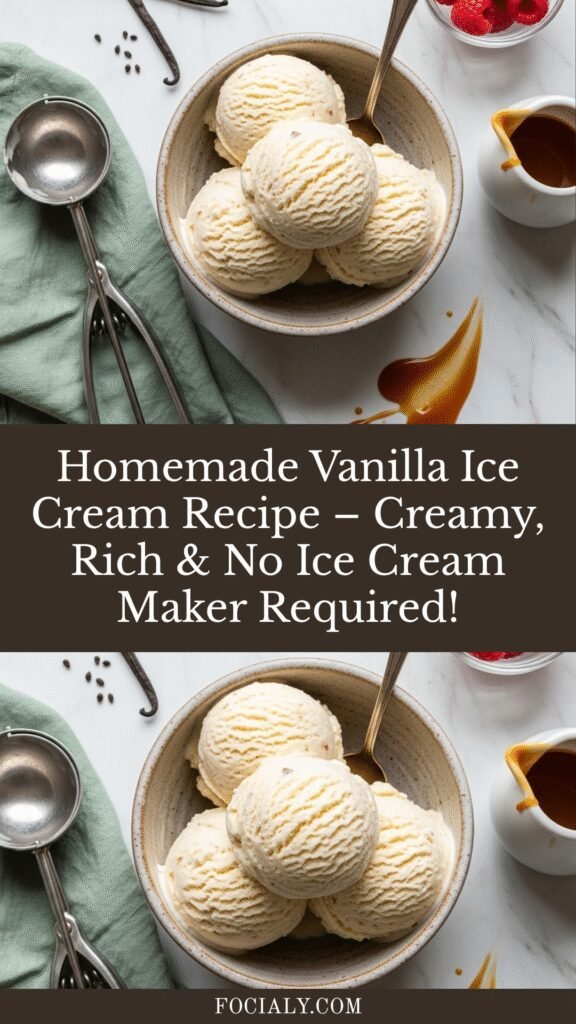
Homemade Vanilla Ice Cream Recipe – Creamy, Rich & No Ice Cream Maker Required!
There’s something truly magical about homemade vanilla ice cream. This classic frozen dessert combines heavy cream, whole milk, sugar, and pure vanilla extract to create a silky-smooth, intensely flavorful treat that beats any store-bought version hands down. Whether you’re serving it alongside warm apple pie, topping it with hot fudge sauce, or enjoying it straight from the bowl on a sweltering summer afternoon, this vanilla ice cream recipe delivers pure comfort in every spoonful.
What makes this recipe special is its versatility and simplicity. You don’t need fancy equipment or hard-to-find ingredients—just a handful of pantry staples and a bit of patience. The result? A luxuriously creamy vanilla ice cream with a custard base that’s rich without being heavy, sweet without being cloying, and perfectly scoopable right from the freezer. It’s the ultimate foundation for sundaes, milkshakes, ice cream sandwiches, or any dessert that calls for a scoop of something cold and delicious.
This homemade vanilla ice cream is perfect for summer barbecues, birthday parties, holiday gatherings, or simply those evenings when you’re craving something sweet and nostalgic. Kids and adults alike will love the clean, pure vanilla flavor that lets you truly taste the quality of the ingredients. Plus, once you master this basic recipe, you can customize it with mix-ins like chocolate chips, cookie dough, fresh fruit, or caramel swirls.
History / Background
Vanilla ice cream has a fascinating history that stretches back centuries and crosses multiple continents. While frozen desserts have existed since ancient times—with Chinese, Persian, and Roman civilizations all enjoying early versions of ices and frozen treats—the vanilla ice cream we know and love today has its roots in 18th-century Europe and colonial America.
The journey of vanilla itself begins in Mexico, where the Totonac people first cultivated vanilla orchids. When Spanish conquistadors encountered this exotic flavoring in Aztec chocolate drinks during the 16th century, they brought it back to Europe, where it became a luxury ingredient reserved for the wealthy elite. For hundreds of years, Mexico remained the only source of vanilla because the specific bee species needed to pollinate vanilla orchids existed nowhere else.
Ice cream as a confection emerged in Europe during the 17th century, with Italian and French chefs creating elaborate frozen desserts for royal courts. The combination of vanilla and ice cream likely first occurred in France, where sophisticated chefs experimented with flavoring their frozen custards with this precious spice. Thomas Jefferson, who served as American minister to France from 1785 to 1789, fell in love with French ice cream and brought back a handwritten recipe for vanilla ice cream to America—one of the earliest documented vanilla ice cream recipes in the United States.
The 19th century brought two game-changing developments: the hand-cranked ice cream maker (patented by Nancy Johnson in 1843) and the successful cultivation of vanilla outside Mexico. These innovations transformed ice cream from an aristocratic luxury into an accessible treat for everyday Americans. Vanilla quickly became—and has remained—the most popular ice cream flavor in the United States, accounting for nearly 30% of all ice cream sales.
What makes vanilla ice cream so enduringly popular is its perfect balance. It’s complex enough to be interesting on its own, yet neutral enough to complement countless desserts. The custard-based French style (also called “Philadelphia style” when made without eggs) became the American standard, prized for its rich, creamy texture and clean vanilla flavor. Today, homemade vanilla ice cream represents a connection to this delicious history—a simple pleasure that’s remained essentially unchanged for over two centuries.
Why You’ll Love This Recipe
This homemade vanilla ice cream recipe is a game-changer for anyone who loves frozen desserts. The beauty of making ice cream from scratch is that you control every ingredient, ensuring the purest, most delicious flavor possible. Unlike commercial ice cream that’s often filled with stabilizers, artificial flavors, and air (called “overrun” in the industry), this recipe gives you dense, creamy, genuinely satisfying ice cream with ingredients you can actually pronounce.
Here’s why this recipe will become your go-to:
- Incredibly creamy texture – The custard base creates a velvety-smooth consistency that melts perfectly on your tongue
- Pure vanilla flavor – Real vanilla extract (or even better, vanilla bean) delivers an incomparable depth and complexity
- No ice cream maker required – While a machine makes things easier, the no-churn method works beautifully
- Customizable base – This recipe is the perfect foundation for any flavor variation you can imagine
- Impressive yet approachable – Guests will think you’re a culinary wizard, but the process is surprisingly simple
- Better than store-bought – Once you taste homemade, there’s no going back to the cardboard-textured store versions
- Budget-friendly – Making your own ice cream costs less per serving than premium brands
- Family-friendly activity – Kids love helping make ice cream and watching the magic happen
- No artificial ingredients – You know exactly what’s going into your dessert
- Makes your kitchen smell amazing – The scent of warm vanilla custard is absolutely heavenly
Whether you’re new to homemade ice cream or a seasoned pro, this recipe delivers consistent, delicious results every single time. The process is meditative and rewarding, and the payoff—that first spoonful of cold, creamy, vanilla-perfumed ice cream—makes every minute worth it.
Ingredient Notes
Let’s talk about what goes into making exceptional vanilla ice cream. Each ingredient plays a crucial role in creating that perfect texture and flavor:
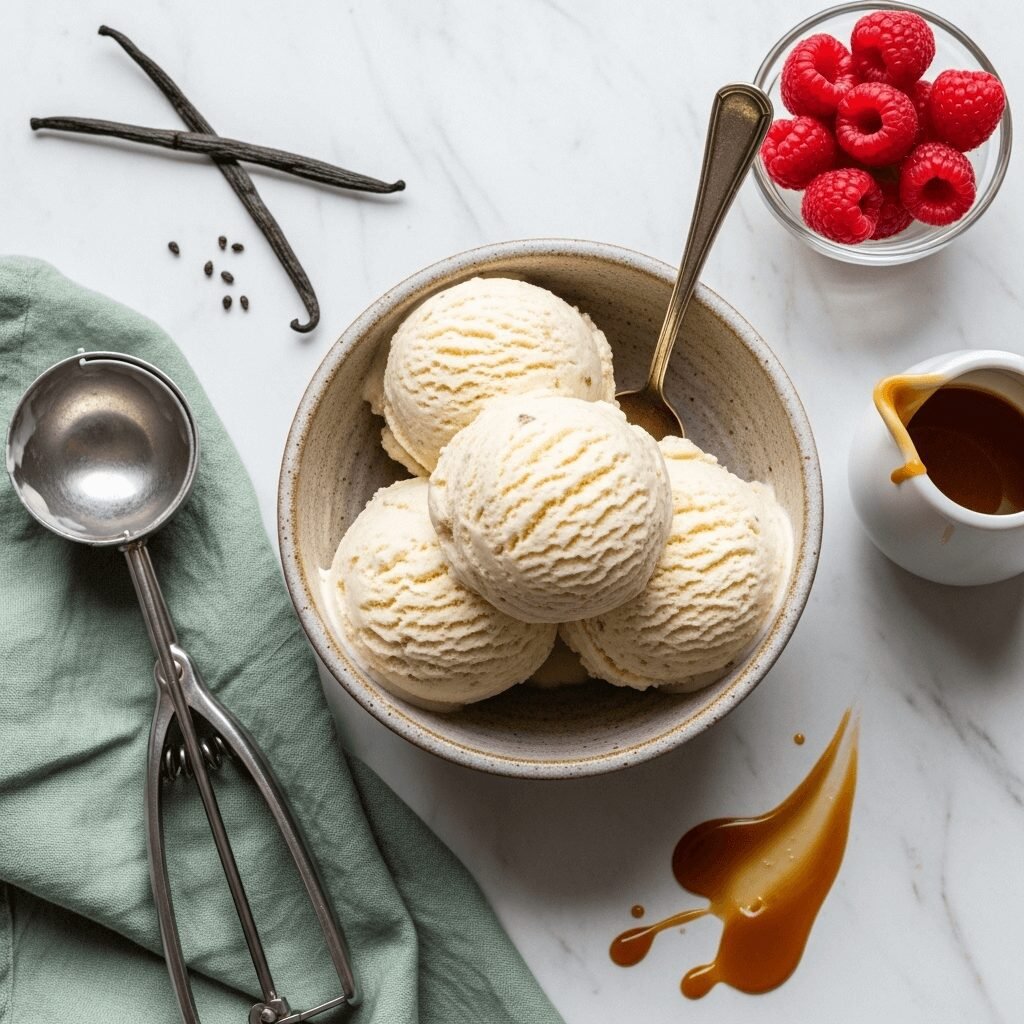
Heavy Cream (2 cups): This is the star ingredient that gives your ice cream its luxurious, rich texture. The high fat content (at least 36%) prevents ice crystals from forming and creates that melt-in-your-mouth creaminess. Don’t substitute with half-and-half or light cream—you need the full-fat version for authentic ice cream texture. For a slightly lighter version, you can use a 1:1 ratio of heavy cream to whole milk, but the texture will be less creamy.
Whole Milk (1 cup): Milk balances the richness of the cream and adds body without making the ice cream too heavy. Whole milk (3.25% fat) is essential—don’t use skim or low-fat milk, as the fat content is crucial for proper texture. Some recipes use all cream, but adding milk creates a better mouthfeel and prevents the ice cream from feeling too heavy or coating your mouth.
Granulated Sugar (¾ cup): Sugar does more than sweeten—it also prevents the ice cream from freezing rock-solid. Sugar lowers the freezing point, keeping your ice cream scoopable straight from the freezer. You can reduce the sugar slightly (to about ⅔ cup) if you prefer less sweetness, but go much lower and you’ll end up with icy, hard-to-scoop ice cream. For a different flavor profile, try substituting ¼ cup of sugar with honey or maple syrup.
Egg Yolks (4-5 large): These create the custard base (called “French-style” ice cream) that gives you ultra-smooth, creamy texture. The yolks act as emulsifiers, helping fat and water molecules bind together smoothly. They also add richness and a gorgeous pale yellow color. Make sure your eggs are fresh—older eggs can give an off flavor. If you’re concerned about raw eggs, you’ll be tempering and cooking them to 170°F, which is safe.
Pure Vanilla Extract (2 tablespoons): This is non-negotiable—never use imitation vanilla. Real vanilla extract (or even better, vanilla bean paste or a whole vanilla bean) provides complex, aromatic flavor with floral and woody notes that artificial vanilla simply can’t match. The amount might seem like a lot, but ice cream’s cold temperature dulls flavors, so you need more than you’d use in baking. For an extra-special treat, split a vanilla bean lengthwise, scrape out the seeds, and steep both seeds and pod in the warming cream mixture.
Salt (¼ teaspoon): Just a pinch enhances all the other flavors and balances the sweetness. It’s a secret ingredient that makes everything taste more vibrant.
Optional additions: Consider adding 1 tablespoon of vodka or other alcohol to the finished base—alcohol doesn’t freeze, so it keeps ice cream softer and more scoopable. A tablespoon of cream cheese or mascarpone can also add tang and improve texture.
Equipment Needed
Having the right tools makes ice cream-making much easier and more enjoyable. Here’s what you’ll need:
- Medium heavy-bottomed saucepan – For heating the cream mixture and making the custard. Heavy-bottomed prevents scorching.
- Whisk – Essential for stirring the custard and preventing lumps
- Fine-mesh strainer – To strain out any cooked egg bits and ensure silky-smooth custard
- Large bowl – For cooling the custard base
- Smaller bowl – For separating and whisking egg yolks
- Digital instant-read thermometer – Critical for tempering eggs to the right temperature (170-175°F)
- Measuring cups and spoons – Accurate measurements are important in ice cream making
- Ice cream maker (optional but recommended) – Churns the ice cream while freezing for optimal texture
- Freezer-safe container with lid – A shallow, flat container (loaf pan or storage container) freezes more evenly
- Rubber spatula – For scraping bowls and folding ingredients
- Plastic wrap – To press directly onto the custard surface to prevent skin formation
- Ice bath (large bowl filled with ice water) – For rapidly cooling the hot custard
No ice cream maker? No problem! You can use the no-churn method: Pour the chilled base into a shallow pan, freeze for 45 minutes, then vigorously whisk to break up ice crystals. Repeat every 30-45 minutes for 3-4 hours until frozen. It takes more effort, but produces excellent results.
PrintVanilla Ice Cream Recipe

Luxuriously creamy homemade vanilla ice cream made with a rich custard base, heavy cream, and pure vanilla extract. This classic French-style ice cream delivers restaurant-quality results right in your own kitchen with simple ingredients and straightforward techniques.
- Prep Time: 20 minutes (plus 4-6 hours chilling time)
- Cook Time: 15 minutes
- Total Time: 5-7 hours (mostly inactive)
- Yield: 6-8 servings (about 1 quart) 1x
- Category: Dessert
- Method: Stovetop, Churning (or No-Churn)
- Cuisine: American (Southern)
- Diet: Vegetarian
Ingredients
- 2 cups heavy cream, divided
- 1 cup whole milk
- ¾ cup granulated sugar, divided
- 4-5 large egg yolks
- 2 tablespoons pure vanilla extract
- ¼ teaspoon fine sea salt
- Optional: 1 vanilla bean (split and scraped) to replace or supplement the extract
Instructions
- Prepare your workspace: Set up an ice bath (large bowl filled with ice and cold water) with a clean medium bowl nestled inside. Place a fine-mesh strainer over the bowl. This will be ready for cooling your custard quickly.
- Heat the cream mixture: In a medium heavy-bottomed saucepan, combine 1 cup of heavy cream, whole milk, ½ cup sugar, and salt. If using a vanilla bean, add the scraped seeds and empty pod to the pan. Heat over medium heat, stirring occasionally, until the mixture is steaming and small bubbles form around the edges (about 170°F). Do not let it boil. Remove from heat.
- Prepare the egg yolks: While the cream heats, whisk together egg yolks and remaining ¼ cup sugar in a medium bowl until the mixture is thick, pale yellow, and falls in ribbons from the whisk (about 2-3 minutes). This is called “ribbon stage.”
- Temper the eggs: This is the most important step! Slowly drizzle about ½ cup of the hot cream mixture into the egg yolks while whisking constantly. This gradually raises the temperature of the eggs without scrambling them. Continue adding hot cream slowly, whisking constantly, until you’ve added about half of the cream mixture to the eggs.
- Combine and cook: Pour the tempered egg mixture back into the saucepan with the remaining cream mixture, stirring constantly. Cook over medium-low heat, stirring constantly with a wooden spoon or heatproof spatula, scraping the bottom and sides of the pan. The mixture is ready when it coats the back of the spoon and reaches 170-175°F on an instant-read thermometer (about 5-8 minutes). Draw your finger through the custard on the spoon—it should leave a clear path. Do not let it boil or the eggs will curdle.
- Strain and cool: Immediately pour the custard through the fine-mesh strainer into the bowl set over the ice bath. Remove the vanilla bean pod if used. Stir in the remaining 1 cup of cold heavy cream and vanilla extract. This quickly cools the custard and stops the cooking. Stir occasionally until the mixture is completely cool (about 30 minutes).
- Chill thoroughly: Cover the bowl with plastic wrap, pressing it directly onto the surface of the custard to prevent a skin from forming. Refrigerate for at least 4-6 hours, or preferably overnight. The colder your base, the better your ice cream will be.
- Churn the ice cream: Pour the chilled custard into your ice cream maker and churn according to the manufacturer’s instructions, usually 20-30 minutes. The ice cream is done when it’s thick and resembles soft-serve consistency. It will still be quite soft.
- Freeze: Transfer the churned ice cream to a freezer-safe container. Press plastic wrap or parchment paper directly onto the surface, then cover with a lid. Freeze for at least 4 hours or until firm enough to scoop.
- Serve: Let the ice cream sit at room temperature for 5-10 minutes before scooping for the perfect texture. Scoop, serve, and enjoy!
Notes
- Make it even richer: Replace ½ cup of milk with ½ cup additional heavy cream for extra-luxurious ice cream.
- Vanilla bean option: One vanilla bean equals about 3 teaspoons extract. Use both for maximum vanilla flavor.
- No-churn method: After chilling, pour base into a shallow metal pan. Freeze 45 minutes, then vigorously whisk. Repeat every 30-45 minutes for 3-4 hours.
- Tempering is crucial: Go slowly when adding hot cream to eggs. Rushing creates scrambled eggs.
- Storage: Homemade ice cream is best within 1-2 weeks. After that, ice crystals may form.
- Alcohol trick: Add 1-2 tablespoons vodka or bourbon to the base before churning for softer, more scoopable ice cream.
Nutrition
- Serving Size: ½ cup (about 85g)/8
- Calories: 285 kcal
- Sugar: 18g
- Sodium: 65mg
- Fat: 22g
- Saturated Fat: 13g
- Unsaturated Fat: 8g
- Trans Fat: 0g
- Carbohydrates: 19g
- Fiber: 0g
- Protein: 4g
- Cholesterol: 145mg
Nutrition information is approximate and calculated based on standard ingredient measurements. Values may vary based on specific brands and ingredient substitutions.
Tips & Variations
The beauty of homemade vanilla ice cream is how easily you can customize it to your preferences. Here are some delicious ways to make this recipe your own:
Flavor Variations:
- Vanilla Bean: Use 2 vanilla beans instead of extract for intense, speckled vanilla flavor
- French Vanilla: Add an extra 2 egg yolks for even richer, custard-forward flavor
- Bourbon Vanilla: Replace 1 tablespoon vanilla extract with bourbon for grown-up sophistication
- Honey Vanilla: Replace ¼ cup sugar with honey for floral sweetness
- Brown Butter Vanilla: Brown 4 tablespoons of butter until nutty, cool, and whisk into the finished custard
Mix-In Ideas (add during last minute of churning):
- Chocolate chips, chunks, or shavings (¾ cup)
- Crushed cookies (Oreos, graham crackers, shortbread) (1 cup)
- Chopped nuts (pecans, almonds, pistachios) (½ cup, toasted)
- Fresh fruit (strawberries, peaches, cherries, diced small) (1 cup)
- Caramel or fudge swirl (½ cup, drizzled in layers during transfer to container)
- Cookie dough pieces (¾ cup)
- Brownie chunks (1 cup)
Dietary Modifications:
- Dairy-Free: Use full-fat coconut cream and coconut milk. Replace eggs with cornstarch (3 tablespoons) as thickener.
- Lower Sugar: Reduce sugar to ⅔ cup, but expect harder texture. Add 1 tablespoon corn syrup to help.
- Egg-Free: Use 2 tablespoons cornstarch mixed with a little milk instead of eggs. Won’t be quite as rich but still delicious.
Texture Adjustments:
- Super Creamy: Add 2 tablespoons cream cheese or mascarpone
- Lighter: Use 1½ cups cream and 1½ cups milk
- Softer Scoop: Add 2 tablespoons vodka, corn syrup, or honey
Pro Chef Tips
These professional techniques will elevate your homemade vanilla ice cream from good to extraordinary:
Temperature control is everything: Use an instant-read thermometer religiously. Custard cooked to exactly 170-175°F will be silky and thick. Go higher and you risk scrambled eggs. Stay lower and you won’t get proper thickening. The custard should coat a spoon and hold a line when you draw your finger through it.
Age your base: Professional ice cream makers let their custard “age” in the refrigerator for 12-24 hours before churning. This allows the fat molecules to crystallize properly, proteins to hydrate fully, and flavors to develop and meld. The result is noticeably smoother, richer ice cream. If you have time, always make your base the day before.
Keep everything cold: Pre-chill your ice cream maker bowl for at least 24 hours (it should be frozen solid). Before churning, place your empty storage container in the freezer. This prevents the freshly churned ice cream from melting when transferred. Work quickly when moving ice cream from machine to container.
The soft-serve stage matters: Don’t over-churn your ice cream. Stop when it reaches soft-serve consistency and holds its shape—it should look like thick frosting. Over-churning incorporates too much air and can create a grainy texture. The ice cream will firm up significantly in the freezer.
Prevent ice crystals: Press plastic wrap or parchment paper directly onto the surface of the ice cream before covering with a lid. This prevents air exposure, which causes ice crystals and freezer burn. For long-term storage, cover the container with a second layer of plastic wrap before adding the lid.
The scoop trick: For perfect scoops, dip your ice cream scoop in hot water and wipe it dry between scoops. The warm metal glides through the ice cream smoothly. For professional-looking quenelles (oval scoops), use two warm spoons to shape the ice cream.
Stabilize with corn syrup: Adding 2 tablespoons of light corn syrup or glucose syrup to your base (reduce sugar by 2 tablespoons to compensate) creates a smoother texture and prevents ice crystals. This is what commercial producers use. Corn syrup doesn’t freeze solid like sugar, keeping ice cream scoopable.
Bloom your vanilla: For maximum vanilla flavor, split your vanilla beans (if using) and steep them in the warm cream mixture for 30 minutes before proceeding with the recipe. This extracts more flavor compounds. Even better, add the vanilla extract to your custard while it’s still warm, then chill—heat releases more aromatic compounds.
Common Mistakes to Avoid
Even experienced cooks can run into issues when making ice cream. Here are the most common problems and how to prevent them:
Scrambled eggs in your custard: This happens when eggs get too hot too quickly. Always temper your eggs by adding hot liquid gradually while whisking constantly. Cook over medium-low heat (never high) and stir constantly, especially around the bottom and sides. The second you see any sign of curdling, immediately strain the custard into your ice bath. A few small bits can be strained out, but if you see chunks, start over—you can’t fix scrambled eggs.
Icy, grainy texture: Several factors cause this. First, not chilling the base long enough—it must be very cold (ideally 40°F or below) before churning. Second, insufficient fat content—don’t use low-fat dairy. Third, too little sugar—sugar prevents ice crystals. Fourth, churning too slowly or freezing without churning. Always churn at high speed for proper texture. Finally, storing ice cream too long (over 2 weeks) inevitably creates ice crystals.
Rock-hard ice cream: If your ice cream freezes solid and is impossible to scoop, you likely used too little sugar or too little fat. Sugar and fat both prevent ice cream from freezing rock-hard. Adding 1-2 tablespoons of alcohol (vodka, bourbon, rum) helps keep it scoopable without affecting flavor. Also, commercial freezers are much colder than home freezers—if your freezer runs very cold, add that alcohol.
Custard won’t thicken: You probably didn’t heat it enough. Egg yolks thicken properly at 170°F and up. Use a thermometer rather than guessing. If your custard still seems thin after cooking, whisk 1 tablespoon of cornstarch with 2 tablespoons cold milk, add to the custard, and heat while stirring until it thickens.
Eggy flavor: This means either your eggs weren’t fresh, you overcooked the custard (above 180°F), or you didn’t cool it quickly enough. Always use fresh eggs, monitor temperature carefully, and immediately strain and cool the custard. Adding enough vanilla also masks any slight egg flavor. If your custard tastes eggy, add an extra tablespoon of vanilla extract.
Ice cream melts too fast: This usually means insufficient churning. Ice cream needs to be churned until very thick (like soft-serve) before freezing. Under-churned ice cream has larger ice crystals and melts quickly. Make sure your ice cream maker bowl is completely frozen (should be solid with no liquid sloshing) and churn for the full recommended time.
Freezer burn: Always press plastic wrap directly onto the ice cream surface, then cover tightly with a lid. Avoid storing ice cream in the freezer door where temperatures fluctuate. Place it in the back of the freezer where it’s coldest and most stable.
Storage & Meal Prep
Refrigerator Storage (custard base): The unwhipped custard base can be stored in the refrigerator for up to 3 days before churning. In fact, aging it 12-24 hours improves the final texture. Keep it covered with plastic wrap pressed directly on the surface. Give it a good stir before churning.
Freezer Storage (finished ice cream): Homemade ice cream is best consumed within 1-2 weeks of making it. Without commercial stabilizers, it’s more susceptible to ice crystals forming over time. Store in an airtight, freezer-safe container with plastic wrap pressed directly on the surface. Keep in the back of the freezer (not the door) where temperature is most consistent. While safe to eat for months, quality deteriorates after 2 weeks.
Preventing freezer burn: The enemy of ice cream is air exposure. Always use an airtight container, press plastic wrap or parchment paper on the surface, and cover with a tight lid. Some people add a layer of plastic wrap over the container, then the lid for extra protection. If ice crystals do form on top, scrape them off before serving—the ice cream underneath should still be fine.
Reheating tips: Ice cream doesn’t need reheating, of course, but if it’s too hard to scoop straight from the freezer, let it sit at room temperature for 5-10 minutes to soften slightly. You can also microwave it for 5-10 seconds at 50% power, but watch carefully—you want it softened, not melted. A professional trick: store your ice cream in a slightly wider, shallower container rather than a tall, narrow one—it’s easier to scoop and softens more evenly.
Portion control tip: If you want individual servings ready to go, scoop ice cream into muffin tins lined with plastic wrap, freeze until firm, then pop them out and store in a freezer bag. Pull out one serving at a time.
Make-Ahead & Freezer Notes
Ice cream is the ultimate make-ahead dessert. Here’s how to plan for perfect results:
Timeline for preparation:
- Day before serving: Make custard base, chill overnight (this actually improves texture)
- Morning of serving: Churn the ice cream, freeze for at least 4 hours
- Serving time: Remove from freezer 5-10 minutes before scooping
Can you make it weeks in advance? Absolutely! While homemade ice cream is at its peak within the first week, it’s still delicious for 2-3 weeks if stored properly. After that, ice crystals may form and texture can become grainy, though it remains perfectly safe to eat.
Freezing tips for best results:
- Use a shallow, flat container rather than a tall, narrow one—ice cream freezes more evenly
- Fill the container nearly full, leaving minimal air space
- Press plastic wrap directly onto the surface before adding the lid
- Label with the date so you know when you made it
- Never refreeze ice cream that’s fully melted—the texture will be ruined
Best reheating method: Again, there’s no “reheating” for ice cream, but to serve it at optimal temperature, remove from freezer 5-10 minutes before serving. If you’re in a hurry, microwave at 50% power in 5-second intervals. The goal is to soften it just enough to scoop easily while keeping it frozen and creamy.
Batch freezing: This recipe makes about 1 quart. If you want to make a larger batch for a party, multiply the recipe but make separate batches rather than doubling in one pot—custard can be tricky in large quantities. Churn in batches too if your ice cream maker has a smaller capacity.
For parties and events: Make ice cream 2-3 days before your event. This gives it time to freeze properly. Scoop into bowls or cones just before serving. If you’re serving to a crowd, consider pre-scooping into individual portions on a parchment-lined baking sheet, freezing them, then transferring to a container for easy serving.
Serving Suggestions
Vanilla ice cream is incredibly versatile, but here are some inspired pairings that take it from simple to spectacular:
Classic dessert companions:
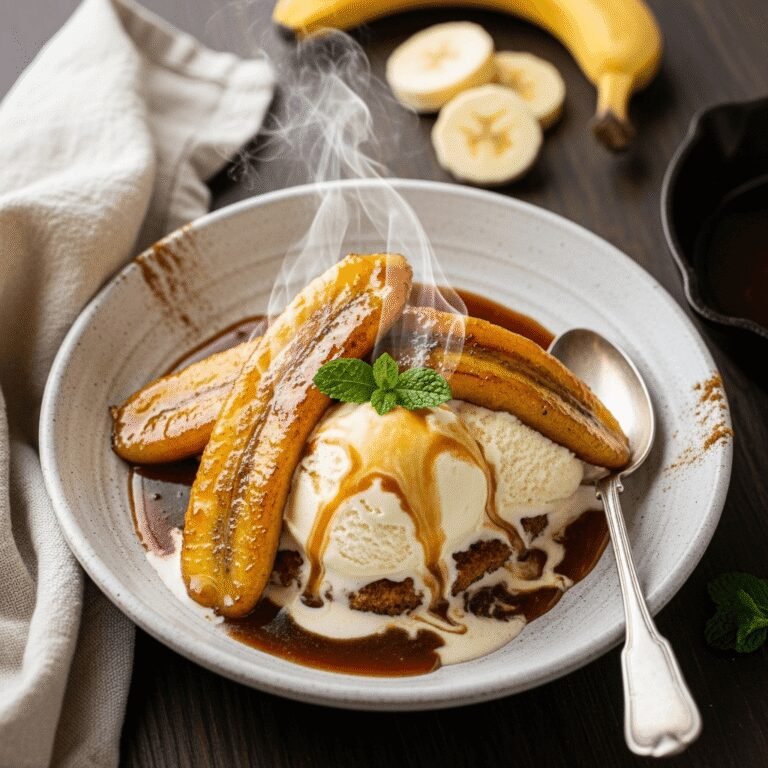
- Warm apple pie, cherry pie, or peach cobbler (the temperature contrast is heavenly)
- Hot fudge brownies or molten chocolate lava cake
- Warm chocolate chip cookies or peanut butter cookies
- Fresh berry crisp or fruit crumble
- Banana split with all the fixings (whipped cream, chocolate sauce, cherries, nuts)
Sophisticated pairings:
- Espresso or affogato (ice cream with a shot of hot espresso poured over)
- Grilled peaches or pineapple with a drizzle of honey
- Dark chocolate torte or flourless chocolate cake
- Fresh berries macerated in balsamic vinegar and sugar
- Lemon olive oil cake or pound cake
Toppings and sauces:
- Hot fudge sauce, caramel sauce, or butterscotch
- Fresh strawberries, blueberries, raspberries, or sliced peaches
- Toasted nuts (pecans, almonds, walnuts, pistachios)
- Crushed cookies (Oreos, graham crackers, biscotti)
- Whipped cream and a maraschino cherry
- Chocolate shavings, sprinkles, or cookie crumbles
- Maple syrup or honey drizzle
- Peanut butter or Nutella warmed for drizzling
Beverages to serve alongside:
- Strong black coffee or cappuccino
- Dessert wine (Moscato, Port, or late-harvest Riesling)
- Root beer or cola (for floats!)
- Irish coffee or spiked hot chocolate
- Fresh lemonade or iced tea
Creative serving ideas:
- Ice cream sandwiches with homemade cookies
- Milkshakes or malts blended with milk
- Ice cream cones (sugar cones, waffle cones, or cake cones)
- Parfaits layered with granola and fruit
- Ice cream pie with a graham cracker or cookie crust
FAQs Section
Can I make vanilla ice cream without an ice cream maker?
Yes! Use the no-churn method: After chilling your custard base, pour it into a shallow metal pan and freeze for 45 minutes. Remove and vigorously whisk to break up ice crystals. Return to freezer and repeat this whisking process every 30-45 minutes for 3-4 hours until frozen. The texture won’t be quite as smooth as machine-churned, but it’s still delicious. Alternatively, make a no-churn version by whipping 2 cups heavy cream to stiff peaks, then folding in 1 can sweetened condensed milk and 2 tablespoons vanilla extract—freeze without stirring.
Why did my ice cream turn out icy instead of creamy?
Several culprits: The base wasn’t cold enough before churning (should be 40°F or colder), insufficient fat content (use full-fat dairy), too little sugar (sugar prevents ice crystals), churning too slowly, or storing too long. Also, if you freeze ice cream without churning, it will always be icier. Make sure to follow the recipe precisely and churn immediately after removing from the refrigerator.
How long does homemade vanilla ice cream last in the freezer?
Homemade ice cream is best within 1-2 weeks. It’s safe to eat for several months, but quality declines over time as ice crystals form. Without commercial stabilizers, homemade ice cream is more susceptible to textural changes. For best results, consume within 2 weeks and always store with plastic wrap pressed directly on the surface.
Can I use vanilla extract instead of vanilla beans?
Absolutely! In fact, this recipe is written for vanilla extract. Use 2 tablespoons of pure vanilla extract (never imitation). If you want to use vanilla beans, substitute 1-2 beans (split and scraped) for the extract. Steep the seeds and pods in the warming cream mixture, then remove pods before churning. For ultimate vanilla flavor, use both vanilla bean and extract.
What’s the difference between French vanilla and regular vanilla ice cream?
French vanilla traditionally refers to ice cream made with a custard base (containing egg yolks), which gives it a richer, creamier texture and pale yellow color. “Regular” vanilla (Philadelphia style) is made without eggs, using just cream, milk, sugar, and vanilla. This recipe is French-style. The egg yolks create a more luxurious, silky texture compared to eggless versions.
Can I reduce the sugar in this recipe?
You can reduce it slightly (to about ⅔ cup), but sugar does more than sweeten—it prevents ice cream from freezing rock-hard. Go much lower and you’ll end up with very hard, icy ice cream that’s difficult to scoop. If you want less sweetness but good texture, replace 2 tablespoons of sugar with 2 tablespoons corn syrup or honey, which keep ice cream soft without adding as much sweetness.
Why do I need to temper the eggs? Can’t I just add them directly?
Tempering gradually raises the temperature of the eggs so they don’t scramble when they hit the hot cream. If you pour cold eggs directly into hot cream, they’ll cook instantly into scrambled eggs, ruining your custard. Tempering is essential—add hot cream to eggs slowly while whisking constantly. Take your time with this step; rushing causes scrambled eggs.
Conclusion
There’s truly nothing like the satisfaction of making your own vanilla ice cream from scratch. The process connects you to a centuries-old tradition of frozen desserts, while the results—creamy, rich, intensely vanilla-flavored ice cream—far surpass anything you can buy at the store. Whether you’re serving it to guests, making it as a family activity, or simply treating yourself on a hot summer day, this homemade vanilla ice cream recipe delivers pure joy in every spoonful.
The beauty of mastering this basic recipe is that it opens up endless possibilities. Once you’re comfortable with the technique, you can experiment with different flavors, mix-ins, and creative combinations. From birthday parties to holiday gatherings, from simple weeknight treats to impressive dinner party desserts, vanilla ice cream is always welcome.
So grab your whisk, gather your ingredients, and get ready to create something truly special. Your kitchen is about to smell absolutely amazing, and your freezer is about to be stocked with the best ice cream you’ve ever tasted. Once you make this recipe, you’ll understand why homemade will always beat store-bought.