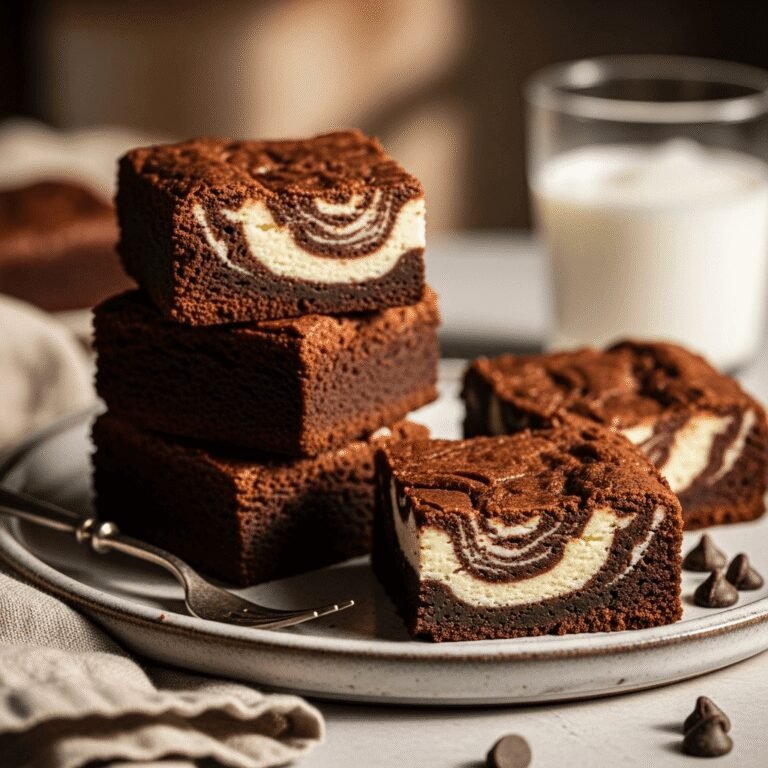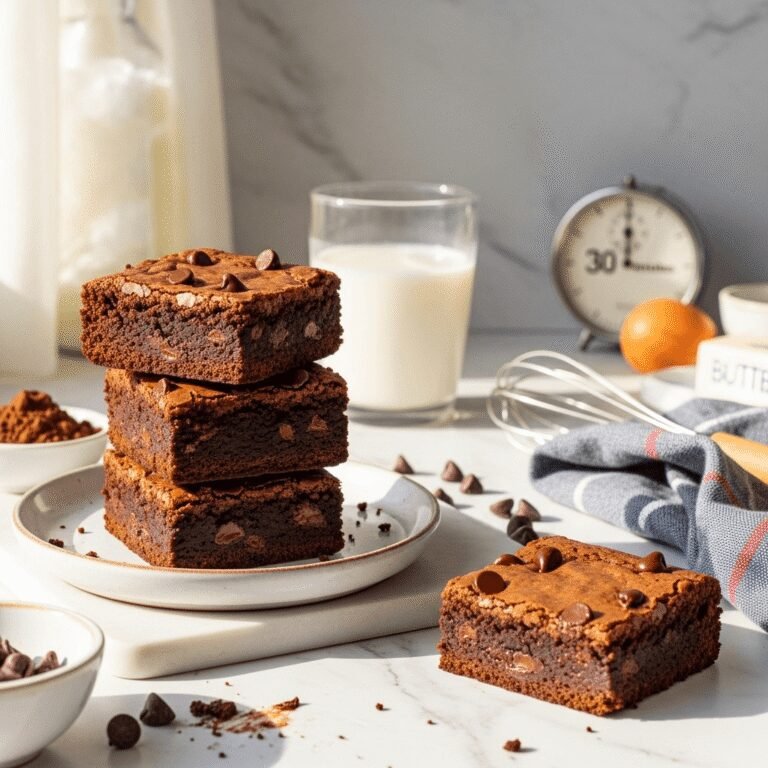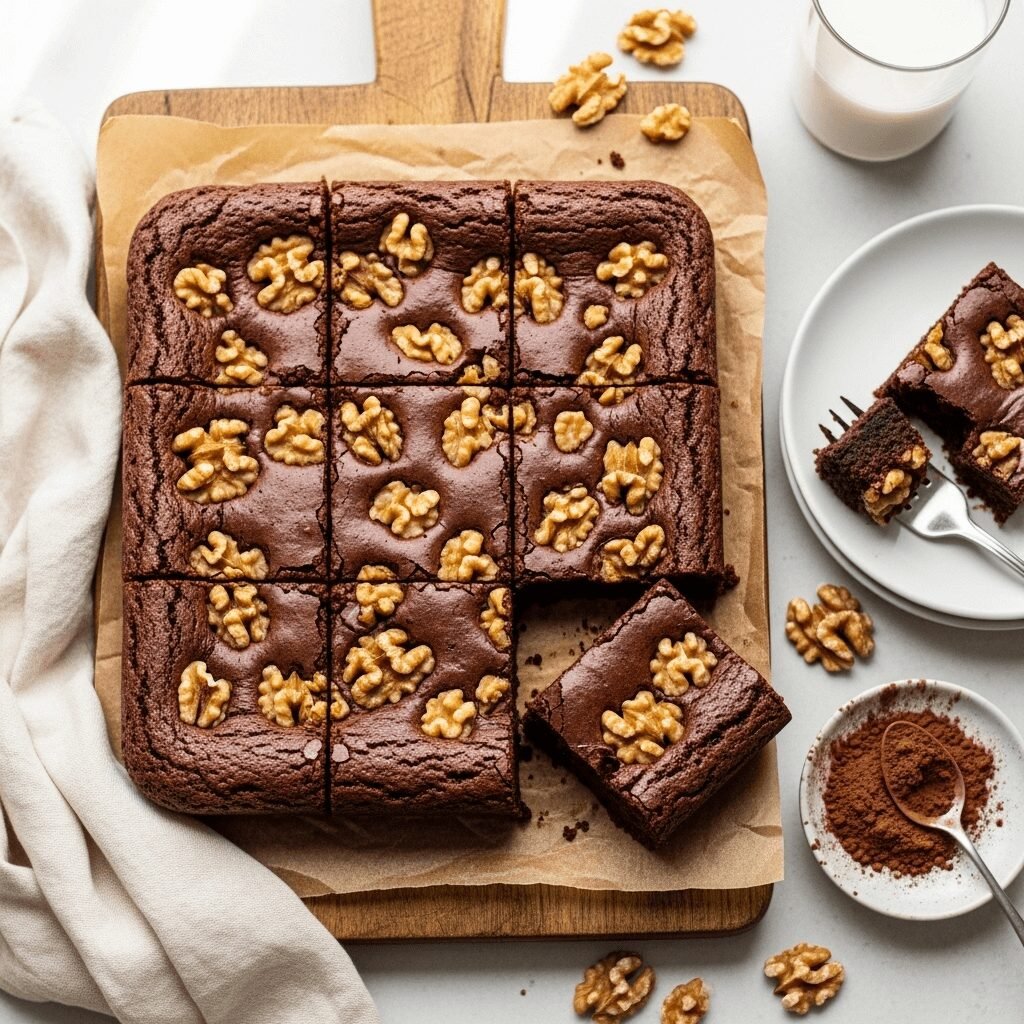
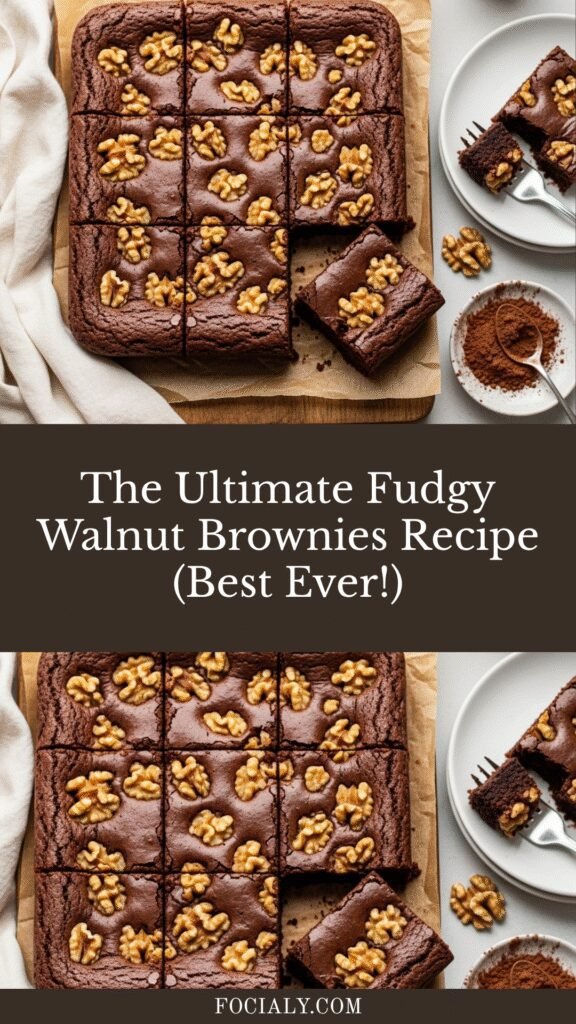
The Ultimate Fudgy Walnut Brownies Recipe (Best Ever!)
There’s something absolutely magical about biting into a perfectly baked brownie—that crispy, crackly top giving way to a dense, fudgy center loaded with toasted walnuts. These walnut brownies are everything a brownie should be: intensely chocolatey, satisfyingly rich, and blessed with that perfect balance of chewy edges and gooey middle. Whether you’re whipping up a batch for a bake sale, bringing dessert to a potluck, or simply treating yourself on a Wednesday evening (no judgment here!), this recipe delivers bakery-quality results every single time.
Introduction to Walnut Brownies
Walnut brownies represent the gold standard of American home baking—a classic chocolate dessert that’s been gracing kitchen counters and school fundraisers for generations. Unlike their cake-like cousins, these brownies embrace a dense, fudgy texture that chocolate lovers dream about. The addition of toasted walnuts brings a delightful crunch and earthy, buttery flavor that perfectly complements the deep chocolate notes.
These brownies are incredibly versatile, making them ideal for virtually any occasion. Serve them warm with vanilla ice cream for an impressive dinner party dessert, pack them in lunchboxes for an afternoon pick-me-up, or wrap them individually as heartfelt homemade gifts during the holidays. They’re equally at home at elegant gatherings and casual family game nights, which is precisely why they’ve remained a beloved staple in American kitchens for decades.
History & Background of Brownies
The brownie’s origin story is as rich as its chocolate flavor. Most food historians trace the first brownies back to the late 19th century in the United States, with several competing legends about their invention. One popular story credits Bertha Palmer, a prominent Chicago socialite, who requested a dessert for ladies attending the 1893 World’s Columbian Exposition that would be more portable than cake but richer than cookies. Her chef at the Palmer House Hotel created a decadent chocolate bar with walnuts and an apricot glaze.
Another origin tale suggests that brownies were born from a happy accident when a forgetful baker forgot to add baking powder to chocolate cake batter, resulting in a dense, flat confection that was absolutely delicious. Regardless of which story holds the truth, brownies officially appeared in print in the 1906 edition of “The Boston Cooking-School Cook Book” by Fannie Farmer, cementing their place in American culinary history.
The walnut brownie specifically became an East Coast tradition, with walnuts being readily available and affordable in northeastern states. Throughout the 20th century, brownies evolved from a fancy dessert into an everyday treat, appearing at school bake sales, church potlucks, and family gatherings across the country. Today, brownies remain one of the most popular homemade desserts in America, with countless variations—but many bakers and chocolate enthusiasts agree that the classic fudgy walnut version simply cannot be beaten.
Why You’ll Love This Walnut Brownies Recipe
This isn’t just another brownie recipe you’ll try once and forget—this is THE brownie recipe that’ll become your go-to for life. These brownies strike that perfect balance between intensely chocolatey and not-too-sweet, with a texture that’s genuinely fudgy (not dry or cakey), and the toasted walnuts add incredible depth and crunch that makes every bite exciting.
Here’s why this recipe will become your new favorite:
- Foolproof and beginner-friendly – Just one bowl, simple pantry ingredients, and straightforward steps mean even novice bakers will succeed beautifully
- Budget-conscious – No expensive ingredients or specialty items required; everything’s available at your regular grocery store
- Impressive results – These taste like they came from an upscale bakery, with that signature crackly top and perfect fudgy texture
- Crowd-pleaser guaranteed – I’ve never met anyone who doesn’t love these brownies; they’re universally adored by kids and adults alike
- Make-ahead friendly – Actually taste even better the next day, making them perfect for planning ahead
- Endlessly customizable – The base recipe is perfection, but you can easily adapt it with different nuts, add-ins, or toppings
- Quick preparation – From start to oven takes only about 15 minutes of active work; the oven does the rest
- Perfect for any occasion – Casual enough for Tuesday night but impressive enough for holiday entertaining
Ingredient Notes
Understanding your ingredients is the secret to baking success. Let me walk you through what goes into these incredible brownies and why each component matters.
Unsalted Butter – The foundation of rich flavor and that coveted fudgy texture. Using unsalted allows you to control the exact salt level. If you only have salted butter, reduce the added salt by half. Make sure it’s good quality—you’ll taste the difference.
Bittersweet or Semisweet Chocolate – Choose chocolate you’d enjoy eating on its own, as it’s the star here. Bittersweet (60-70% cacao) creates deeper, more complex brownies, while semisweet (around 50-60% cacao) yields sweeter results. Avoid chocolate chips for melting; use bar chocolate instead for better texture. In a pinch, chocolate chips work but may create a slightly different consistency.
Granulated Sugar – Provides sweetness and contributes to that gorgeous crackly top. Don’t substitute with brown sugar entirely, as you’ll lose the crackle, but you can replace up to half the sugar with brown sugar for chewier, more caramel-like brownies.
Eggs – Create structure and contribute to the fudgy texture. Use large eggs at room temperature for best results. They should be incorporated one at a time for proper emulsification.
Vanilla Extract – Pure vanilla extract is worth the investment here. It enhances and deepens the chocolate flavor remarkably. Imitation vanilla works in a pinch but lacks the complexity.
All-Purpose Flour – Provides just enough structure without making the brownies cakey. Measure correctly by spooning into your measuring cup and leveling off—don’t pack it down.
Unsweetened Cocoa Powder – Intensifies the chocolate flavor significantly. Dutch-process cocoa creates a darker, more mellow flavor, while natural cocoa powder adds brightness. Either works beautifully.
Salt – Don’t skip it! Salt is a flavor enhancer that makes the chocolate taste even more chocolatey. It’s essential for balanced, complex brownies.
Walnuts – Toasting them first (which takes just 5-8 minutes) transforms their flavor from flat to rich, buttery, and incredibly aromatic. Raw walnuts work too, but you’ll miss that extra dimension. Feel free to substitute with pecans, almonds, or leave them out entirely for pure chocolate bliss.
Equipment Needed
Having the right tools makes baking so much easier and more enjoyable. Here’s what you’ll need for perfect brownies:
- 9×13-inch baking pan – The standard size for this recipe; glass, metal, or ceramic all work (metal browns slightly more)
- Parchment paper or aluminum foil – For easy removal and cleanup; leave overhang on sides to lift brownies out
- Medium saucepan – For melting butter and chocolate together
- Large mixing bowl – If not using the saucepan for mixing, you’ll need a bowl large enough to accommodate all ingredients
- Whisk – For beating eggs and incorporating ingredients smoothly
- Rubber spatula – For folding in flour and nuts, and scraping every bit of batter into the pan
- Measuring cups and spoons – Accurate measurements matter in baking
- Cutting board and sharp knife – For chopping walnuts and cutting finished brownies
- Small baking sheet – For toasting the walnuts
- Toothpick or cake tester – For checking doneness (though we want them slightly underdone for fudginess)
Walnut Brownies Recipe
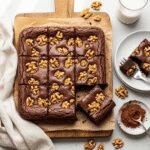
The ultimate fudgy walnut brownies with a shiny, crackly top, intensely chocolatey center, and perfect chewy texture. This foolproof recipe uses simple ingredients to create bakery-quality brownies that’ll disappear in minutes!
- Prep Time: 15 minutes
- Cook Time: 28-32 minutes
- Total Time: 45-50 minutes
- Yield: 24 brownies 1x
- Category: Dessert
- Method: Baking
- Cuisine: American
- Diet: Vegetarian
Ingredients
- 1 cup (2 sticks) unsalted butter
- 8 ounces bittersweet or semisweet chocolate, chopped
- 1¾ cups granulated sugar
- 4 large eggs, at room temperature
- 2 teaspoons pure vanilla extract
- 1 cup all-purpose flour
- ⅔ cup unsweetened cocoa powder
- ½ teaspoon salt
- 1½ cups walnuts, roughly chopped and toasted
Instructions
- Preheat your oven to 350°F (175°C). Line a 9×13-inch baking pan with parchment paper, leaving a 2-inch overhang on two opposite sides for easy removal. Lightly grease the parchment with butter or cooking spray.
- Toast the walnuts by spreading them on a baking sheet and placing in the preheated oven for 6-8 minutes, stirring once halfway through, until fragrant and lightly golden. Remove and let cool while you prepare the batter.
- Melt the butter and chocolate together in a medium saucepan over low heat, stirring frequently until completely smooth and combined. Remove from heat and let cool for 5 minutes.
- Add the sugar to the chocolate mixture and whisk vigorously for about 1 minute until well incorporated and slightly glossy.
- Add the eggs one at a time, whisking well after each addition. The mixture should become thick, smooth, and glossy. Whisk in the vanilla extract.
- Combine dry ingredients by sifting together (or whisking) the flour, cocoa powder, and salt in a separate bowl.
- Fold in the dry ingredients using a rubber spatula, stirring just until no flour streaks remain. Don’t overmix—this is crucial for fudgy brownies. The batter should be thick and glossy.
- Fold in the toasted walnuts, reserving about ¼ cup to sprinkle on top if desired.
- Pour the batter into your prepared pan, spreading it evenly to the corners with your spatula. Sprinkle reserved walnuts on top if using.
- Bake for 28-32 minutes until a toothpick inserted 2 inches from the edge comes out with just a few moist crumbs attached. The center should still look slightly underdone—this ensures fudgy brownies. Don’t overbake!
- Cool completely in the pan on a wire rack (this takes about 2 hours). Resist cutting them warm, as they’ll be too soft and fall apart.
- Lift the brownies out using the parchment overhang, place on a cutting board, and cut into 24 squares using a sharp knife wiped clean between cuts for neat edges.
Notes
- For the fudgiest brownies, slightly underbake them; the center should still jiggle very slightly when you shake the pan
- Brownies continue cooking as they cool, so taking them out when they look slightly underdone is perfect
- For clean cuts, refrigerate the brownies for 30 minutes before slicing, and use a sharp knife warmed under hot water and wiped dry
- Don’t skip toasting the walnuts—it makes a huge difference in flavor
- Brownies taste even better the day after baking once the flavors have melded
Nutrition
- Serving Size: 1 brownie
- Calories: 245
- Sugar: 18g
- Sodium: 65mg
- Fat: 15g
- Saturated Fat: 7g
- Unsaturated Fat: 7g
- Trans Fat: 0g
- Carbohydrates: 27g
- Fiber: 2g
- Protein: 4g
- Cholesterol: 55mg
Tips & Variations
The beauty of this brownie recipe lies in its versatility. Once you’ve mastered the base, feel free to get creative!
Nut Variations: Swap walnuts for pecans, hazelnuts, almonds, or macadamia nuts. You can also use a combination of different nuts for interesting texture and flavor complexity.
Extra Chocolatey: Fold in ½ to 1 cup of chocolate chips (dark, milk, or white) along with the walnuts for pockets of melty chocolate throughout.
Espresso Enhancement: Add 1 tablespoon of instant espresso powder to the melted chocolate mixture to deepen and intensify the chocolate flavor without making them taste like coffee.
Salted Caramel Swirl: Drizzle ½ cup of salted caramel sauce over the batter before baking and swirl gently with a knife for gorgeous marbled brownies with sweet-salty flavor.
Mint Chocolate: Add ½ teaspoon of peppermint extract along with the vanilla for refreshing mint brownies. Top with crushed candy canes during holidays!
Peanut Butter Swirl: Dollop ½ cup of peanut butter over the batter and swirl with a knife before baking for that addictive chocolate-peanut butter combination.
Gluten-Free Option: Replace all-purpose flour with a 1:1 gluten-free baking flour blend. Make sure all other ingredients are certified gluten-free.
Boozy Brownies: Add 2 tablespoons of bourbon, rum, or Grand Marnier along with the vanilla for sophisticated, adult-friendly brownies.
Pro Chef Tips
These professional techniques will elevate your brownies from great to absolutely extraordinary:
Room Temperature Eggs Are Non-Negotiable: Cold eggs don’t emulsify properly with the warm chocolate mixture, which can lead to grainy texture. Let eggs sit out for 30 minutes, or place them (still in shells) in warm water for 5 minutes before using.
The Mixing Method Matters: When adding eggs, whisk vigorously for at least 20 seconds after each addition. This incorporates air and creates that signature shiny, crackly top. However, once you add flour, switch to gentle folding to avoid overdeveloping gluten, which makes brownies tough and cakey.
Invest in Quality Chocolate: Since chocolate is the star ingredient, use the best you can afford. Ghirardelli, Guittard, or Callebaut create noticeably better brownies than generic brands. The chocolate should have cocoa butter as the fat, not palm oil.
The Toothpick Test Isn’t Perfect: For fudgy brownies, you actually want the toothpick to come out with some moist crumbs. If it comes out completely clean, you’ve overbaked them. Test about 2 inches from the edge, not in the very center.
Strategic Pan Positioning: Place your baking pan on the center rack of the oven for even heat distribution. If you have a finicky oven with hot spots, rotate the pan halfway through baking.
The Resting Period Is Crucial: Brownies absolutely must cool completely before cutting, preferably for at least 2-3 hours. They’re still setting up as they cool, and cutting too early results in a gooey mess rather than neat squares.
Temperature Check for Precision: If you have an instant-read thermometer, brownies are perfectly fudgy at 190-195°F in the center. Insert the thermometer at an angle into the center of the pan.
Common Mistakes to Avoid
Learn from these pitfalls so your brownies turn out perfect every time:
Overbaking Is the Number One Crime: This is the most common mistake that turns fudgy dreams into dry disappointment. Set a timer for the minimum baking time and check early. Remember, brownies continue cooking in the hot pan after you remove them from the oven.
Overmixing After Adding Flour: Once flour is added, you’re developing gluten. Too much mixing creates tough, cakey brownies instead of tender, fudgy ones. Fold just until flour disappears—some lumps are perfectly fine.
Using Chocolate Chips for Melting: While convenient, chocolate chips contain stabilizers that prevent them from melting as smoothly as bar chocolate. They’ll work in a pinch but may create a grainier texture. Always chop bar chocolate for melting.
Not Greasing the Parchment: Even with parchment, brownies can stick along the edges. A light coating of butter or cooking spray ensures they release cleanly and your corners remain intact.
Cutting While Warm: I know they smell amazing and you’re eager to dig in, but warm brownies are structurally fragile and will fall apart or smear. Patience is rewarded with clean, beautiful squares.
Skipping the Nut Toasting: Raw nuts taste flat and can even be slightly bitter. Just 6-8 minutes in the oven transforms them into aromatic, buttery treasures that elevate your brownies significantly.
Inaccurate Measuring: Baking is chemistry, and ratios matter. Too much flour makes dry brownies; too little creates a gooey puddle. Spoon flour into measuring cups and level off—don’t scoop and pack.
Storage & Meal Prep
Proper storage keeps your brownies tasting fresh and fudgy for days:
Room Temperature Storage: Store completely cooled brownies in an airtight container at room temperature for up to 4 days. Place parchment paper between layers if stacking to prevent sticking.
Refrigerator Storage: Brownies keep in the refrigerator for up to 1 week in an airtight container. They’ll become firmer and denser (which some people actually prefer!). Let them come to room temperature for 20-30 minutes before serving for the best texture.
Individual Wrapping: For grab-and-go treats or lunchboxes, wrap individual brownies tightly in plastic wrap. They’ll stay fresh for 3-4 days and are perfectly portable.
Reheating Tips: For that fresh-baked taste, microwave individual brownies for 10-15 seconds (no more, or they’ll become tough). Alternatively, wrap in foil and warm in a 300°F oven for 5-7 minutes.
Keeping Them Fudgy: The key to maintaining that coveted fudgy texture is preventing moisture loss. Make sure your storage container seals tightly, and consider adding a slice of bread to the container (it releases moisture that keeps brownies soft).
Make-Ahead & Freezer Notes
These brownies are absolutely fantastic for advance preparation, making your life easier when you need dessert in a hurry:
Baking Ahead: Brownies actually improve with age! Make them 1-2 days before you need them—the flavors deepen and meld beautifully, creating even more complex chocolate taste.
Freezing Whole Pan: Once completely cooled, wrap the entire uncut pan tightly in plastic wrap, then cover with aluminum foil. Freeze for up to 3 months. Thaw overnight in the refrigerator, then cut and serve.
Freezing Individual Portions: Cut brownies into squares, wrap each individually in plastic wrap, then place in a freezer-safe zip-top bag or container. Freeze for up to 3 months. This method lets you grab single servings whenever a chocolate craving hits!
Thawing Instructions: For whole pan, thaw overnight in refrigerator. For individual brownies, let sit at room temperature for 30-45 minutes, or microwave frozen for 20-25 seconds for warm brownies.
Freezing Unbaked Batter: Yes! Pour batter into your prepared pan, cover tightly with plastic wrap and foil, and freeze for up to 2 months. Bake directly from frozen, adding 5-10 extra minutes to the baking time.
Best Reheating Method from Frozen: Unwrap individual brownies and microwave for 15-20 seconds, or wrap in foil and heat in a 300°F oven for 8-10 minutes until warmed through. Serve with ice cream and no one will believe they were frozen!
Serving Suggestions
While these brownies are absolutely delicious on their own, here are some serving ideas that’ll make them even more spectacular:
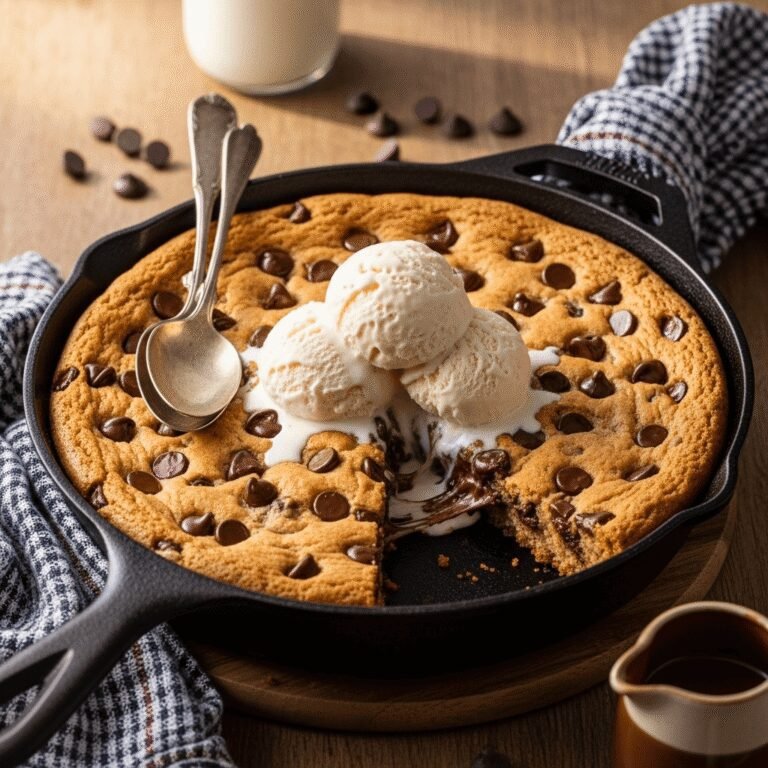
Classic À La Mode: Serve warm brownies with a generous scoop of vanilla ice cream. The temperature contrast between warm brownie and cold ice cream is pure magic. Try salted caramel, coffee, or mint chocolate chip ice cream for exciting variations.
Dessert Board Centerpiece: Cut brownies into smaller squares and arrange on a dessert board alongside fresh berries, whipped cream, chocolate sauce, and caramel for a stunning, interactive dessert experience.
Brownie Sundae Bar: Set up a DIY sundae bar with brownies as the base, plus ice cream, whipped cream, chocolate sauce, caramel, sprinkles, crushed cookies, and cherries. Perfect for parties!
With Coffee or Milk: The classic pairing! A glass of cold milk or a hot cup of coffee perfectly complements the rich chocolate. Try Mexican hot chocolate for an extra special treat.
Dressed Up for Company: Dust with powdered sugar, drizzle with melted chocolate or caramel, add a dollop of whipped cream, and garnish with a fresh raspberry or mint sprig for an elegant presentation.
Brownie Trifle: Cube brownies and layer in glasses with whipped cream, chocolate pudding, and fresh berries for a show-stopping dessert.
Breakfast (We Won’t Judge!): Honestly, these brownies pair beautifully with your morning coffee. Add a smear of peanut butter for protein and call it breakfast.
FAQs
Q: Why are my brownies cakey instead of fudgy?
A: Several factors contribute to cakey brownies: overbaking is the most common culprit, but overmixing after adding flour, using too much flour, or not enough fat (butter/chocolate) can also cause this. Make sure to slightly underbake, mix gently once flour is added, and measure flour accurately by spooning and leveling.
Q: Can I make these brownies without nuts?
A: Absolutely! Simply omit the walnuts entirely for pure chocolate brownies. You can also replace them with chocolate chips, dried cherries, toffee bits, or shredded coconut if you’d like a different add-in.
Q: How do I know when brownies are done?
A: Insert a toothpick about 2 inches from the edge of the pan. For fudgy brownies, it should come out with a few moist crumbs—not wet batter, but definitely not clean. The center should look slightly underdone and still jiggle very slightly when you shake the pan gently.
Q: Can I use milk chocolate instead of dark chocolate?
A: You can, but the results will be significantly sweeter and less complex. Milk chocolate contains more sugar and less cocoa, so your brownies may also be a bit softer. For best results, stick with semisweet or bittersweet chocolate.
Q: Why do my brownies have a cracked, flaky top?
A: Good news—that crackly, shiny top is actually desirable! It comes from vigorously beating the eggs and sugar, which creates a meringue-like layer. If you don’t want it, mix the eggs more gently.
Q: Can I double this recipe?
A: Yes! Double all ingredients and use two 9×13-inch pans, or bake in a large roasting pan. Keep in mind that a very thick layer in one large pan will require significantly longer baking time and may cook unevenly.
Q: How can I make cleaner cuts?
A: Chill the brownies for 30 minutes before cutting, use a long, sharp knife, and wipe the blade clean with a warm, damp cloth between each cut. Some bakers also spray the knife with cooking spray for ultra-clean cuts.
Conclusion
There you have it—the ultimate guide to baking absolutely perfect, intensely fudgy walnut brownies that’ll have everyone asking for the recipe! These brownies represent everything wonderful about home baking: simple ingredients, straightforward technique, and extraordinary results that taste like you spent hours in the kitchen.
The beauty of this recipe is that it’s nearly foolproof, making it perfect whether you’re a confident baker or just starting your baking journey. The rich chocolate flavor, fudgy texture, and crunchy walnuts create a brownie experience that’s truly unforgettable. Once you make these, they’ll become your go-to dessert for potlucks, bake sales, holiday gatherings, or those evenings when only chocolate will do.
I’d absolutely love to hear how your brownies turn out! Drop a comment below sharing your results, any fun variations you tried, or questions you might have. And please, do me a favor—snap a photo of your gorgeous brownies and share it on Pinterest! Tag me so I can see your creations and celebrate your baking success. Your pin helps other home bakers discover this recipe and brings our community of chocolate lovers together.
Now grab your mixing bowl, preheat that oven, and get ready to bake the best brownies of your life. Happy baking, friends! 🍫