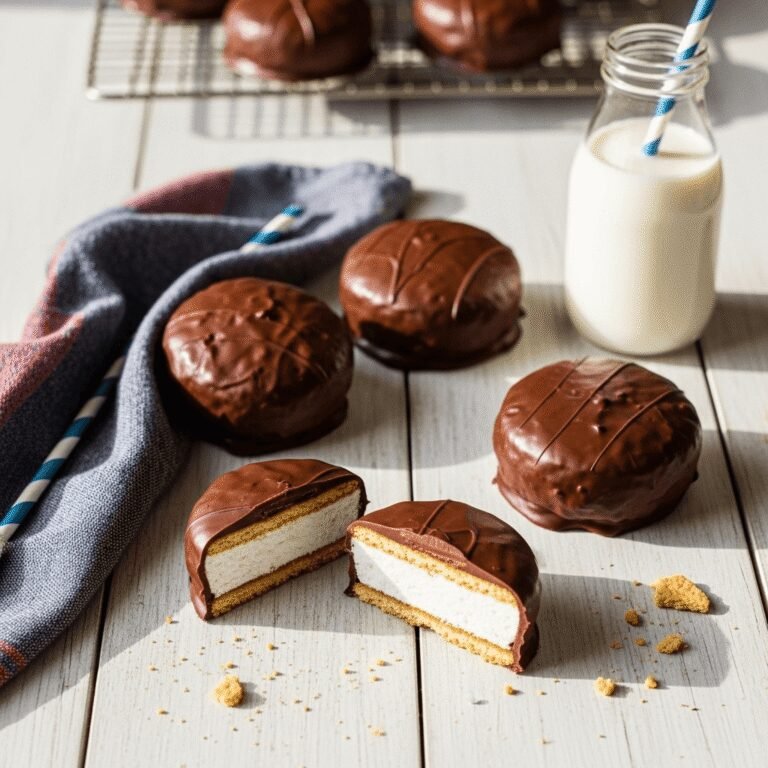
Classic Whoopie Pies Recipe (Soft, Pillowy & Perfectly Sweet!)
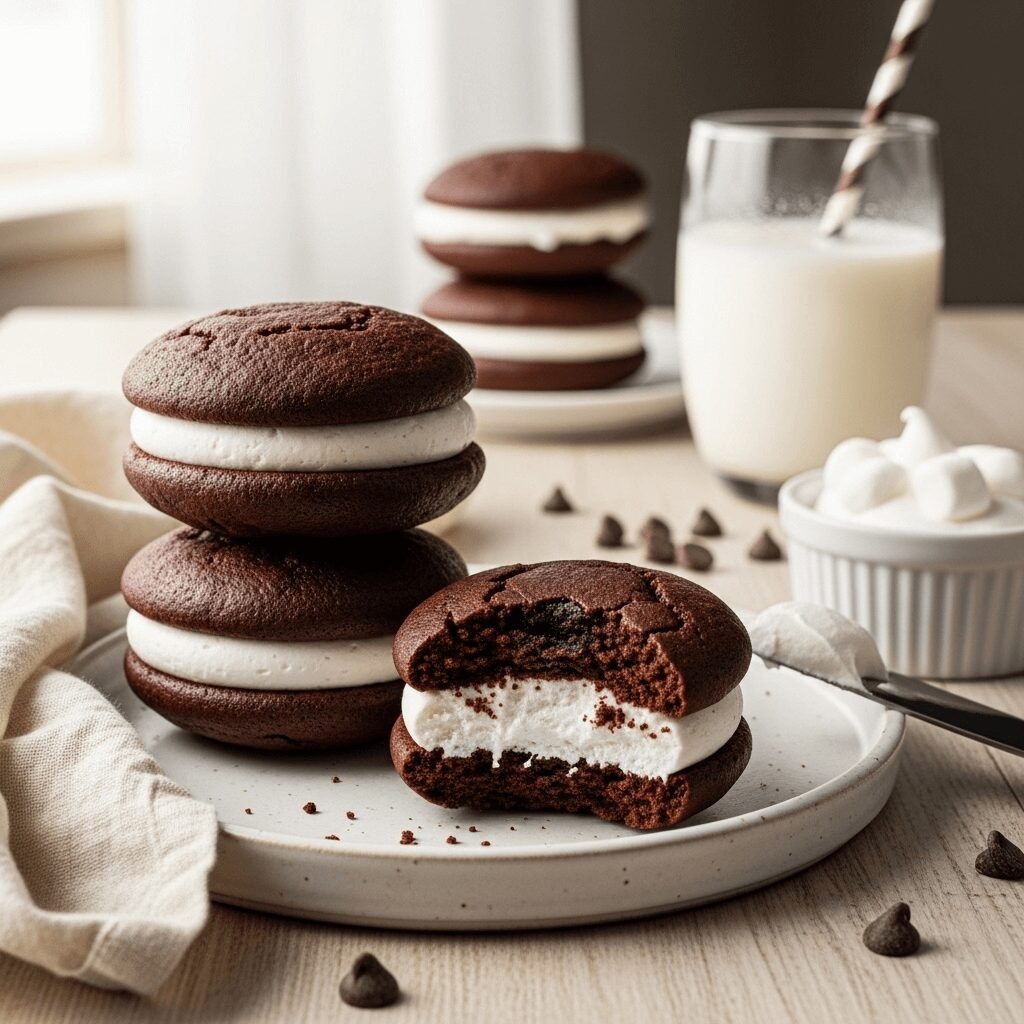
Get ready to fall in love with one of America’s most beloved treats! Whoopie pies are soft, cake-like chocolate cookies sandwiched together with a cloud of sweet, marshmallow-like filling. These handheld desserts are the perfect combination of textures—tender, almost brownie-like cookies paired with a fluffy, creamy center that literally melts in your mouth.
Despite the name, whoopie pies aren’t actually pies at all—they’re more like portable cake sandwiches that you can eat with your hands! The chocolate cookies are incredibly moist and tender, never dry or crumbly, and the traditional marshmallow filling (often called “fluff” filling) is sweet, light, and absolutely irresistible. Each bite delivers the perfect ratio of cake to cream, making them dangerously addictive.
Whoopie pies are perfect for so many occasions: pack them in lunchboxes for a special treat, bring them to bake sales where they always sell out first, serve them at birthday parties, holiday gatherings, or simply enjoy them as an afternoon pick-me-up with a cold glass of milk. They’re especially popular during fall festivities and Christmas cookie exchanges, but honestly, any day is a good day for whoopie pies! Kids and adults alike go crazy for these nostalgic treats that taste like childhood memories wrapped up in a delicious, handheld package.
History / Background
The origin story of whoopie pies is one of the most hotly debated topics in American dessert history, with multiple states claiming to be the birthplace of this iconic treat. The争议 is so serious that in 2011, Maine officially designated the whoopie pie as the state’s official treat, much to the dismay of Pennsylvania!
The most widely accepted origin story places whoopie pies in Pennsylvania’s Amish country during the early 20th century. According to legend, Amish women would bake these treats using leftover cake batter, creating hand-sized portions that were perfect for packing in farmers’ lunch pails. The story goes that when children would find these sweet surprises in their lunch boxes, they’d shout “Whoopie!”—thus giving the dessert its playful name. These homemade treats became a staple at Amish markets and gradually spread throughout Pennsylvania Dutch country.
However, Maine residents have their own claim to fame. The Labadie family of Lewiston, Maine, insists that Labadie’s Bakery was making and selling whoopie pies commercially as early as 1925. Maine’s whoopie pie tradition runs deep, with the treat becoming so beloved that the state hosts an annual Whoopie Pie Festival in Dover-Foxcroft, attracting thousands of visitors who come to celebrate this regional specialty.
Massachusetts also throws its hat in the ring, with some historians pointing to the Berwick Cake Company as an early commercial producer. The debate continues to this day, with passionate advocates on all sides!
Regardless of where they truly originated, whoopie pies gained widespread popularity throughout New England and Pennsylvania in the mid-1900s. They became fixtures at county fairs, church socials, and family gatherings. The classic version features chocolate cake cookies with marshmallow filling, but regional variations abound—Maine is known for using marshmallow fluff in the filling, while Pennsylvania Dutch versions often use a buttercream-based filling.
By the 1920s and 30s, whoopie pies were appearing in community cookbooks across rural America. The treat remained relatively regional until the 2000s, when gourmet bakeries began creating upscale versions with flavors like red velvet, pumpkin, and salted caramel. This “whoopie pie renaissance” introduced the classic treat to a whole new generation and cemented its place in American dessert culture.
Today, whoopie pies are recognized nationwide as a nostalgic, comforting treat that represents homestyle American baking at its finest.
Why You’ll Love This Recipe
This isn’t just any whoopie pie recipe—it’s the result of countless batches and testing to create the absolute best version you’ll ever taste. These whoopie pies have the perfect texture: soft and cake-like but sturdy enough to hold their generous filling without falling apart.
The chocolate cookies are deeply chocolatey without being overwhelmingly rich, striking that perfect balance that keeps you reaching for another. The marshmallow filling is smooth, sweet, and incredibly fluffy—it literally melts on your tongue. Together, they create a flavor combination that’s greater than the sum of its parts.
Here’s why this recipe will become your new favorite:
- Incredibly soft texture – These cookies stay tender and moist for days, never drying out like some whoopie pie recipes
- Perfect for beginners – Simple ingredients and straightforward method make these accessible even if you’re new to baking
- Makes a big batch – Recipe yields about 12 large whoopie pies, perfect for sharing or freezing
- Kid-friendly project – Children love helping assemble these treats (and eating them afterward!)
- Impressive presentation – They look bakery-quality but are surprisingly easy to make at home
- Portable and mess-free – Unlike layer cakes or frosted cupcakes, these travel beautifully without getting squished
- Nostalgic flavor – Tastes exactly like the classic whoopie pies from your childhood (or the ones you wish you’d had!)
- Customizable – Easy to adapt with different fillings, colors, or mix-ins to suit any occasion
- Budget-friendly – Uses simple pantry staples without expensive ingredients
- Crowd-pleaser – I’ve never met anyone who doesn’t love a good whoopie pie—they disappear instantly at gatherings!
Ingredient Notes
Let’s break down what makes these whoopie pies so incredibly delicious. Each ingredient plays an important role in creating that signature texture and flavor.
All-Purpose Flour – Provides structure to the cookies while keeping them tender. Don’t substitute cake flour, as it will make them too delicate to hold the filling properly.
Dutch-Process Cocoa Powder – This is the secret to deeply flavored, rich chocolate cookies. Dutch-process cocoa has been treated to neutralize its acidity, giving it a smoother, more mellow chocolate flavor and darker color. You can use natural cocoa in a pinch, but the flavor and color won’t be quite as intense.
Baking Soda – The leavening agent that gives the cookies their slight rise and tender crumb. Make sure yours is fresh for best results.
Salt – Enhances all the flavors and balances the sweetness. Don’t skip it!
Unsalted Butter (for cookies) – Adds richness and helps create that tender, cake-like texture. Should be at room temperature for easy mixing.
Granulated Sugar – Sweetens the cookies and helps create moisture. The right amount ensures they’re sweet but not cloying.
Egg – Binds everything together and adds structure. Use a large egg at room temperature.
Vanilla Extract – Enhances the chocolate flavor and adds depth. Always use pure vanilla, not imitation.
Buttermilk – This is crucial for ultra-tender cookies! The acidity in buttermilk reacts with the baking soda to create a tender crumb and adds a subtle tang that balances the sweetness. Don’t have buttermilk? Make your own by adding 1 tablespoon of lemon juice or white vinegar to 1 cup of milk and letting it sit for 5 minutes.
Hot Water – Blooms the cocoa powder, intensifying the chocolate flavor and helping create a smooth batter.
For the Filling:
Unsalted Butter (for filling) – Should be very soft, almost room temperature, for a fluffy filling. This is the base that creates that signature marshmallow-like texture.
Vegetable Shortening – The secret ingredient for authentic whoopie pie filling! It creates that pure white color and light, fluffy texture. You can use all butter if you prefer, but the filling will be more ivory-colored and slightly denser.
Powdered Sugar – Sweetens and thickens the filling. Make sure to sift it if it’s lumpy.
Marshmallow Fluff – This is what makes the filling taste authentically like whoopie pie! It adds sweetness, flavor, and that signature marshmallow taste. Marshmallow Fluff is a brand name, but you can use any marshmallow creme.
Vanilla Extract – Adds flavor depth to the sweet filling.
Salt – A tiny pinch balances the sweetness and makes all the flavors pop.
Equipment Needed
You won’t need any specialized equipment for these whoopie pies—just standard baking tools:
- Two large baking sheets – For baking multiple batches of cookies
- Parchment paper or silicone baking mats – Essential for preventing sticking and ensuring even baking
- Large mixing bowl – For the cookie batter
- Medium mixing bowl – For the dry ingredients
- Electric mixer (stand or hand) – Makes mixing both the cookies and filling much easier, though you can do it by hand
- Measuring cups and spoons – For accurate measurements
- Whisk – For combining dry ingredients
- Rubber spatula – For scraping down bowls and folding ingredients
- Cookie scoop or ice cream scoop – A 2-tablespoon scoop ensures uniform cookies (about 2-3 inches in diameter)
- Cooling rack – Essential for cooling cookies completely before filling
- Offset spatula or butter knife – For spreading filling on cookies
- Piping bag (optional) – Makes filling the whoopie pies neater, but not necessary
Classic Whoopie Pies Recipe (Soft, Pillowy & Perfectly Sweet!)

Classic homemade whoopie pies with soft, chocolatey cookies and fluffy marshmallow filling. These nostalgic treats taste just like the bakery-style whoopie pies you remember, with a tender cake-like texture and sweet, creamy center.Whoopie Pie Recipe
- Prep Time: 20 minutes
- Cook Time: 12 minutes (per batch)
- Total Time: 1 hour (including cooling)
- Yield: 12 large whoopie pies 1x
- Category: Dessert
- Method: Baking
- Diet: Vegetarian
Ingredients
For the Chocolate Cookies:
- 2 cups all-purpose flour
- ½ cup Dutch-process cocoa powder
- 1¼ teaspoons baking soda
- ½ teaspoon salt
- ½ cup unsalted butter, softened to room temperature
- 1 cup granulated sugar
- 1 large egg, at room temperature
- 1 teaspoon pure vanilla extract
- 1 cup buttermilk, at room temperature
- ¼ cup hot water
For the Marshmallow Filling:
- ½ cup unsalted butter, very soft
- ½ cup vegetable shortening
- 2 cups powdered sugar, sifted
- 1½ cups marshmallow fluff (marshmallow creme)
- 2 teaspoons pure vanilla extract
- Pinch of salt
Instructions
Make the Cookies:
- Preheat and Prep: Preheat your oven to 350°F (175°C). Line two large baking sheets with parchment paper or silicone baking mats. Set aside.
- Mix Dry Ingredients: In a medium bowl, whisk together the flour, cocoa powder, baking soda, and salt until well combined and no lumps remain. Set aside.
- Cream Butter and Sugar: In a large bowl using an electric mixer (or a stand mixer fitted with the paddle attachment), beat the softened butter and granulated sugar together on medium speed for 2-3 minutes until light and fluffy. This incorporates air and creates a tender cookie.
- Add Egg and Vanilla: Beat in the egg and vanilla extract until fully incorporated, scraping down the sides of the bowl as needed.
- Alternate Wet and Dry: With the mixer on low speed, add the flour mixture in three additions, alternating with the buttermilk in two additions. Begin and end with the flour mixture. Mix each addition just until incorporated—don’t overmix.
- Add Hot Water: Pour in the hot water and mix on low speed until the batter is smooth and well combined. The batter will be thick but pourable, similar to cake batter.
- Scoop Cookies: Using a 2-tablespoon cookie scoop or measuring spoon, drop rounded portions of batter onto the prepared baking sheets, spacing them about 2 inches apart (they will spread slightly). You should get about 24 cookies total. Try to make them as uniform as possible for even baking and easy sandwich assembly.
- Bake: Bake one sheet at a time for 11-13 minutes, or until the cookies are puffed and spring back lightly when touched. They should look set but still soft—don’t overbake or they’ll be dry. The tops won’t look shiny when done.
- Cool: Let the cookies cool on the baking sheet for 5 minutes, then carefully transfer to a cooling rack to cool completely. This is important—the cookies must be completely cool before filling or the filling will melt!
Make the Filling:
- Beat Butter and Shortening: In a large bowl using an electric mixer, beat the very soft butter and shortening together on medium speed for 2 minutes until smooth and creamy.
- Add Sugar: Add the sifted powdered sugar and beat on low speed until incorporated, then increase to medium-high and beat for 2 minutes until fluffy.
- Add Marshmallow Fluff: Add the marshmallow fluff, vanilla extract, and salt. Beat on medium-high speed for 2-3 minutes until the filling is light, fluffy, and completely smooth. It should look glossy and hold soft peaks.
Assemble:
- Pair Cookies: Match up cookies in similar sizes so your whoopie pies look uniform.
- Add Filling: Turn half the cookies flat-side up. Using an offset spatula, butter knife, or piping bag, add a generous amount of filling (about 2-3 tablespoons) to the flat side of each cookie. You want a nice thick layer of filling!
- Sandwich Together: Top each filled cookie with a matching cookie, flat side down. Gently press together so the filling spreads to the edges but doesn’t squish out too much.
- Serve: Enjoy immediately, or store for later. The flavors actually improve after sitting for a few hours as the cookies soften slightly from the filling.
Notes
- Cookie texture: The cookies should be soft and cake-like, not crispy. If they’re dry, you may have overbaked them
- Uniform size matters: Use a cookie scoop for consistent sizes that bake evenly
- Don’t skip cooling: Hot cookies will melt the filling
- Filling consistency: If your filling is too stiff, beat in 1-2 tablespoons of milk; if too soft, add more powdered sugar
- Make it easier: You can use store-bought chocolate cake mix for cookies if you’re short on time, though homemade tastes better
- Storage is key: Store in an airtight container to keep cookies soft
Nutrition
- Serving Size: 1 whoopie pie
- Calories: 385
- Sugar: 38g
- Sodium: 195mg
- Fat: 18g
- Saturated Fat: 9g
- Unsaturated Fat: 8g
- Trans Fat: 0g
- Carbohydrates: 53g
- Fiber: 1g
- Protein: 3g
- Cholesterol: 45mg
Note: Nutrition information is approximate and calculated per whoopie pie.
Tips & Variations
The beauty of whoopie pies is how easily you can customize them to create exciting new flavor combinations!
Pumpkin Whoopie Pies: Replace the cocoa powder with ½ cup pumpkin puree and add 1½ teaspoons pumpkin pie spice to the dry ingredients. Use cream cheese filling instead of marshmallow (beat 4 oz softened cream cheese with butter, powdered sugar, and vanilla).
Red Velvet Whoopie Pies: Reduce cocoa to 2 tablespoons, add red food coloring to the batter, and fill with cream cheese frosting. Perfect for Valentine’s Day!
Mint Chocolate Whoopie Pies: Add ½ teaspoon peppermint extract to the cookie batter and use mint-flavored filling (add peppermint extract to the marshmallow filling and a drop of green food coloring if desired).
Peanut Butter Whoopie Pies: Use vanilla cookies instead of chocolate (omit cocoa, increase flour to 2½ cups) and make peanut butter filling by replacing half the marshmallow fluff with ¾ cup creamy peanut butter.
S’mores Whoopie Pies: Use the chocolate cookies as written, add mini chocolate chips to the marshmallow filling, and roll the edges in crushed graham crackers.
Cookies and Cream: Fold crushed Oreo cookies into the marshmallow filling for a cookies and cream flavor.
Salted Caramel: Drizzle the assembled whoopie pies with salted caramel sauce and sprinkle with flaky sea salt.
Mini Whoopie Pies: Use a 1-tablespoon scoop for bite-sized versions perfect for parties. Bake for 8-10 minutes.
Healthier Version: Substitute half the butter with Greek yogurt in the cookies, use coconut oil instead of shortening in the filling, and reduce sugar by ¼ cup in both components.
Gluten-Free: Use a 1:1 gluten-free flour blend in place of all-purpose flour. The texture will be slightly different but still delicious.
Pro Chef Tips
After making hundreds of whoopie pies, I’ve learned some professional tricks that make all the difference:
Measure your cookie portions precisely. Using a cookie scoop ensures every cookie is the same size, which means they bake evenly and are easy to match up into perfect pairs. Inconsistent sizes lead to some cookies being overdone while others are underbaked.
Don’t overbake the cookies. This is the number one mistake! The cookies should look just set and still feel soft when you touch them gently—they’ll firm up as they cool. If you bake until they look “done,” they’ll be dry. Remember, these should be cake-like and tender, not crispy.
Room temperature ingredients matter. Cold eggs and buttermilk don’t incorporate as smoothly into the batter, potentially creating a lumpy texture. Let them sit out for 30 minutes before starting, or place eggs in warm water for 5 minutes.
Bloom your cocoa with hot water. Adding hot water to the cocoa powder activates its flavor compounds, giving you deeper, richer chocolate taste. This simple step makes a noticeable difference.
Let cookies cool completely before filling. I know it’s tempting to speed things up, but warm cookies will absolutely melt your filling, creating a mess. Plan ahead and let them cool for at least 30 minutes.
Beat the filling longer than you think necessary. The filling should be extremely light and fluffy, almost mousse-like. Beat it for a full 3-4 minutes—your arm might get tired, but the texture will be worth it. The filling should nearly double in volume.
Use the right ratio of filling. You want a generous amount—about 2-3 tablespoons per whoopie pie. Too little and they’ll taste dry; too much and they’ll squish out everywhere when you bite into them.
Chill the filling if it’s too soft. If your kitchen is warm and the filling seems runny, refrigerate it for 10-15 minutes until it firms up slightly. This makes it easier to spread and helps it hold its shape.
Press gently but firmly. When sandwiching the cookies together, use just enough pressure to spread the filling to the edges without squishing it all out. A gentle twist motion works well.
Let them rest before serving. Whoopie pies actually taste better after sitting for 2-4 hours. The moisture from the filling softens the cookies slightly, and all the flavors meld together beautifully.
Common Mistakes to Avoid
Even experienced bakers can stumble with whoopie pies. Here’s how to avoid the most common pitfalls:
Overmixing the batter – Once you add the flour mixture and buttermilk, mix only until just combined. Overmixing develops gluten, leading to tough, dense cookies instead of tender, cake-like ones. It’s okay if there are a few small lumps.
Overbaking the cookies – This is the biggest mistake I see! Whoopie pie cookies should be soft and tender, almost undercooked-looking when you remove them from the oven. They continue cooking on the hot pan as they cool. If they look firm and set in the oven, they’ll be dry and crumbly when cool. Remove them when they spring back lightly to a gentle touch but still look slightly shiny.
Using cold ingredients – Room temperature butter, eggs, and buttermilk incorporate much more smoothly and create better texture. Cold butter won’t cream properly with sugar, cold eggs can cause the batter to curdle, and cold buttermilk creates lumps.
Inconsistent cookie sizes – Eyeballing the cookie sizes leads to uneven baking and makes pairing difficult. Some will be overcooked while others are still raw in the center. Always use a cookie scoop for uniform portions.
Not letting cookies cool completely – Filling warm or even slightly warm cookies causes the filling to melt and slide out. It’s worth the wait! Plan your timing so the cookies have a full 30-45 minutes to cool.
Skipping the marshmallow fluff – Some recipes use only buttercream filling, but marshmallow fluff is what gives whoopie pies their signature flavor and texture. It’s worth buying a jar specifically for this recipe!
Storing improperly – Leaving whoopie pies uncovered dries out the cookies. They need to be stored in an airtight container to maintain that soft, tender texture. Also, stacking them directly on top of each other can squish the filling—layer with parchment paper between.
Storage & Meal Prep
Proper storage is crucial for maintaining that perfect soft texture that makes whoopie pies so special.
Room Temperature Storage: Store assembled whoopie pies in an airtight container at room temperature for up to 3 days. Place parchment paper or wax paper between layers to prevent them from sticking together or squishing. They’ll actually improve over the first 24 hours as the moisture from the filling softens the cookies slightly, creating that perfect texture.
Refrigerator Storage: You can refrigerate whoopie pies for up to 1 week in an airtight container. This is especially helpful if your kitchen is very warm or if you’ve used a cream cheese filling instead of marshmallow. However, refrigeration can make the cookies slightly firmer. Let them sit at room temperature for 15-20 minutes before eating for the best texture.
Unfilled Cookie Storage: If you want to bake ahead, you can store unfilled cookies in an airtight container at room temperature for up to 5 days, or freeze them for up to 3 months. This is great if you’re planning for a party—bake the cookies in advance, then make fresh filling and assemble the day of your event.
Individual Wrapping: For lunchboxes or grab-and-go snacks, wrap each whoopie pie individually in plastic wrap or place in small zipper bags. This keeps them fresh and makes portion control easy.
Maintaining Softness: If your whoopie pies start to dry out slightly, place a slice of bread in the storage container with them overnight. The moisture from the bread will transfer to the cookies, softening them back up. Remove the bread the next day.
Signs of Spoilage: Properly stored whoopie pies should stay fresh for days, but discard them if you notice any mold, off smells, or if the filling starts to separate or become watery.
Make-Ahead & Freezer Notes
Whoopie pies are fantastic for making ahead, which makes them perfect for parties, bake sales, or meal prep!
Freezing Assembled Whoopie Pies: This is my preferred make-ahead method. Freeze assembled whoopie pies on a baking sheet until solid (about 2 hours), then wrap each individually in plastic wrap and place all wrapped pies in a freezer-safe bag or container. Freeze for up to 3 months. The filling freezes beautifully and helps keep the cookies moist.
Thawing Assembled Whoopie Pies: Remove from the freezer and let thaw at room temperature (still wrapped) for 1-2 hours, or thaw in the refrigerator overnight. They taste fresh-made after thawing! The texture is sometimes even better after freezing and thawing.
Freezing Unfilled Cookies: Bake the cookies completely and let cool. Stack with parchment paper between layers and place in a freezer-safe bag or container. Freeze for up to 3 months. Thaw at room temperature for 30 minutes, then prepare fresh filling and assemble.
Freezing Just the Filling: Make the marshmallow filling and store in an airtight container in the freezer for up to 2 months. Thaw in the refrigerator overnight, then bring to room temperature and beat for 1-2 minutes to restore the fluffy texture before using.
Make-Ahead Timeline for Events: For parties or gatherings, bake the cookies 2-3 days ahead and store at room temperature, then make the filling and assemble the day before your event. This ensures maximum freshness while reducing day-of stress.
Best Thawing Method: Always thaw whoopie pies at room temperature rather than in the microwave, which can make the cookies soggy and melt the filling. If you’re in a rush, you can speed up thawing by placing wrapped whoopie pies near (not on) a warm spot, but room temperature is always best.
Quality After Freezing: I’ve done extensive testing, and I can confidently say that properly frozen and thawed whoopie pies taste virtually identical to fresh ones. In fact, many people can’t tell the difference at all!
Serving Suggestions
Whoopie pies are delicious on their own, but here are some fun ways to serve and enjoy them:
Classic Pairings:
- Serve with a tall glass of cold milk—the absolute classic combination
- Pair with hot coffee or espresso for a delightful afternoon treat
- Hot chocolate makes a cozy winter pairing, especially with peppermint whoopie pies
- Iced coffee or cold brew for summer gatherings
- Fresh-brewed tea (English breakfast or Earl Grey work beautifully)
Dessert Presentations:
- Serve on a tiered cake stand for elegant presentation at parties or showers
- Create a whoopie pie “cake” by stacking several whoopie pies with extra filling between layers
- Crumble over vanilla ice cream for an indulgent sundae
- Warm slightly and serve with a scoop of vanilla bean ice cream alongside
- Drizzle with chocolate ganache or caramel sauce for an elevated dessert
Party Ideas:
- Create a whoopie pie bar with different flavors and fillings for guests to try
- Package individually in cellophane bags tied with ribbon for party favors
- Stack on a platter with fresh berries for color contrast
- Serve mini whoopie pies as part of a dessert buffet
- Arrange on a rustic wooden board with fresh flowers for a beautiful display
Lunchbox Treats:
- Pack with fresh fruit and cheese for a balanced lunch dessert
- Include with a thermos of soup for a comforting meal
- Pair with carrot sticks and hummus to balance the sweetness
- Add to a bento box for a special surprise
Holiday Serving:
- Christmas: Make red and green whoopie pies and arrange on a festive platter
- Valentine’s Day: Serve red velvet whoopie pies on heart-shaped plates
- Halloween: Make orange-tinted cookies and add candy eyes for “monster” whoopie pies
- Thanksgiving: Serve pumpkin whoopie pies as an alternative to pie
Beverage Pairings:
- Milk (classic for a reason!)
- Coffee or espresso
- Hot chocolate with marshmallows
- Apple cider in fall
- Iced tea in summer
- Dessert wine like port or moscato for adult gatherings
FAQs Section
Q: Can I make whoopie pies without marshmallow fluff?
A: While marshmallow fluff creates the most authentic whoopie pie filling, you can make a buttercream version if you can’t find it. Simply beat 1 cup softened butter with 3 cups powdered sugar, 2-3 tablespoons heavy cream, and 2 teaspoons vanilla until fluffy. The texture will be more like frosting than the traditional marshmallow filling, but it’s still delicious!
Q: Why are my whoopie pie cookies spreading too much or too little?
A: Spreading issues usually come from ingredient temperature or oven temperature. If cookies spread too much, your butter may have been too soft or your oven too cool. If they don’t spread enough and stay domed, your butter may have been too cold or your oven too hot. Also check that you’re measuring flour correctly—too much flour restricts spreading.
Q: Can I make these gluten-free?
A: Yes! Use a high-quality 1:1 gluten-free flour blend (like Bob’s Red Mill or King Arthur) in place of all-purpose flour. The texture will be slightly different—a bit more delicate—but still delicious. Make sure your blend contains xanthan gum for proper structure.
Q: My filling is too runny. How do I fix it?
A: If your filling is too soft, beat in additional powdered sugar (¼ cup at a time) until it reaches the desired consistency. You can also refrigerate the filling for 15-20 minutes to firm it up. If it’s very warm in your kitchen, the butter and shortening may have gotten too soft—chilling will help significantly.
Q: Can I use natural cocoa powder instead of Dutch-process?
A: You can, but the results will be slightly different. Natural cocoa powder has a lighter color and more acidic, somewhat harsh chocolate flavor. Dutch-process cocoa is darker, smoother, and more mellow. If using natural cocoa, you might want to reduce the baking soda slightly (use 1 teaspoon instead of 1¼ teaspoons) since natural cocoa is more acidic.
Q: How do I know when the cookies are done baking?
A: The cookies should look just set on top and spring back lightly when gently touched. They won’t look shiny or wet, but they shouldn’t look firm and crispy either. Remember that they continue cooking for a minute or two after you remove them from the oven. When in doubt, slightly underbake rather than overbake—you want them soft and cake-like, not dry.
Q: Can I halve this recipe?
A: Absolutely! This recipe halves beautifully if you only want 6 whoopie pies. Just divide all ingredients in half and proceed with the recipe as written. You’ll only need one baking sheet.
Q: Why do my whoopie pies taste like shortening?
A: This can happen if the filling isn’t beaten enough or if you used too much shortening. Make sure to beat the filling for a full 3-4 minutes until it’s very light and fluffy—this incorporates air and mellows the shortening flavor. You can also adjust the ratio to use ¾ cup butter and ¼ cup shortening if you prefer a more buttery taste, though the filling won’t be as white or fluffy.
Conclusion
There you have it—the ultimate whoopie pie recipe that brings together soft, chocolatey cookies and fluffy marshmallow filling in perfect harmony! These classic American treats are so much more than just cookies; they’re nostalgic bites of joy that transport you back to simpler times with every mouthful.
Whether you’re making these for a special occasion, surprising your family with a homemade treat, or simply satisfying a sweet tooth, I promise these whoopie pies will not disappoint. The combination of that tender, cake-like cookie and cloud-like filling is absolutely irresistible, and the fact that they’re handheld makes them even more fun to eat.
I love that whoopie pies are accessible to bakers of all skill levels—if you can make cookies and mix frosting, you can absolutely make these! Plus, they’re endlessly customizable, so once you master this classic chocolate version, you can experiment with all sorts of fun flavors and fillings.
I’d absolutely love to hear about your whoopie pie adventures! Did you try any of the flavor variations? Did your kids help assemble them? Did you bring them to a potluck and have everyone asking for the recipe? Drop a comment below and share your experience. And please, please save this recipe to your Pinterest boards so you can find it easily whenever a whoopie pie craving strikes (which will be often, I guarantee!).
Now grab your mixing bowls and get baking—homemade whoopie pies are calling your name! 🍫🥧💕