The Ultimate Zebra Cake Recipe – Stunning Striped Dessert That’s Easier Than It Looks!

If you’ve ever scrolled through Pinterest and stopped dead in your tracks at a gorgeously striped cake that looks like it came straight from a professional bakery, you’ve probably encountered the mesmerizing zebra cake. This show-stopping dessert features dramatic black and white stripes that swirl through every slice, creating a pattern that’s as delicious as it is Instagram-worthy.
Despite its impressive appearance, zebra cake is surprisingly simple to make at home. You don’t need any special piping skills, fancy equipment, or pastry school training. The magic happens through a clever layering technique where you alternately pour vanilla and chocolate batters into the center of your pan, letting gravity do the beautiful work for you. The result? A moist, tender cake with eye-catching zebra stripes that’ll have everyone asking for your secret.
This zebra cake recipe is perfect for birthday celebrations, baby showers, potlucks, or any time you want to serve something that looks incredibly impressive but won’t keep you in the kitchen all day. It’s a conversation starter, a crowd-pleaser, and honestly, just plain fun to make. Kids absolutely love watching the pattern form as you pour the batter, making this a fantastic family baking project for weekend afternoons.
History / Background
The zebra cake, known in Russian as “Zebra tort” or “торт зебра,” has its roots in Eastern European baking traditions, particularly in Russia and neighboring countries. This beloved dessert emerged during the Soviet era when home bakers were getting creative with limited ingredients, developing techniques that produced maximum visual impact with minimal resources.
The genius of zebra cake lies in its simplicity. During times when elaborate cake decorating supplies weren’t readily available, resourceful bakers discovered that by alternating dark and light batters in a specific pouring pattern, they could create stunning visual effects without any frosting artistry. The cake became a staple at celebrations throughout Russia, Ukraine, and Poland, where it was treasured for being both beautiful and achievable for everyday home cooks.
The technique spread across Eastern Europe and eventually made its way to Western kitchens through immigrant families sharing their treasured recipes. In recent years, zebra cake has experienced a major renaissance on social media platforms, particularly Pinterest, where the dramatic striped pattern photographs beautifully and captures the attention of scrolling users instantly.
What makes this cake particularly special is its democratic nature—it doesn’t require professional skills, yet delivers professional-looking results. The zebra pattern emerges naturally through the physics of how batters of different densities spread and settle, making every home baker feel like a pastry genius. It’s a testament to the ingenuity of home cooks who proved that stunning desserts don’t always require complicated techniques or expensive ingredients.
Why You’ll Love This Recipe
This zebra cake recipe strikes the perfect balance between impressive presentation and straightforward preparation. You’ll find yourself making it again and again because it consistently delivers that “wow factor” without the stress of complicated baking techniques. The cake itself is wonderfully moist and tender, with a fine, even crumb that melts on your tongue, while the alternating vanilla and chocolate flavors create a delightful taste experience with every bite.
Here’s why this recipe will become your go-to showstopper:
- Easier than it looks – The intricate zebra pattern forms automatically as you pour; no artistic skills required
- One-bowl method – You’ll make a base batter, then divide and flavor it, minimizing cleanup
- Beginner-friendly – If you can stir batter and pour it into a pan, you can make this cake perfectly
- Crowd-pleasing flavor – The classic vanilla and chocolate combination appeals to everyone, from kids to grandparents
- Budget-friendly – Uses simple pantry staples you probably already have on hand
- Make-ahead friendly – Tastes even better the next day, making it perfect for party planning
- Customizable – Easy to adapt with different flavors, add-ins, or frostings to suit your preferences
- Instagram-worthy – Every slice reveals those gorgeous stripes, making it incredibly shareable on social media
- Conversation starter – Guests will be fascinated by the technique and asking how you achieved the pattern
Ingredient Notes
Understanding your ingredients is key to baking success, especially with a cake that relies on proper batter consistency for that signature pattern.
All-purpose flour forms the structure of your cake. Make sure to measure it correctly using the spoon-and-level method rather than scooping directly from the bag, which can pack too much flour and result in a dry cake. You can substitute with a 1:1 gluten-free baking flour if needed.
Granulated sugar not only sweetens but also helps create the tender, moist texture that makes zebra cake so irresistible. Don’t reduce the amount significantly, as sugar plays an important role in the cake’s structure.
Eggs should be at room temperature for better incorporation into the batter. Cold eggs can cause the butter to seize up and create a lumpy batter. If you forgot to take them out in advance, place them in a bowl of warm water for 5-10 minutes.
Unsalted butter gives richness and flavor. Using unsalted allows you to control the salt level precisely. Make sure it’s softened to room temperature—it should leave a slight indent when pressed but not be greasy or melted.
Sour cream or yogurt is the secret ingredient that makes this cake incredibly moist and tender. The acidity also helps activate the leavening agents for a better rise. Full-fat versions work best, but low-fat will work in a pinch.
Cocoa powder should be unsweetened and of good quality. Dutch-processed cocoa will give you a darker, more dramatic stripe and richer chocolate flavor, while natural cocoa works perfectly well too.
Vanilla extract enhances all the other flavors. Use pure vanilla extract rather than imitation for the best taste.
Baking powder and baking soda work together to give your cake the perfect rise and tender crumb. Make sure they’re fresh—baking powder loses potency after about 6 months.
Salt might seem minor, but it’s crucial for balancing sweetness and enhancing all the other flavors in your cake.
Milk helps thin the batter to the right consistency for creating those beautiful zebra stripes. Whole milk is ideal, but 2% works well too.
Equipment Needed
Having the right tools makes the baking process smoother and more enjoyable. Here’s what you’ll need to create your perfect zebra cake:
- 9-inch round cake pan (or 8-inch for a taller cake) – A springform pan works beautifully for easy removal
- Large mixing bowl – For combining your batter
- Medium mixing bowl – For dividing and flavoring the batter
- Electric mixer (stand or hand) – Makes creaming butter and sugar effortless
- Measuring cups and spoons – For accurate measurements
- Rubber spatula – For scraping down bowl sides and folding ingredients
- Sifter or fine-mesh strainer – For sifting cocoa powder and preventing lumps
- Ladle or large spoon – For pouring batters in the center of the pan
- Parchment paper – For lining the pan bottom to prevent sticking
- Cooling rack – Essential for proper cooling after baking
- Toothpick or cake tester – For checking doneness
- Offset spatula (optional) – Helpful for frosting if desired
Zebra Cake Recipe

A stunning zebra cake with dramatic black and white stripes throughout. This moist, tender cake looks incredibly impressive but uses a simple alternating pour technique that anyone can master. Perfect for celebrations or whenever you want to serve something that’ll have everyone talking!
- Prep Time: 20 minutes
- Cook Time: 45 minutes
- Total Time: 1 hour 5 minutes
- Yield: 12 servings 1x
- Category: Dessert
- Method: Baking
- Cuisine: Eastern European (Russian)
- Diet: Vegetarian
Ingredients
For the Cake:
- 2½ cups all-purpose flour
- 2 cups granulated sugar
- 4 large eggs, room temperature
- 1 cup unsalted butter, softened
- 1 cup sour cream, room temperature
- ½ cup whole milk
- 3 tablespoons unsweetened cocoa powder
- 2 teaspoons vanilla extract
- 1½ teaspoons baking powder
- 1 teaspoon baking soda
- ½ teaspoon salt
- 2 tablespoons hot water (for cocoa mixture)
For Optional Frosting:
- 1 cup heavy cream
- 2 tablespoons powdered sugar
- ½ teaspoon vanilla extract
Instructions
- Prepare your pan and preheat: Preheat your oven to 350°F (175°C). Grease a 9-inch round cake pan generously with butter or cooking spray, then line the bottom with parchment paper. Grease the parchment as well. This double protection ensures your beautiful zebra cake releases perfectly.
- Cream butter and sugar: In a large mixing bowl, beat the softened butter and granulated sugar together using an electric mixer on medium-high speed for 3-4 minutes. The mixture should become pale, fluffy, and increase in volume. This step incorporates air that helps create a light, tender cake texture.
- Add eggs one at a time: With the mixer on medium speed, add eggs one at a time, beating well after each addition. Make sure each egg is fully incorporated before adding the next. Scrape down the sides of the bowl as needed to ensure even mixing.
- Mix in sour cream and vanilla: Add the sour cream and vanilla extract to the butter mixture. Beat on medium speed until completely smooth and well combined. The sour cream adds incredible moisture and a subtle tang that balances the sweetness perfectly.
- Combine dry ingredients: In a separate bowl, whisk together the flour, baking powder, baking soda, and salt. This ensures the leavening agents are evenly distributed throughout the flour.
- Alternate adding dry ingredients and milk: With the mixer on low speed, add the flour mixture in three additions, alternating with the milk in two additions. Begin and end with the flour mixture. Mix just until combined after each addition—overmixing can result in a tough cake. Scrape down the sides of the bowl to ensure everything is incorporated.
- Divide the batter: Measure out your finished batter and pour roughly half into a separate medium bowl. You should have approximately 2½ cups of batter in each bowl.
- Create the chocolate batter: In a small bowl, mix the cocoa powder with 2 tablespoons of hot water to create a smooth paste. This step, called “blooming” the cocoa, intensifies the chocolate flavor and ensures no cocoa lumps in your cake. Add this chocolate paste to one bowl of batter and fold gently until the color is uniform and no streaks remain.
- Create the zebra pattern: Place your prepared pan on a flat surface. Using a ladle or large spoon, pour about ¼ cup of the vanilla batter directly into the center of the pan. Next, pour about ¼ cup of chocolate batter directly into the center of the vanilla batter. The chocolate will push the vanilla outward, creating a ring. Continue alternating, always pouring into the center—vanilla, then chocolate, vanilla, then chocolate—until both batters are used up. The pattern will naturally form concentric circles that create the zebra stripes when baked and sliced.
- Smooth and tap: Gently smooth the top with a spatula if needed, but don’t disturb the pattern underneath. Tap the pan firmly on the counter 3-4 times to release any air bubbles trapped in the batter.
- Bake: Place the pan in the preheated oven and bake for 45-50 minutes, or until a toothpick inserted into the center comes out clean or with just a few moist crumbs. The top should be golden brown and spring back when lightly pressed. Start checking at 45 minutes, as oven temperatures vary.
- Cool properly: Remove the cake from the oven and let it cool in the pan for 15 minutes. This cooling time allows the cake to set and makes it less likely to break when you remove it. After 15 minutes, run a knife around the edges, invert onto a cooling rack, remove the parchment paper, and let cool completely before slicing.
- Optional frosting: If desired, whip the heavy cream with powdered sugar and vanilla until stiff peaks form. Spread or pipe over the cooled cake. Alternatively, dust with powdered sugar or serve plain to showcase the beautiful zebra stripes.
Notes
- Batter consistency is key: Both batters should be the same consistency—pourable but not too thin. If one batter seems thicker, add a teaspoon of milk to thin it slightly.
- Pour slowly and steadily: Take your time with the alternating pours. Pouring too quickly or off-center can disrupt the pattern.
- Don’t open the oven: Resist the urge to peek during the first 40 minutes of baking, as temperature fluctuations can cause the cake to sink.
- Room temperature ingredients matter: Cold eggs and sour cream can cause the batter to curdle or not mix properly, affecting texture.
- Springform pan option: If using a springform pan, place it on a baking sheet to catch any potential drips and make transferring to the oven easier.
Nutrition
- Serving Size: 1 slice (1/12 of cake)
- Calories: 385
- Sugar: 28g
- Sodium: 245mg
- Fat: 20g
- Saturated Fat: 12g
- Unsaturated Fat: 6g
- Trans Fat: 0g
- Carbohydrates: 46g
- Fiber: 1g
- Protein: 6g
- Cholesterol: 110mg
Nutritional information is approximate and based on the cake without frosting.
Tips & Variations
Flavor Variations: Transform your zebra cake with different flavor combinations. Try replacing half the vanilla extract with almond extract for a subtle nutty note, or add orange zest to the vanilla batter and use orange extract for a chocolate-orange zebra cake. Coffee lovers can add 2 tablespoons of instant espresso powder to the chocolate batter to intensify the chocolate flavor. For a fun twist, use strawberry or raspberry extract and a few drops of pink food coloring in place of the vanilla for a pink and chocolate zebra.
Make it extra moist: Brush each layer with a simple syrup (equal parts sugar and water, heated until dissolved and cooled) before frosting. This bakery trick keeps cakes incredibly moist for days and adds a subtle sweetness.
Different patterns: While the traditional zebra creates concentric circles, you can experiment with the pouring pattern. Try pouring from different spots in the pan for a more organic, marbled look, or pour in a spiral pattern starting from the edge and working toward the center for a different stripe effect.
Chocolate lovers: Reverse the ratio to have more chocolate batter than vanilla—use ⅔ chocolate and ⅓ vanilla for a deeper chocolate flavor with vanilla accents. You can also add chocolate chips to the chocolate batter for extra richness.
Healthier swaps: Replace half the all-purpose flour with whole wheat pastry flour for added fiber without sacrificing texture. Substitute Greek yogurt for the sour cream for extra protein. Use coconut sugar instead of granulated sugar for a lower glycemic option (note that this will affect the color slightly).
Add-ins: Fold ½ cup mini chocolate chips into the vanilla batter for surprise pockets of chocolate. Add ¼ cup of finely chopped nuts to either batter for crunch. A teaspoon of cinnamon in the chocolate batter adds warmth and complexity.
Pro Chef Tips
Weigh your ingredients for the most consistent results, especially with flour. 2½ cups of flour should weigh approximately 300 grams when measured correctly. Baking is science, and precise measurements ensure your cake turns out perfectly every time.
Bloom your cocoa powder by mixing it with hot liquid before adding it to the batter. This technique, used by professional bakers, awakens the cocoa’s full flavor potential and ensures a smoother, more intense chocolate taste without any raw cocoa graininess.
Check your oven temperature with an oven thermometer. Many home ovens run hot or cold by 25°F or more, which can dramatically affect baking times and results. If your cake browns too quickly on top but remains raw inside, your oven likely runs hot—reduce the temperature by 25°F.
Use the toothpick test correctly: A perfectly baked cake should have a toothpick that comes out with a few moist crumbs clinging to it, not completely clean. A completely clean toothpick often means you’ve overbaked slightly, which can result in a drier cake.
Let the cake cool completely before slicing for the cleanest cuts and most defined zebra stripes. Use a long serrated knife and wipe it clean between cuts. For ultra-clean slices, chill the cake for an hour before cutting—the cold cake slices much more neatly.
Create a crumb coat if frosting: Apply a thin layer of frosting all over the cake first, then refrigerate for 30 minutes before applying the final frosting layer. This seals in crumbs and gives you a professional, smooth finish.
Common Mistakes to Avoid
Overmixing the batter: Once you add the flour, mix just until you can no longer see dry flour streaks. Overmixing develops the gluten in the flour, resulting in a tough, dense cake instead of a tender, fluffy one. If you see the batter looking stringy or elastic, you’ve mixed too much.
Using cold ingredients: Cold eggs, butter, and sour cream don’t emulsify properly, leading to a curdled-looking batter that can bake up with an uneven, dense texture. Always allow refrigerated ingredients to sit out for 30-60 minutes before starting, or use the warm water trick for eggs.
Pouring batters off-center: The zebra pattern only works if you consistently pour directly into the center of the pan. Pouring off to the side will create an asymmetrical, messy pattern instead of the beautiful concentric circles you’re after. Take your time and aim carefully with each pour.
Opening the oven door too early: That rush of cool air can cause your cake to sink in the middle or develop a gummy texture. The structure isn’t set during the first 40 minutes, so be patient and trust the process. Only check after 45 minutes.
Not preparing the pan properly: Even with non-stick pans, always grease thoroughly and use parchment paper on the bottom. Zebra cake’s tight crumb can stick surprisingly easily, and there’s nothing more heartbreaking than a beautiful cake that breaks apart when you try to remove it from the pan.
Storage & Meal Prep
Room temperature storage: Keep your zebra cake covered at room temperature for up to 3 days. Use a cake dome or cover tightly with plastic wrap. The cake actually improves after a day as the flavors meld and the texture becomes even more moist. This makes it perfect for preparing ahead of parties.
Refrigerator storage: If you’ve frosted your zebra cake with cream cheese frosting, whipped cream, or any dairy-based frosting, you’ll need to refrigerate it. Store covered for up to 5 days. Bring to room temperature 30 minutes before serving for the best flavor and texture—cold cake mutes the flavors.
Freezing whole cake: Wrap the completely cooled unfrosted cake tightly in plastic wrap, then in aluminum foil. Freeze for up to 3 months. Thaw overnight in the refrigerator, then bring to room temperature before serving or frosting. The texture remains excellent after freezing.
Freezing individual slices: Cut the cake into slices and wrap each slice individually in plastic wrap, then place in a freezer bag. This way, you can thaw individual portions whenever you want a slice of cake. Thaw at room temperature for about an hour.
Reheating: While zebra cake is delicious at room temperature, if you prefer it slightly warm, microwave individual slices for 10-15 seconds. Don’t overheat or the cake will dry out.
Make-Ahead & Freezer Notes
Zebra cake is an excellent make-ahead dessert, which makes it perfect for stress-free party planning. You can bake the cake completely up to 2 days before you need it—just wrap it well in plastic wrap and store at room temperature. Many bakers actually prefer the texture and flavor on day two, as the cake has time to settle and the flavors deepen.
Best make-ahead strategy: Bake the cake 1-2 days before your event and store it wrapped at room temperature. Frost it on the day you plan to serve it for the freshest presentation. If using whipped cream frosting, you can frost up to 4 hours ahead and keep refrigerated.
Freezer method: For ultimate advance preparation, bake the cake up to 3 months ahead. Once completely cooled, wrap tightly in two layers of plastic wrap followed by a layer of aluminum foil. Label with the date and contents. When you’re ready to use it, unwrap and thaw overnight in the refrigerator, then bring to room temperature for 1-2 hours before serving.
Freezing frosted cake: You can also freeze the cake after frosting it (except for delicate whipped cream frostings). Use the same wrapping method, being careful not to disturb the frosting. Flash freeze uncovered for 1 hour first to harden the frosting, then wrap. Thaw in the refrigerator overnight.
Best reheating method: While not necessary, if you want to serve zebra cake slightly warm (especially nice in cooler months), the best method is to let it come to room temperature first, then warm individual slices in the microwave for 10-15 seconds. Alternatively, wrap the whole cake in foil and warm in a 300°F oven for 10 minutes.
Serving Suggestions
Zebra cake is stunning on its own, but the right accompaniments can elevate it to an unforgettable dessert experience.
Classic pairings: Serve slices with a dollop of freshly whipped cream and fresh berries—strawberries, raspberries, or blueberries all work beautifully. The slight tartness of the berries balances the cake’s sweetness perfectly. A scoop of vanilla ice cream alongside a slice creates a delightful temperature and texture contrast.
Beverage pairings: This cake pairs wonderfully with hot coffee or espresso, making it an excellent choice for afternoon coffee gatherings. For a more elegant presentation, serve with champagne or prosecco at celebrations. Hot tea, especially Earl Grey or chai, complements the vanilla and chocolate flavors beautifully. For kids’ parties, pair with cold milk or chocolate milk.
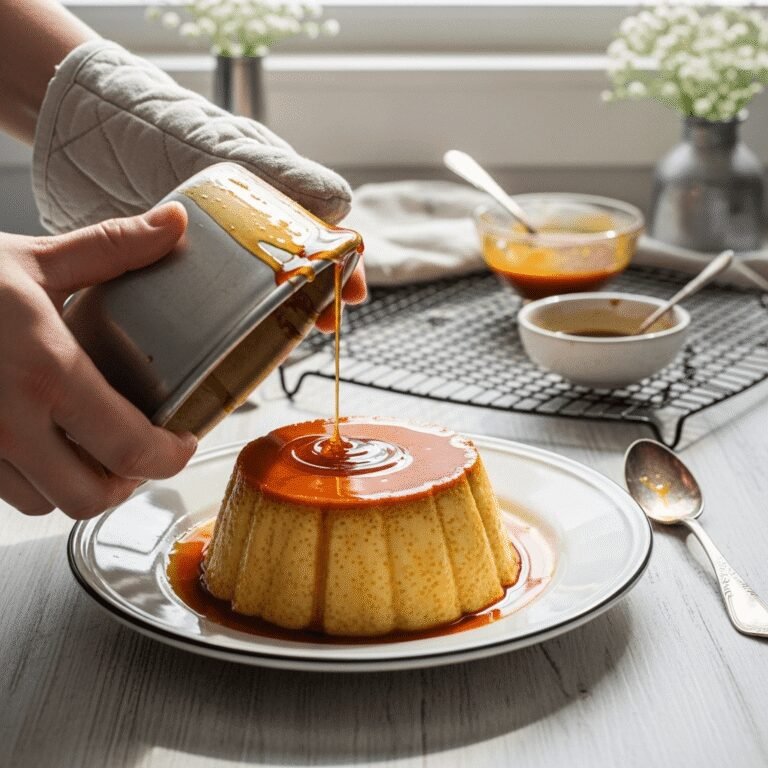
Sauce drizzles: Elevate your presentation with a chocolate ganache drizzle, caramel sauce, or raspberry coulis pooled on the plate. These not only add visual appeal but also introduce complementary flavors that enhance the cake experience.
Plated dessert style: For a restaurant-worthy presentation, dust the plate with cocoa powder, place your cake slice on top, add a quenelle of whipped cream, garnish with fresh mint, and finish with a few chocolate shavings or fresh berries artfully arranged.
Party presentation: For buffet-style serving, display the whole cake on a cake stand with the first slice already cut and pulled slightly away so guests can see the dramatic zebra stripes inside. This creates visual interest and makes the pattern immediately visible.
Seasonal variations: Top with chocolate shavings and peppermint whipped cream during the holidays. In summer, serve with lemon curd and fresh strawberries. Fall calls for caramel sauce and toasted pecans.
FAQs Section
Can I make zebra cake in a different size pan?
Absolutely! This recipe works in an 8-inch round pan (makes a taller cake, bake for 50-55 minutes), a 9×13-inch rectangular pan (bake for 35-40 minutes), or even in a bundt pan (bake for 45-50 minutes). Just adjust the baking time accordingly and always test for doneness with a toothpick. The stripe pattern works in any shape—even in a loaf pan for a fun surprise when you slice it.
Why didn’t my zebra stripes form properly?
The most common issue is batter consistency. If one batter is thicker than the other, it won’t spread properly to create the pattern. Both batters should be the same pourable consistency. Also make sure you’re pouring directly into the center of the pan each time—pouring off-center disrupts the concentric circle formation. Finally, make sure you’re using enough batter in each pour (about ¼ cup) so the layers push outward properly.
Can I make this cake without eggs?
Yes, you can substitute with flax eggs (1 tablespoon ground flaxseed + 3 tablespoons water per egg, let sit 5 minutes) or use a commercial egg replacer following package directions for 4 eggs. The texture will be slightly different—a bit denser—but the cake will still work and the zebra pattern will still form. Some readers have had success using applesauce (¼ cup per egg) as well.
Do I need to sift the flour?
You don’t need to sift the all-purpose flour, but you absolutely should sift the cocoa powder. Cocoa powder tends to be lumpy and clumpy, and sifting ensures it incorporates smoothly into the batter without leaving cocoa lumps in your finished cake. If your cocoa powder is very fresh and lump-free, you can skip this step, but it’s generally a good practice.
Can I use oil instead of butter?
While you can substitute vegetable oil or melted coconut oil for the butter (use ¾ cup oil to replace 1 cup butter), the flavor and texture will be different. Butter provides rich flavor and a tender crumb structure that oil doesn’t replicate. If you need a dairy-free version, use vegan butter substitutes rather than oil for results closer to the original.
Why did my cake sink in the middle?
A sunken middle usually means the cake wasn’t fully baked (test with a toothpick), the oven temperature was too high (causing the outside to set before the inside cooked), or the oven door was opened too early, causing a sudden temperature drop. Make sure your oven temperature is accurate, avoid opening the door for the first 40 minutes, and bake until a toothpick comes out with just a few moist crumbs.
Can I double this recipe?
Yes, you can double the recipe to make two cakes or one large sheet cake. However, I recommend making the batter in two separate batches rather than one huge batch, as it’s easier to manage and ensures proper mixing. If making two cakes, you can bake them simultaneously if they both fit in your oven with space for air circulation.
Conclusion
There’s something truly magical about slicing into a zebra cake and revealing those stunning black and white stripes. Despite its impressive appearance, this recipe proves that bakery-worthy desserts are absolutely achievable in your own kitchen. The beauty of zebra cake isn’t just in how it looks—it’s in how it brings people together, sparks conversation, and creates those memorable moments around the table.
Whether you’re baking this for a special celebration or just because it’s a Tuesday and you deserve something beautiful, this zebra cake recipe delivers on all fronts. It’s approachable for beginners, impressive enough for experienced bakers to feel proud of, and delicious enough that everyone will be asking for seconds. The tender, moist crumb combined with the classic vanilla and chocolate flavors creates a timeless dessert that never goes out of style.
Now it’s your turn to create this stunning dessert! Gather your ingredients, trust the process, and enjoy watching those gorgeous zebra stripes form as you pour the batter. Don’t forget to snap a photo of your beautiful creation—both the whole cake and especially that first slice that reveals the pattern—and save this recipe to your Pinterest boards so you can find it easily next time. I’d love to hear how your zebra cake turns out! Drop a comment below with your baking experience, any variations you tried, or questions you might have. Happy baking, and here’s to making home-baked magic happen in your kitchen!