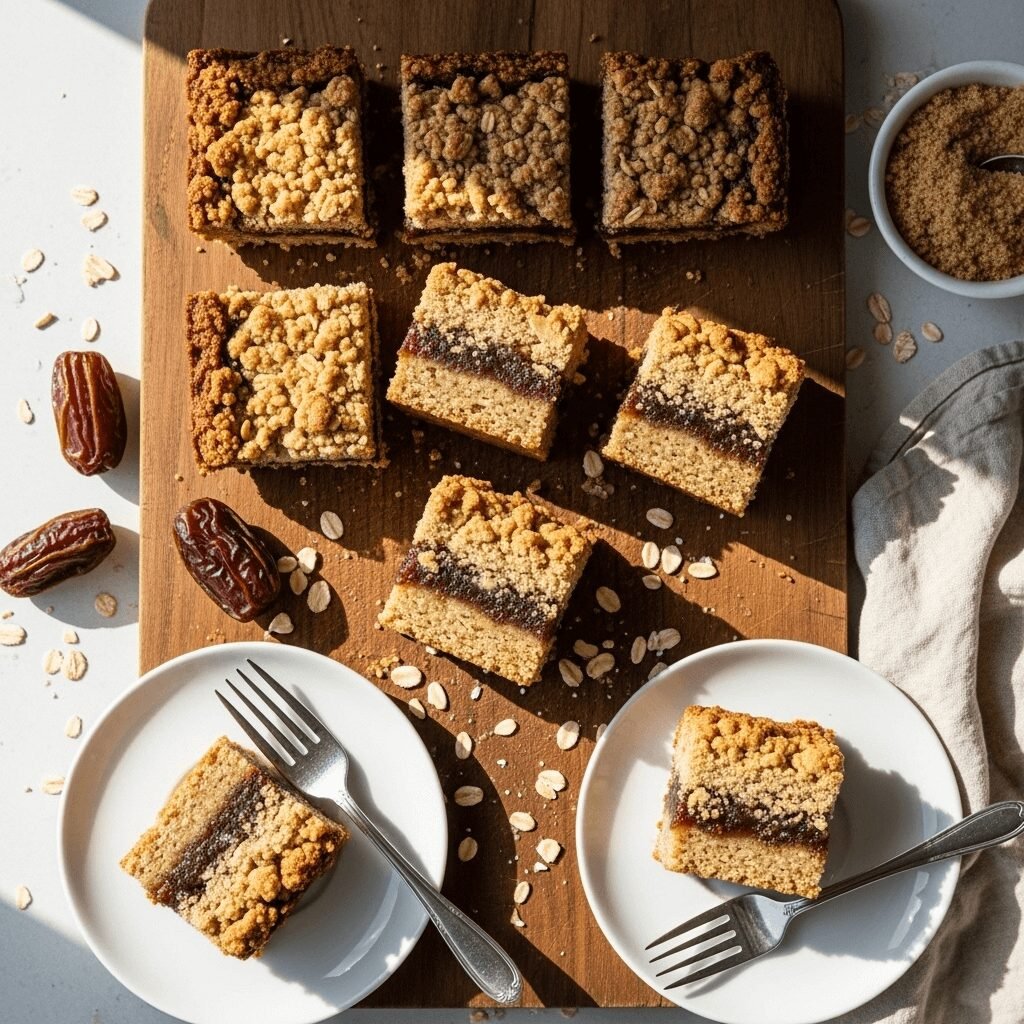
Easy Date Squares with Crumbly Oat Topping (Matrimonial Bars)
If you’ve never tried date squares, you’re in for an absolute treat! These beloved bars feature a buttery, crumbly oat crust and topping that sandwiches a luscious, naturally sweet date filling. Sometimes called “matrimonial cake” or “date crumble bars,” this classic recipe delivers the perfect balance of textures – crispy edges, tender oat layers, and a soft, caramel-like date center that melts in your mouth.
Date squares are the ultimate comfort dessert that works for virtually any occasion. Serve them at holiday gatherings, pack them in lunchboxes, bring them to potlucks, or simply enjoy them with your afternoon coffee. They’re easier to make than you might think, requiring just simple pantry ingredients and about an hour of your time. The best part? These bars taste even better the next day, making them perfect for advance preparation.
History / Background
Date squares have a rich history rooted in Canadian and British baking traditions, though they’ve become equally beloved across the United States. The recipe gained widespread popularity during World War II when butter and sugar were rationed, and resourceful home bakers turned to naturally sweet dried dates as an affordable and accessible sweetener. Dates were easy to store, didn’t require refrigeration, and provided concentrated sweetness without depleting precious sugar rations.
The nickname “matrimonial cake” has two charming origin stories. Some say it refers to the “marriage” of the two oat layers with the date filling between them – a perfect union of flavors and textures. Others believe the name comes from the tradition of serving these squares at wedding receptions and church socials, where they were economical enough to feed a crowd yet special enough for celebration.
In Canada, particularly in the prairie provinces, date squares are considered a cultural icon. They appeared in community cookbooks throughout the 1940s and 1950s, and nearly every grandmother had her own treasured version of the recipe. The dessert represents an era of practical, wholesome baking where nothing went to waste and simple ingredients created memorable treats. Today, date squares remain a nostalgic favorite that connects us to generations of home bakers who perfected this timeless recipe.
Why You’ll Love This Recipe
This date squares recipe strikes the perfect balance between rustic simplicity and irresistible flavor. The combination of wholesome oats, sweet dates, and butter creates something truly magical – a dessert that feels both comforting and sophisticated. Unlike complicated layer cakes or fussy pastries, these bars come together with straightforward techniques that even beginner bakers can master.
Here’s why this recipe will become your new favorite:
- Naturally sweetened – The date filling provides deep, caramel-like sweetness without excessive refined sugar
- Wholesome ingredients – Rolled oats add fiber and nutrition, making these feel less guilty than typical desserts
- Make-ahead friendly – These bars actually improve after sitting, perfect for busy schedules and meal prep
- Crowd-pleaser – The flavor profile appeals to kids and adults alike, making them ideal for family gatherings
- Customizable – Easy to adapt with spices, nuts, or flavor variations to suit your preferences
- Budget-friendly – Uses simple pantry staples without expensive or hard-to-find ingredients
- Portable – Cuts into neat squares that travel well for picnics, bake sales, and lunchboxes
- Versatile serving – Delicious on their own or dressed up with whipped cream or ice cream
Ingredient Notes
Dates: Medjool or Deglet Noor dates work beautifully for this recipe. Medjool dates are larger, softer, and sweeter, while Deglet Noor dates have a slightly firmer texture and less intense sweetness. Make sure your dates are soft and pliable – if they’re dried out, soak them in warm water for 10 minutes before using. You can substitute with dried figs or prunes for a different flavor profile.
Rolled Oats: Old-fashioned rolled oats are essential for the proper texture. Don’t substitute with quick oats or instant oats, as they’ll create a mushy consistency. The rolled oats provide that signature crumbly, textured topping and base. For a gluten-free version, ensure you’re using certified gluten-free oats.
All-Purpose Flour: Provides structure to the oat layers and helps them hold together. You can substitute with whole wheat flour for a nuttier flavor and extra fiber, or use a 1:1 gluten-free baking blend.
Butter: Use unsalted butter so you can control the salt level. The butter should be melted and slightly cooled. It binds the oat mixture together and provides rich flavor. For a dairy-free option, coconut oil works as a substitute, though it will impart a subtle coconut flavor.
Brown Sugar: Adds moisture and caramel notes to the oat layers. Light or dark brown sugar both work – dark brown sugar will give a deeper molasses flavor.
Baking Soda: A small amount helps the oat mixture achieve the perfect crumbly texture without becoming too dense.
Vanilla Extract: Enhances all the other flavors and adds warmth to both the filling and the oat layers.
Lemon Juice: Brightens the date filling and prevents it from being too cloying. The acidity balances the natural sweetness of the dates beautifully.
Equipment Needed
To make these date squares successfully, you’ll need the following kitchen tools:
- 9×9-inch square baking pan or 8×8-inch pan (for thicker bars)
- Parchment paper for easy removal and cleanup
- Medium saucepan for cooking the date filling
- Large mixing bowl for combining the oat mixture
- Wooden spoon or spatula for stirring
- Measuring cups and spoons for accurate measurements
- Potato masher or fork for breaking down the cooked dates
- Sharp knife for chopping dates
- Cutting board
- Cooling rack for cooling the baked bars
- Offset spatula (optional but helpful for spreading the filling evenly)
Date Squares Recipe

Classic date squares feature buttery oat layers sandwiching a sweet, caramel-like date filling. These wholesome bars are perfect for dessert, snacks, or coffee breaks.
- Prep Time: 20 minutes
- Cook Time: 35 minutes
- Total Time: 55 minutes
- Yield: 16 squares 1x
- Category: Dessert
- Method: Baking
- Cuisine: Canadian/American
- Diet: Vegetarian
Ingredients
For the Date Filling:
- 2 cups (340g) pitted dates, chopped
- 1 cup (240ml) water
- 2 tablespoons lemon juice
- 1 teaspoon vanilla extract
- Pinch of salt
For the Oat Layers:
- 1½ cups (150g) old-fashioned rolled oats
- 1¼ cups (156g) all-purpose flour
- ¾ cup (150g) packed light brown sugar
- ½ teaspoon baking soda
- ½ teaspoon salt
- ¾ cup (170g) unsalted butter, melted
- 1 teaspoon vanilla extract
Instructions
- Preheat and prepare: Preheat your oven to 350°F (175°C). Line a 9×9-inch baking pan with parchment paper, leaving an overhang on two sides for easy removal. Lightly grease the parchment.
- Make the date filling: In a medium saucepan, combine chopped dates, water, lemon juice, and salt. Bring to a boil over medium-high heat, then reduce heat to medium-low. Simmer for 8-10 minutes, stirring occasionally, until dates are very soft and the mixture thickens.
- Mash the dates: Remove from heat and use a potato masher or fork to break down the dates into a thick paste. Some small chunks are fine – you don’t need a completely smooth puree. Stir in vanilla extract. Set aside to cool slightly.
- Prepare the oat mixture: In a large bowl, combine rolled oats, flour, brown sugar, baking soda, and salt. Stir until evenly mixed. Pour in melted butter and vanilla extract. Mix with a fork or your hands until the mixture resembles coarse crumbs and holds together when pressed.
- Assemble the base layer: Press about two-thirds (approximately 2½ cups) of the oat mixture firmly into the bottom of your prepared baking pan, creating an even layer. Use the bottom of a measuring cup to pack it down firmly.
- Add the filling: Spread the date mixture evenly over the oat base, leaving a small border around the edges. Use an offset spatula or the back of a spoon to spread it gently without disturbing the bottom layer.
- Add the top layer: Crumble the remaining oat mixture evenly over the date filling. Press down very gently – you want some texture on top, not a completely smooth surface.
- Bake: Place in the preheated oven and bake for 30-35 minutes, until the top is golden brown and the edges are slightly darker. The center should look set but may still seem slightly soft – it will firm up as it cools.
- Cool completely: Remove from oven and place the pan on a cooling rack. Allow to cool in the pan for at least 1 hour, or preferably 2-3 hours. For the cleanest cuts, refrigerate for 30 minutes before slicing.
- Cut and serve: Use the parchment overhang to lift the entire square from the pan. Transfer to a cutting board and use a sharp knife to cut into 16 squares. Wipe the knife clean between cuts for neat edges.
Notes
- Date selection matters: Softer, fresh dates create a smoother filling. If your dates are dry, soak them in warm water for 10-15 minutes before using.
- Don’t skip the cooling: These bars need time to set properly. Cutting them while warm will result in messy squares that fall apart.
- Adjust sweetness: If you prefer less sweet bars, reduce the brown sugar to ½ cup in the oat mixture.
- Make them thicker: Use an 8×8-inch pan for extra-thick squares, but increase baking time by 5-7 minutes.
Nutrition
- Serving Size: 1 square
- Calories: 215
- Sugar: 22g
- Sodium: 140mg
- Fat: 9g
- Saturated Fat: 5g
- Unsaturated Fat: 3g
- Trans Fat: 0g
- Carbohydrates: 33g
- Fiber: 3g
- Protein: 2g
- Cholesterol: 23mg
Tips & Variations
Spiced Date Squares: Add ½ teaspoon cinnamon, ¼ teaspoon nutmeg, and a pinch of ground ginger to the oat mixture for warm, spiced flavor perfect for fall and winter.
Nutty Variation: Fold ½ cup chopped walnuts or pecans into the oat mixture for added crunch and protein. Toast the nuts first for deeper flavor.
Coconut Date Squares: Replace ½ cup of the oats with unsweetened shredded coconut in the oat layers. This adds tropical flavor and extra texture.
Orange Date Filling: Replace the lemon juice with fresh orange juice and add 1 teaspoon orange zest to the date filling for a citrusy twist.
Chocolate Date Squares: Stir 2-3 tablespoons cocoa powder into the oat mixture and add ½ cup mini chocolate chips to the date filling for a chocolate-date combination.
Maple Sweetened: Replace the brown sugar with ¾ cup pure maple syrup, but reduce the butter slightly to ⅔ cup to compensate for the added liquid.
Vegan Date Squares: Substitute the butter with coconut oil or vegan butter for a plant-based version that’s just as delicious.
Pro Chef Tips
Create contrast with salt: Don’t skip the salt in either the filling or the oat layers. A pinch of flaky sea salt sprinkled on top before baking elevates these from good to extraordinary by enhancing the caramel notes in the dates.
Pack the bottom layer firmly: The base needs to be compressed tightly so it doesn’t crumble when you cut the squares. Use the bottom of a measuring cup or glass to really press it down.
Leave the top layer loose: Conversely, the top oat layer should be crumbly and textured, not packed down. This creates visual appeal and a more interesting mouthfeel with both crispy and tender elements.
Watch for golden edges: The edges will darken before the center, which is your signal that they’re nearly done. The center should look set but may appear slightly underdone – trust the timer and the edges rather than the center appearance.
Score while warm, cut when cold: If you want extra-clean cuts, lightly score the squares with a knife while they’re still slightly warm (about 30 minutes after baking), then finish cutting through once completely cooled.
Toast your oats: For deeper, nuttier flavor, toast the rolled oats in a dry skillet over medium heat for 3-4 minutes before using them in the recipe. This extra step adds incredible depth.
Common Mistakes to Avoid
Using instant oats: Quick oats or instant oats will turn mushy and won’t provide the proper texture. Always use old-fashioned rolled oats for the signature crumbly consistency.
Not cooking the dates long enough: The date filling needs to cook until very soft and paste-like. Undercooked dates won’t spread properly and will create hard spots in your finished bars.
Cutting too soon: This is the most common mistake! Warm date squares fall apart. Wait until they’re completely cooled, or better yet, refrigerate them briefly for the cleanest cuts.
Overpacking the top layer: If you compress the top oat layer too much, you’ll lose the textural contrast that makes these bars special. Keep it crumbly and loose.
Using a pan that’s too large: A larger pan makes thin, dry squares. Stick to 9×9 or 8×8 inches for the proper thickness and moisture balance.
Storage & Meal Prep
Date squares store exceptionally well, making them ideal for meal prep and advance baking. Once completely cooled, store the squares in an airtight container at room temperature for up to 4 days. Layer them with parchment paper to prevent sticking.
For longer storage, refrigerate date squares in an airtight container for up to 10 days. The cool temperature actually improves the texture, making the oat layers slightly firmer and the date filling more cohesive. Let them come to room temperature before serving, or enjoy them cold – both ways are delicious.
You can also freeze individual squares by wrapping each one tightly in plastic wrap, then placing them all in a freezer-safe container or bag. Frozen date squares stay fresh for up to 3 months. Thaw overnight in the refrigerator or at room temperature for 2-3 hours. Avoid microwaving to thaw, as this can make the oats soggy.
Make-Ahead & Freezer Notes
Date squares are one of the best make-ahead desserts because their flavor and texture actually improve after sitting. The oat layers absorb moisture from the date filling, creating an even better balance of textures after 24 hours.
Make-Ahead Timeline:
- 2-3 days ahead: Bake, cool, and cut the squares. Store in an airtight container at room temperature. This timing allows flavors to meld perfectly.
- Up to 1 week ahead: Bake and store uncut in the refrigerator. Slice just before serving for the freshest appearance.
- Up to 3 months ahead: Freeze baked and cooled squares individually or as a whole uncut batch.
Freezer Instructions: To freeze the entire batch uncut, wrap the cooled squares (still in one piece) tightly in plastic wrap, then cover with aluminum foil. Label with the date and freeze flat. When ready to serve, thaw in the refrigerator overnight, bring to room temperature, then cut into squares.
For freezing individual portions, cut the squares and wrap each one separately. This allows you to grab single servings whenever you need a quick dessert or snack. They thaw quickly – in just 30 minutes at room temperature.
Reheating Tips: While date squares are traditionally served at room temperature or chilled, you can warm them slightly if desired. Place a square on a microwave-safe plate and heat for 8-10 seconds – just enough to take off the chill. Alternatively, warm them in a 300°F oven for 5 minutes. Serve warm squares with vanilla ice cream for an indulgent treat.
Serving Suggestions
Date squares are wonderfully versatile and can be served in numerous ways. For a classic presentation, arrange them on a simple plate or cake stand and serve alongside hot coffee or tea. The rich, sweet flavors pair beautifully with the slight bitterness of coffee, making them a perfect afternoon treat.
Elevated Serving Ideas:
- Serve warm with a scoop of vanilla ice cream or a dollop of sweetened whipped cream
- Dust with powdered sugar just before serving for an elegant finish
- Drizzle with salted caramel sauce for extra decadence
- Pair with sharp cheddar cheese (a surprisingly delicious combination – the salty cheese complements the sweet dates)
- Serve with fresh fruit like sliced apples or pears for a refreshing contrast
Beverage Pairings:
- Hot coffee or espresso
- English breakfast tea or earl grey tea
- Cold glass of milk (perfect for kids)
- Chai latte for spiced warmth
- Dessert wine like tawny port
Occasion Ideas: These squares work wonderfully for holiday cookie exchanges, bake sales, potlucks, and family gatherings. They’re substantial enough to satisfy as a dessert but not so rich that you can’t enjoy one with your morning coffee. Pack them in lunchboxes, serve them at brunch, or bring them to book club meetings.
FAQs Section
Can I make date squares without a food processor? Absolutely! This recipe doesn’t require a food processor at all. You simply chop the dates with a knife and cook them on the stovetop until soft, then mash them with a potato masher or fork. No special equipment needed.
Why are my date squares crumbly and falling apart? This usually happens for two reasons: the bottom layer wasn’t packed firmly enough, or the squares were cut before cooling completely. Make sure to press the base layer down very firmly and allow the bars to cool for at least 2 hours (or refrigerate for 30 minutes) before cutting.
Can I use date paste instead of whole dates? Yes! If using date paste (available at Middle Eastern markets or health food stores), you’ll need about 1½ cups. Mix it with the water and lemon juice in the saucepan and cook for just 3-4 minutes until it’s spreadable. The texture will be smoother than using whole dates.
How do I know when the date filling is cooked enough? The date mixture should be thick enough that when you drag a spoon through it, it leaves a trail that doesn’t immediately fill in with liquid. It should look like a thick jam or paste. If it’s still watery after 10 minutes, continue cooking for a few more minutes.
Can I reduce the sugar in this recipe? Yes, you can reduce the brown sugar in the oat layers to ½ cup without dramatically affecting the texture. Keep in mind that the dates provide most of the sweetness anyway. Reducing it further may make the oat layers too dry and crumbly.
My date squares turned out dry. What happened? Dry squares usually result from overbaking or using a pan that’s too large. Make sure you’re using the correct pan size (9×9 or 8×8 inches) and watch the timing carefully. The bars should be golden but not dark brown. Also check that your dates were soft and fresh – dried-out dates create a less moist filling.
Are date squares healthy? While they do contain natural sugars and butter, date squares are made with wholesome ingredients like oats and dates, which provide fiber, vitamins, and minerals. They’re definitely healthier than many conventional desserts. Enjoy them as an occasional treat as part of a balanced diet.
Conclusion
These classic date squares represent everything wonderful about traditional home baking – simple ingredients, straightforward techniques, and absolutely delicious results. The combination of buttery oat layers with naturally sweet date filling creates a dessert that’s both comforting and sophisticated. Whether you call them date squares, matrimonial cake, or date crumble bars, one thing is certain: once you make these, they’ll become a regular fixture in your baking rotation.
The beauty of this recipe lies in its versatility and make-ahead convenience. Bake a batch on the weekend, and you’ll have homemade treats ready for school lunches, afternoon snacks, or unexpected guests throughout the week. They freeze beautifully, travel well, and please everyone from young children to grandparents.
I’d love to hear how your date squares turn out! Drop a comment below with your experience, any variations you tried, or questions you have. And if you loved this recipe as much as we do, please share it on Pinterest – pin the image, save it to your dessert boards, and spread the date square love! Don’t forget to tag your baking photos so we can see your beautiful creations. Happy baking!