Buttery Jam Thumbprint Cookies – Classic Holiday Recipe Everyone Loves

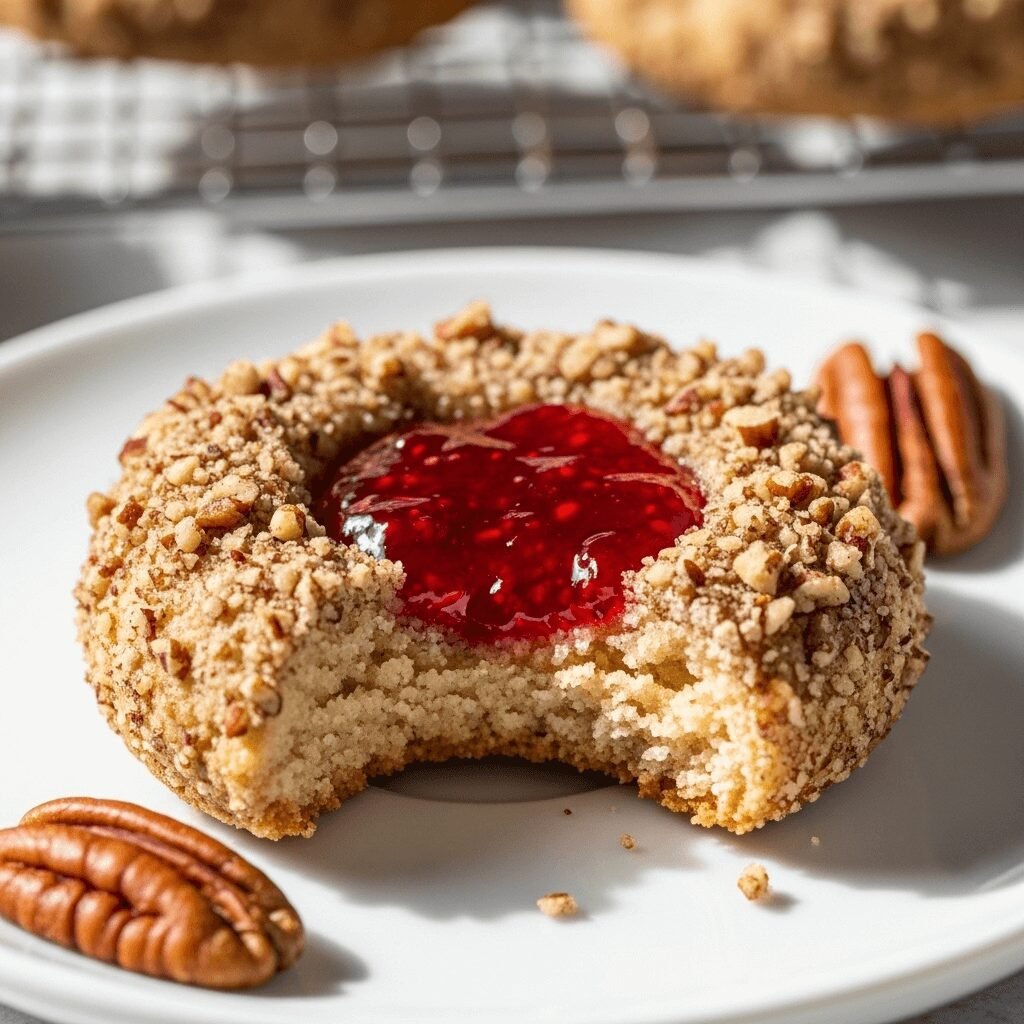
There’s something truly magical about jam thumbprint cookies. These delightful little treats are buttery, tender shortbread cookies with a jewel-like dollop of jam nestled right in the center. They’re beautiful to look at, wonderfully simple to make, and absolutely irresistible to eat.
Jam thumbprint cookies are a beloved classic that graces cookie platters during the holidays, appears at wedding showers and baby celebrations, and makes regular appearances at bake sales and cookie exchanges. Their charm lies in their simplicity – a rich, melt-in-your-mouth butter cookie base paired with your favorite fruit preserves creates a flavor combination that’s both nostalgic and sophisticated.
Whether you’re baking for Christmas, hosting a tea party, or simply craving homemade cookies on a lazy Sunday afternoon, these jam thumbprint cookies are the perfect choice. They’re elegant enough to serve at special occasions yet approachable enough to make any day of the week. Plus, you can customize them with different jam flavors and even roll them in nuts for added texture and visual appeal.
History / Background
The thumbprint cookie has a fascinating history that spans multiple cultures and continents. While the exact origin is debated, most food historians trace these charming cookies back to Scandinavian and Eastern European baking traditions, where similar butter cookies with fruit or nut fillings have been made for centuries.
In Sweden, they’re similar to “hallongrotta” (raspberry cave) cookies, traditionally made with raspberry jam and often rolled in pearl sugar or chopped almonds. Swedish immigrants brought these recipes to America in the late 19th and early 20th centuries, where they gradually evolved into what we now know as thumbprint cookies.
The name “thumbprint” comes from the traditional method of creating the indentation – bakers literally used their thumb to press into the center of each cookie before filling it with jam. This hands-on technique made the cookies accessible to home bakers of all skill levels, contributing to their widespread popularity.
During the 1940s and 1950s, thumbprint cookies became a staple in American home baking, featured prominently in women’s magazines and community cookbooks. They were particularly popular during the holiday season when colorful cookie platters were a point of pride for home bakers. The vibrant red of strawberry or raspberry jam made them especially festive for Christmas celebrations.
Today, thumbprint cookies remain a beloved classic that bridges generations. Grandmothers pass down their recipes to grandchildren, and modern bakers continue to innovate with new flavor combinations, from lemon curd to Nutella to salted caramel. Yet the basic concept remains unchanged – a simple, buttery cookie with a sweet surprise in the middle.
Why You’ll Love This Recipe
This jam thumbprint cookie recipe strikes the perfect balance between simplicity and elegance. You don’t need any fancy equipment or hard-to-find ingredients, yet the results look and taste like they came from a professional bakery. The cookie base is rich and buttery with a tender, shortbread-like texture that practically melts on your tongue. The jam adds a burst of fruity sweetness that complements the butter flavor beautifully.
Here’s why this recipe is absolutely perfect for you:
- Beginner-friendly – No rolling pins, cookie cutters, or complicated techniques required. If you can stir and press your thumb into dough, you can make these!
- Customizable – Use any jam flavor you love, from classic strawberry and raspberry to apricot, blackberry, or even fig preserves
- Make-ahead friendly – The dough can be prepared in advance and refrigerated, making these perfect for stress-free holiday baking
- Beautiful presentation – These cookies look stunning on any dessert table with their jewel-toned centers and optional nut coating
- Freezer-friendly – Both the dough and baked cookies freeze beautifully, so you can always have homemade cookies on hand
- Budget-friendly – Made with pantry staples you probably already have at home
- Kid-approved activity – Children love pressing their thumbs into the dough and filling the cookies with jam
- Versatile for any occasion – Perfect for holidays, weddings, showers, cookie exchanges, or everyday snacking
Ingredient Notes
All-Purpose Flour – The foundation of your cookie dough. All-purpose flour provides the right structure without making the cookies tough. Don’t substitute with cake flour (too soft) or bread flour (too strong).
Unsalted Butter – Use high-quality unsalted butter for the best flavor. It should be softened to room temperature so it creams easily with the sugar. European-style butter with higher fat content will make even richer cookies.
Granulated Sugar – Sweetens the dough and helps create the tender, crumbly texture. Some recipes use powdered sugar, but granulated sugar gives a better texture in this recipe.
Egg Yolk – Adds richness and helps bind the dough. We use only the yolk (saving the white for coating) because it creates a more tender, shortbread-like texture. The yolk also contributes to the beautiful golden color.
Vanilla Extract – Pure vanilla extract is best. It enhances all the other flavors and adds warmth to the buttery dough. You can also use almond extract for a different flavor profile.
Salt – Just a pinch balances the sweetness and enhances the butter flavor. Don’t skip it!
Egg White – Used as a wash to help the chopped nuts stick to the cookies. If you’re not using nuts, you can skip this.
Finely Chopped Nuts – Typically pecans, walnuts, or almonds. These add texture, flavor, and visual appeal. Completely optional if you have nut allergies or prefer plain cookies.
Jam or Preserves – This is where you can get creative! Seedless raspberry and strawberry are classic choices, but apricot, blackberry, cherry, or even marmalade work beautifully. Use good-quality jam for the best flavor. Preserves work better than jelly because they’re thicker and won’t run as much during baking.
Equipment Needed
- Electric mixer (stand mixer or hand mixer) – Makes creaming the butter and sugar effortless
- Mixing bowls – One large bowl for the dough, smaller bowls for egg white and nuts
- Measuring cups and spoons – For accurate measurements
- Baking sheets – At least two, so you can prepare one batch while another bakes
- Parchment paper or silicone baking mats – Prevents sticking and makes cleanup easy
- Cookie scoop or tablespoon – Ensures uniform cookie sizes
- Small spoon or piping bag – For filling the thumbprints with jam
- Wire cooling rack – Allows air circulation so cookies cool evenly
- Rubber spatula – For scraping down the bowl
Jam Thumbprint Cookies Recipe
Classic buttery thumbprint cookies with a sweet jam center. These tender shortbread-style cookies are rolled in chopped nuts and filled with your favorite fruit preserves. Perfect for holidays, cookie exchanges, or afternoon tea!
- Prep Time: 20 minutes
- Cook Time: 12 minutes
- Total Time: 32 minutes (plus chilling time)
- Yield: 36 cookies 1x
- Category: Dessert
- Method: Baking
- Cuisine: American
- Diet: Vegetarian
Ingredients
- 1 cup (226g) unsalted butter, softened to room temperature
- ⅔ cup (133g) granulated sugar
- 2 large egg yolks
- 2 teaspoons pure vanilla extract
- 2 cups (250g) all-purpose flour
- ½ teaspoon salt
- 1 large egg white, lightly beaten
- 1½ cups (180g) finely chopped pecans or walnuts (optional)
- ½ cup (160g) jam or fruit preserves (raspberry, strawberry, apricot, or your choice)
Instructions
- Preheat and prep: Preheat your oven to 350°F (175°C). Line two baking sheets with parchment paper or silicone baking mats and set aside.
- Cream butter and sugar: In a large mixing bowl, use an electric mixer to beat the softened butter and granulated sugar together on medium speed for 2-3 minutes until light and fluffy. The mixture should look pale and creamy.
- Add egg yolks and vanilla: Beat in the egg yolks and vanilla extract until fully combined. Scrape down the sides of the bowl with a rubber spatula to ensure everything is incorporated.
- Mix dry ingredients: In a separate bowl, whisk together the flour and salt. Gradually add the flour mixture to the butter mixture, beating on low speed until just combined. Don’t overmix – stop as soon as you no longer see streaks of flour.
- Chill the dough (optional but recommended): Cover the bowl with plastic wrap and refrigerate for 30 minutes. This makes the dough easier to handle and helps the cookies hold their shape better during baking.
- Prepare coating station: Place the beaten egg white in one small bowl and the chopped nuts in another shallow dish.
- Shape the cookies: Roll the dough into 1-inch balls (about 1 tablespoon of dough each). Dip each ball into the egg white, then roll in the chopped nuts to coat (if using). Place the coated balls on the prepared baking sheets, spacing them about 2 inches apart.
- Make the thumbprints: Using your thumb or the back of a round ½ teaspoon measuring spoon, press firmly into the center of each cookie to create a deep indentation. The dough may crack slightly around the edges – this is normal. You can gently press the cracks back together with your fingers.
- Fill with jam: Spoon about ½ teaspoon of jam into each indentation. Don’t overfill – the jam will spread slightly during baking.
- Bake: Bake for 12-14 minutes, until the cookies are set and the edges are just beginning to turn golden. The cookies should still look slightly pale in color – they’ll firm up as they cool.
- Cool: Let the cookies cool on the baking sheet for 5 minutes, then carefully transfer them to a wire rack to cool completely. If the jam indentations have puffed up during baking, you can gently press them down again while the cookies are still warm.
- Add more jam (optional): Once cooled, you can add a tiny bit more jam to each center if desired for a more dramatic presentation.
Notes
- Make sure your butter is properly softened – it should be soft enough to leave an imprint when pressed but not melted or greasy.
- Don’t skip chilling the dough if your kitchen is warm – it makes a significant difference in how well the cookies hold their shape.
- Re-press the thumbprints if they puff up during baking while the cookies are still warm.
- Use thick jam or preserves rather than thin jelly for best results. If your jam is runny, cook it down slightly before using.
- Store in an airtight container at room temperature for up to 1 week, or freeze for up to 3 months.
Serving Size: 1 cookie
Calories: 115
Sugar: 7g
Sodium: 35mg
Fat: 7g
Saturated Fat: 3.5g
Unsaturated Fat: 3g
Nutrition
- Serving Size: 1 cookie
- Calories: 115
- Sugar: 7g
- Sodium: 35mg
- Fat: 7g
- Saturated Fat: 3.5g
- Unsaturated Fat: 3g
- Trans Fat: 0g
- Carbohydrates: 12g
- Fiber: 0.5g
- Protein: 1.5g
- Cholesterol: 25mg
Nutrition information is approximate and will vary based on exact ingredients used and jam selection.
Tips & Variations
Chocolate Thumbprints: Skip the jam and fill the centers with melted chocolate, Nutella, or chocolate ganache after baking.
Lemon Curd Version: Use lemon curd instead of jam for a bright, tangy flavor. Add lemon zest to the dough for extra citrus punch.
Caramel Pecan Thumbprints: Fill with salted caramel sauce and top with a whole pecan half.
Gluten-Free Option: Substitute a 1:1 gluten-free flour blend for the all-purpose flour. The texture will be slightly more delicate.
Almond Flavor: Replace the vanilla extract with almond extract and use chopped almonds for coating. Fill with apricot or cherry preserves.
Peanut Butter Thumbprints: Add 2-3 tablespoons of peanut butter to the dough and fill with grape or strawberry jelly for PB&J cookies.
Mini Thumbprints: Make smaller balls (about ½ tablespoon each) for bite-sized cookies perfect for parties. Reduce baking time by 2-3 minutes.
Coconut-Coated: Roll the cookies in shredded coconut instead of nuts for a tropical twist.
Mix-and-Match Jams: Use 3-4 different jam flavors on one batch for a beautiful, colorful cookie platter.
Pro Chef Tips
Bring all ingredients to room temperature before starting. This ensures even mixing and a smoother dough that’s easier to work with.
Invest in a cookie scoop for perfectly uniform cookies. Consistent size means even baking – no burnt edges or undercooked centers.
Press deep thumbprints – don’t be shy! The indentation will puff up slightly during baking, so make it deeper than you think necessary.
Warm the jam slightly before spooning it into the cookies. Room temperature or slightly warmed jam spreads more easily and creates a neater appearance.
Double-pan your baking sheets by stacking two sheets together. This prevents the bottoms of the cookies from browning too quickly and creates more even baking.
Let the dough rest in the refrigerator overnight if you have time. This allows the flour to fully hydrate, resulting in a more tender, flavorful cookie.
Toast the nuts before chopping them for coating. A quick 5-minute toast in a 350°F oven intensifies their flavor and adds extra crunch.
Use a piping bag with a small round tip for the neatest jam application. This gives you more control than a spoon and reduces mess.
Common Mistakes to Avoid
Using melted or too-soft butter – This causes cookies to spread too much and lose their shape. Butter should be softened but still hold its shape when pressed.
Overfilling the thumbprints – Too much jam will overflow during baking, creating a sticky mess. Stick to ½ teaspoon or less per cookie.
Not pressing deep enough – Shallow indentations will disappear during baking. Press firmly to create a deep well for the jam.
Overmixing the dough – This develops the gluten in the flour, resulting in tough, dense cookies instead of tender, crumbly ones. Mix just until the flour disappears.
Skipping the chilling step – Warm dough is harder to handle and cookies will spread more during baking. Even a 30-minute chill makes a big difference.
Baking at too high a temperature – These cookies should stay pale with just golden edges. High heat causes overbrowning and makes them dry.
Removing from pan too soon – Let cookies set for 5 minutes on the baking sheet before transferring. They’re fragile when hot and can break easily.
Storage & Meal Prep
Room Temperature Storage: Store completely cooled thumbprint cookies in an airtight container at room temperature for up to 1 week. Place parchment or wax paper between layers to prevent sticking.
Refrigerator Storage: In hot, humid weather, store the cookies in the refrigerator to prevent the jam from becoming too soft or the cookies from getting soggy. They’ll keep for up to 2 weeks refrigerated. Let them come to room temperature before serving for the best texture.
Proper Container: Use a container with a tight-fitting lid. Adding a slice of bread to the container helps maintain moisture and keeps cookies fresh longer – replace the bread slice every 2-3 days.
Reheating: These cookies are delicious at room temperature and don’t require reheating. However, if you prefer them slightly warm, heat in a 300°F oven for 3-5 minutes.
Maintaining Freshness: The jam centers may become slightly firmer after a day or two – this is normal. The cookies will still taste delicious, just with a different texture.
Make-Ahead & Freezer Notes
Preparing Dough in Advance: You can make the cookie dough up to 2 days ahead. Shape it into a disk, wrap tightly in plastic wrap, and refrigerate. Let it sit at room temperature for 15-20 minutes before rolling into balls.
Freezing Unbaked Dough: Shape the dough into balls and freeze them on a baking sheet until solid. Transfer to a freezer bag or container and freeze for up to 3 months. You can coat them in egg white and nuts before freezing, or do this step after thawing. Bake directly from frozen, adding 2-3 minutes to the baking time. Add the jam after baking when using frozen dough balls.
Freezing Baked Cookies: Thumbprint cookies freeze exceptionally well after baking. Let them cool completely, then arrange in a single layer on a baking sheet and freeze until solid. Transfer to freezer bags or airtight containers, layering with parchment paper. They’ll keep for up to 3 months.
Best Thawing Method: For frozen baked cookies, remove them from the freezer and let them thaw at room temperature for about 30 minutes. They’ll taste freshly baked! You can also thaw them overnight in the refrigerator.
Make-Ahead for Events: Bake these cookies 1-2 days before your event and store at room temperature. The flavors actually meld and improve slightly after a day.
Serving Suggestions
Jam thumbprint cookies are incredibly versatile and pair beautifully with many beverages and accompaniments. Here are some delicious ways to serve them:
Hot Beverages: Serve alongside freshly brewed coffee, cappuccino, hot tea, or hot chocolate for a cozy afternoon treat. The buttery cookies complement the warmth of your favorite drink perfectly.
Dessert Platters: Arrange on a beautiful platter with other holiday cookies like snickerdoodles, sugar cookies, and chocolate crinkles for a stunning cookie exchange display.
Tea Party Spread: These cookies are elegant enough for formal afternoon tea. Serve with finger sandwiches, scones, and petit fours for a sophisticated gathering.
Ice Cream Pairing: Crumble thumbprint cookies over vanilla ice cream or use them as a base for an ice cream sandwich with berry ice cream.
Cheese Board Addition: Add a few thumbprint cookies to your dessert cheese board alongside soft brie, honey, fresh berries, and crackers.
Gift Packaging: Layer cookies in decorative tins or boxes with parchment paper between layers. They make wonderful homemade gifts for teachers, neighbors, and friends during the holidays.
Brunch Table: Include these cookies as part of a brunch dessert spread alongside fruit salad, pastries, and coffee cake.
Kids’ Parties: Children love these colorful cookies. Serve with cold milk or hot cocoa for a kid-friendly treat.
FAQs Section
Can I make thumbprint cookies without eggs?
Yes! For an egg-free version, omit the egg yolk and replace with 2 tablespoons of milk or cream. Skip the egg white wash and either coat the cookies directly with nuts or brush with a little milk before rolling in nuts. The texture will be slightly different but still delicious.
Why did my thumbprints disappear during baking?
This happens when the indentation isn’t pressed deep enough or the dough is too warm. Make sure to press firmly to create a deep well, and chill the shaped cookies for 10-15 minutes before baking if your kitchen is warm. You can also re-press the indentations immediately after removing from the oven while cookies are still hot.
Can I use frozen butter for this recipe?
No, butter should be softened to room temperature (around 65-67°F). If you’re in a pinch, you can microwave cold butter in 5-second intervals, rotating the butter each time, until it’s soft but not melted.
What’s the best jam to use for thumbprint cookies?
Seedless raspberry and strawberry preserves are traditional favorites, but any thick jam or preserve works beautifully. Apricot, blackberry, cherry, and fig are all excellent choices. Avoid thin jellies or jams with lots of seeds, as they tend to run during baking.
How do I prevent the cookies from spreading too much?
Chill the dough before baking, make sure your butter isn’t too soft when you start, and don’t overbake. Also ensure your oven is fully preheated before baking. If cookies still spread excessively, refrigerate the shaped, unbaked cookies on the baking sheet for 10-15 minutes before baking.
Can I make these cookies dairy-free?
Absolutely! Replace the butter with a high-quality vegan butter alternative (like Earth Balance or Miyoko’s). Use the same measurements and follow the recipe as written. The flavor will be slightly different, but they’ll still be delicious.
Do thumbprint cookies need to be refrigerated?
Not necessarily. They’re fine stored in an airtight container at room temperature for up to a week. However, in very hot or humid weather, refrigeration helps prevent the jam from becoming too soft and the cookies from getting soggy.
Conclusion
These classic jam thumbprint cookies are everything you want in a homemade treat – buttery, tender, beautiful, and absolutely delicious. Whether you’re baking for the holidays, preparing for a special celebration, or simply want to fill your cookie jar with something special, this recipe delivers every time.
The best part? These cookies are as fun to make as they are to eat. There’s something wonderfully therapeutic about rolling the dough, pressing those little thumbprints, and watching the jam-filled centers glisten as they come out of the oven. And when you take that first bite and experience the contrast between the crumbly, buttery cookie and the sweet, fruity jam center – pure magic!
I hope you and your family love these thumbprint cookies as much as we do. They’ve become a cherished tradition in our home, and I have a feeling they’ll become a favorite in yours too. Don’t forget to experiment with different jam flavors and nut varieties to make them uniquely yours.
Ready to bake? Save this recipe to your Pinterest boards so you can find it easily when cookie season arrives! I’d love to see your beautiful creations – share photos on Pinterest or tag your baking adventures. Happy baking, friend!