Red Velvet Cake Recipe – Perfectly Moist, Fluffy & Bakery-Style!
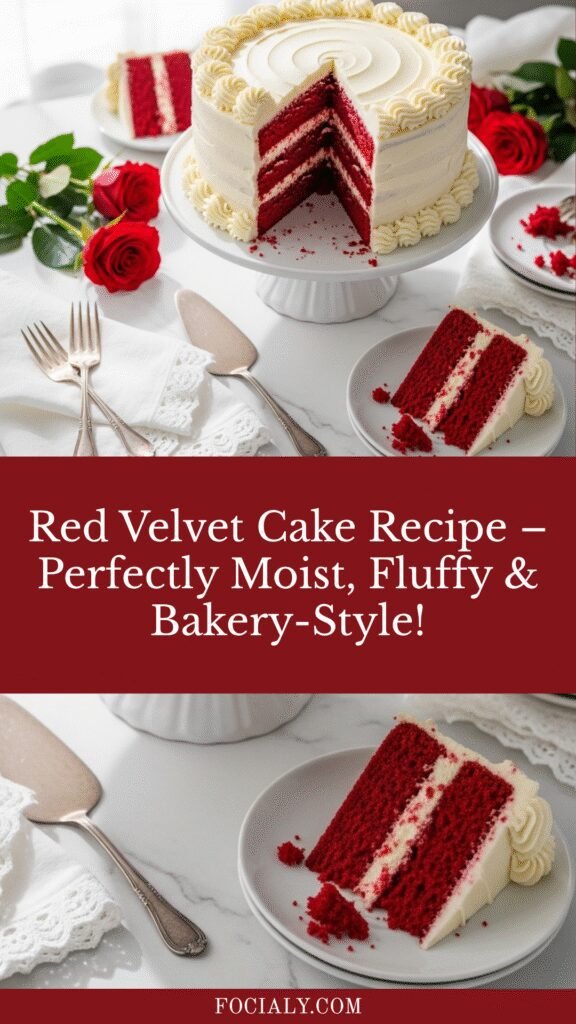
There’s something absolutely magical about red velvet cake that makes it a showstopper at every gathering. This isn’t just another chocolate cake—it’s a delicate balance of subtle cocoa flavor, tangy buttermilk richness, and that signature velvety crumb that melts in your mouth. Topped with silky cream cheese frosting, this red velvet cake recipe delivers bakery-quality results right from your home kitchen.
Whether you’re celebrating a birthday, Valentine’s Day, Christmas, or just craving something special for Sunday dinner, this red velvet cake never disappoints. The stunning crimson layers paired with white frosting create an eye-catching contrast that photographs beautifully (hello, Pinterest!) and tastes even better than it looks. This recipe walks you through every step to ensure your cake turns out perfectly moist, tender, and absolutely irresistible.
History / Background
Red velvet cake has a fascinating history that’s as rich as its flavor. While its exact origins are debated, most food historians trace this beloved dessert back to the Victorian era when “velvet” cakes became popular. These cakes were prized for their exceptionally soft, fine crumb—a luxury texture achieved through specific ingredient combinations and techniques.
The distinctive red color has an interesting evolution. Originally, the natural chemical reaction between cocoa powder (which contained more acidic compounds in early recipes), buttermilk, and vinegar would produce a subtle reddish-brown hue. During the Great Depression and World War II rationing, bakers began using boiled beet juice to enhance the color and add moisture, making the cake more economical and visually appealing.
The modern red velvet cake as we know it—with its vibrant crimson color—gained massive popularity in the 1940s and 1950s, partly thanks to the Adams Extract Company’s marketing campaign. They sold red food coloring alongside recipe cards for “Red Velvet Cake,” and the trend exploded across America. The Waldorf-Astoria Hotel in New York City also claims to have popularized the recipe, though this remains contested culinary lore.
By the 1970s and 1980s, red velvet cake had become a Southern staple, particularly beloved at Juneteenth celebrations, church potlucks, and family reunions. The pairing with tangy cream cheese frosting (rather than the traditional ermine or boiled milk frosting) became standard and is now considered the classic combination. Today, red velvet has transcended regional boundaries and become a nationwide favorite, inspiring everything from cupcakes and cookies to lattes and pancakes.
Why You’ll Love This Recipe
This red velvet cake recipe has been perfected through countless kitchen tests to give you foolproof results every single time. Unlike some recipes that turn out dry or lack that signature tang, this version delivers authentic flavor and texture that rivals any high-end bakery.
Here’s why this recipe will become your go-to:
- Incredibly moist texture – The combination of buttermilk, oil, and eggs creates a cake that stays tender for days
- Perfect balance of flavors – Just enough cocoa for depth without overwhelming the subtle vanilla and tangy notes
- Stunning visual appeal – Vibrant red layers that photograph beautifully and impress every guest
- Beginner-friendly – Clear instructions that guide you through each step, even if you’re new to layer cakes
- Reliable results – Tested measurements and techniques that work consistently every time
- Make-ahead friendly – Layers can be baked in advance, making party prep stress-free
- Crowd-pleaser – This cake appeals to both chocolate lovers and vanilla fans alike
- Special occasion worthy – Elegant enough for weddings yet approachable for casual gatherings
- Budget-friendly ingredients – Uses pantry staples without expensive specialty items
Ingredient Notes
Understanding your ingredients is key to baking success. Here’s what makes each component essential to this recipe:
All-Purpose Flour: Provides structure without making the cake tough. Cake flour can be substituted for an even more tender crumb (use 2¾ cups cake flour in place of 2½ cups all-purpose).
Cocoa Powder: Use unsweetened natural cocoa powder, not Dutch-processed, as the natural acidity is important for the chemical reaction that creates the velvety texture. You only need 2 tablespoons—this isn’t a chocolate cake, just chocolate-kissed.
Buttermilk: The star ingredient that creates the signature tang and tender crumb. No substitutes work quite as well, but in a pinch, mix 1 cup whole milk with 1 tablespoon white vinegar and let sit for 5 minutes.
Vegetable Oil: Keeps the cake incredibly moist and tender, even better than butter alone. The neutral flavor doesn’t compete with the delicate red velvet taste.
Eggs: Room temperature eggs incorporate better and create a lighter texture. Pull them from the fridge 30 minutes before baking.
White Vinegar: Reacts with buttermilk and baking soda to create lift and enhance the velvety texture. Don’t skip it!
Red Food Coloring: Traditional liquid red food coloring works, but gel food coloring gives more vibrant color with less product. You’ll need about 1-2 tablespoons of liquid or 1-2 teaspoons of gel.
Cream Cheese: Must be full-fat and at room temperature for smooth, lump-free frosting. Low-fat versions don’t whip properly.
Butter: Adds richness to the frosting. Always use unsalted so you can control the salt level.
Equipment Needed
Having the right tools makes baking much easier and more enjoyable. Here’s what you’ll need:
- Two or three 9-inch round cake pans
- Parchment paper for lining pans
- Large mixing bowls (at least 2)
- Electric hand mixer or stand mixer with paddle attachment
- Measuring cups and spoons (dry and liquid measures)
- Whisk
- Rubber spatula for folding and scraping
- Cooling racks (wire racks)
- Offset spatula for frosting
- Cake turntable (optional but helpful for frosting)
- Toothpick or cake tester
- Small bowl for mixing food coloring paste
- Sifter or fine-mesh strainer for cocoa powder
Velvet Cake Recipe
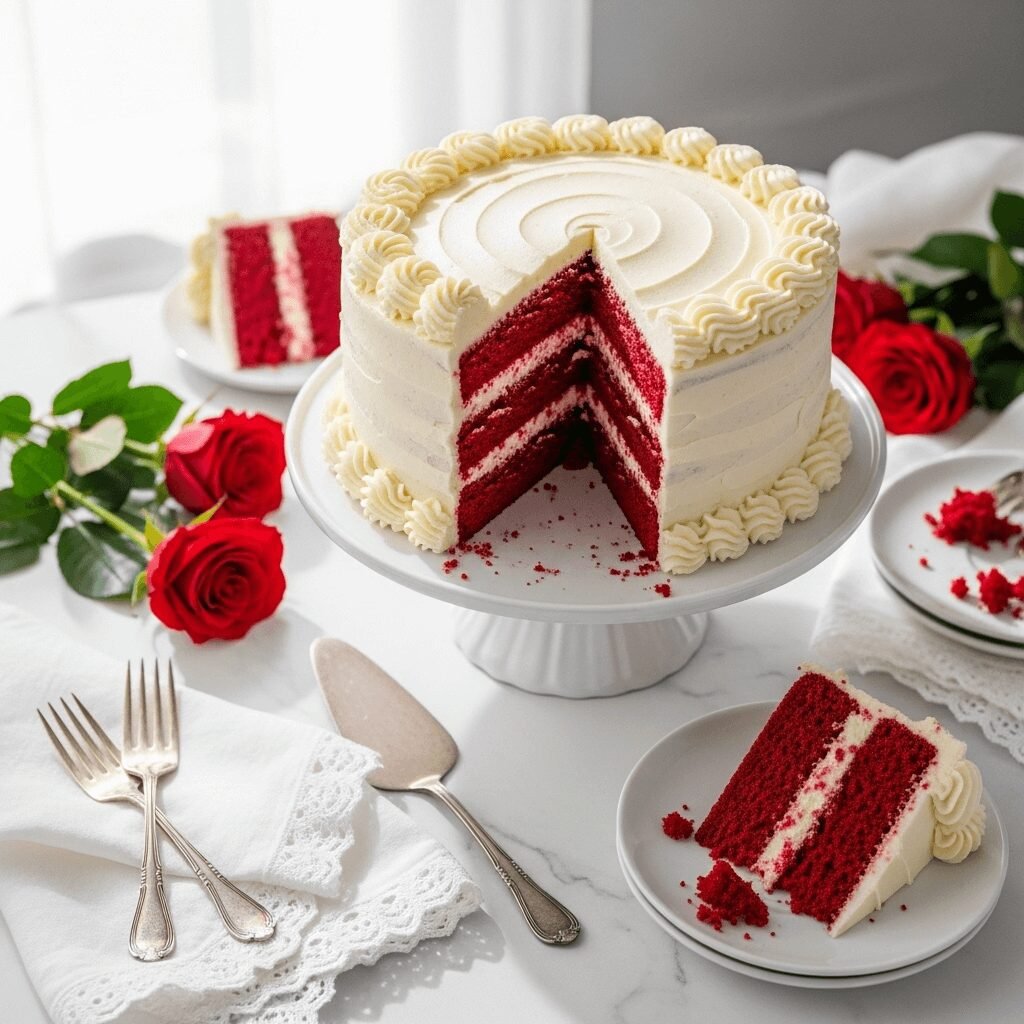
This classic red velvet cake features three layers of perfectly moist, tender crimson cake with subtle cocoa flavor, topped with rich cream cheese frosting. It’s the ultimate celebration cake that’s surprisingly easy to make at home with simple ingredients and clear instructions.
- Prep Time: 25 minutes
- Cook Time: 30 minutes
- Total Time: 55 minutes (plus cooling time)
- Yield: 12-16 servings 1x
- Category: Dessert
- Method: Baking
- Cuisine: American
- Diet: Vegetarian
Ingredients
For the Cake:
- 2½ cups all-purpose flour
- 2 tablespoons unsweetened natural cocoa powder
- 1 teaspoon baking soda
- 1 teaspoon salt
- 1½ cups granulated sugar
- 1½ cups vegetable oil
- 2 large eggs, room temperature
- 1 cup buttermilk, room temperature
- 2 tablespoons red food coloring (liquid) or 1-2 teaspoons gel food coloring
- 1 teaspoon white vinegar
- 1 teaspoon pure vanilla extract
For the Cream Cheese Frosting:
- 16 oz (two 8-oz packages) cream cheese, softened to room temperature
- ¾ cup (1½ sticks) unsalted butter, softened to room temperature
- 5 cups powdered sugar, sifted
- 2 teaspoons pure vanilla extract
- Pinch of salt
Instructions
Prepare the Pans and Oven:
- Preheat your oven to 350°F (175°C). Grease two 9-inch round cake pans with butter or non-stick spray, then line the bottoms with parchment paper circles. Grease the parchment as well and lightly dust with flour, tapping out the excess.
Mix the Dry Ingredients: 2. In a medium bowl, sift together the flour, cocoa powder, baking soda, and salt. Sifting is important to remove lumps and ensure even distribution. Set aside.
Combine Wet Ingredients: 3. In a large mixing bowl, whisk together the sugar and vegetable oil until well combined. Add the eggs one at a time, beating well after each addition until the mixture is smooth and slightly thickened.
- In a small bowl or measuring cup, combine the buttermilk, red food coloring, vinegar, and vanilla extract. Stir until the color is evenly distributed.
Combine Everything: 5. Add the dry ingredients to the sugar-oil-egg mixture in three additions, alternating with the buttermilk mixture, beginning and ending with the dry ingredients. Mix on low speed or stir by hand just until combined after each addition. Do not overmix—stop as soon as you no longer see streaks of flour.
Bake the Cakes: 6. Divide the batter evenly between the prepared pans (use a kitchen scale for precision if desired—each pan should have about 24-25 oz of batter). Smooth the tops with a spatula.
- Bake for 28-32 minutes, or until a toothpick inserted into the center comes out with just a few moist crumbs (not wet batter). The cakes should spring back when lightly pressed.
- Remove from oven and let cool in the pans for 10 minutes, then carefully turn out onto wire cooling racks. Peel off the parchment paper and let cool completely before frosting (this takes about 1-2 hours).
Make the Cream Cheese Frosting: 9. While the cakes cool, prepare the frosting. In a large bowl using an electric mixer, beat the softened cream cheese and butter together on medium speed for 2-3 minutes until completely smooth and creamy with no lumps.
- Reduce speed to low and gradually add the sifted powdered sugar, one cup at a time, beating until incorporated. Add the vanilla extract and salt.
- Increase speed to medium-high and beat for 2-3 minutes until the frosting is light, fluffy, and spreadable. If it’s too thick, add 1-2 tablespoons of heavy cream or milk. If too thin, add more powdered sugar ¼ cup at a time.
Assemble the Cake: 12. Place one cake layer on your serving plate or cake stand. If the tops are domed, use a serrated knife to level them for easier stacking.
- Spread about 1 cup of frosting over the first layer, spreading it evenly to the edges. Place the second cake layer on top, pressing down gently.
- Apply a thin “crumb coat” of frosting over the entire cake to seal in crumbs. Refrigerate for 15-20 minutes to set.
- Apply the final layer of frosting, using an offset spatula to create smooth sides and top, or decorative swirls as desired. Decorate with cake crumbs around the bottom edge if desired.
Notes
- Room Temperature Ingredients: This is crucial! Cold ingredients don’t incorporate properly and can cause the batter to curdle or the frosting to be lumpy.
- Food Coloring Amount: Start with less food coloring and add more if needed. Gel colors are more concentrated than liquid.
- Don’t Overmix: Overmixing develops gluten and creates a tough, dense cake. Mix just until you don’t see dry flour.
- Buttermilk Substitute: If you don’t have buttermilk, mix 1 cup whole milk with 1 tablespoon white vinegar or lemon juice. Let sit 5 minutes before using.
- Cake Flour Option: For an even more tender crumb, substitute cake flour (2¾ cups cake flour for 2½ cups all-purpose flour).
Nutrition
- Serving Size: 1 slice (1/12 of cake)
- Calories: 685
- Sugar: 68g
- Sodium: 385mg
- Fat: 38g
- Saturated Fat: 14g
- Unsaturated Fat: 22g
- Trans Fat: 0g
- Carbohydrates: 82g
- Fiber: 1g
- Protein: 6g
- Cholesterol: 95mg
Nutrition information is estimated and will vary based on cooking methods and specific brands of ingredients used.
Tips & Variations
Classic Variations:
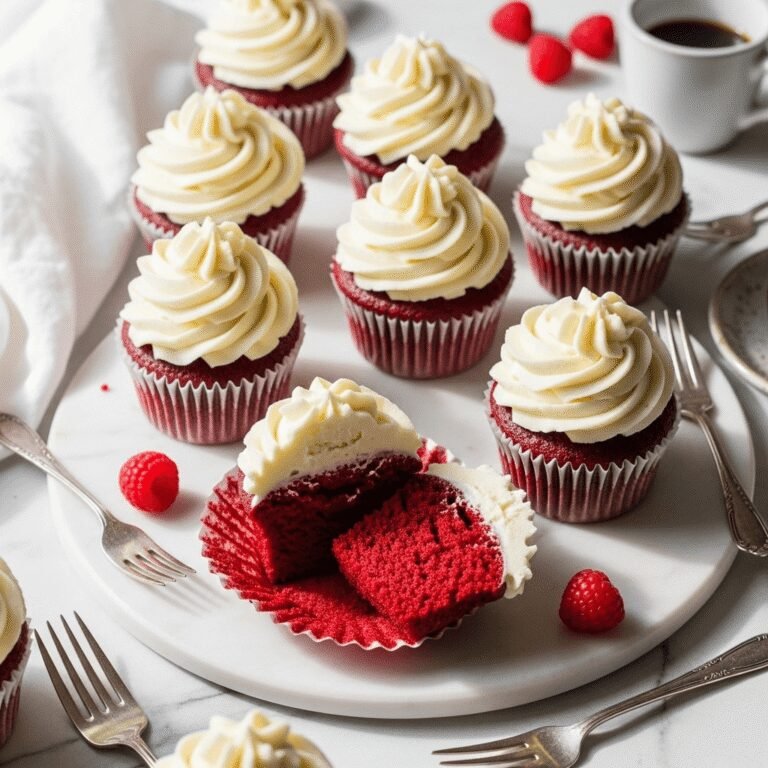
- Red Velvet Cupcakes: Use this batter for 24 cupcakes. Bake at 350°F for 18-22 minutes.
- Sheet Cake: Pour into a 9×13-inch pan and bake for 35-40 minutes for an easier, casual version.
- Three-Layer Cake: Divide batter among three 8-inch pans and reduce baking time to 25-28 minutes.
Flavor Twists:
- Blue Velvet or Pink Velvet: Simply change the food coloring for different occasions.
- Chocolate Cream Cheese Frosting: Add ½ cup cocoa powder to the frosting for chocolate lovers.
- Orange Red Velvet: Add 1 tablespoon orange zest to the batter and 2 teaspoons to the frosting for a subtle citrus note.
- Espresso Red Velvet: Add 1 tablespoon instant espresso powder to enhance the chocolate notes.
Dietary Modifications:
- Gluten-Free: Use a 1:1 gluten-free flour blend with xanthan gum (King Arthur Measure for Measure works well).
- Dairy-Free: Use non-dairy buttermilk (almond milk + vinegar), dairy-free cream cheese, and vegan butter. Results will vary slightly in texture.
Pro Chef Tips
Temperature Matters More Than You Think: Professional bakers always work with room temperature ingredients because they emulsify better, creating a smoother batter and more even crumb structure. Set out your eggs, buttermilk, cream cheese, and butter 1-2 hours before baking.
The Oil Secret: While many home bakers prefer butter for flavor, oil creates a moister cake that stays fresh longer. The vegetable oil doesn’t solidify when refrigerated like butter does, so your cake won’t dry out or become dense after chilling.
Level Your Layers: Use a cake leveler or serrated knife to trim any domed tops before assembling. This creates professional-looking, stable layers that don’t slide around. Save the scraps for cake truffles or simply snack on them!
The Crumb Coat Technique: That first thin layer of frosting isn’t optional—it traps all the loose crumbs so your final coat looks smooth and professional. Let it set in the fridge for 15-20 minutes, and your final frosting layer will glide on beautifully.
Measuring Flour Correctly: Spoon flour into your measuring cup and level with a knife. Never scoop directly from the bag, as this packs the flour and adds 20-30% more than the recipe intended, resulting in dry, dense cake.
Check Doneness Early: Ovens vary significantly. Start checking your cakes at 25 minutes. You want a toothpick to come out with a few moist crumbs, not completely clean. Overbaked cake is the #1 cause of dryness.
Common Mistakes to Avoid
Using Cold Ingredients: This is the most common error. Cold cream cheese creates lumpy frosting, and cold eggs and buttermilk can cause the batter to curdle or not incorporate smoothly. Always bring dairy and eggs to room temperature first.
Overmixing the Batter: Once you add the flour, mix only until just combined. Overmixing develops too much gluten, resulting in a tough, dense cake instead of that signature tender crumb. It’s okay if you see a few small lumps—they’ll bake out.
Skipping the Parchment Paper: Even greased pans can cause sticking. Those 5 extra seconds to line your pans with parchment circles will save you from cake disasters and ensure your layers release perfectly every time.
Not Sifting the Cocoa Powder: Cocoa powder is notorious for forming hard lumps. If you don’t sift it with the flour, you’ll end up with chocolate spots and uneven flavor throughout your cake.
Frosting Warm Cake: This is a recipe for disaster! Warm cake will cause the frosting to melt, slide off, and create a goopy mess. Always let your cake layers cool completely—at least 1-2 hours or even overnight in the fridge before frosting.
Storage & Meal Prep
Room Temperature Storage: If your kitchen isn’t too warm (below 70°F), you can keep frosted red velvet cake covered on the counter for up to 2 days. The cream cheese frosting is generally safe due to the high sugar content acting as a preservative.
Refrigerator Storage: For longer storage or warmer environments, refrigerate the cake in an airtight container or covered cake dome for up to 5 days. Bring to room temperature 30-60 minutes before serving for the best texture and flavor. Cold cake is denser and less flavorful.
Unfrosted Layers: Wrapped tightly in plastic wrap, unfrosted cake layers stay fresh at room temperature for 2 days, refrigerated for 1 week, or frozen for up to 3 months.
Frosting Storage: Extra cream cheese frosting keeps in an airtight container in the refrigerator for up to 2 weeks. Bring to room temperature and re-whip briefly before using to restore the fluffy texture.
Reheating: While best served at room temperature, you can gently warm individual slices in the microwave for 10-15 seconds if you prefer warm cake. The frosting will soften but won’t melt completely.
Make-Ahead & Freezer Notes
This red velvet cake is wonderfully make-ahead friendly, which makes it perfect for stress-free entertaining and special occasions.
Baking the Layers in Advance: You can bake the cake layers up to 2 days ahead. Once completely cooled, wrap each layer tightly in plastic wrap, then wrap again in aluminum foil. Store at room temperature for up to 2 days or refrigerate for up to 5 days before frosting.
Freezing Cake Layers: For longer advance prep, freeze unfrosted layers for up to 3 months. Wrap each cooled layer in plastic wrap, then foil, and place in a freezer-safe bag or container. Thaw overnight in the refrigerator, then bring to room temperature before frosting. The texture remains perfect!
Freezing the Frosted Cake: Yes, you can freeze the entire frosted cake! First, freeze it uncovered for 1-2 hours until the frosting is firm. Then wrap carefully in plastic wrap and foil. Freeze for up to 2 months. Thaw overnight in the refrigerator, still wrapped, then uncover and bring to room temperature before serving.
Making the Frosting Ahead: Prepare cream cheese frosting up to 3 days ahead and refrigerate in an airtight container. When ready to use, let it come to room temperature, then beat with a mixer for 1-2 minutes to restore the light, fluffy texture.
Best Reheating Method: If frozen, always thaw in the refrigerator while wrapped to prevent condensation from making the cake soggy. Once thawed, let come to room temperature for the best flavor and texture. Red velvet cake is meant to be enjoyed at room temperature when the flavors are most pronounced.
Serving Suggestions
Red velvet cake is stunning on its own, but these pairings elevate the experience:
Classic Beverage Pairings: Hot coffee or espresso cuts through the richness beautifully. Cold milk is a childhood favorite that never gets old. For adults, a glass of sweet dessert wine like Moscato or a creamy Irish cream liqueur complements the tangy frosting perfectly.
For Afternoon Tea or Brunch: Serve smaller slices alongside fresh strawberries, raspberries, or mixed berries. The fruit’s tartness balances the sweet frosting. Add champagne or mimosas for a celebratory brunch spread.
Ice Cream Pairing: A scoop of vanilla bean ice cream or cream cheese ice cream alongside warm red velvet cake creates an irresistible hot-cold contrast.
Holiday Presentations: For Christmas, garnish with white chocolate shavings, fresh cranberries, and mint sprigs. For Valentine’s Day, add fresh rose petals and chocolate-covered strawberries. For summer celebrations, top with fresh berries and edible flowers.
Complete Dessert Table: If you’re serving this at a party, round out your dessert spread with lighter options like lemon bars, fruit tarts, or a cheese board with honey and nuts so guests can choose their sweetness level.
FAQs Section
Q: Can I make this cake without food coloring?
A: Absolutely! You’ll have a “naked velvet” or “mystery cake” with all the same delicious flavor but a light brown color from the cocoa. Some bakers actually prefer this more natural look. The taste remains identical.
Q: Why is my red velvet cake dry?
A: The most common causes are overbaking, using too much flour (pack it less when measuring), or overmixing the batter. Make sure to check doneness a few minutes early, measure flour correctly by spooning and leveling, and mix only until just combined.
Q: Can I use a different frosting instead of cream cheese?
A: While cream cheese frosting is traditional and beloved, you can use vanilla buttercream, ermine frosting (cooked flour frosting—the original pairing), or even whipped cream for a lighter option. However, cream cheese frosting’s tang perfectly complements the cake’s subtle flavors.
Q: My frosting is too soft/runny. How do I fix it?
A: This usually means your cream cheese or butter was too warm, or you didn’t use enough powdered sugar. Refrigerate the frosting for 20-30 minutes, then re-whip. If still too soft, gradually beat in more powdered sugar ¼ cup at a time until you reach spreading consistency.
Q: What’s the difference between red velvet and chocolate cake?
A: Red velvet contains much less cocoa powder (just 2 tablespoons versus ½-¾ cup in chocolate cake), uses oil instead of butter, and includes buttermilk and vinegar for a tangy flavor and velvety texture. It’s more subtle and complex than chocolate cake.
Q: Can I bake this as cupcakes, and if so, how long?
A: Yes! This recipe makes about 24 cupcakes. Fill liners ⅔ full and bake at 350°F for 18-22 minutes, testing with a toothpick. They’re perfect for parties and portion control.
Q: Why does my cake have a weird aftertaste?
A: This could be from using too much baking soda (which tastes metallic), artificial vanilla extract (use pure vanilla), or expired ingredients. Also, Dutch-processed cocoa instead of natural cocoa can create off flavors in this recipe due to different acidity levels.
Conclusion
There’s a reason red velvet cake has remained a beloved American classic for generations—it’s simply unforgettable. The moment you slice into those gorgeous crimson layers and take your first bite of that tender, tangy cake with luscious cream cheese frosting, you’ll understand why this recipe deserves a permanent spot in your baking repertoire.
Whether you’re baking for a special celebration, surprising someone you love, or simply treating yourself to something extraordinary, this red velvet cake delivers every single time. The best part? It’s so much easier to make than it looks, and the compliments you’ll receive will make you feel like a professional baker.
I’d love to hear about your red velvet cake adventures! Did you add your own twist? Serve it at a special occasion? Drop a comment below and share your experience. And don’t forget to save this recipe to your Pinterest boards so you can find it whenever the craving strikes. Happy baking, friends—here’s to creating delicious memories, one slice at a time! 🍰❤️