The Best Homemade Graham Cracker Crust Recipe (So Easy & No-Bake!)
If you’ve ever made a cheesecake, cream pie, or no-bake dessert, you know that a buttery, sweet graham cracker crust is the foundation that holds everything together. This homemade graham cracker crust recipe is incredibly simple, requiring just three basic ingredients and about 10 minutes of your time. Unlike store-bought crusts that can taste stale or overly processed, making your own graham cracker crust gives you complete control over the texture, sweetness, and quality of ingredients.
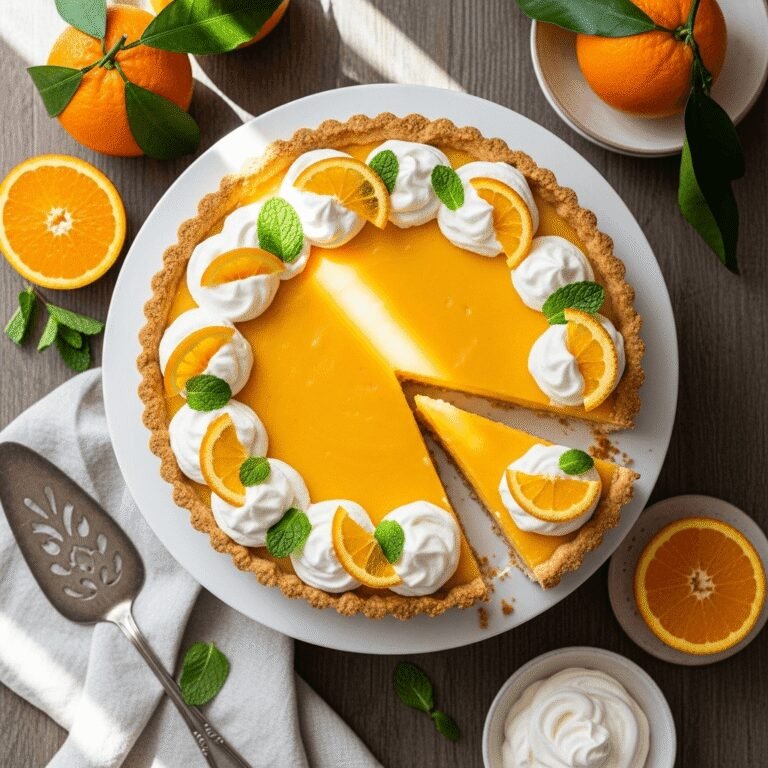
Whether you’re preparing a classic New York cheesecake, a silky chocolate cream pie, a refreshing key lime pie, or even cheesecake bars, this versatile crust works beautifully with both baked and no-bake desserts. The combination of finely ground graham crackers, melted butter, and a touch of sugar creates a crispy, slightly sweet base that complements creamy fillings without overpowering them. It’s become a staple in American dessert-making, and once you learn how easy it is to make from scratch, you’ll never go back to the pre-made versions.
This recipe is perfect for holiday gatherings, potlucks, birthday celebrations, or simply when you’re craving something sweet and homemade. The best part? You can make it ahead of time, customize it with different flavors, and even freeze it for future use.
History / Background
The graham cracker itself has a fascinating history that dates back to the 1820s when Reverend Sylvester Graham, a Presbyterian minister and dietary reformer, created the graham flour as part of his advocacy for healthier eating habits. He believed that a diet rich in whole grains would improve both physical and spiritual health. The original graham crackers were unsweetened, bland, and quite different from the honey-sweetened treats we enjoy today.
Graham crackers gained widespread popularity in America during the late 19th and early 20th centuries, eventually becoming a pantry staple. The transformation of graham crackers into a dessert crust likely emerged in the early 1900s as home bakers began experimenting with alternative pie crusts that didn’t require the labor-intensive process of making traditional pastry dough.
The graham cracker crust became especially popular during the mid-20th century when convenience cooking took center stage in American kitchens. Recipes for no-bake desserts flourished, and the simple combination of crushed graham crackers and butter provided an accessible solution for busy homemakers who wanted to create impressive desserts without spending hours in the kitchen.
Today, the graham cracker crust is synonymous with American dessert culture, particularly associated with cheesecakes, cream pies, and summertime desserts. It represents the beautiful intersection of convenience and homemade quality—something that’s quick enough for weeknight treats but delicious enough for special occasions.
Why You’ll Love This Recipe
Making your own graham cracker crust from scratch is truly a game-changer in home baking. While it might seem easier to grab a pre-made crust from the store, the homemade version is so simple and so much better that you’ll wonder why you ever bought the packaged kind. The process is straightforward, forgiving, and incredibly satisfying.
Here’s what makes this recipe absolutely irresistible:
- Ridiculously Easy – With just 3 ingredients and no special skills required, even complete beginners can master this recipe on their first try
- Ready in Minutes – From start to finish, you’ll have a perfect crust ready in about 10 minutes, plus optional chilling time
- Budget-Friendly – Making your own costs significantly less than buying pre-made crusts, and you probably already have the ingredients in your pantry
- Incredibly Versatile – Works perfectly for cheesecakes, cream pies, icebox cakes, and countless other desserts
- Customizable – Easily adjust the sweetness, add spices like cinnamon, or swap in different types of crackers for unique flavor profiles
- Better Texture – Homemade crusts have a superior texture—crispy, buttery, and fresh-tasting without any preservatives or artificial flavors
- Make-Ahead Friendly – Prepare it days in advance or even freeze it for up to three months without any quality loss
- Crowd-Pleaser – Everyone loves the sweet, buttery crunch that perfectly complements creamy dessert fillings
Ingredient Notes
The beauty of this graham cracker crust lies in its simplicity. With just three basic ingredients, you can create something that tastes homemade and impressive. Let’s break down each component and why it matters.
Graham Crackers – The star of the show! You’ll need about 9-10 full graham cracker sheets (which typically come scored into 4 sections each). Look for regular honey graham crackers for the classic flavor, though you can experiment with chocolate or cinnamon varieties for different flavor profiles. The crackers need to be finely ground into crumbs—the finer, the better. If your crumbs are too coarse, the crust won’t hold together properly. Substitution: You can use vanilla wafers, chocolate wafer cookies, gingersnaps, or even crushed digestive biscuits for different flavor variations.
Unsalted Butter – Melted butter acts as the binding agent that holds the crumbs together and creates that irresistible buttery flavor and golden color when baked. Using unsalted butter allows you to control the saltiness of your crust. Make sure it’s fully melted but not sizzling hot, as extremely hot butter can make the mixture too wet. Substitution: Salted butter works fine if that’s what you have—just reduce or omit any additional salt. For dairy-free versions, use melted coconut oil or vegan butter.
Granulated Sugar – Just a touch of sugar enhances the natural sweetness of the graham crackers and helps with browning if you’re baking the crust. Some bakers prefer light brown sugar for a deeper, more caramel-like flavor. Substitution: Brown sugar, coconut sugar, or even a sugar substitute like monk fruit sweetener can work, though the flavor and texture may vary slightly.
Optional: Salt – A tiny pinch of salt (about 1/8 teaspoon) isn’t necessary but can really elevate the flavor by balancing the sweetness and enhancing the buttery notes.
Equipment Needed
You don’t need any specialized equipment to make a perfect graham cracker crust, but having the right tools makes the process even easier:
- Food Processor or Blender – The fastest way to turn graham crackers into fine crumbs. A food processor gives you the most control and even texture.
- Rolling Pin and Zip-Top Bag – If you don’t have a food processor, place the crackers in a sturdy zip-top bag and crush them with a rolling pin until finely ground. This method takes a bit more elbow grease but works perfectly.
- Mixing Bowl – A medium-sized bowl for combining the crumbs, butter, and sugar.
- Measuring Cups and Spoons – For accurate ingredient measurements.
- 9-Inch Pie Plate or Springform Pan – Depending on what dessert you’re making. Glass, ceramic, or metal pans all work well.
- Flat-Bottomed Measuring Cup or Glass – Essential for pressing the crust evenly into the pan and up the sides.
- Fork – For pricking the bottom of the crust if you’re pre-baking it to prevent bubbles.
Graham Cracker Crust Recipe
This easy homemade graham cracker crust requires just 3 simple ingredients and comes together in minutes. Perfect for cheesecakes, cream pies, and no-bake desserts, this buttery, crispy crust is far superior to store-bought versions.
- Prep Time: 10 minutes
- Cook Time: 10 minutes (if baking) or 0 minutes (for no-bake)
- Total Time: 20 minutes (baked) or 2 hours 10 minutes (no-bake with chilling)
- Yield: 1 9-inch pie crust (8 servings) 1x
- Category: Dessert
- Method: No-Bake
- Cuisine: American
- Diet: Vegetarian
Ingredients
- 1½ cups (150g) graham cracker crumbs (about 9-10 full graham cracker sheets)
- 5 tablespoons (70g) unsalted butter, melted
- ¼ cup (50g) granulated sugar
- Pinch of salt (optional)
Instructions
- Prepare Your Graham Cracker Crumbs: Break the graham crackers into pieces and add them to a food processor. Pulse until you have fine, even crumbs with no large chunks remaining. Alternatively, place crackers in a sturdy zip-top bag, seal it, and crush them with a rolling pin until finely ground. You should have about 1½ cups of crumbs when measured.
- Combine the Ingredients: Transfer the graham cracker crumbs to a medium mixing bowl. Add the granulated sugar and salt (if using), and stir to combine evenly. Pour the melted butter over the crumb mixture and stir with a fork or spatula until all the crumbs are evenly moistened. The mixture should resemble wet sand and hold together when squeezed in your palm.
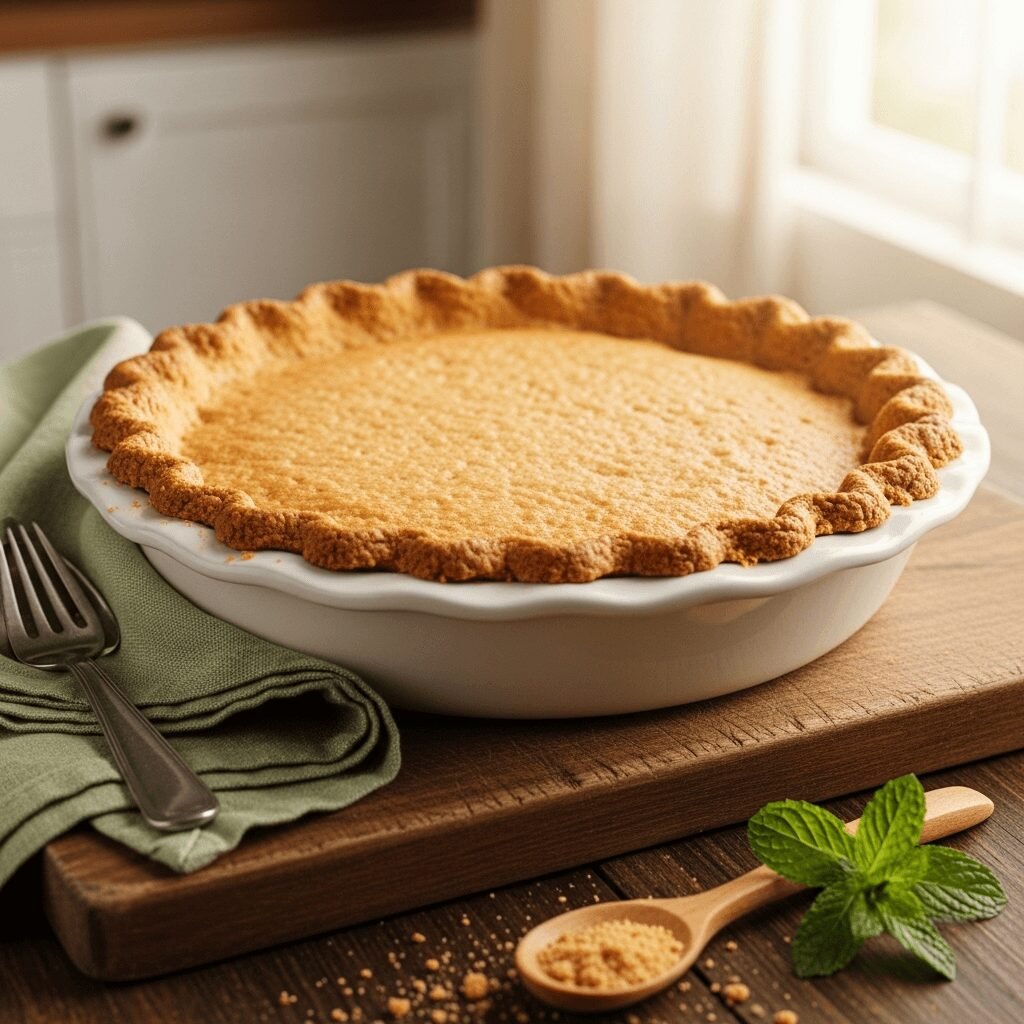
- Press Into the Pan: Transfer the crumb mixture to your 9-inch pie plate or springform pan. Pour the mixture into the center and spread it evenly across the bottom. Using the bottom of a flat measuring cup or glass, press the crumbs firmly into the bottom and up the sides of the pan, creating an even layer. Make sure to compact it well—a loose crust will crumble when you try to slice your dessert. Pay special attention to where the bottom meets the sides, pressing firmly to prevent gaps.
- Choose Your Method:
- For No-Bake Desserts: Cover the crust and refrigerate for at least 2 hours or freeze for 30 minutes until firm before adding your filling. This helps the butter solidify and the crust hold its shape.
- For Baked Desserts: Preheat your oven to 350°F (175°C). Prick the bottom of the crust several times with a fork to prevent bubbling. Bake for 8-10 minutes until the crust is lightly golden and fragrant. Remove from the oven and let it cool completely before filling. If you’re making a baked dessert like traditional cheesecake, you can skip pre-baking and bake the crust along with your filling.
- Fill and Serve: Once your crust is ready (either chilled or baked and cooled), add your desired filling and proceed with your recipe. Slice with a sharp knife, wiping the blade clean between cuts for neat slices.
Notes
- Butter Temperature: Make sure your melted butter isn’t too hot, or it can make the mixture too greasy. Let it cool slightly after melting.
- Thickness: For a thicker crust, use 2 cups of graham cracker crumbs, 6 tablespoons of butter, and ⅓ cup of sugar.
- Preventing Soggy Crust: For very wet fillings, brush the pre-baked crust with a thin layer of melted white chocolate or brush beaten egg white over the crust and bake for 5 minutes to create a moisture barrier.
- Even Pressing: The key to a sturdy crust is pressing it firmly and evenly. Don’t be shy—really pack it down!
Nutrition
- Serving Size: 1 slice (⅛ of crust)
- Calories: 165
- Sugar: 10g
- Sodium: 135mg
- Fat: 9g
- Saturated Fat: 5g
- Unsaturated Fat: 3g
- Trans Fat: 0g
- Carbohydrates: 19g
- Fiber: 0.5g
- Protein: 1g
- Cholesterol: 20mg
Note: Nutrition information is an estimate and will vary based on specific brands used and whether the crust is used for the bottom only or pressed up the sides.
Tips & Variations
One of the best things about this graham cracker crust is how adaptable it is to different flavors and dietary needs. Here are some creative ways to customize your crust:
Flavor Variations:
- Chocolate Graham Cracker Crust – Use chocolate graham crackers instead of regular ones for a deeper, richer flavor that pairs beautifully with chocolate or peanut butter desserts.
- Cinnamon Spice – Add ½ teaspoon of ground cinnamon or a pinch of nutmeg to the crumb mixture for a warm, spiced crust perfect for fall desserts.
- Brown Butter Version – Brown your butter before mixing it with the crumbs for a nutty, caramel-like flavor that adds incredible depth.
- Lemon or Orange Zest – Add 1 teaspoon of finely grated citrus zest to brighten up the flavor, especially nice for lemon or key lime pies.
- Vanilla Extract – A splash of pure vanilla extract (about ½ teaspoon) enhances the overall sweetness and aroma.
Alternative Crumb Bases:
- Oreo Cookie Crust – Swap graham crackers for Oreo cookies (cream filling and all) for a chocolate cookie crust.
- Gingersnap Crust – Use gingersnap cookies for a spicy, robust crust that works wonderfully with pumpkin or apple desserts.
- Pretzel Crust – Substitute crushed pretzels for a sweet-and-salty crust that’s amazing with chocolate or peanut butter fillings.
- Biscoff or Speculoos Crust – Use Biscoff cookies for a caramelized, spiced cookie crust with incredible flavor.
Dietary Modifications:
- Vegan/Dairy-Free – Replace butter with melted coconut oil or vegan butter. The crust will still hold together beautifully.
- Gluten-Free – Use certified gluten-free graham crackers or gluten-free vanilla wafers.
- Lower Sugar – Reduce the sugar to 2 tablespoons or use a sugar substitute if you prefer a less sweet crust.
Pro Chef Tips
Taking your graham cracker crust from good to absolutely exceptional comes down to a few professional techniques:
Weigh Your Ingredients – For the most consistent results, weigh your graham cracker crumbs rather than measuring by volume. 150 grams of crumbs will always give you the perfect texture, whereas cup measurements can vary depending on how finely ground your crumbs are.
Test the Moisture Level – Before pressing the mixture into your pan, squeeze a small amount in your hand. It should hold together like wet sand without being greasy or dry. If it’s too dry and crumbly, add another tablespoon of melted butter. If it’s too wet, add a few more tablespoons of crumbs.
Use a Second Pan for Perfect Pressing – Here’s a pro trick: If you’re using a pie plate, press the crumbs in with a slightly smaller pie plate or the bottom of a same-sized pan. This creates an incredibly even, professional-looking crust with uniform thickness.
Don’t Skip the Fork Prick – If you’re pre-baking your crust, pricking the bottom with a fork prevents steam bubbles from forming and creating an uneven surface. This simple step ensures your crust stays flat and smooth.
Cool Completely Before Filling – If you’re baking your crust, let it cool to room temperature before adding any filling. Adding filling to a warm crust can cause it to become soggy or make the filling weep.
Freeze for Extra Sturdiness – Even if you’re just chilling your crust, popping it in the freezer for 20-30 minutes creates an extra-firm base that’s much easier to work with and less likely to crack when you add your filling.
Brush with Egg White for Moisture Protection – For custard or cream pies with very wet fillings, brush the pre-baked crust with beaten egg white and bake for an additional 3-5 minutes. This creates an invisible barrier that prevents sogginess.
Common Mistakes to Avoid
Even with such a simple recipe, there are a few pitfalls that can turn your perfect crust into a crumbly mess:
Not Grinding the Crackers Fine Enough – Large chunks of graham crackers won’t bind together properly and will create a crust that falls apart when you try to slice it. Take the time to pulse your food processor or crush with a rolling pin until the crumbs are uniformly fine, almost like coarse sand.
Using Too Much or Too Little Butter – The butter is what holds everything together, so the ratio matters. Too little butter results in a dry, crumbly crust that won’t hold its shape. Too much butter makes the crust greasy and soggy. Stick to the measurements and adjust only if the texture isn’t right when you squeeze it.
Not Pressing Firmly Enough – A loosely packed crust will crumble the moment you try to cut it. You really need to press down hard with your measuring cup or glass, compacting the crumbs as much as possible. Don’t worry about pressing too hard—it’s almost impossible to overdo it.
Filling the Crust While It’s Still Warm – If you’ve pre-baked your crust, adding filling while it’s warm can cause moisture to condense and make the crust soggy. Always let it cool completely to room temperature first.
Ignoring the Chill Time for No-Bake Crusts – If your recipe calls for a no-bake crust, skipping or shortening the chill time means the butter won’t have time to solidify. This results in a crust that’s too soft and won’t support your filling properly. Give it the full 2 hours in the fridge or 30 minutes in the freezer.
Storage & Meal Prep
One of the best features of graham cracker crust is how well it stores, making it perfect for advance preparation:
Unfilled Crust Storage:
- Refrigerator: An unfilled, baked or unbaked crust can be wrapped tightly with plastic wrap and stored in the refrigerator for up to 3 days before filling.
- Room Temperature: If your kitchen is cool and dry, an unfilled baked crust can sit at room temperature, covered with foil or plastic wrap, for up to 2 days.
Filled Dessert Storage:
- Once filled, storage depends on your filling. Most cream pies and cheesecakes should be refrigerated and will keep for 3-5 days covered loosely with plastic wrap or in an airtight container.
- For best texture, let refrigerated desserts sit at room temperature for about 15 minutes before serving to take the chill off.
Reheating:
- Graham cracker crusts are typically served with cold or room-temperature fillings and don’t need reheating. However, if you want to refresh a crust that’s become slightly soft, you can warm it in a 300°F oven for 5-7 minutes to re-crisp it, then cool completely before filling.
Keeping Crusts Crispy:
- To prevent sogginess, store filled desserts uncovered in the refrigerator for the first hour to let the surface set, then cover loosely. This prevents condensation from forming on the surface.
Make-Ahead & Freezer Notes
Graham cracker crust is incredibly freezer-friendly, making it one of the best crusts to prepare in advance:
Freezing Unbaked Crust:
- Press your crust into the pan as directed, then wrap the entire pan tightly with plastic wrap followed by aluminum foil. Freeze for up to 3 months. When ready to use, you can bake or fill the crust directly from frozen—no need to thaw first. If baking from frozen, add 2-3 extra minutes to the baking time.
Freezing Baked Crust:
- Let the baked crust cool completely, then wrap tightly with plastic wrap and aluminum foil. Freeze for up to 3 months. Thaw in the refrigerator overnight or at room temperature for about an hour before filling.
Make-Ahead Tips:
- You can prepare the graham cracker crumbs up to a week in advance. Store them in an airtight container at room temperature, then just add the butter and sugar when you’re ready to make the crust.
- For entertaining, make your crust 2-3 days ahead and store it covered in the refrigerator. This actually allows the flavors to develop and the butter to firm up nicely.
Freezing Filled Desserts:
- Many filled desserts like cheesecake and cream pies freeze beautifully. Wrap them well after they’re completely set and freeze for up to 2 months. Thaw overnight in the refrigerator before serving.
Best Reheating Method:
- For a make-ahead baked crust that’s been refrigerated or frozen, warm it in a 300°F oven for 5-7 minutes to restore crispness, then cool completely before adding your filling.
Serving Suggestions
A graham cracker crust is the perfect foundation for countless desserts. Here are some delicious ways to use your homemade crust:
Classic Pairings:
- New York Cheesecake – The ultimate pairing! The buttery graham crust perfectly complements rich, creamy cheesecake.
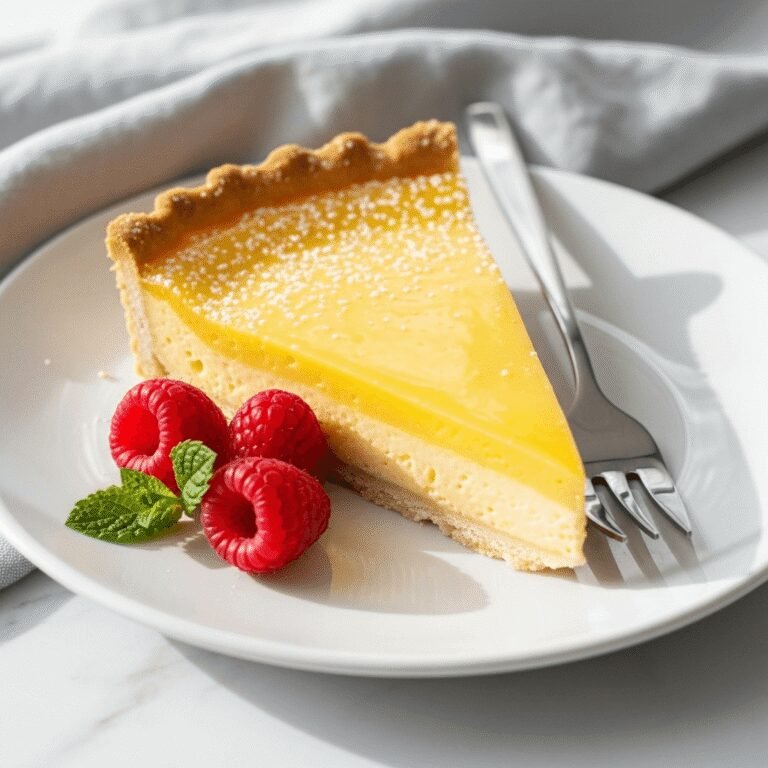
- Key Lime Pie – Tart, tangy key lime filling with a sweet graham base is a match made in heaven.
- Chocolate Cream Pie – Silky chocolate pudding nestled in a graham cracker crust and topped with whipped cream.
- Banana Cream Pie – Layers of vanilla custard, fresh bananas, and whipped cream on a graham cracker base.
- Pumpkin Cheesecake – Combine the best of both worlds with spiced pumpkin cheesecake on a cinnamon graham crust.
No-Bake Desserts:
- Icebox Cake – Layer pudding and whipped cream in your graham crust for an easy, impressive dessert.
- Strawberry Pretzel Salad Pie – A unique sweet-and-salty combination that’s always a hit.
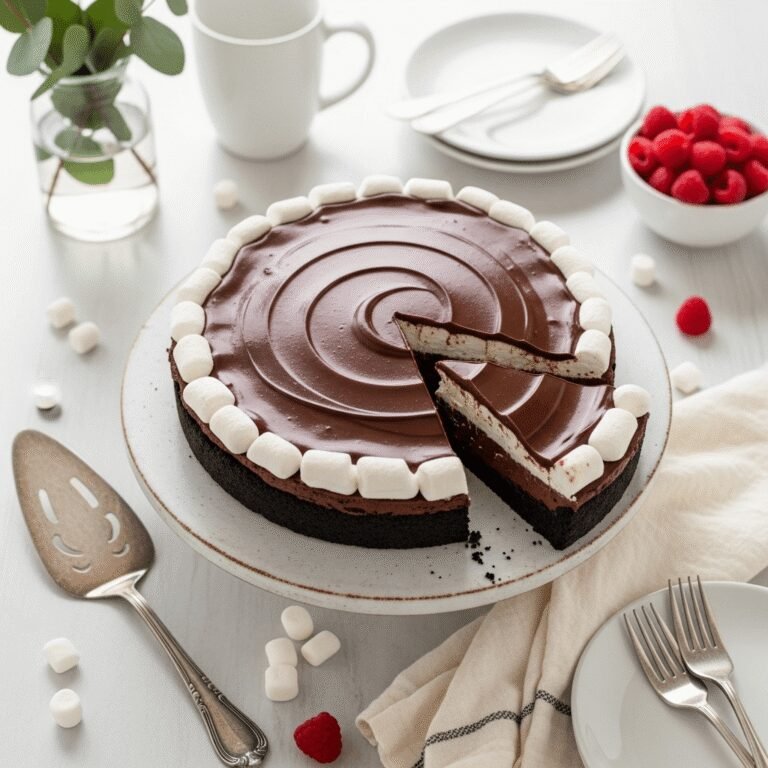
- No-Bake Peanut Butter Pie – Creamy peanut butter filling on a chocolate graham crust is absolutely decadent.
Accompaniments:
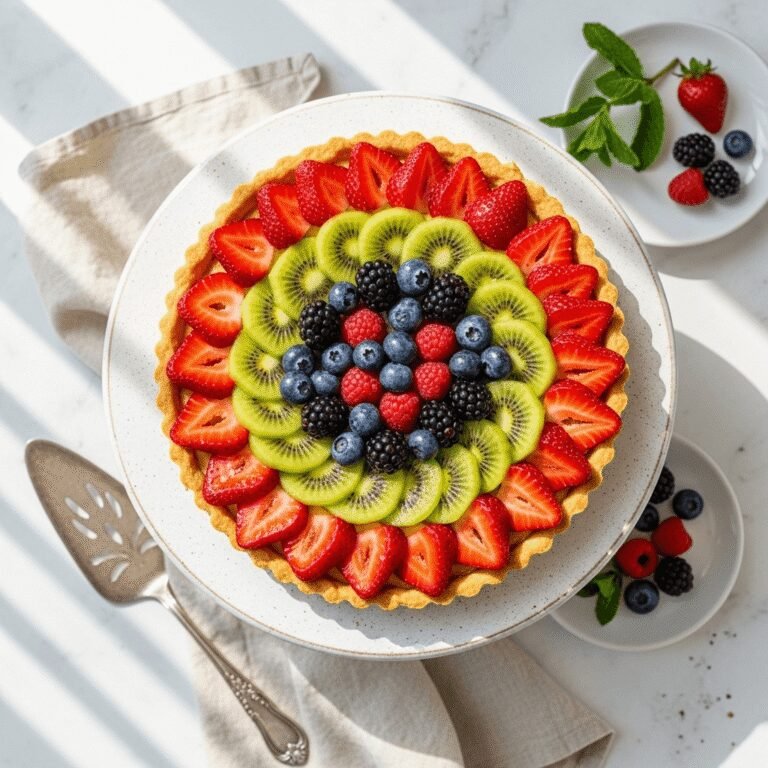
- Fresh berries (strawberries, blueberries, raspberries) add color and freshness
- A drizzle of chocolate or caramel sauce elevates any dessert
- Freshly whipped cream or a dollop of Cool Whip for lighter desserts
- A scoop of vanilla ice cream for an extra-indulgent treat
- Fresh mint leaves as a garnish for a pop of color
- A cup of coffee or espresso to balance the sweetness
FAQs Section
Can I make graham cracker crust without butter? Yes! While butter provides the best flavor, you can substitute melted coconut oil for a dairy-free version. The texture will be slightly different but still delicious. For a lower-fat option, you can try using melted coconut oil spray or a combination of applesauce and a small amount of oil, though the crust won’t be quite as crispy.
Do I have to bake my graham cracker crust? No, you don’t have to! For no-bake desserts like icebox pies or no-bake cheesecakes, simply chill your pressed crust in the refrigerator for at least 2 hours (or freeze for 30 minutes) to firm up. The butter will solidify and hold the crust together. However, baking does create a crispier, sturdier crust with deeper flavor, so it’s recommended when possible.
Why is my graham cracker crust falling apart? The most common reasons are: not enough butter (add another tablespoon if the mixture seems dry), crumbs that are too coarse (process them until very fine), or not pressing the mixture firmly enough into the pan. The mixture should hold together like wet sand when squeezed. Make sure to pack it down really well using the bottom of a measuring cup.
Can I use a graham cracker crust in a tart pan or different size pan? Absolutely! This recipe works in 9-inch pie plates, 9-inch springform pans, 8-inch or 9-inch tart pans, and even as the base for cheesecake bars in a 9×13 pan. For smaller pans, reduce the ingredients proportionally. For a 9×13 pan, double the recipe.
How do I prevent my graham cracker crust from getting soggy? Pre-baking the crust helps create a barrier against moisture. You can also brush the baked crust with a thin layer of melted white chocolate or beaten egg white (then bake for 3-5 more minutes) to seal it. For very wet fillings, consider a thicker crust or adding a layer of whipped cream or stabilized whipped cream between the crust and filling.
What’s the best way to cut clean slices with a graham cracker crust? Use a sharp chef’s knife and wipe it clean with a damp cloth between each cut. For cheesecakes and cream pies, dipping the knife in hot water and wiping it dry before each cut creates the cleanest slices. You can also use unflavored dental floss for perfectly clean cuts—just slide it under the pie and pull it through.
Can I make graham cracker crust ahead of time? Yes! This is one of the most make-ahead-friendly components of dessert making. You can prepare the crust (baked or unbaked) up to 3 days ahead and store it covered in the refrigerator, or freeze it for up to 3 months. This makes entertaining so much easier since you can check this off your prep list well in advance.
Conclusion
There you have it—the ultimate guide to making perfect graham cracker crust every single time! This simple, three-ingredient recipe proves that homemade doesn’t have to be complicated or time-consuming. Whether you’re a seasoned baker or just starting your cooking journey, this versatile crust is an essential skill that will serve you well for countless desserts to come.
The beauty of mastering graham cracker crust is that it opens up a world of dessert possibilities. From classic cheesecakes to creative no-bake treats, you now have the foundation for so many delicious creations. The buttery, sweet crunch of homemade crust simply can’t be matched by store-bought versions, and your family and friends will absolutely taste the difference.
I hope this recipe becomes a staple in your kitchen just like it has in mine! The next time you’re planning a dessert, remember how quick and easy it is to whip up this crust from scratch. Your desserts will taste more homemade, more special, and definitely more delicious.
Now it’s your turn! I’d love to hear how your graham cracker crust turns out. Did you try any of the flavor variations? What dessert did you use it for? Leave a comment below with your experience, and if you loved this recipe, please share it with your fellow baking enthusiasts and save it to your Pinterest boards for easy access later. Happy baking!