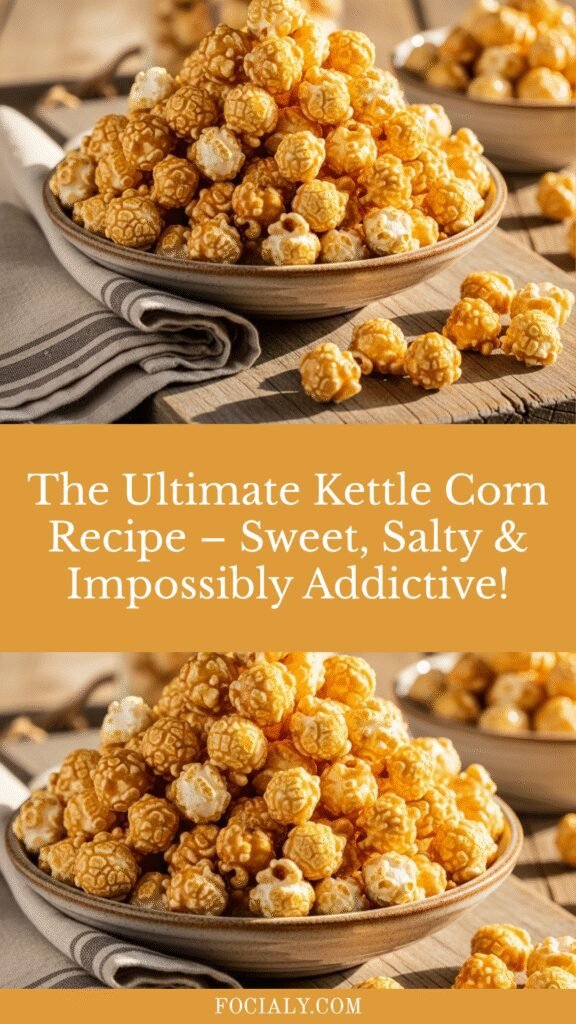
The Ultimate Kettle Corn Recipe – Sweet, Salty & Impossibly Addictive!
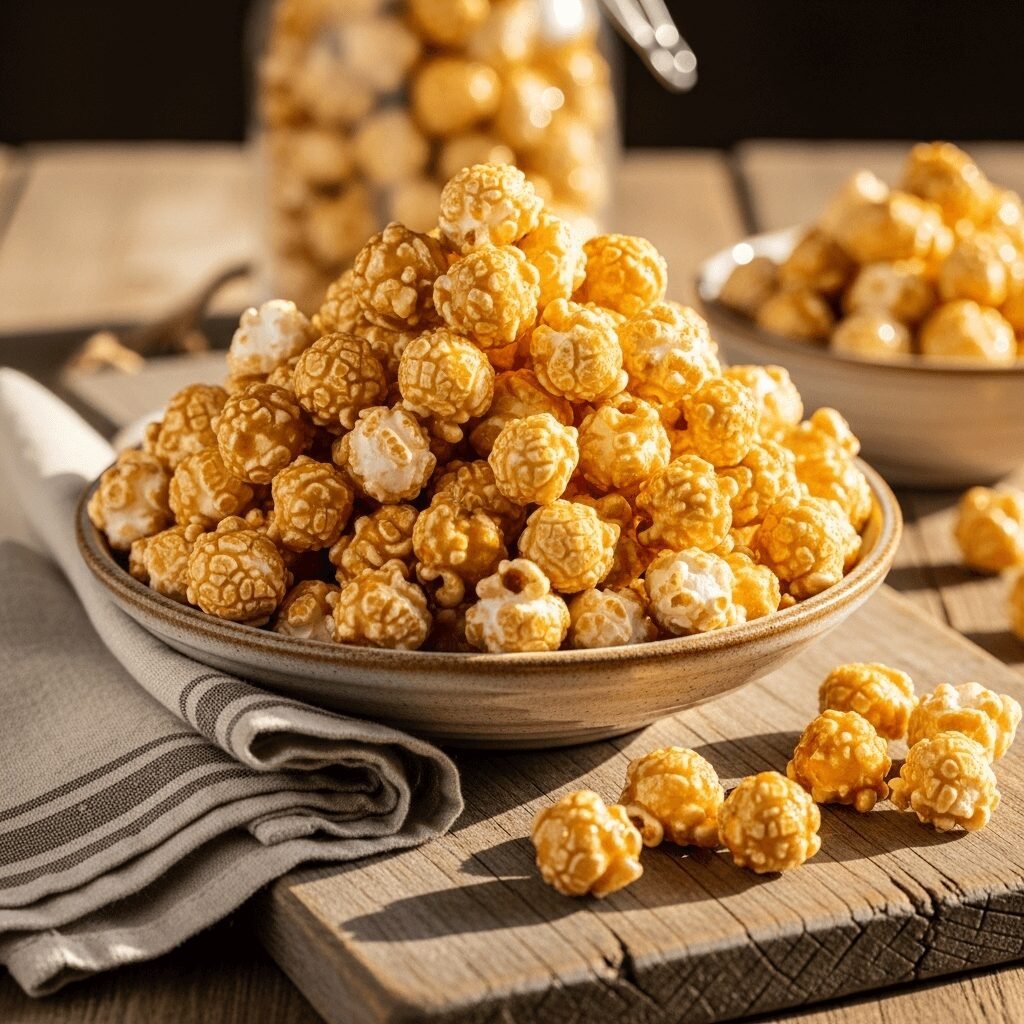
If you’ve ever wandered through a county fair or farmers market and been drawn in by that intoxicating aroma of sweet and salty popcorn, you know the magic of kettle corn. This homemade kettle corn recipe delivers that same carnival-quality crunch right in your own kitchen, and honestly, it’s dangerously easy to make. Unlike regular popcorn that’s simply buttered and salted, kettle corn strikes that perfect balance between sweet caramelized sugar and savory salt that makes it absolutely irresistible.
This classic American snack is perfect for movie nights, game day gatherings, afternoon snacking, or packaging up as homemade gifts during the holidays. The best part? You only need four simple ingredients and about ten minutes from start to finish. Once you make this homemade version, you’ll never go back to store-bought kettle corn again. The freshness, the customizable sweetness level, and the satisfaction of making it yourself just can’t be beaten.
Whether you’re hosting a backyard barbecue, need a quick snack for hungry kids, or want to impress guests with a homemade treat, this kettle corn recipe is about to become your new favorite go-to. Let’s dive into everything you need to know to make perfect kettle corn every single time.
History / Background
Kettle corn has a rich history that dates back to early 18th century America, long before movie theaters made popcorn a staple snack. The earliest references to kettle corn appear in Dutch-American communities, where settlers would pop corn in cast iron kettles over open fires at fairs, festivals, and public gatherings. The addition of sugar and salt made it a special treat compared to everyday popcorn, and it quickly became associated with celebration and community events.
The name “kettle corn” comes directly from the cooking method – corn popped in large cast iron kettles. Street vendors and fair merchants would prepare batch after batch in these heavy kettles, stirring constantly with long wooden paddles to prevent the sugar from burning. The sound of kernels popping and the sweet-smoky aroma would draw crowds from across the fairgrounds, making kettle corn vendors some of the most popular attractions at any gathering.
During colonial times, corn was abundant and sugar was becoming more accessible, making kettle corn an affordable luxury that families could enjoy at special occasions. The recipe was passed down through generations, with each family adding their own twist – some preferred it sweeter, others saltier, and some added spices like cinnamon or nutmeg for extra flavor.
Kettle corn experienced a major resurgence in the 1970s and 1980s when it began appearing at craft fairs and outdoor festivals across America. The nostalgic appeal combined with the unique flavor profile made it a hit with both older generations remembering their childhood and younger people discovering it for the first time. Today, while you can find pre-packaged kettle corn in grocery stores, nothing compares to the freshly made version with its warm, crispy texture and that perfect sweet-salty balance that’s kept people coming back for nearly three centuries.
Why You’ll Love This Recipe
Making kettle corn at home is one of those cooking experiences that feels almost magical – watching plain kernels transform into golden, glazed puffs of deliciousness in just minutes. This recipe takes a classic fair favorite and makes it totally achievable in your home kitchen without any special equipment or hard-to-find ingredients.
Here’s why this homemade kettle corn will become your new obsession:
- Lightning fast – From pantry to bowl in under 10 minutes, making it perfect for last-minute snack attacks or unexpected guests
- Only 4 simple ingredients – Popcorn kernels, sugar, oil, and salt – ingredients you probably already have in your pantry right now
- Incredibly budget-friendly – Make a huge batch for pennies compared to store-bought or fair prices
- Customizable sweetness – Adjust the sugar to your personal preference, whether you like it subtly sweet or candy-coated
- No artificial ingredients – You control exactly what goes into your snack, with no preservatives, artificial flavors, or mystery additives
- Kid-friendly project – Children love watching the kernels pop and helping shake on the toppings (with adult supervision, of course)
- Perfect for gifting – Package it in mason jars or decorative bags for thoughtful homemade presents
- Endlessly customizable – Add cinnamon, vanilla, chocolate drizzle, or nuts once you master the basic recipe
- Impressive but easy – Guests will think you’re a culinary wizard, but it’s secretly one of the easiest recipes ever
- Naturally gluten-free – A safe snack option for those with gluten sensitivities
Ingredient Notes
The beauty of kettle corn lies in its simplicity. Each ingredient plays a crucial role in creating that signature sweet-salty crunch, and understanding them helps you make perfect batches every time.
Popcorn Kernels – Use high-quality popcorn kernels for the best pop-to-kernel ratio. Yellow kernels produce larger, fluffier popcorn with a slightly nutty flavor, while white kernels create smaller, more tender pieces. Both work beautifully, but yellow kernels are traditional for kettle corn. Avoid microwave popcorn packets or pre-popped corn – you need plain, raw kernels. Store them in an airtight container in a cool, dry place to maintain freshness.
Granulated Sugar – Regular white granulated sugar is essential for authentic kettle corn. The sugar caramelizes as it heats, creating that glossy coating and signature crunch. Don’t substitute with powdered sugar (it won’t caramelize properly) or brown sugar (it burns too easily at high heat). Some people successfully use coconut sugar for a slightly deeper flavor, but your results may vary. The key is using a sugar that can withstand high heat without burning immediately.
Vegetable Oil – You need an oil with a high smoke point since kettle corn requires high heat. Vegetable oil, canola oil, or coconut oil all work perfectly. Avoid olive oil or butter, as they have lower smoke points and can burn before your corn pops. Coconut oil adds a subtle sweet flavor that many people love, and it’s actually what many commercial kettle corn makers use. You need enough oil to coat the bottom of your pot and allow the kernels to pop without sticking.
Salt – Fine sea salt or regular table salt works best because it distributes evenly over the popcorn. The salt balances the sweetness and is what makes kettle corn so addictive. You’ll add some during cooking and can adjust more after popping to taste. Coarse salt doesn’t stick as well to the popcorn, so save that fancy flaky sea salt for finishing other dishes.
Optional Add-ins – Once you master the basic recipe, try adding vanilla extract (just a few drops), ground cinnamon (1/2 teaspoon), cayenne pepper (for spicy-sweet), or even cocoa powder for chocolate kettle corn. These should be added after popping, not during, to prevent burning.
Equipment Needed
Making kettle corn doesn’t require any fancy equipment, but having the right tools makes the process smoother and safer. Here’s what you’ll need:
Large Heavy-Bottomed Pot with Lid – This is the most important piece of equipment. You need a pot that’s at least 6 quarts with a heavy bottom to distribute heat evenly and prevent burning. A thin-bottomed pot will create hot spots that burn the sugar. The lid is essential – it needs to fit tightly but ideally should have a small vent to release steam. A Dutch oven or large stockpot works perfectly.
Long-Handled Wooden Spoon or Silicone Spatula – You’ll need to stir the sugar and kernels before they start popping. A long handle keeps your hands safely away from the hot pot. Wooden or silicone won’t conduct heat like metal spoons do.
Large Mixing Bowl – You’ll need a big bowl to transfer the hot popcorn into immediately after popping. Make sure it’s big enough to toss the popcorn without spilling – at least 8 quarts is ideal.
Measuring Cups and Spoons – Accurate measurements ensure consistent results, especially for the sugar-to-kernel ratio.
Pot Holders or Oven Mitts – The pot gets extremely hot, and you’ll need to shake it periodically, so protect your hands with good quality heat protection.
Baking Sheet (Optional) – If you want to spread out the kettle corn to cool and crisp up even more, a large baking sheet lined with parchment paper works great.
Kitchen Timer – Kettle corn moves fast, and having a timer helps you track the process so nothing burns.
PrintKettle Corn Recipe

This homemade kettle corn recipe creates perfectly sweet and salty popcorn with a crispy caramelized coating in just 10 minutes. Better than any fair or store-bought version, this easy snack requires only 4 simple ingredients and delivers irresistible flavor every time.
- Prep Time: 2 minutes
- Cook Time: 8 minutes
- Total Time: 10 minutes
- Yield: 8 servings (about 8-10 cups) 1x
- Category: Dessert
- Method: Baking
- Cuisine: American
- Diet: Vegetarian
Ingredients
- 1/2 cup popcorn kernels
- 1/4 cup granulated sugar
- 1/4 cup vegetable oil (or coconut oil)
- 1/2 teaspoon fine salt, plus more to taste
- Optional: 1/4 teaspoon vanilla extract for finishing
Instructions
- Prepare your workspace – Have your large bowl ready near the stove, along with pot holders. Clear space because you’ll need to work quickly once the popping starts.
- Heat the oil – Add the vegetable oil to your large heavy-bottomed pot and place over medium-high heat. Let it heat for about 1-2 minutes until it’s shimmering but not smoking.
- Test the temperature – Drop 3-4 popcorn kernels into the hot oil. When these test kernels pop, your oil is at the perfect temperature. Remove any popped test kernels from the pot.
- Add kernels and sugar – Once the oil is hot, add the remaining popcorn kernels and all of the sugar. Sprinkle in half of the salt. Quickly stir everything together with your wooden spoon to coat the kernels evenly with the sugar and oil mixture.
- Cover and shake – Immediately put the lid on the pot. As the kernels begin to pop (this happens quickly), gently shake the pot back and forth over the burner. Keep the pot moving constantly by sliding it back and forth across the burner or lifting and shaking it slightly. This prevents the sugar from burning and ensures even popping.
- Listen for the pop – Continue shaking the pot as the popping intensifies. Once the popping slows to 2-3 seconds between pops, immediately remove the pot from heat. Don’t wait for all popping to stop or the sugar will burn. This whole process takes about 4-5 minutes.
- Transfer immediately – As soon as you remove the pot from heat, pour the kettle corn into your large bowl. Work quickly because the sugar continues cooking from residual heat. Use a spoon to scrape out any kernels that are stuck, but be careful – the caramelized sugar is extremely hot.
- Season and cool – While the kettle corn is still warm, sprinkle with the remaining salt (and vanilla extract if using) and gently toss to distribute. Spread the popcorn out in a single layer if possible so it cools quickly and stays crispy. The sugar coating will harden as it cools, creating that signature crunch.
- Break apart clusters – Once cooled for 2-3 minutes, break apart any large clusters with your hands. The popcorn should be crispy and ready to eat immediately.
- Serve and enjoy – Transfer to serving bowls or storage containers. Try not to eat the entire batch in one sitting (though we won’t judge if you do)!
Notes
- Don’t walk away – Kettle corn requires your full attention. The sugar can go from perfectly caramelized to burnt in seconds.
- Pot size matters – Make sure your pot is large enough. The kernels will expand to about 8-10 cups, so you need plenty of room for them to pop without overflowing.
- Temperature control – If your stove runs hot, reduce to medium heat. If the sugar is browning too quickly or you smell burning, immediately remove from heat.
- Unpopped kernels – It’s normal to have some unpopped kernels. Pour the popcorn into your bowl carefully and leave the hard kernels behind in the pot.
- Sticking issues – If your kettle corn is sticking together too much, you may have used too much sugar or not removed it from heat quickly enough. It will still taste delicious, just break it apart as it cools.
- Altitude adjustments – If you’re at high altitude, you may need slightly lower heat and a bit more oil to prevent burning.
Nutrition
- Serving Size: 1 cup (approximately 30g)
- Calories: 120
- Sugar: 6g
- Sodium: 150mg
- Fat: 7g
- Saturated Fat: 0.5g
- Unsaturated Fat: 6.5g
- Trans Fat: 0g
- Carbohydrates: 15g
- Fiber: 2g
- Protein: 1g
- Cholesterol: 0mg
Note: Nutritional information is approximate and will vary based on specific brands of ingredients used and exact measurements.
Tips & Variations
Once you’ve mastered the classic kettle corn recipe, the flavor possibilities are endless. Here are some delicious ways to customize your batch:
Sweet Variations:
- Cinnamon Sugar Kettle Corn – Add 1/2 teaspoon ground cinnamon to the sugar before cooking, or toss finished popcorn with a cinnamon-sugar mixture
- Vanilla Kettle Corn – Add 1/2 teaspoon vanilla extract to the finished popcorn while tossing
- Maple Kettle Corn – Replace half the sugar with maple sugar for a rich, autumnal flavor
- Chocolate Drizzle – Once cooled, drizzle melted dark or white chocolate over the kettle corn and let it set
Savory-Sweet Combos:
- Spicy-Sweet – Add 1/4 teaspoon cayenne pepper or chili powder to the sugar for a sweet heat combination
- Rosemary Parmesan – Toss finished kettle corn with finely grated Parmesan and fresh chopped rosemary
- Everything Bagel – Sprinkle everything bagel seasoning over the finished popcorn for a savory twist
- Curry Kettle Corn – Add 1/2 teaspoon curry powder to the oil before popping for an unexpected flavor
Mix-Ins:
- Trail Mix Style – Toss cooled kettle corn with roasted peanuts, dried cranberries, and chocolate chips
- Candied Nuts – Mix in candied pecans or almonds for extra crunch and luxury
- Coconut – Stir in toasted coconut flakes for a tropical vibe
- Pretzel Mix – Combine with broken pretzel pieces for ultimate sweet-salty satisfaction
Healthier Options:
- Use coconut sugar instead of white sugar for a lower glycemic option
- Reduce sugar to 3 tablespoons for a less sweet version
- Use coconut oil instead of vegetable oil for healthier fats
- Add nutritional yeast after popping for a cheesy, protein-rich boost
Pro Chef Tips
Professional kettle corn makers have perfected their craft over years of trial and error. Here are insider secrets to elevate your homemade batches:
Control your heat precisely – The single biggest factor in perfect kettle corn is temperature management. Your oil should be hot enough to pop the kernels rapidly but not so hot that the sugar burns before the corn finishes popping. Medium-high heat works for most stoves, but every burner is different. Pay attention to how quickly the test kernels pop – if they pop instantly and aggressively, reduce heat slightly.
Constant motion is key – Never let your pot sit still on the burner once you’ve added the sugar. The continuous shaking motion serves multiple purposes: it prevents hot spots from forming, keeps the sugar from settling and burning on the bottom, and ensures every kernel gets coated evenly. Think of it as a workout – your arm will get tired, but the results are worth it.
Use the freshest kernels possible – Popcorn kernels contain moisture that’s essential for popping. Old kernels lose moisture over time, resulting in more duds and less fluffy popcorn. Store your kernels in an airtight container in a cool, dark place, and they’ll stay fresh for months. If you notice lots of unpopped kernels, it might be time to buy a fresh bag.
Timing is everything with the sugar – The window between perfectly caramelized and burnt is incredibly narrow – we’re talking seconds. Remove the pot from heat when you still hear occasional pops rather than waiting for complete silence. The residual heat will finish popping those last few kernels without burning the sugar coating.
Season in stages – Add half your salt during cooking (it helps it stick as the sugar caramelizes) and half after (so you can taste and adjust). This two-stage approach ensures even distribution and allows you to customize saltiness to your preference.
Spread it out immediately – Restaurant-quality kettle corn gets its signature crunch from cooling quickly in a single layer. The moment you pour it into your bowl, spread it out on a baking sheet if possible. This rapid cooling prevents the sugar from continuing to cook and keeps pieces separated rather than forming one giant popcorn blob.
Rinse your pot immediately – Don’t let caramelized sugar harden in your pot. Fill it with hot water right after emptying the popcorn, and the sugar will dissolve easily. If you wait, you’ll be scrubbing for days.
Common Mistakes to Avoid
Even with a simple recipe like kettle corn, there are a few pitfalls that can sabotage your batch. Here’s what to watch out for:
Using too-high heat – This is the number one mistake. When your burner is screaming hot, the sugar burns before the kernels finish popping, leaving you with a bitter, scorched mess and a kitchen full of smoke. If you smell burning at any point, immediately remove from heat. It’s better to have a few unpopped kernels than burnt sugar coating everything.
Adding sugar too early or too late – The sugar needs to be added at the same time as the kernels so they heat and caramelize together. If you add sugar before the oil is hot enough, it dissolves and burns. If you wait until after kernels start popping, the sugar won’t coat evenly and may burn on the bottom while the top stays white.
Overcrowding the pot – If your pot isn’t large enough or you use too many kernels for your pot size, the kernels can’t pop properly and the sugar doesn’t coat evenly. Use a pot that’s at least 6 quarts for 1/2 cup of kernels. If you want to make more, do multiple batches rather than overfilling one pot.
Not shaking constantly – Set that pot down mid-popping and you’ll end up with sugar burnt to the bottom and unevenly popped kernels. Your arm might get tired, but that constant motion is non-negotiable. Think of it as your workout for the day.
Leaving it in the pot too long – Once popping slows down, get that kettle corn out of the hot pot immediately. Even off the heat, the residual temperature will continue cooking the sugar. Every extra second increases the risk of burning and can turn your sweet coating bitter.
Using the wrong oil – Butter and olive oil smoke and burn at the high temperatures needed for kettle corn. Stick with high smoke point oils like vegetable, canola, or coconut oil. Save the fancy oils for finishing dishes, not high-heat popping.
Tossing salt on too late – Salt doesn’t stick well to dry, cooled popcorn. Season while it’s still slightly warm and coated with that sticky sugar glaze for maximum adhesion and flavor distribution.
Storage & Meal Prep
Proper storage keeps your kettle corn crispy and delicious for days after making it (if it lasts that long without being devoured).
Room Temperature Storage – Once your kettle corn has cooled completely (give it at least 15-20 minutes), transfer it to an airtight container. Mason jars, plastic containers with tight-fitting lids, or resealable plastic bags all work great. The key is keeping moisture out – any humidity will make your kettle corn soggy and chewy instead of crispy. Properly stored, kettle corn stays fresh and crunchy for 3-5 days at room temperature. Keep it away from heat sources and out of direct sunlight.
Avoid Refrigeration – Never refrigerate kettle corn. The moisture in your refrigerator will ruin the texture, making it soft and stale. Room temperature storage in an airtight container is always best.
Reviving Stale Kettle Corn – If your kettle corn loses its crunch after a day or two, spread it on a baking sheet and warm it in a 250°F oven for 5-7 minutes. This drives out any moisture that’s snuck in and crisps everything back up. Let it cool completely before storing again.
Portion Control Tip – If you’re prone to eating entire batches in one sitting (no judgment here), portion your kettle corn into individual serving bags right after making it. This makes it perfect for school lunches, portion-controlled snacks, or grab-and-go options.
Preventing Clumping – If you live in a humid climate, add a food-safe silica gel packet or a few grains of raw rice to your storage container. These will absorb excess moisture and keep your kettle corn crispy longer.
Make-Ahead & Freezer Notes
The beauty of kettle corn is that it’s so quick to make that there’s rarely a need to prepare it far in advance, but here’s what you should know about longer-term storage:
Make-Ahead Timeline – Kettle corn is definitely best enjoyed the day it’s made when it’s at peak freshness and crunch. However, you can make it up to 2-3 days ahead for parties or gifts. Make sure it’s completely cooled and store it in airtight containers away from moisture and heat. If you’re gifting it, package it the day of or day before for the freshest result.
Freezer Storage (Not Recommended) – While you technically can freeze kettle corn, I don’t recommend it. The freezing process can introduce moisture when the popcorn thaws, compromising that signature crispy texture. The sugar coating can also become sticky during thawing. If you must freeze it, use heavy-duty freezer bags, remove as much air as possible, and freeze for no more than 1 month. Thaw completely at room temperature before opening the bag to prevent condensation.
Batch Cooking Strategy – Instead of making one huge batch and trying to store it, make smaller fresh batches as needed. Since it only takes 10 minutes from start to finish, you can easily whip up a fresh batch right before serving. Your guests will be impressed by warm, fresh-from-the-pot kettle corn.
Best Reheating Method – If you’ve made kettle corn ahead and it’s lost some crispness, spread it on a baking sheet and warm in a 250°F oven for 5-7 minutes. Don’t microwave it – this will make it rubbery and tough. The low oven heat gently crisps everything back up without burning the sugar coating.
Gifting Timeline – If you’re making kettle corn for holiday gifts or party favors, prepare it the night before at the earliest. Package it in cellophane bags or mason jars with decorative ribbons and store in a cool, dry place until giving. Include a note that it’s best enjoyed within 3-4 days for optimal freshness.
Serving Suggestions
Kettle corn is incredibly versatile and pairs beautifully with so many occasions and complementary foods. Here are some serving ideas:
Movie Night Spread – Serve your homemade kettle corn alongside regular buttered popcorn and a spicy seasoned popcorn for a “popcorn bar.” Add candy, pretzels, and mixed nuts for a complete snacking experience. Pair with ice-cold sodas, craft root beer, or homemade lemonade.
Party Pleaser – Portion kettle corn into individual paper cones or small decorative bags for parties, baby showers, or wedding receptions. It’s a charming, nostalgic treat that guests can enjoy during the event or take home as favors.
Game Day Appetizer Table – Include kettle corn as part of your game day spread alongside buffalo chicken dip, loaded nachos, wings, and sliders. The sweet-salty combo provides a nice contrast to spicy and savory foods.
Ice Cream Topping – Crumble kettle corn over vanilla ice cream for an incredible sweet-salty sundae. Add hot fudge and caramel sauce for ultimate indulgence. It’s like a deconstructed caramel corn sundae that’s absolutely divine.
Trail Mix Addition – Mix kettle corn with roasted nuts, dried fruit, chocolate chips, and coconut flakes for an elevated trail mix perfect for hiking, road trips, or afternoon snacking.
Dessert Pairing – Serve alongside brownies, chocolate chip cookies, or fruit cobbler for textural contrast. The light, airy crunch complements dense, rich desserts beautifully.
Kids’ Lunch Boxes – Pack individual portions in small containers or bags for a special lunch box treat that’s more wholesome than candy but still feels like a reward.
Hot Beverage Companion – Enjoy kettle corn with coffee, hot chocolate, or spiced chai for a cozy afternoon snack. The sweet-salty flavor pairs surprisingly well with rich, warm beverages.
Charcuterie Board Addition – Add a bowl of kettle corn to your charcuterie or cheese board for an unexpected element. It pairs especially well with sharp cheddar, brie, and aged gouda.
FAQs Section
Can I make kettle corn without sugar?
Traditional kettle corn requires sugar for that signature caramelized coating and sweet-salty flavor. However, you can reduce the sugar to 2-3 tablespoons for a less sweet version. Sugar-free alternatives like monk fruit sweetener or erythritol don’t caramelize properly at high heat and aren’t recommended for authentic kettle corn texture.
Why is my kettle corn chewy instead of crunchy?
Chewy kettle corn usually results from moisture exposure or not cooling properly. Make sure you spread it out in a single layer immediately after popping so it cools quickly. Store only completely cooled popcorn in airtight containers. If you live in a humid climate, chewy texture is more common – try the oven-crisping method at 250°F for 5-7 minutes to restore crunch.
Can I use an air popper or microwave to make kettle corn?
Unfortunately, no. Authentic kettle corn requires the kernels, oil, and sugar to cook together in a pot so the sugar caramelizes directly onto the popping corn. Air poppers and microwaves pop the kernels separately from any coating. You could pop corn separately and toss with melted butter and sugar, but it won’t have that same caramelized, crunchy coating that defines real kettle corn.
How do I prevent the sugar from burning?
Temperature control and constant motion are crucial. Use medium-high heat (not high), keep the pot moving continuously once the sugar is added, and remove from heat as soon as popping slows to 2-3 seconds between pops. Don’t wait for all popping to stop. Using a heavy-bottomed pot also helps distribute heat evenly and prevent hot spots that burn sugar.
Can I double the recipe?
It’s better to make two separate batches rather than doubling ingredients in one pot. Overcrowding prevents proper popping and even sugar distribution. Since kettle corn only takes 10 minutes per batch, making two consecutive batches is quick and ensures better results than trying to double up.
What’s the best way to clean my pot after making kettle corn?
Fill the pot with hot water immediately after emptying the popcorn. The hot water will dissolve the caramelized sugar within 10-15 minutes. If you let it cool and harden, you’ll need to simmer water in the pot to melt the sugar before cleaning. For stubborn spots, add a bit of baking soda to the water and let it soak.
Is kettle corn gluten-free and vegan?
Yes! When made with vegetable or coconut oil, kettle corn is naturally gluten-free, dairy-free, and vegan. It’s a safe snack for people with gluten sensitivities, lactose intolerance, or those following plant-based diets. Always check your specific popcorn kernel packaging to ensure no cross-contamination if severe allergies are a concern.
Conclusion
There’s something truly special about homemade kettle corn – the way it fills your kitchen with that irresistible sweet-smoky aroma, the satisfying sound of kernels popping in the pot, and that first warm, crunchy-sweet bite that transports you straight to a summer carnival. This simple recipe proves that the best snacks don’t require complicated techniques or expensive ingredients, just a little attention and care.
Whether you’re making kettle corn for a cozy movie night at home, packaging it as thoughtful homemade gifts, or serving it at your next party, this recipe delivers consistent, delicious results every single time. Once you master the basic technique, you’ll find yourself experimenting with different flavor variations and wondering why you ever bought the store-bought stuff.
I’d love to hear about your kettle corn adventures! Did you try any of the flavor variations? What’s your favorite way to enjoy it? Drop a comment below and share your experience. And if you loved this recipe as much as I think you will, please save it to your Pinterest boards so you can find it easily next time that kettle corn craving hits. Don’t forget to snap a photo of your beautiful batch and tag me – I love seeing your creations!
Happy popping, friends! May your kernels always pop fluffy and your sugar coating stay perfectly crispy. Now go make some magic in that pot! 🍿