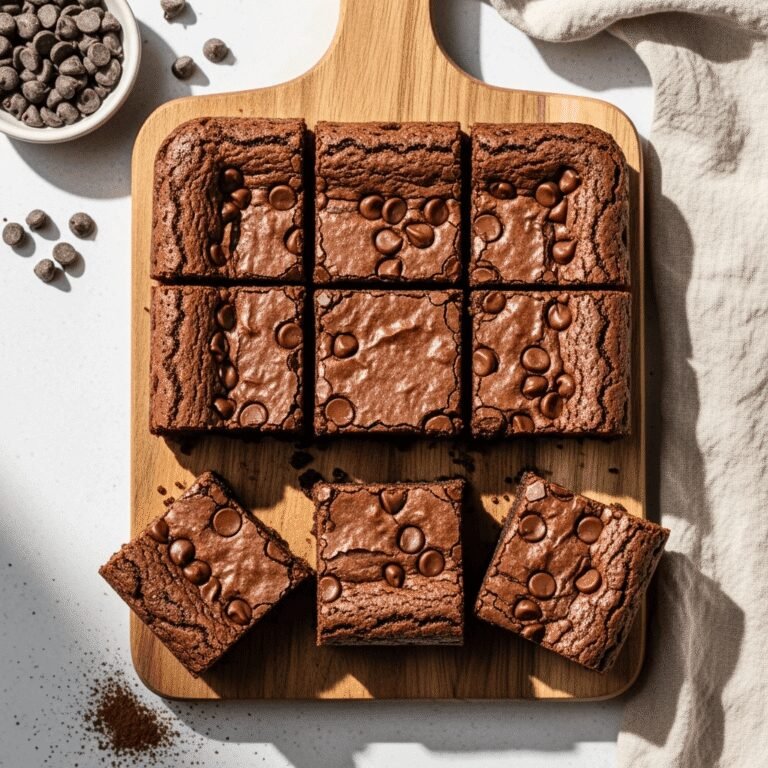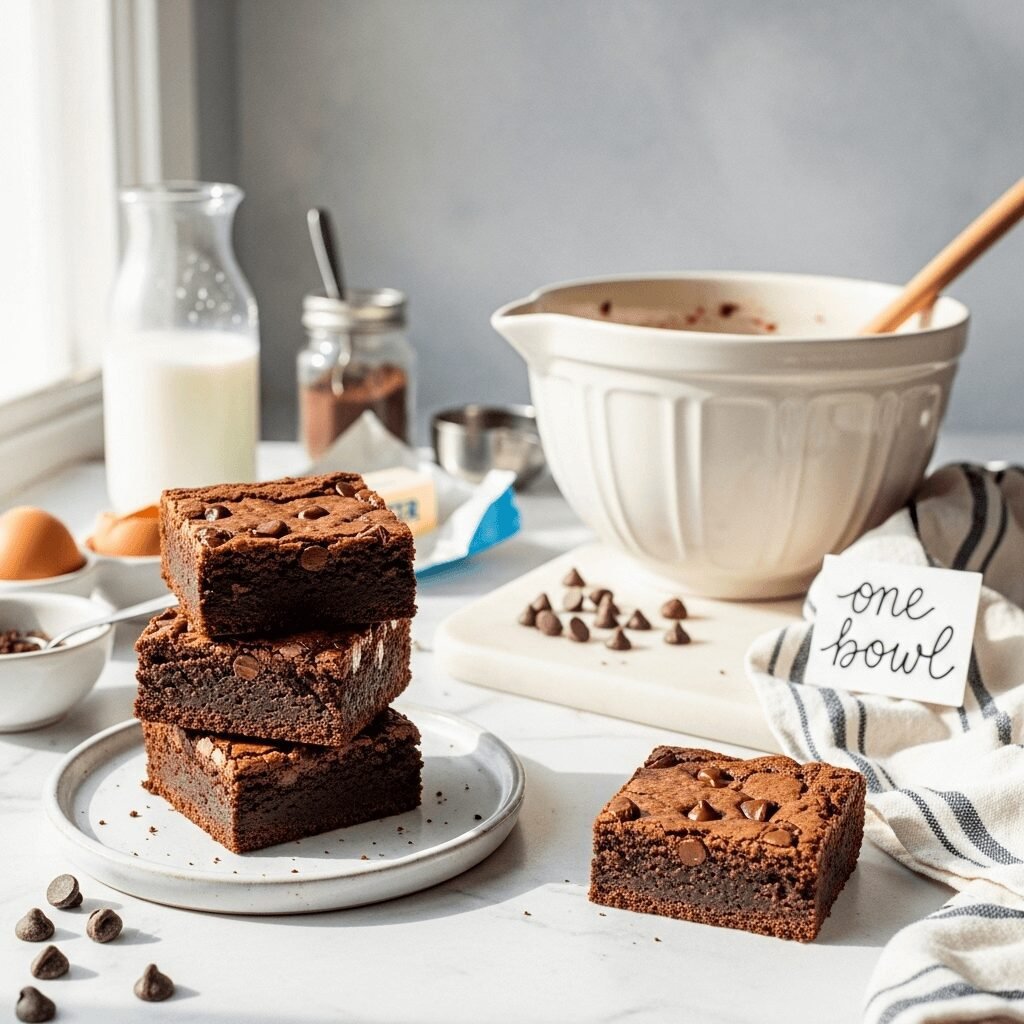
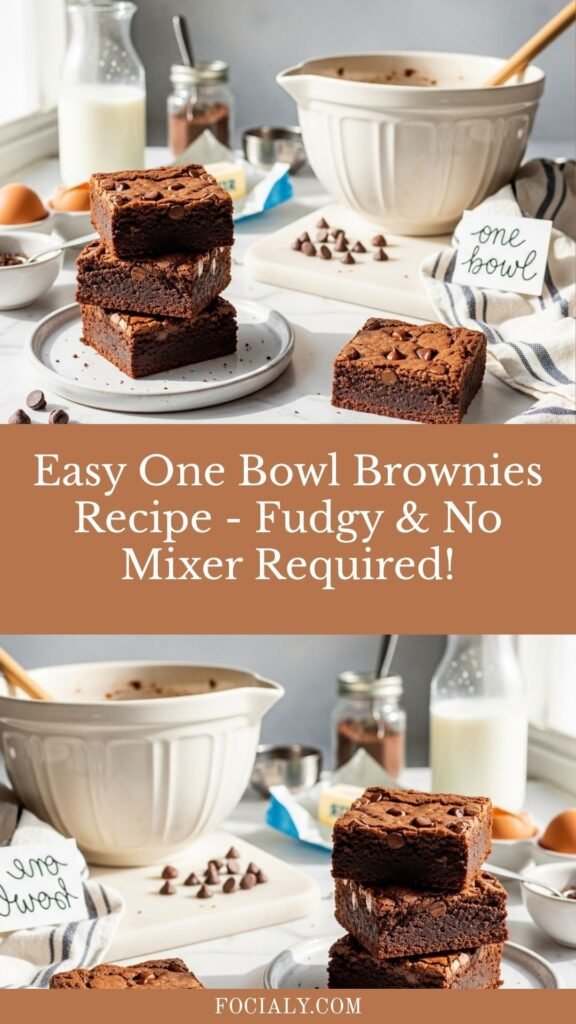
Easy One Bowl Brownies Recipe – Fudgy & No Mixer Required!
Get ready to make the most incredible one bowl brownies recipe that delivers rich, fudgy, chocolatey perfection with absolutely minimal cleanup! These amazing brownies are mixed entirely in one bowl using just a whisk and spoon – no electric mixer, no multiple bowls, and no complicated steps. Whether you’re craving a last-minute chocolate fix, need a simple dessert for unexpected guests, or just want homemade brownies without the kitchen chaos, these easy one bowl brownies are about to become your new obsession.
What makes these simple one bowl brownies so spectacular? They prove that minimal effort doesn’t mean minimal flavor! These brownies deliver that perfect fudgy texture with crackly tops, intense chocolate taste, and melt-in-your-mouth quality – all from scratch with basic pantry ingredients mixed in a single bowl. These brownies are perfect for busy weeknights, spontaneous baking with kids, stress-free entertaining, or anytime you want homemade deliciousness without spending your evening washing dishes. Plus, the entire recipe from start to finish takes less than an hour, including baking time!
History / Background
The concept of one-bowl baking represents a beautiful evolution in American home cooking, reflecting our ongoing quest to make delicious food more accessible without sacrificing quality or taste.
Brownies themselves are a distinctly American creation dating back to the late 1800s or early 1900s. While the exact origin is debated (with competing claims from Chicago’s Palmer House Hotel in 1893 and a housewife in Bangor, Maine in 1905), what’s clear is that brownies quickly became an American baking staple. These dense, chocolatey squares offered something unique – richer than cookies but simpler than layer cakes.
Traditional brownie recipes from the early to mid-20th century often required the “creaming method” – beating butter and sugar together until fluffy, a technique borrowed from cake making. This typically required an electric mixer and multiple bowls for separating wet and dry ingredients. While this method produced excellent brownies, it also created more dishes and took more time.
The one bowl brownie method emerged as home bakers discovered a simpler approach: melting the butter and chocolate together, then mixing everything sequentially in that same bowl. This technique gained particular popularity in the 1970s and 1980s as American cooking increasingly valued convenience alongside quality. Food writers and cookbook authors like Marion Cunningham and Maida Heatter championed streamlined baking methods that didn’t compromise on results.
The one-bowl method works beautifully for brownies because brownie batter is more forgiving than cake batter. The high fat content from chocolate and butter creates a tender crumb even without extensive mixing or aeration. The dense, fudgy texture that makes brownies so beloved actually benefits from minimal mixing – overmixing develops gluten and creates cakey brownies, while gentle one-bowl mixing produces perfect fudgy results.
The rise of food blogs and Pinterest in the 2000s and 2010s further popularized easy one bowl brownie recipes. Home bakers shared their streamlined versions, emphasizing both the incredible taste and the practical benefit of minimal cleanup. The phrase “one bowl” became a powerful draw – signaling to busy home cooks that delicious homemade treats were achievable even on hectic days.
Today, one bowl brownies from scratch represent the best of modern home baking: respecting tradition while embracing practicality, delivering bakery-quality results without professional equipment, and proving that sometimes the simplest methods produce the most delicious outcomes.
Why You’ll Love This Recipe
These fudgy one bowl brownies are absolutely phenomenal, and once you make them, you’ll wonder why you ever complicated brownie-making!
Here’s why this recipe will become your forever favorite:
- Truly one bowl – Everything mixed in the same bowl, minimal cleanup
- No mixer required – Just a whisk and spoon, perfect for anyone
- Ready in under an hour – From craving to eating in 45 minutes
- Perfectly fudgy texture – Dense, moist, and intensely chocolatey
- Pantry staples only – No specialty ingredients needed
- Foolproof recipe – Impossible to mess up, works every time
- Better than boxed mix – Superior taste without the artificial flavor
- Kid-friendly baking – Simple enough for children to help
- Budget-friendly – Costs less than buying a mix or bakery brownies
- Customizable – Easy to add your favorite mix-ins
- No special equipment – Just basic kitchen tools
- Perfect for any occasion – Casual snacks to special celebrations
Whether you’re a busy parent, a college student in a tiny kitchen, or just someone who hates doing dishes, this recipe is pure magic!
Ingredient Notes
Let’s break down the simple ingredients that create these easy homemade one bowl brownies:
Unsalted Butter – Creates rich flavor and fudgy texture. Melted butter makes mixing effortless. Substitution: For dairy-free, use melted coconut oil or vegan butter (slight flavor difference).
Semi-Sweet Chocolate or Chocolate Chips – Provides deep chocolate flavor and contributes to fudgy texture. Use quality chocolate for best results. Substitution: Dark chocolate (60-70% cacao) creates more intense flavor; milk chocolate makes sweeter brownies.
Granulated Sugar – Sweetens and helps create that desirable crackly top. Substitution: Can use ½ cup white sugar + ½ cup brown sugar for extra depth and chewiness.
Eggs – Provide structure, richness, and help bind everything together. Use large eggs at room temperature. Substitution: For vegan brownies, try flax eggs (1 tablespoon ground flaxseed + 3 tablespoons water per egg, let sit 5 minutes), though texture will differ.
Vanilla Extract – Enhances all the chocolate flavors. Use pure vanilla extract. Substitution: Vanilla bean paste adds lovely specks; almond extract creates interesting depth.
All-Purpose Flour – Creates structure without making brownies cakey. Measure carefully! Substitution: For gluten-free, use 1:1 gluten-free baking flour blend.
Unsweetened Cocoa Powder – Intensifies chocolate flavor and contributes to that rich brown color. Substitution: Dutch-process cocoa creates darker, richer flavor; natural cocoa is slightly more acidic.
Salt – Essential for balancing sweetness and enhancing chocolate. Never skip! Substitution: Can use fine sea salt; flaky salt for finishing adds extra dimension.
Espresso Powder (Optional) – Deepens chocolate flavor without making brownies taste like coffee. Substitution: Can omit, but it really enhances chocolate!
Chocolate Chips (Optional) – Creates pockets of melted chocolate throughout. Substitution: Chopped chocolate, nuts, or any mix-ins you love!
Equipment Needed
You’ll need minimal equipment for these brownies!
Essential:
- One large mixing bowl (the star of the show!)
- 8×8-inch or 9×9-inch square baking pan (metal or glass)
- Medium saucepan (for melting butter and chocolate)
- Whisk (for mixing – no electric mixer needed!)
- Rubber spatula or wooden spoon (for folding)
- Measuring cups and spoons (for accuracy)
- Parchment paper (for easy removal)
- Toothpick (for testing doneness)
- Wire cooling rack (for cooling)
Optional but helpful:
- Kitchen scale (for most precise measuring)
- Offset spatula (for spreading batter evenly)
One Bowl Brownies Recipe

The easiest, most delicious one bowl brownies made from scratch! Fudgy, chocolatey, and incredibly simple with no mixer required. Everything mixes in one bowl for minimal cleanup and maximum chocolate satisfaction!
- Prep Time: 10 minutes
- Cook Time: 25 minutes
- Total Time: 35 minutes
- Yield: 16 brownies 1x
- Category: Dessert
- Method: Baking
- Cuisine: American
- Diet: Vegetarian
Ingredients
For the Brownies:
- ½ cup (115g) unsalted butter
- 4 oz (115g) semi-sweet chocolate, chopped (or ¾ cup chocolate chips)
- 1 cup (200g) granulated sugar
- 2 large eggs, room temperature
- 2 teaspoons vanilla extract
- ⅔ cup (80g) all-purpose flour
- ½ cup (50g) unsweetened cocoa powder
- ½ teaspoon salt
- ¼ teaspoon espresso powder (optional but recommended)
- ½ cup (85g) chocolate chips (optional but delicious)
Instructions
Step 1: Preheat and Prepare Pan
Preheat oven to 350°F (175°C). Line an 8×8-inch square baking pan with parchment paper, leaving overhang on two sides for easy removal. Lightly grease the parchment with butter or cooking spray. Set aside.
Step 2: Melt Butter and Chocolate
In a medium saucepan over low heat, melt butter and chopped chocolate together, stirring constantly until completely smooth and melted. Remove from heat and let cool for 3-5 minutes. (Alternatively, melt in microwave in 30-second intervals, stirring between each.) Pour melted mixture into your large mixing bowl.
Step 3: Add Sugar
Add granulated sugar to the chocolate-butter mixture in the bowl. Whisk vigorously for about 30-45 seconds until well combined and smooth. The mixture should look glossy and slightly thickened.
Step 4: Add Eggs and Vanilla
Add eggs one at a time, whisking well after each addition. The mixture should become thick, smooth, and lighter in color. Add vanilla extract and whisk until fully incorporated. This vigorous whisking incorporates air and helps create that beautiful crackly top!
Step 5: Add Dry Ingredients
Add flour, cocoa powder, salt, and espresso powder (if using) directly to the wet ingredients in the same bowl. Using a rubber spatula or wooden spoon (switch from whisk now), fold and stir gently just until no dry streaks remain. Don’t overmix! The batter should be thick, smooth, and glossy. If using chocolate chips, fold them in now.
Step 6: Pour and Bake
Pour batter into prepared pan, spreading evenly with spatula to reach all corners. Tap the pan gently on the counter 2-3 times to release air bubbles. Bake for 25-30 minutes. Brownies are done when edges look set and center has just a slight jiggle. A toothpick inserted 2 inches from edge should come out with moist crumbs – not wet batter, but not completely clean. Don’t overbake!
Step 7: Cool
Remove from oven and let cool in the pan on a wire rack for at least 20-30 minutes. The brownies will continue to set as they cool. For cleanest cuts, cool completely (about 1 hour) before cutting.
Step 8: Cut and Serve
Use the parchment overhang to lift brownies out of pan. Place on cutting board and cut into 16 squares with a sharp knife, wiping blade clean between cuts. Serve and enjoy!
Notes
- Don’t overbake: Brownies should look slightly underdone in center when removed. They firm up as they cool.
- Room temperature eggs: They mix more smoothly, but cold eggs work too.
- One bowl magic: Seriously, everything mixes in one bowl! Don’t create extra dishes.
- Melting chocolate: Low heat prevents burning. Stir constantly.
- Pan size: 8×8 creates thicker brownies (30 min), 9×9 creates thinner (25 min).
- Make them extra fudgy: Use only ½ cup flour instead of ⅔ cup.
- Add-ins: Fold in nuts, peanut butter chips, or candy pieces!
Nutrition
- Serving Size: 1 brownie (1/16 of recipe)
- Calories: 165
- Sugar: 16g
- Sodium: 85mg
- Fat: 9g
- Saturated Fat: 5g
- Unsaturated Fat: 3g
- Trans Fat: 0g
- Carbohydrates: 21g
- Fiber: 2g
- Protein: 2g
- Cholesterol: 35mg
Tips & Variations
The beauty of one bowl brownies is how wonderfully customizable they are!
Double Chocolate Brownies: Fold in 1 cup of chocolate chips for extra chocolate pockets.
Nutty Brownies: Add ½ cup chopped walnuts, pecans, or almonds for crunch.
Peanut Butter Swirl: Drop spoonfuls of peanut butter on top and swirl with knife before baking.
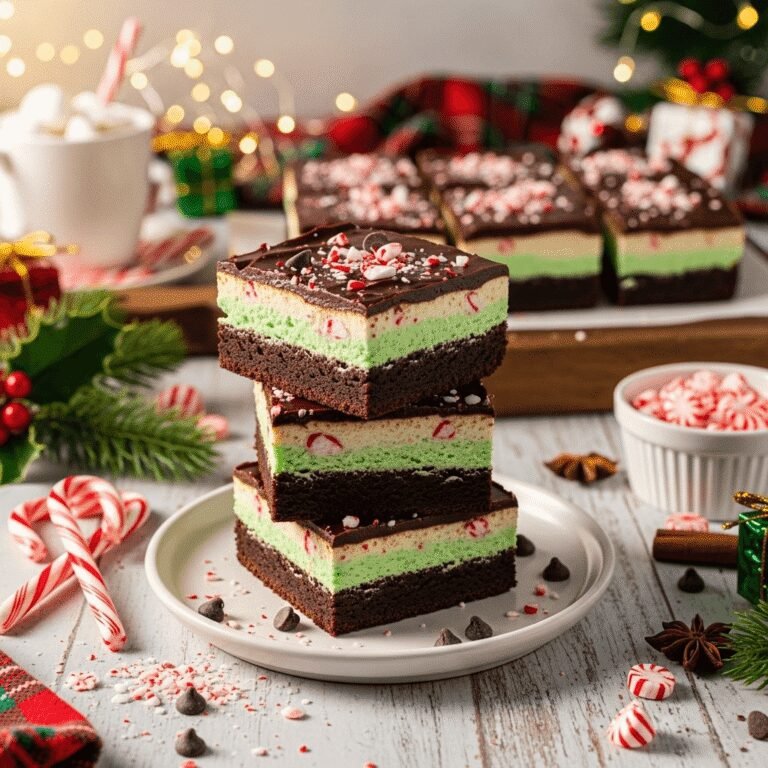
Mint Chocolate Brownies: Add ½ teaspoon peppermint extract and fold in chopped Andes mints.
Espresso Brownies: Increase espresso powder to 1 teaspoon for mocha flavor.
S’mores Brownies: Top with mini marshmallows and graham cracker pieces during last 5 minutes of baking.
Salted Caramel Brownies: Swirl caramel sauce into batter and sprinkle with flaky sea salt.
White Chocolate Raspberry: Fold in white chocolate chips and fresh raspberries.
Brown Butter Brownies: Brown the butter first, cool, then proceed with recipe for nutty depth.
Vegan One Bowl Brownies: Use coconut oil, flax eggs, and dairy-free chocolate.
Gluten-Free: Use 1:1 gluten-free flour blend. Texture is nearly identical!
Healthier Version: Replace half the butter with Greek yogurt (different texture but still tasty).
Pro Chef Tips
Want bakery-perfect brownies? Here are professional secrets:
Whisk vigorously when adding eggs and sugar. This is the secret to that gorgeous shiny, crackly top! Beat the eggs and sugar mixture for at least 30-45 seconds until slightly thickened and lighter in color. This incorporates air which creates those beautiful cracks.
Use high-quality chocolate and cocoa. Since chocolate is the star, quality matters enormously. Good chocolate and Dutch-process cocoa create richer, more complex brownies than cheap alternatives. The investment is worth it!
Let melted chocolate cool slightly before adding eggs. If chocolate mixture is too hot, it can partially cook the eggs, creating scrambled bits. Let it cool for 3-5 minutes so it’s warm but not scalding.
Switch from whisk to spatula after adding flour. Whisks overdevelop gluten once flour is added. Switch to gentle folding with a spatula to keep brownies fudgy, not tough or cakey.
Don’t overmix after adding flour. Mix just until no flour streaks remain. Overmixing develops gluten and creates dense, tough brownies. Some tiny lumps are fine – they’ll bake out!
Underbake slightly for perfect fudgy texture. The #1 tip! Pull brownies when center still jiggles slightly and toothpick has moist crumbs. They continue cooking from residual heat. Better slightly underbaked than overbaked!
Line pan with parchment “handles.” Cut parchment to fit bottom with 2-inch overhang on opposite sides. This creates handles for lifting entire brownie slab out cleanly.
Cool completely before cutting. I know it’s torture, but brownies need at least 20-30 minutes to set. For absolute cleanest cuts, wait a full hour. Patience = perfect squares!
Warm knife for clean cuts. Run knife under hot water, wipe dry, then cut. Clean and warm between each cut for bakery-perfect edges.
Add espresso powder even if you don’t like coffee. Just ¼ teaspoon enhances chocolate flavor dramatically without any coffee taste. Professional baker’s secret!
Common Mistakes to Avoid
Even simple recipes can go wrong. Here are pitfalls to watch for:
Overbaking the brownies: This is mistake #1! Brownies continue cooking after leaving the oven. Pull them when center still looks slightly underdone with moist crumbs on toothpick. Waiting for a completely clean toothpick = dry, cakey brownies. Better underdone than overdone!
Overmixing after adding flour: Once flour hits the bowl, stir gently with spatula just until combined. Aggressive mixing or using a whisk at this stage develops gluten, creating tough, dense brownies instead of tender, fudgy ones.
Using a bowl that’s too small: Trying to mix everything in a small bowl creates mess and makes thorough mixing difficult. Use a large bowl (at least 2-3 quart capacity) with plenty of room for whisking without splattering.
Burning the chocolate while melting: Chocolate scorches easily! Use low heat and stir constantly. If using microwave, use 30-second intervals, stirring between each. Burnt chocolate tastes bitter and ruins brownies.
Cutting brownies too soon: Warm brownies are delicious but too soft to cut cleanly – they’ll crumble and fall apart. Wait at least 20-30 minutes for them to set properly. For perfect squares, cool completely.
Not greasing parchment paper: Even with parchment, fudgy brownies can stick without light greasing. A quick spray prevents frustration when removing brownies.
Measuring flour incorrectly: Scooping flour directly from bag packs it down, and you’ll use too much, creating dry brownies. Spoon flour into measuring cup and level with knife, or weigh it (80g per ⅔ cup).
Storage & Meal Prep
One bowl brownies store beautifully!
Room Temperature Storage: Store brownies in airtight container at room temperature for up to 4 days. Layer parchment paper between stacks to prevent sticking. They stay naturally moist and fudgy!
Refrigerator Storage: For longer storage, refrigerate in airtight container for up to 1 week. Let brownies come to room temperature 15-20 minutes before eating for best flavor and texture, or enjoy them cold (some people love chilled fudgy brownies!).
Individual Wrapping: Wrap individual brownies in plastic wrap or wax paper, then store in container or bag. Perfect for lunchboxes, gifts, or portion control!
Keeping Brownies Fresh: The key is preventing air exposure which dries them out. Always use airtight container or wrap tightly with plastic wrap.
Best Storage Container: Use container with tight-fitting lid. Glass or plastic both work well.
Make-Ahead & Freezer Notes
These brownies are incredibly freezer-friendly!
Freezing Whole Pan: Cool brownies completely, wrap entire uncut pan tightly in two layers of plastic wrap, then aluminum foil. Freeze up to 3 months. Thaw overnight at room temperature, still wrapped. Cut and serve!
Freezing Individual Brownies: Cut into squares, wrap each individually in plastic wrap, place all wrapped brownies in freezer bag or container. Freeze up to 3 months. Thaw at room temperature for 30-45 minutes, or microwave for 15-20 seconds for warm brownie bliss.
Flash-Freezing for Best Results: Arrange cut brownies on baking sheet, freeze until solid (1-2 hours), then transfer to freezer bags. This prevents them from sticking together and preserves perfect shape.
Make-Ahead Strategy: These brownies are so quick (10 minutes active prep!) that making them far ahead isn’t usually necessary. However, you can bake up to 2 days before serving. Store covered at room temperature.
Reheating Frozen Brownies: Microwave individual frozen brownies for 20-30 seconds for fresh-from-the-oven warmth and gooeyness. For whole pan, thaw completely, then warm in 300°F oven for 10 minutes if desired.
Emergency Dessert Stash: Keep individually wrapped brownies in freezer for unexpected guests or sudden chocolate cravings!
Serving Suggestions
One bowl brownies are delicious alone but here are wonderful serving ideas:
Classic Style: Serve at room temperature with a tall glass of cold milk – perfection!
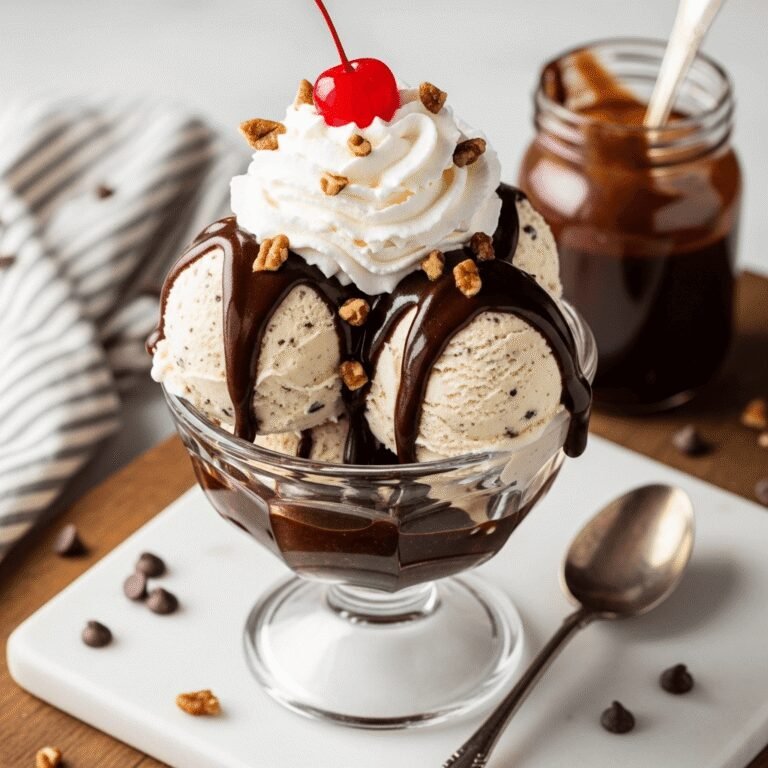
À La Mode: Top warm brownies with vanilla ice cream, drizzle with hot fudge or caramel sauce, add whipped cream for ultimate sundae.
Elegant Plating: Dust with powdered sugar, add scoop of ice cream, garnish with fresh berries and mint.
Brownie Sundae Bar: Set out brownies with various ice cream flavors, sauces (chocolate, caramel, raspberry), whipped cream, nuts, sprinkles, cherries. Let everyone create their masterpiece!
With Coffee or Tea: Serve alongside afternoon coffee or tea for sophisticated treat.
Birthday Style: Top with candles for casual birthday celebration instead of cake.
Perfect Accompaniments:
- Vanilla ice cream or gelato
- Coffee or mint chip ice cream
- Fresh whipped cream
- Hot fudge or chocolate sauce
- Caramel sauce
- Fresh berries (strawberries, raspberries)
- Chopped nuts
- Sea salt flakes
- Powdered sugar
Beverage Pairings:
- Cold milk (the classic!)
- Hot coffee or espresso
- Hot chocolate
- Cold brew coffee
- Tea
Occasion Ideas:
- After-school snacks
- Casual dinners
- Potlucks
- Bake sales
- Movie nights
- Picnics
- Lunchbox treats
- Last-minute desserts
FAQs Section
Why is this called a one bowl recipe?
Everything truly mixes in one bowl! You melt the butter and chocolate in a saucepan, then pour into your mixing bowl and add all remaining ingredients sequentially in that same bowl. No need for separate bowls for wet and dry ingredients. Minimal dishes = maximum happiness!
Can I make these without melting chocolate?
This recipe specifically uses melted chocolate for fudgy texture. If you only have cocoa powder, you’d need to adjust the recipe significantly – adding more butter and changing proportions. It’s easier to just pick up chocolate chips!
Why are my brownies cakey instead of fudgy?
Usually from overbaking or using too much flour. Make sure you’re measuring flour correctly (spoon and level method), and pull brownies from oven when center still looks slightly underdone. Also avoid overmixing after adding flour.
Do I need a stand mixer or hand mixer?
Nope! That’s the beauty of this recipe. You mix everything by hand with just a whisk and spatula. No mixer required, which means even less cleanup!
How do I know when brownies are done?
The edges should look set and possibly pulling slightly from pan. Center should have just a slight jiggle when you gently shake the pan. Toothpick inserted 2 inches from edge should have moist crumbs – not wet batter, not clean.
Can I double this recipe?
Absolutely! Double all ingredients and bake in 9×13-inch pan for 30-35 minutes. You’ll still mix everything in one bowl (just use a bigger bowl!). Makes about 24 brownies.
Why do my brownies stick to the pan?
Always line pan with parchment paper and lightly grease the parchment. Let brownies cool at least 20-30 minutes before removing – they need time to set. If they still stick, they may have been slightly overbaked.
Conclusion
And there you have it – everything you need to make the most incredible easy one bowl brownies that prove delicious doesn’t have to be complicated! These fudgy, chocolatey treats come together in a single bowl with minimal effort and deliver results that rival any fancy bakery or expensive mix.
Whether you’re a busy parent looking for simple desserts, a beginner baker building confidence, or just someone who values their time and hates washing dishes, this one bowl brownie recipe is pure genius. The best part? You’ll feel accomplished making something from scratch that requires just one bowl, one pan, and about 10 minutes of your time!
I’d love to hear about your one bowl brownie adventures! Did you love the minimal cleanup as much as the chocolate? What mix-ins did you add? How fast did they disappear? Drop a comment below and share your experience – I read every one and love connecting with fellow chocolate lovers! If this recipe simplified your baking life (or just satisfied your brownie craving with minimal dishes), please save it to your Pinterest boards and share it with friends who appreciate easy, delicious homemade treats!
Now grab that one bowl and let’s make some magic happen – the easiest, most delicious brownies of your life are just 40 minutes away! Happy baking!