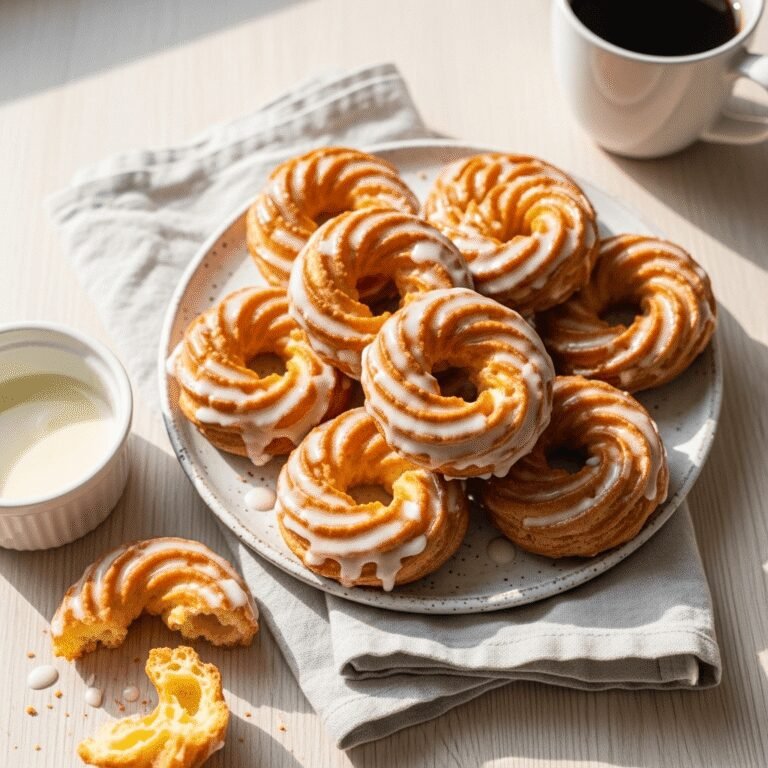
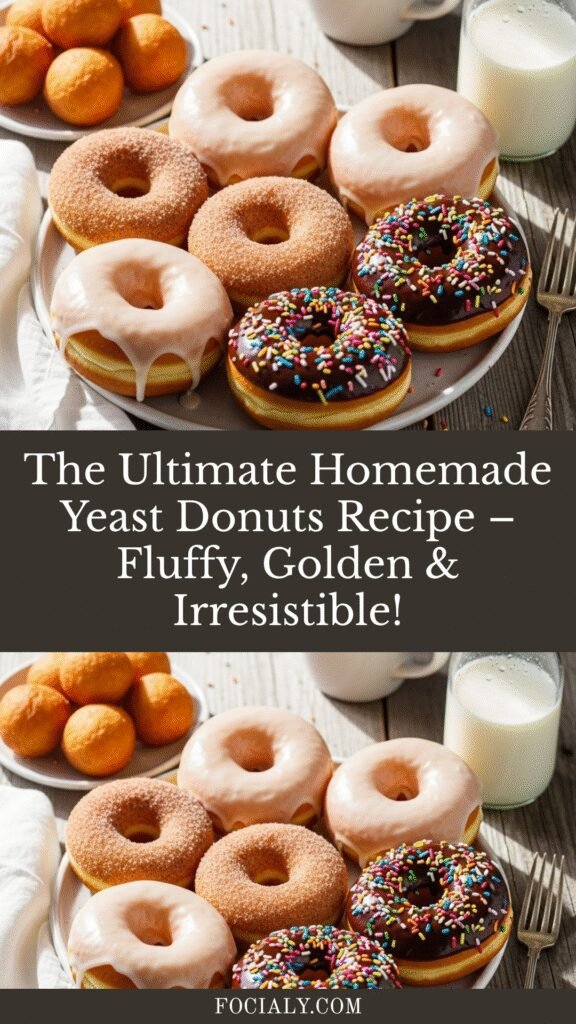
The Ultimate Homemade Yeast Donuts Recipe – Fluffy, Golden & Irresistible!
There’s something absolutely magical about biting into a fresh, warm yeast donut – that pillowy-soft interior, the delicate sweetness, and that signature golden-brown exterior that’s just begging to be glazed, sugared, or filled with your favorite cream. Homemade yeast donuts are a beloved American breakfast and dessert treat that transforms simple pantry ingredients into bakery-quality perfection right in your own kitchen.
These classic yeast-raised donuts are perfect for lazy Sunday mornings, special birthday breakfasts, holiday celebrations, or honestly any time you want to treat yourself and your loved ones to something truly spectacular. Unlike cake donuts that rely on baking powder for leavening, yeast donuts have that characteristic airy, almost cloud-like texture that makes them impossible to resist. Serve them fresh for breakfast with hot coffee, pack them for brunch gatherings, or make them as a fun weekend baking project with kids. Once you master this homemade yeast donuts recipe, you’ll never look at store-bought the same way again!
History / Background
The history of donuts in America is as rich and layered as the pastries themselves. While fried dough has existed in various cultures for centuries – from Dutch “olykoeks” (oil cakes) to German “fastnachts” – the donut as we know it became quintessentially American during the 19th century.
Dutch settlers brought their tradition of fried dough balls to New Amsterdam (now New York) in the early 1800s, and the treat began evolving into what we recognize today. The iconic ring shape with a hole in the center is often attributed to a New England ship captain named Hanson Gregory, who in 1847 claimed to have punched a hole in the center of fried dough to ensure even cooking and eliminate the raw, doughy center.
Yeast donuts specifically gained massive popularity during World War I when “Doughnut Lassies” – female Salvation Army volunteers – served freshly fried donuts to American soldiers in France, providing a comforting taste of home during difficult times. This cemented the donut’s place in American culture and sparked a nationwide craze when soldiers returned home.
The mid-20th century saw the rise of donut shops across America, with chains like Dunkin’ Donuts (founded 1950) and Krispy Kreme (founded 1937, expanded nationally in the 1950s-60s) making yeast donuts accessible nationwide. Today, homemade yeast donuts represent both nostalgia and the growing desire to recreate artisanal, from-scratch versions of beloved classics in our own kitchens. They’re a labor of love that connects us to generations of bakers before us.
Why You’ll Love This Recipe
This homemade yeast donuts recipe delivers everything you dream about when you think of the perfect donut – and it’s so much more achievable than you might think! While yeast donuts have a reputation for being complicated or intimidating, this recipe breaks down every step into manageable, easy-to-follow instructions that guarantee success even for beginners.
Here’s why this recipe will become your go-to:
- Bakery-quality texture at home – Impossibly light, fluffy, and airy with that signature yeast donut texture that melts in your mouth
- Customizable and versatile – Use this base recipe to create glazed donuts, sugar-coated classics, filled donuts, or any flavor variation your heart desires
- Surprisingly affordable – Make a dozen donuts for a fraction of the cost of buying them from a bakery or donut shop
- Fun family activity – Kids absolutely love helping shape the dough and watching donuts puff up in hot oil (with proper supervision, of course!)
- Make-ahead friendly – Prepare the dough the night before and fry fresh donuts in the morning for minimal early-morning effort
- Impressive but achievable – Serving homemade donuts makes you look like a baking superstar, but the process is straightforward and forgiving
- Fresher than fresh – Nothing beats the taste and aroma of donuts fried in your own kitchen, still warm and ready to enjoy immediately
- Ingredient transparency – You know exactly what goes into your donuts with no preservatives, additives, or mystery ingredients
Ingredient Notes
Understanding your ingredients is key to donut success! Here’s what you need and why each component matters:
All-Purpose Flour – The foundation of your donuts. All-purpose flour provides the perfect protein content (around 10-12%) for structure without making donuts tough. Bread flour can be substituted for slightly chewier donuts, while cake flour creates more delicate ones.
Active Dry Yeast – This is what creates those beautiful air pockets and gives yeast donuts their signature fluffy texture. You can substitute instant yeast in equal amounts (no proofing required – just mix directly with dry ingredients). Make sure your yeast is fresh and not expired!
Whole Milk – Adds richness, tenderness, and flavor. The fat content contributes to the soft crumb. You can use 2% milk in a pinch, though whole milk yields the best results. Non-dairy milk works but may slightly alter texture.
Granulated Sugar – Feeds the yeast, adds sweetness, and helps create that golden-brown exterior. Don’t reduce the sugar too much, as yeast needs it to activate properly.
Eggs – Provide structure, richness, and that beautiful golden color. They also add moisture and help create tender donuts. Use large eggs at room temperature for best incorporation.
Butter – Unsalted butter is preferred so you can control salt levels. Butter adds flavor, richness, and keeps donuts tender. It must be softened (not melted) to incorporate properly into the dough.
Salt – Enhances all the flavors and balances sweetness. Don’t skip it! Salt also strengthens gluten structure and controls yeast activity.
Vanilla Extract – Pure vanilla extract adds warmth and depth. This is optional but highly recommended for that classic donut shop flavor.
Neutral Oil for Frying – Vegetable oil, canola oil, or peanut oil all work beautifully. You need an oil with a high smoke point (at least 350°F) that won’t impart strong flavors. Avoid olive oil.
Glaze/Topping Ingredients – Powdered sugar, additional butter, milk, and vanilla for classic glaze. Cinnamon sugar, chocolate glaze, or sprinkles for variations.
Equipment Needed
Having the right tools makes the donut-making process smooth and enjoyable:
- Large mixing bowl – For combining dough ingredients
- Stand mixer with dough hook (or hand mixer) – Makes kneading easier, though you can knead by hand
- Measuring cups and spoons – Accurate measurements are crucial for yeast dough
- Kitchen thermometer – Essential for checking oil temperature (ideally a candy/deep-fry thermometer)
- Heavy-bottomed pot or Dutch oven (3-4 quarts) – For frying; must be deep enough to hold at least 3 inches of oil
- Rolling pin – For rolling out dough to consistent thickness
- Donut cutter (or two round cutters) – A 3-inch cutter for donuts and 1-inch for holes, or use a specialized donut cutter
- Slotted spoon or spider strainer – For safely turning and removing donuts from hot oil
- Wire cooling rack set over baking sheet – For draining excess oil
- Clean kitchen towels or plastic wrap – For covering dough during rising
- Pastry brush – For applying glaze evenly
- Parchment paper – For placing cut donuts during second rise
Yeast Donuts Recipe
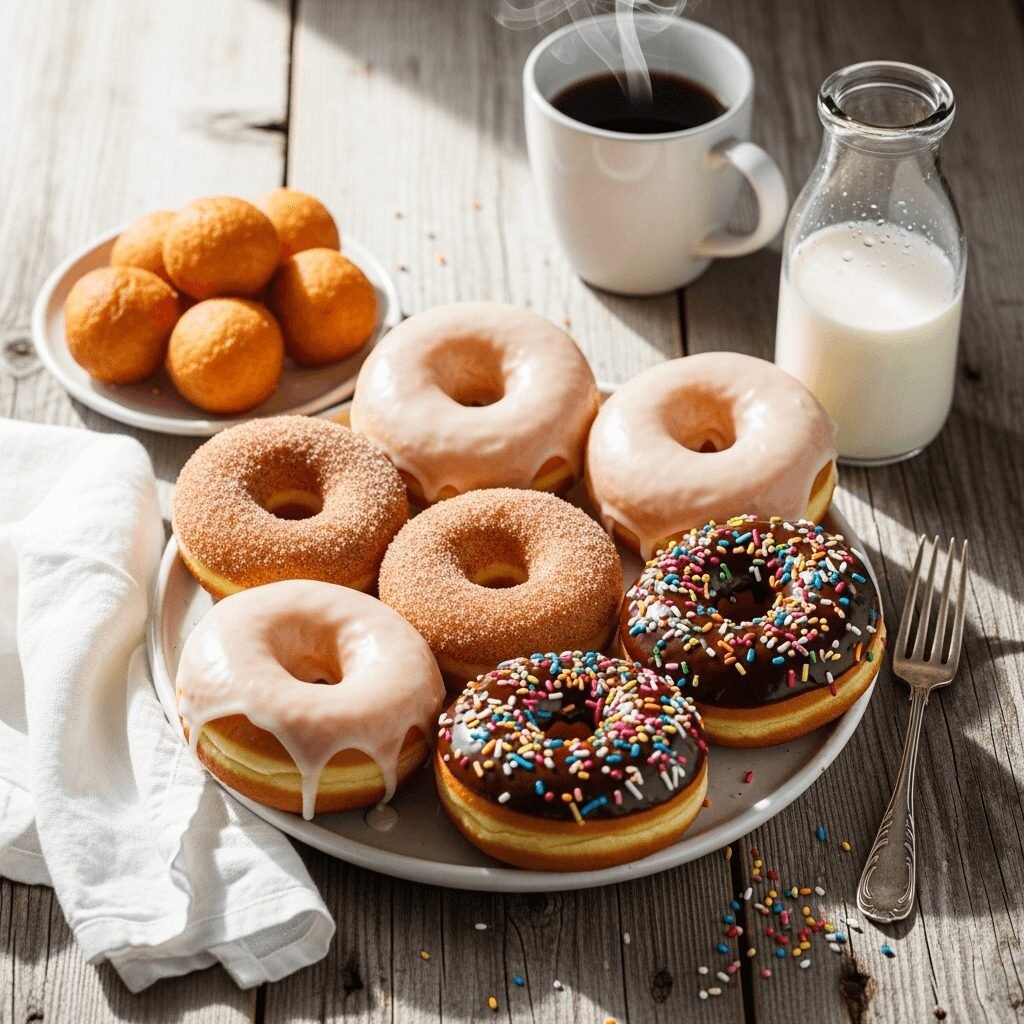
These classic homemade yeast donuts are incredibly light, fluffy, and tender with a golden exterior. Perfect for glazing, sugaring, or filling, this foolproof recipe delivers bakery-quality donuts right from your kitchen!
- Prep Time: 2 hours 30 minutes (includes rising time)
- Cook Time: 15 minutes
- Total Time: 2 hours 45 minutes
- Yield: 12-14 donuts plus donut holes 1x
- Category: Breakfast, Dessert
- Method: Frying
- Cuisine: American
- Diet: Vegetarian
Ingredients
For the Donuts:
- 2 ¼ teaspoons (1 packet) active dry yeast
- ¼ cup warm water (110°F)
- ¾ cup whole milk, warmed to 110°F
- ¼ cup granulated sugar
- 1 teaspoon salt
- 2 large eggs, room temperature
- ¼ cup unsalted butter, softened
- 3 ½ to 4 cups all-purpose flour
- 1 teaspoon vanilla extract
- Vegetable or canola oil for frying (about 8 cups)
For the Classic Vanilla Glaze:
- 3 cups powdered sugar
- ½ cup whole milk
- 2 tablespoons unsalted butter, melted
- 1 teaspoon vanilla extract
- Pinch of salt
For Cinnamon Sugar Coating (Alternative):
- 1 cup granulated sugar
- 2 tablespoons ground cinnamon
- 4 tablespoons melted butter (for brushing)
Instructions
Step 1: Activate the Yeast
In a small bowl, combine warm water (make sure it’s between 105-115°F – too hot will kill the yeast) with 1 teaspoon of the sugar. Sprinkle yeast over the water and let sit for 5-10 minutes until foamy and bubbly. If it doesn’t foam, your yeast is dead – start over with fresh yeast.
Step 2: Mix the Wet Ingredients
In the bowl of a stand mixer fitted with the paddle attachment, combine warm milk, remaining sugar, salt, eggs, softened butter, and vanilla extract. Mix on low speed until well combined. Add the activated yeast mixture.
Step 3: Add Flour and Form Dough
Switch to the dough hook attachment. With mixer on low speed, gradually add flour one cup at a time. After adding 3 cups, check consistency. The dough should pull away from the sides of the bowl but still be slightly sticky. Add remaining flour 2 tablespoons at a time until you reach the right consistency. Don’t add too much flour or donuts will be dense!
Step 4: Knead the Dough
Knead on medium-low speed for 5-7 minutes until the dough is smooth, elastic, and springs back when poked. If kneading by hand, turn dough onto a lightly floured surface and knead for 8-10 minutes.
Step 5: First Rise
Form dough into a ball and place in a large greased bowl, turning once to coat all sides with oil. Cover with a clean kitchen towel or plastic wrap. Let rise in a warm, draft-free place for 1-1.5 hours, or until doubled in size. (Pro tip: Turn your oven to the lowest setting for 1 minute, then turn it off – this creates the perfect warm environment.)
Step 6: Roll and Cut Donuts
Punch down the risen dough to release air. Turn out onto a lightly floured surface. Roll dough to about ½-inch thickness (not too thin or donuts will be flat). Using a 3-inch donut cutter (or round cookie cutter), cut out donuts. Use a 1-inch cutter for the center holes. Re-roll scraps gently and cut more donuts – you should get 12-14 total.
Step 7: Second Rise
Place cut donuts and holes on parchment paper-lined baking sheets, leaving 2 inches between each. Cover loosely with a kitchen towel and let rise for 30-45 minutes until puffy and nearly doubled. They should spring back slowly when gently pressed.
Step 8: Heat the Oil
About 15 minutes before the second rise is complete, heat 3-4 inches of oil in a heavy-bottomed pot or Dutch oven to 350-365°F. Use a thermometer to monitor temperature constantly – this is crucial! Too hot and donuts burn outside while staying raw inside; too cool and they absorb excess oil and become greasy.
Step 9: Fry the Donuts
Carefully slide 2-3 donuts into the hot oil (don’t overcrowd). Fry for 60-90 seconds per side until deep golden brown. Use a slotted spoon to gently flip them halfway through. Remove with the slotted spoon and place on a wire rack set over a baking sheet to drain. Fry donut holes for 30-45 seconds per side.
Step 10: Glaze or Coat
For glazed donuts: While donuts are still slightly warm (not hot), dip the top of each donut into the vanilla glaze. Let excess drip off, then return to the wire rack. Glaze will set in about 10 minutes.
For cinnamon sugar: Brush warm donuts all over with melted butter, then toss in cinnamon sugar mixture until completely coated.
Step 11: Serve and Enjoy
Donuts are best enjoyed within 2-3 hours of frying when they’re at peak freshness. Serve with coffee, hot chocolate, or cold milk!
Notes
- Temperature is everything: Keep oil between 350-365°F. Check between batches and adjust heat as needed.
- Don’t skip the second rise: This is what makes donuts incredibly light and prevents them from being dense or doughy inside.
- Altitude adjustments: At high altitude (above 3,000 feet), reduce yeast to 1 ¾ teaspoons and reduce first rise time slightly.
- Dough too sticky? Add flour 1 tablespoon at a time, but err on the side of slightly sticky rather than too dry.
- Make-ahead option: After shaping donuts, place on baking sheets and refrigerate overnight. Let come to room temperature and rise 30-45 minutes before frying.
Nutrition
- Serving Size: 1 donut (without glaze)
- Calories: 245
- Sugar: 8g
- Sodium: 185mg
- Fat: 12g
- Saturated Fat: 3.5g
- Unsaturated Fat: 8g
- Trans Fat: 0g
- Carbohydrates: 30g
- Fiber: 1g
- Protein: 4g
- Cholesterol: 38mg
Note: Nutrition values are estimates and will vary based on specific ingredients used and size of donuts. Adding glaze or coatings will increase calories and sugar content by approximately 80-120 calories per donut.
Tips & Variations
Make It Your Own:
- Chocolate Glazed: Add 3 tablespoons cocoa powder to the glaze and increase milk slightly for desired consistency. Dip donuts and top with sprinkles!
- Filled Donuts: Skip cutting the center hole. After frying, let cool 5 minutes, then use a piping bag fitted with a long tip to inject jam, custard, or cream filling from the side.
- Maple Glazed: Replace vanilla in the glaze with 2 teaspoons maple extract and add 2 tablespoons pure maple syrup.
- Lemon Poppy Seed: Add 2 tablespoons lemon zest to the dough and 1 tablespoon poppy seeds. Make a lemon glaze with powdered sugar and fresh lemon juice.
- Birthday Cake Donuts: Add rainbow sprinkles to the dough and glaze, then top with more sprinkles.
- Spiced Donuts: Add ½ teaspoon nutmeg, ½ teaspoon cinnamon, and ¼ teaspoon cardamom to the dough for warm, spiced flavors.
- Lighter Version: Bake at 375°F for 10-12 minutes instead of frying (they won’t be quite as fluffy but still delicious).
Pro Chef Tips
Master These Techniques:
- The Window Pane Test: After kneading, stretch a small piece of dough. If it stretches thin enough to see light through without tearing, your gluten is perfectly developed.
- Consistent Thickness: Use dowel rods or rolling pin guides on either side of your dough to ensure uniform ½-inch thickness. This guarantees even frying and perfectly shaped donuts.
- The Float Test: Before frying all your donuts, test one first. If it floats immediately and puffs up beautifully, your oil is the right temperature and your dough is perfectly proofed.
- Oil Recovery Time: After adding donuts to hot oil, temperature drops. Wait 30-60 seconds between batches to let oil return to proper temperature for consistent results.
- Glaze Consistency: Your glaze should be the consistency of thick cream – it should slowly drip off a spoon. Too thick and it won’t coat smoothly; too thin and it won’t stick.
- The Warm Water Bath: For stubborn yeast activation, place your bowl of yeast mixture in a larger bowl of warm (not hot) water. This gentle warmth encourages activation.
- Steam for Rising: Place a pan of hot water on the lowest oven rack and your covered dough on the middle rack (oven off). The humid environment speeds rising and prevents dough from drying out.
Common Mistakes to Avoid
Don’t Let These Trip You Up:
- Overheating Liquids – Water or milk above 120°F will kill your yeast, resulting in dense donuts that don’t rise. Always use a thermometer and aim for 105-115°F. When in doubt, err on the cooler side.
- Adding Too Much Flour – The number one cause of tough, dense donuts. The dough should be slightly tacky but not sticking to your hands. Remember, you can always add more flour but you can’t take it away!
- Skipping Temperature Checks – Frying without a thermometer is a recipe for greasy, undercooked donuts or burnt exteriors with raw centers. Invest in an inexpensive thermometer – it’s essential.
- Rushing the Rise Times – Yeast needs time to do its magic. Cutting the rising time short results in dense, heavy donuts without that signature airy texture. Be patient!
- Overcrowding the Pot – Frying too many donuts at once dramatically drops oil temperature and causes uneven cooking. Stick to 2-3 donuts maximum per batch, giving them room to float and expand.
- Glazing Too Hot – If you glaze donuts straight from the fryer, the glaze will melt right off. Wait until they’re warm but not hot to the touch (about 5 minutes of cooling).
Storage & Meal Prep
Keeping Donuts Fresh:
Room Temperature: Store unfilled, unglazed donuts in an airtight container at room temperature for up to 2 days. Place parchment paper between layers to prevent sticking. They’ll lose some freshness but remain edible.
Glazed Donuts: Best eaten within 4-6 hours. The glaze softens over time and can make donuts soggy if stored. If you must store, place in a single layer in a container (not airtight – leave slightly open) for up to 1 day.
Filled Donuts: Refrigerate due to cream/custard fillings. Store in an airtight container for up to 2 days. Let come to room temperature before eating, or enjoy cold (some prefer them chilled!).
Reheating: For day-old donuts, microwave for 8-10 seconds or place in a 350°F oven for 3-5 minutes to refresh. Don’t overdo it or they’ll dry out.
Make-Ahead & Freezer Notes
Plan Ahead for Fresh Donuts:
Overnight Dough Method: Complete the recipe through Step 6 (cutting donuts). Place cut donuts on parchment-lined baking sheets, cover tightly with plastic wrap, and refrigerate up to 16 hours. In the morning, remove from refrigerator, let sit at room temperature for 45-60 minutes until puffy, then fry as directed. This is perfect for serving fresh donuts at breakfast without waking up at 4 AM!
Freezing Fried Donuts: Let donuts cool completely after frying but before glazing. Place in a single layer on a baking sheet and freeze until solid (about 2 hours). Transfer to freezer bags with parchment between layers. Freeze up to 2 months. Thaw overnight in the refrigerator or at room temperature for 1-2 hours, then glaze and serve. Alternatively, glaze after thawing and warm in the oven at 350°F for 5 minutes.
Freezing Raw Dough: You can freeze the dough after the first rise. Shape into a ball, wrap tightly in plastic wrap, then place in a freezer bag. Freeze up to 3 months. Thaw overnight in the refrigerator, then let come to room temperature, roll, cut, let rise, and fry.
Best Reheating Method: For frozen fried donuts, microwave for 15-20 seconds, then place in a 350°F oven for 5-7 minutes. This restores the exterior texture while warming the interior. Glaze after reheating if desired.
Not Recommended: Freezing glazed donuts. The glaze becomes crystalized and doesn’t maintain good texture. Always freeze unglazed and add fresh glaze after thawing.
Serving Suggestions
Perfect Pairings:
- Beverages: Hot coffee (the classic pairing!), café au lait, hot chocolate, chai tea, cold milk, fresh-squeezed orange juice, or champagne for an elegant brunch
- Breakfast Spread: Serve alongside scrambled eggs, crispy bacon, fresh fruit salad, and yogurt parfaits for a complete brunch spread
- Donut Bar: Create a DIY donut bar with multiple glaze options, toppings (sprinkles, chopped nuts, coconut flakes, crushed cookies), and let guests customize their own
- Ice Cream Sandwiches: Slice donuts in half horizontally and fill with vanilla ice cream for an indulgent dessert
- Dessert Platter: Arrange alongside other pastries like croissants, muffins, and Danish for a bakery-style dessert table
- Coffee Shop Experience: Serve on a wooden board with coffee, whipped cream on the side, and a small vase of fresh flowers for that Instagram-worthy presentation
- Kids’ Birthday Party: Stack donuts on a tiered stand, use them as the base for a donut birthday cake tower, or thread them on dowels for a unique party centerpiece
FAQs Section
Q: Can I bake these donuts instead of frying them?
A: Yes, though they won’t have quite the same texture as traditional fried yeast donuts. After the second rise, place donuts on parchment-lined baking sheets and bake at 375°F for 10-12 minutes until lightly golden. Brush with melted butter immediately after baking, then glaze or coat as desired. They’ll be more similar to a dinner roll texture but still delicious!
Q: Why are my donuts greasy or oily?
A: This usually happens when the oil temperature is too low (below 340°F). At lower temperatures, donuts absorb excess oil instead of developing a crispy seal. Always maintain 350-365°F and check temperature frequently. Also ensure donuts have completed their second rise – underproofed donuts are denser and absorb more oil.
Q: Can I use instant yeast instead of active dry yeast?
A: Absolutely! Use the same amount (2 ¼ teaspoons) and skip the activation step in Step 1. Simply mix the instant yeast directly with the flour in Step 3, then proceed with the recipe. The rise times may be slightly shorter with instant yeast.
Q: My dough isn’t rising. What went wrong?
A: The most common causes are: (1) Dead yeast – check expiration date and ensure it foamed during activation, (2) Liquid was too hot and killed the yeast, (3) Environment is too cold – try placing dough in an oven with just the light on or near a warm (not hot) oven, (4) Not enough time – be patient and wait the full rise time, sometimes longer in cold weather.
Q: How do I know when donuts are done frying?
A: Properly fried donuts should be deep golden brown on both sides (not pale or blonde), float in the oil, and spring back when gently pressed. The entire frying process should take 2-3 minutes total (60-90 seconds per side). If you cut one open, the interior should be fluffy and cooked through with no raw dough visible.
Q: Can I make these dairy-free?
A: Yes! Substitute the whole milk with unsweetened almond milk, oat milk, or soy milk (full-fat versions work best). Replace butter with vegan butter or coconut oil. The texture will be slightly different but still delicious. Make sure your milk substitute is warmed to the proper temperature for yeast activation.
Q: What’s the white ring around my donut after frying?
A: This white ring (sometimes called a “fry line”) appears when donuts are overproofed during the second rise. They become too fragile and develop a ring where the uncooked center meets the fried exterior. To prevent this, watch the second rise carefully – donuts should be puffy but not overexpanded. When gently pressed, they should spring back slowly but not collapse.
Conclusion
There you have it – the ultimate guide to creating bakery-quality homemade yeast donuts right in your own kitchen! While these beauties do require a bit of time and patience (mostly hands-off rising time), the results are absolutely spectacular and so worth the effort. That first bite of a warm, freshly fried donut with its impossibly light texture and golden exterior is pure magic, and knowing you created them from scratch makes them taste even sweeter.
Whether you’re glazing them with vanilla, rolling them in cinnamon sugar, filling them with cream, or creating your own signature flavor combination, these yeast donuts are guaranteed to impress family, friends, and especially yourself. They’re perfect for special occasions, weekend baking projects, or any time you want to bring a little extra joy to your kitchen.
Remember, practice makes perfect! Your first batch might not be flawless, but every time you make these donuts, you’ll get better at gauging dough consistency, timing the rises, and maintaining perfect frying temperature. Don’t be intimidated – you’ve absolutely got this!
Now it’s your turn to bring this recipe to life! I’d love to hear how your homemade yeast donuts turned out. Did you try a creative glaze flavor? Did your family devour them in record time? Leave a comment below sharing your experience, and don’t forget to rate this recipe to help other home bakers. Pin this recipe to your Pinterest boards so you can find it easily next time the donut craving strikes, and share it with your fellow baking enthusiasts who need this in their lives! Happy frying, and enjoy every delicious bite! 🍩✨